Mom's Train Table
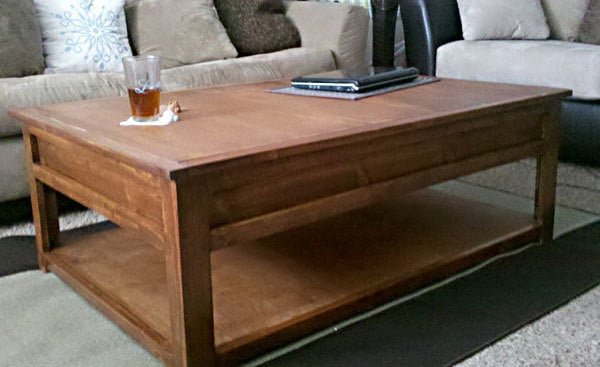
DIY Coffee Table with hidden train table storage inside. Special thanks to Christy for sharing her photos with us.
Specifications
| Project type | Kids Tables and Chairs |
|---|---|
| Room | living room |
| Style | Children's and Kid's Room Furniture and Toy Plans |
| Difficulty | Beginner Projects |
| Estimated cost | $50 - $100 |
Dimensions
Use the size-specific shopping and cut lists below.
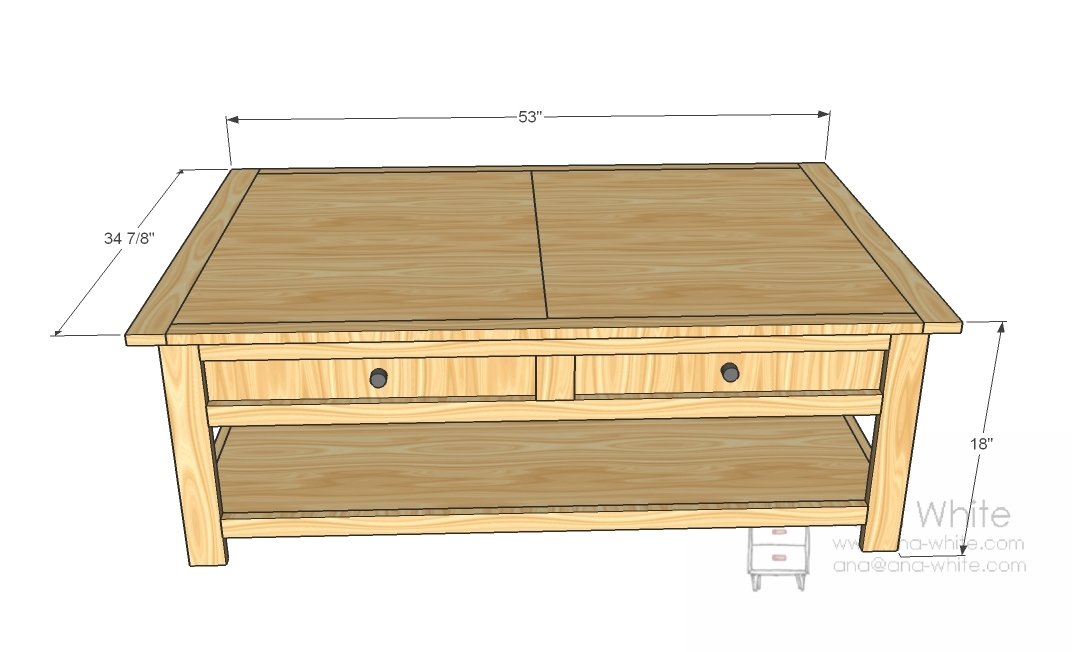
Shopping List
1 – sheet of 3/4″ plywood or MDF cut into strips 31 7/8″ wide x 48″ long (you will get exactly 3 strips) 1 – 1×6, 8 feet long 1 – 1×6, 6 feet long x – 1×3, 8 feet long x – 1×3, 8 feet long 2″ screws 1 1/4″ screws Finish nails Wood Glue Wood Filler Finishing Supplies All visible edges will be finished, so no need for edge banding on this one.
Cut List
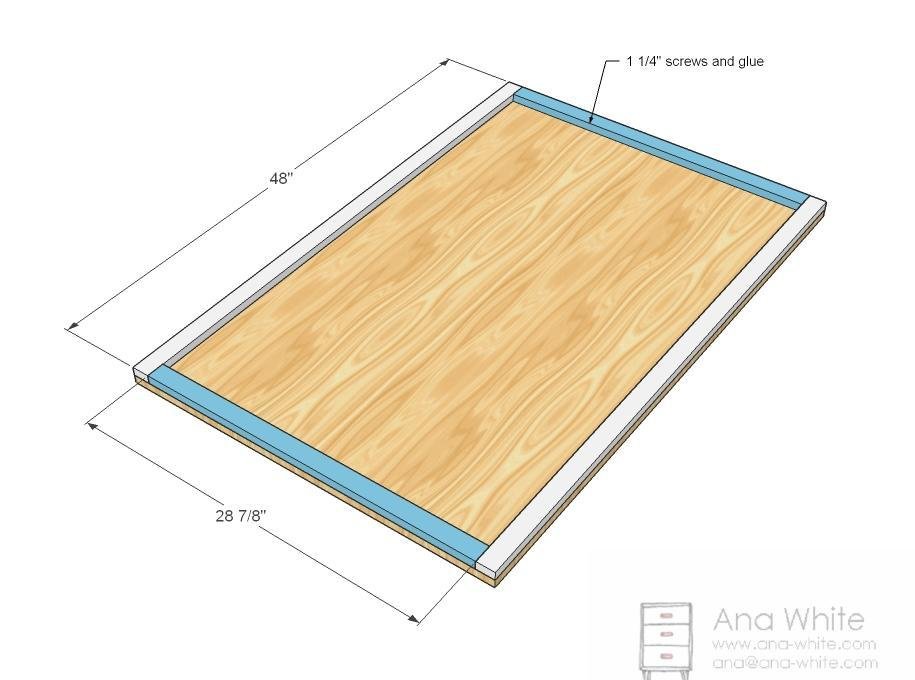
2 – 1×6 @ 48″ 2 – 1×6 @ 30 3/8″ 2 – 3/4″ Plywood or MDF @ 48″ x 31 7/8″ 4 – 1×2 @ 17 1/4″ (Side Legs) 4 – 1×3 @ 17 1/4″ (Front/Back Legs) 2 – 1×2 @48″ (bottom shelf supports) 2 – 1×2 @ 28 7/8″ (bottom shelf) 6 – 1×2 @ 28 7/8″ (trim) 6 – 1×2 @ 44 1/2″ (trim) 2 – 1×3 @ 34 7/8″ (top end) 2 – 1×2 @ 48″ (top sides)
Tools
- measuring tape
- square
- pencil
- safety glasses
- hearing protection
- kreg-jig
- drill
- circular saw
- sander
- level
- countersink drill bit
Step-by-step Instructions
Step 1
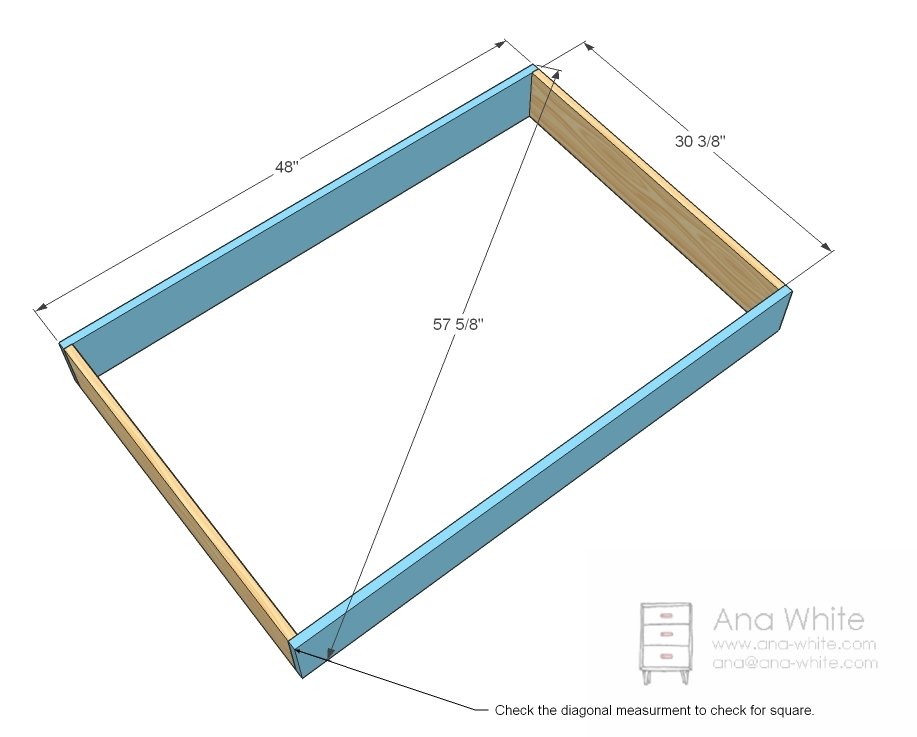
Build the Box Screw the box together as shown above with 2″ screws and glue. The measure across diagonally, checking to see if the measurement matches the diagonal above. Measure the oppostite diagonal. One diagonal will be longer than the other. On the longer diagonal, push the two opposite corners together, decreasing the distance between the corners. This is how you adjust for square. When the diagonals match, you’ve got a square box!
Step 2
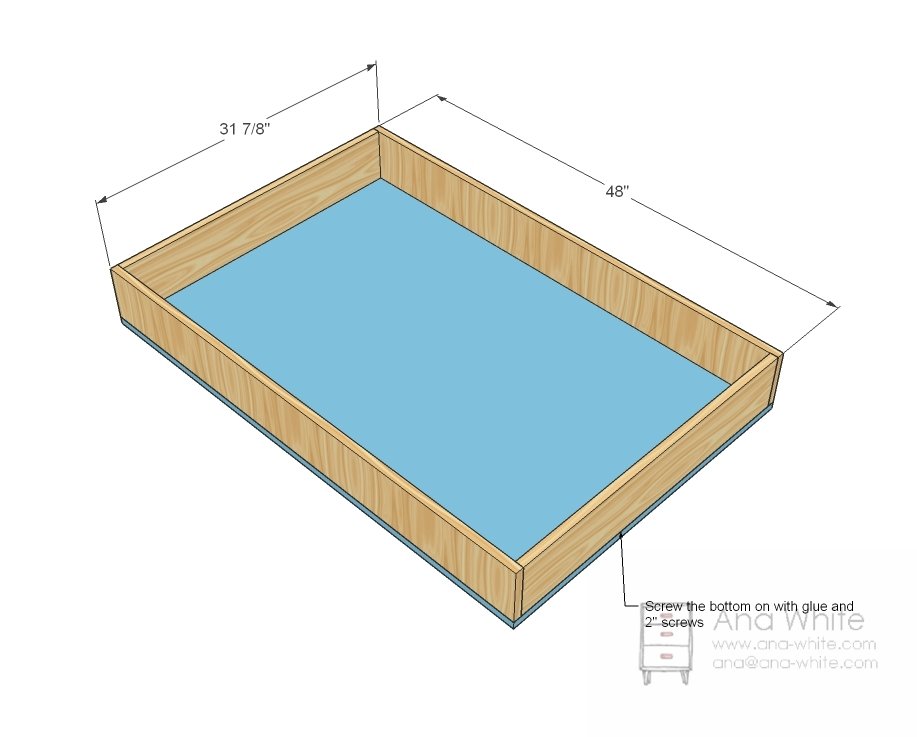
Put the Bottom on the Box This diagram really should be upside down. Just lay one of the sheets of plywood on top of the box and screw down with 1 1/4″ screws. Of course, you should always predrill your screw holes and use glue.
Step 3
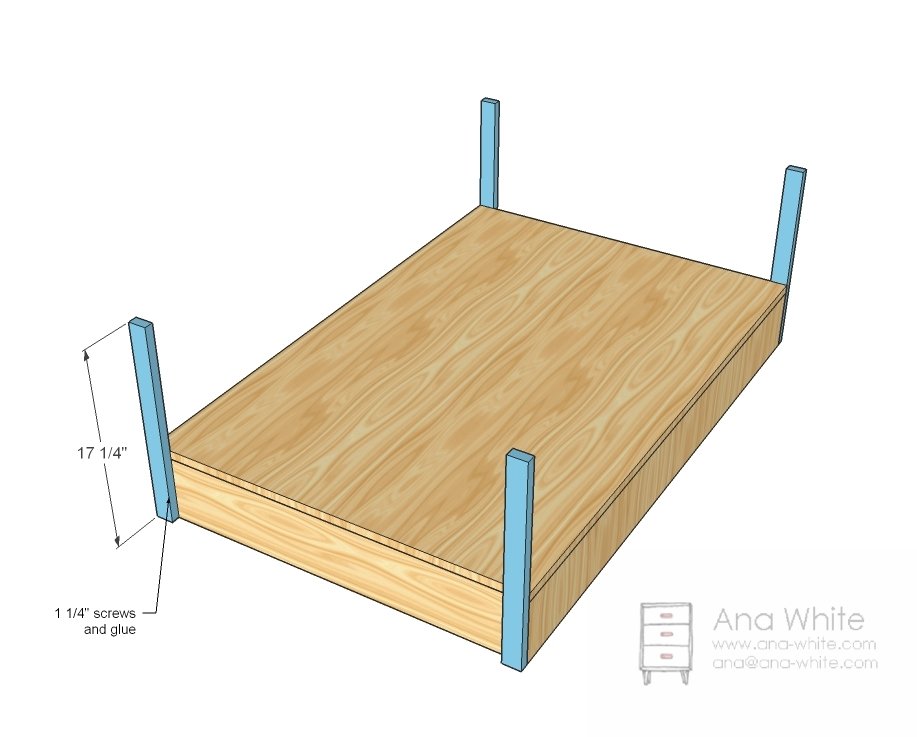
End Legs Now just screw the legs to the short ends (these are the 1×2 legs) with 1 1/4″ screws and glue. Super easy. Keep things flush to the sides and top.
Step 4
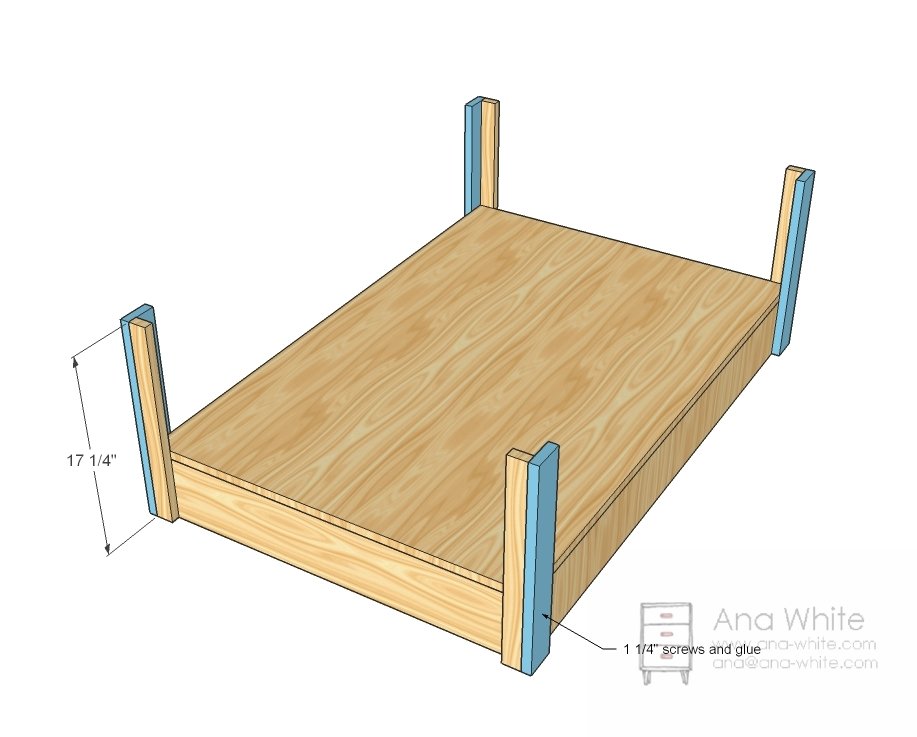
Side Legs Now simply screw the side legs to the end legs and the box sides with 1 1/4″ screws and glue.
Step 5
Step 6
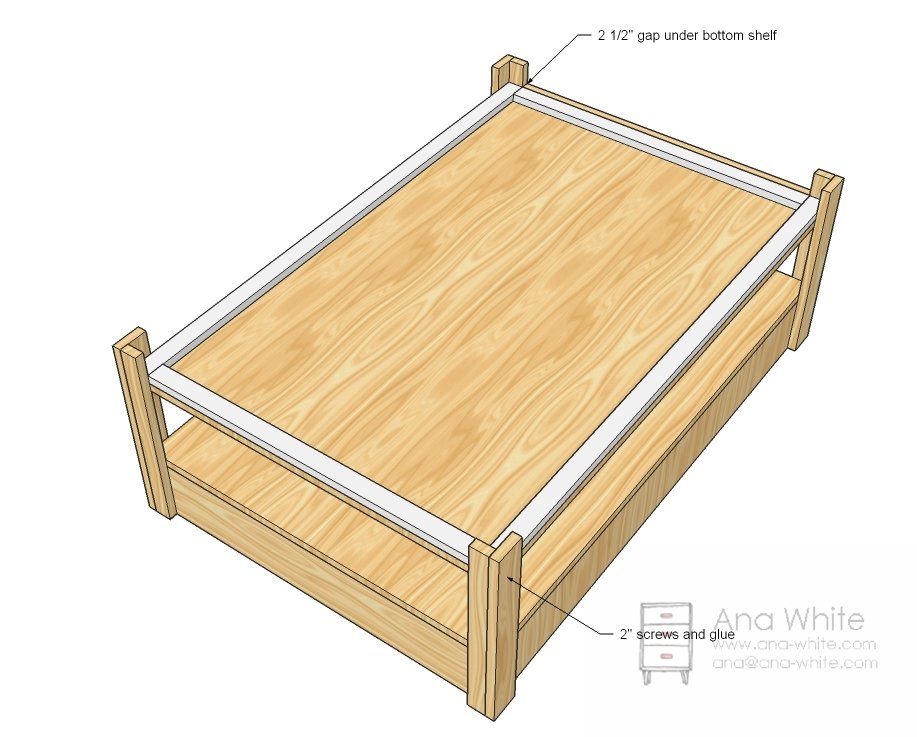
Attach Bottom Shelf Get some help on this one or turn the table on it’s side. Predrill holes and attach the bottom shelf. What I would do is to cut 2 1/2″ long spacers and screw to the inside of the legs on the underside (with the shelf in place) flush with the bottom of the legs. Then let the bottom shelf rest on the tops of these spacers as you predrill holes and screw the bottom shelf on. You could even leave the spacers in.
Step 7
Trim Now the fun part.. at least if you have a nailer. Attach the trim to the sides as shown above. You can use screws or a good ole hammer and nails too.
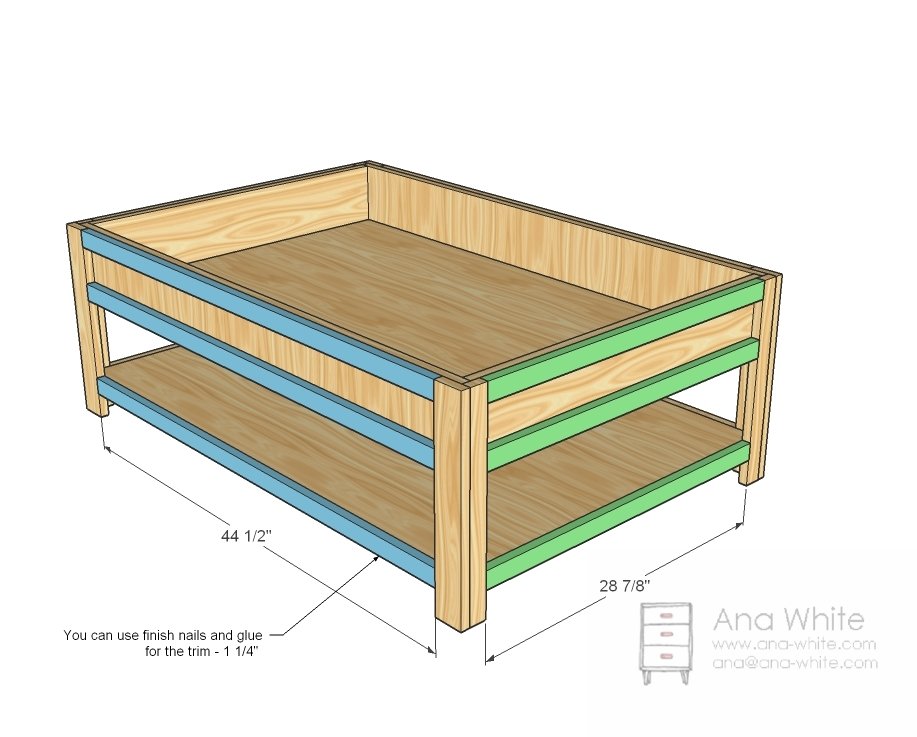
Step 8
Top Trim Now the top trim. The top trim does not get screwed into the 1×6 sides, rather the legs and the side trim pieces. What I would do is layout the tabletop pieces (see below diagram) and trim around them so you have a nice tight but removeable fit.
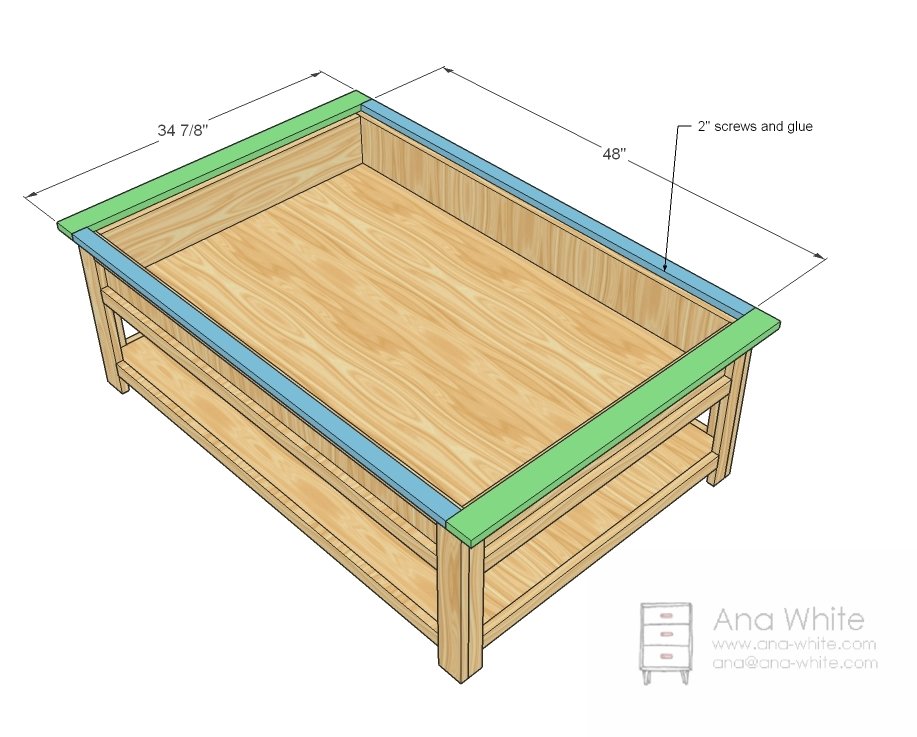
Step 9
Top Inserts And those are the top inserts I was talking about. Sand them to get a nice fit. You may wish to drill a little hole in the center (half on each insert) to have a spot to pull the inserts up with. For those of you concerned about sagging, I checked the deflection and you should be able to put 70 pounds on each inset with no noticeable deflection – that’s as much as any preschooler would weigh. But if you are going to stand on it, make sure you put a foot on each insert
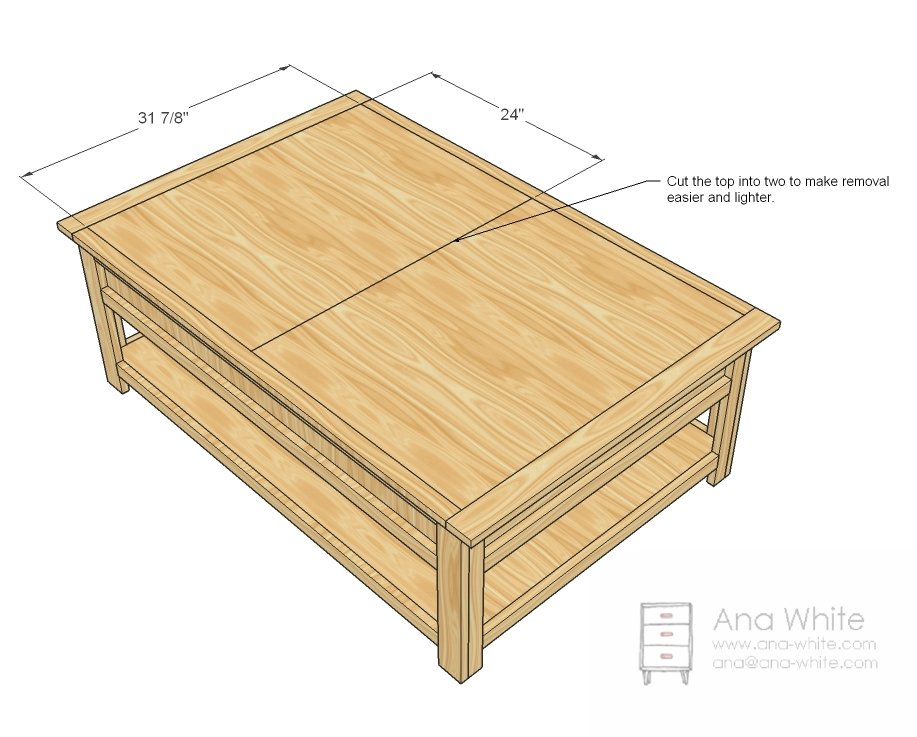
Finishing
Sand all surfaces, starting with a medium grit and finishing with fine. Wipe off the dust, fill any holes or gaps with wood filler, and sand smooth once dry. Apply primer if you're painting, then finish with your choice of paint or stain and seal with a durable clear topcoat. For outdoor projects, use exterior-rated primer, paint or stain, and sealer so the piece stands up to the weather.
Source (temporary): https://www.ana-white.com/woodworking-projects/moms-train-table