Mud Kitchen
s are a backyard must for summertime play! We love this DIY mud kitchen because its wood (biodegradable and repairable), it's easy to build, you can customize it for whatever you want - like adding a real working sink or custom colors and personalization. The include video, step by step instructions with diagrams, shopping and cut lists, and lots of real reader submitted photos!
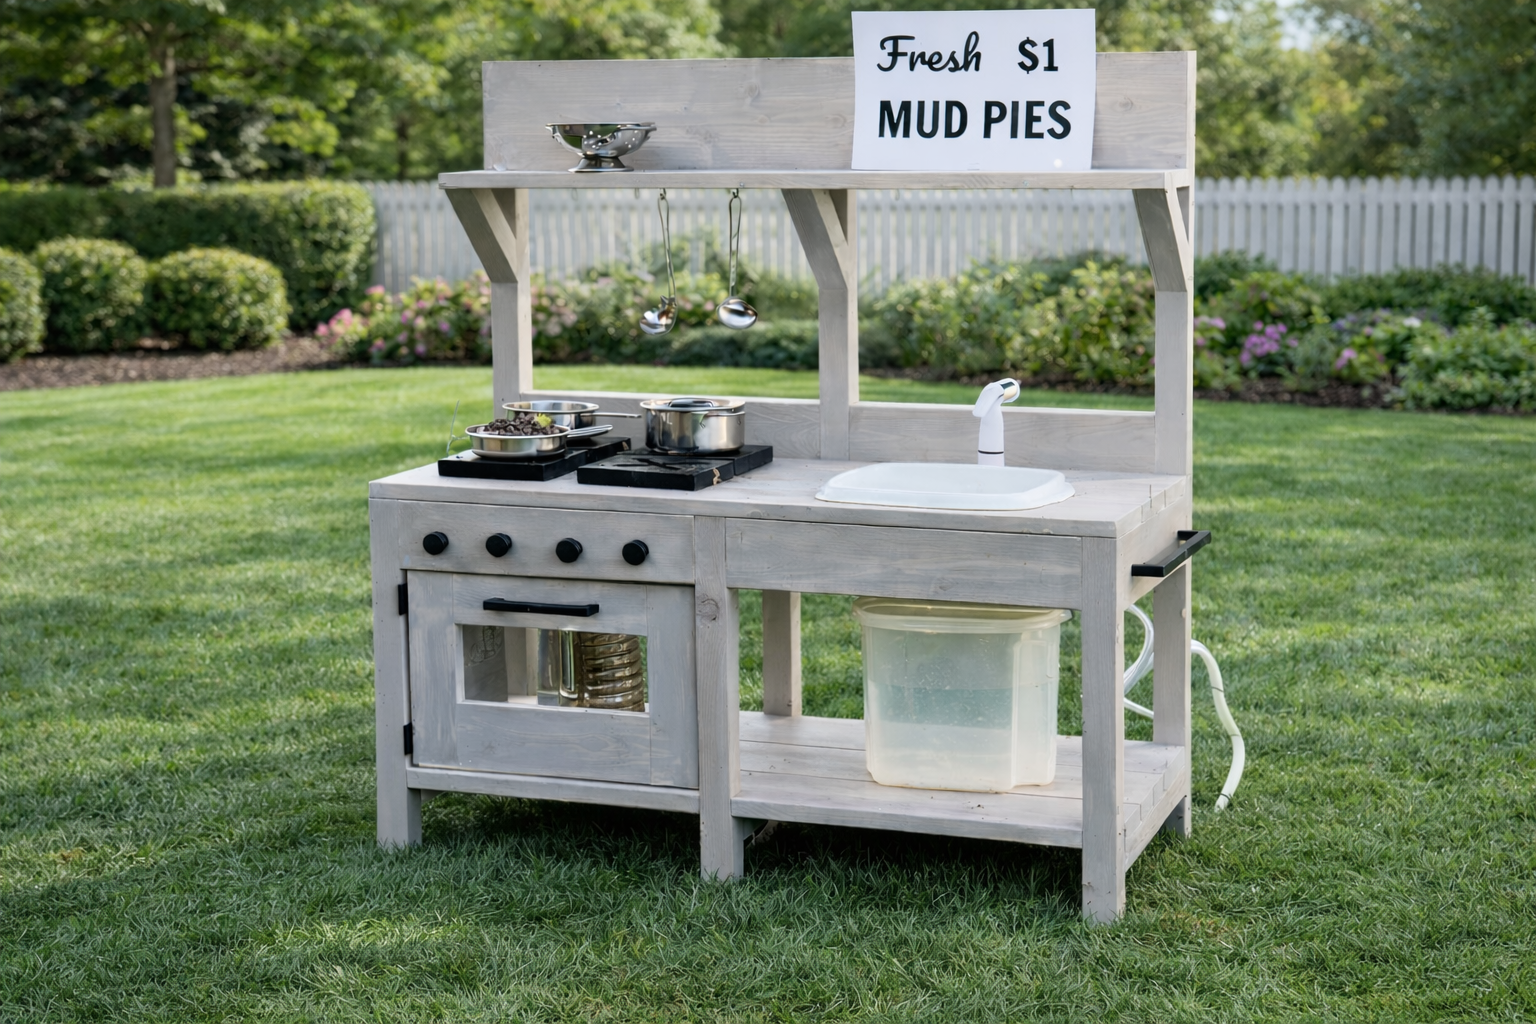
Specifications
| Project type | Play Kitchen Collection |
|---|---|
| Room | Kids and Toys |
| Difficulty | Beginner Projects |
Dimensions
Use the size-specific shopping and cut lists below.
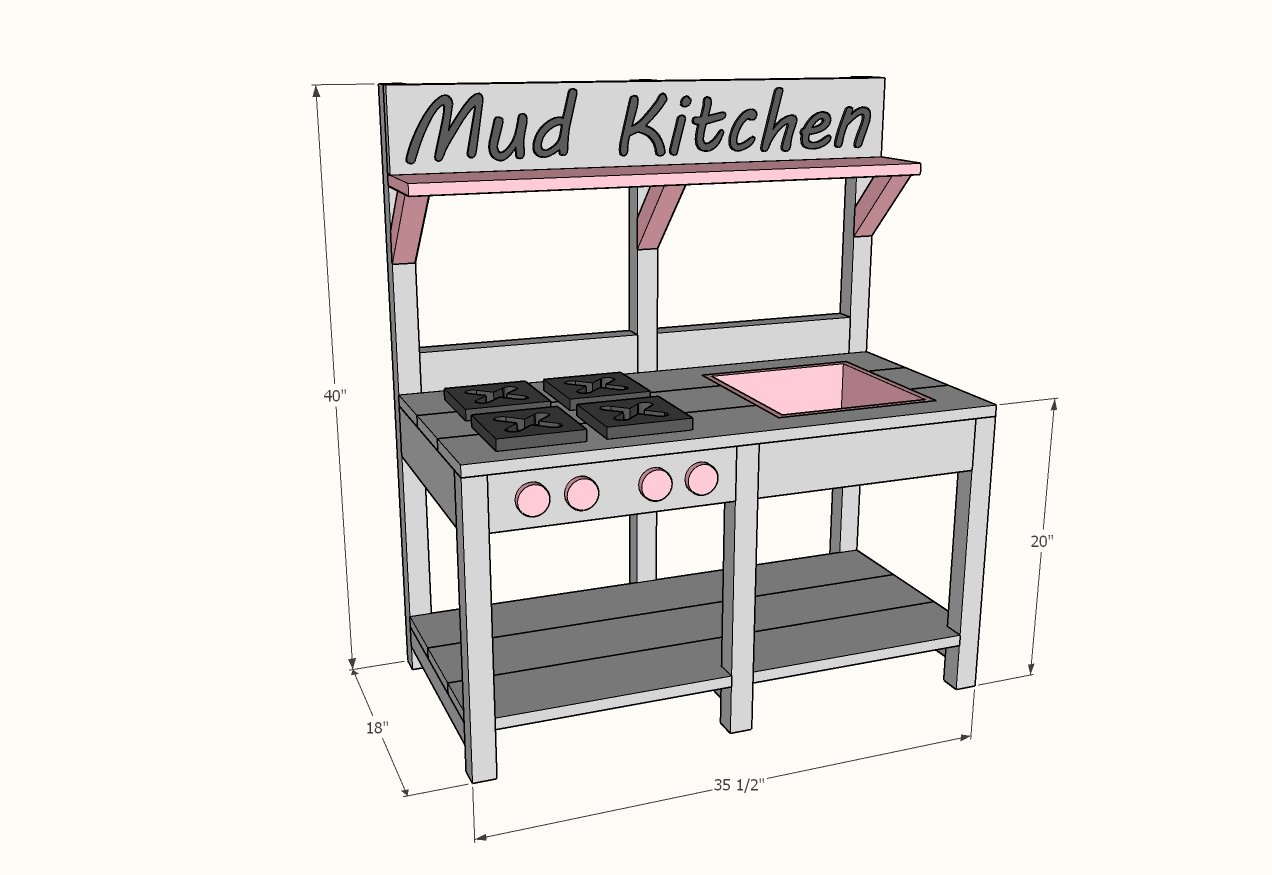
Shopping List
- 3 - 2x2 @ 8 feet long
- 1 - 2x4 @ 10 feet long
- 4 - 5-1/2" wide cedar fence pickets, 6 feet long, prefer NOT dogeared
- 40 - 2-1/2" long self tapping trim screws
- 50 - 1-1/2" long self tapping trim screws
Cut List
- 3 - 2x2 @ 40" - back legs
- 3 - 2x2 @ 19-1/4" - front legs
- 3 - 2x2 @ 15-1/2" - bottom shelf support
- 7 - 2x4 @ 15-1/2" - top shelf supports and back splash
- 8 - 5-1/2" wide cedar fence pickets @ 35-1/2" long
- 3 - 2x2 @ 7" - long point to long point measurement, both ends cut at 45 degrees, ends NOT parallel*
*DO NOT cut from small pieces of wood to avoid hand injuries. Always clamp when cutting.
Tools
- measuring tape
- square
- pencil
- safety glasses
- drill
- jigsaw
- sander
- countersink drill bit
Step-by-step Instructions
Step 1
Build three leg sets the same as shown in diagram. I used two screws to attach the 2x4s, and one 2x2 to attach the 2x2s to the 2x2s.
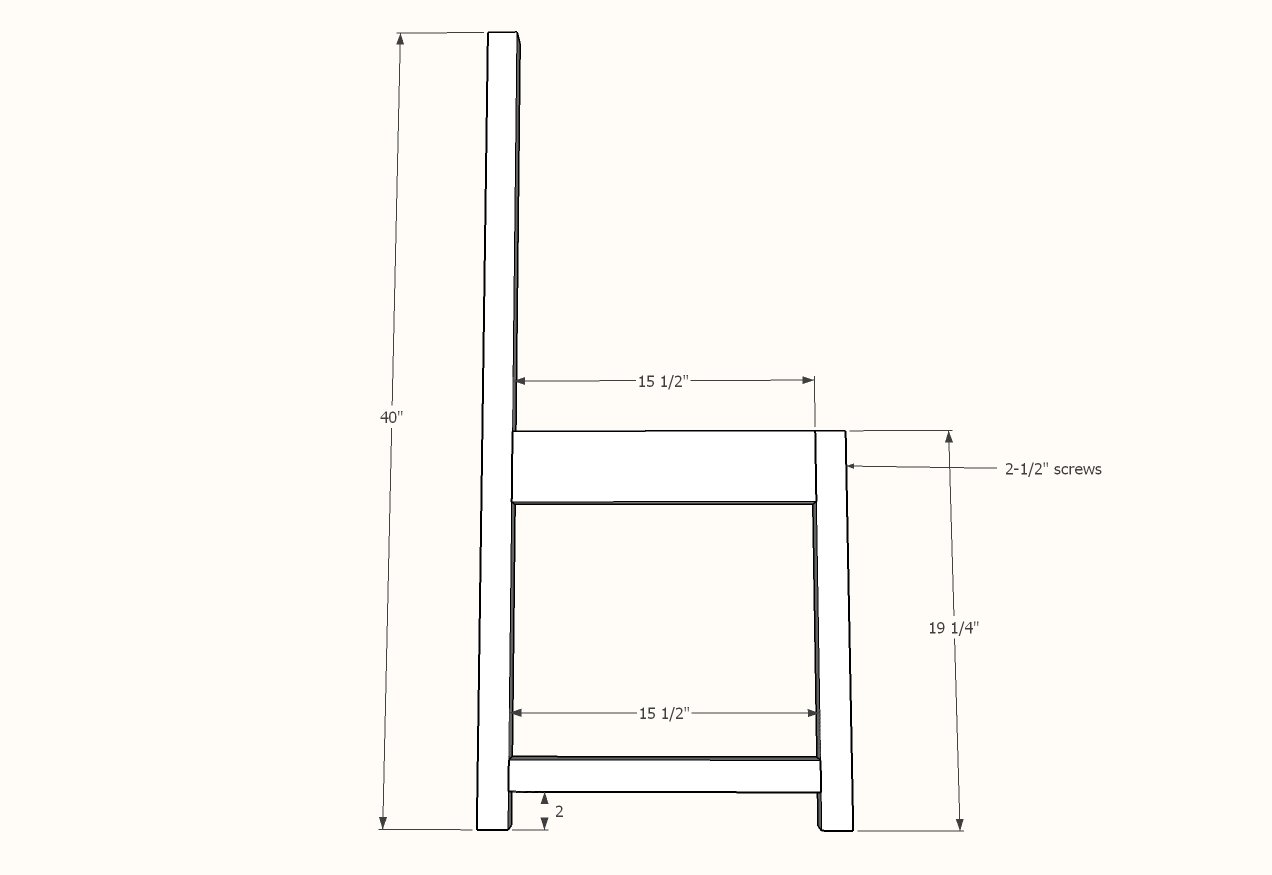
Step 2
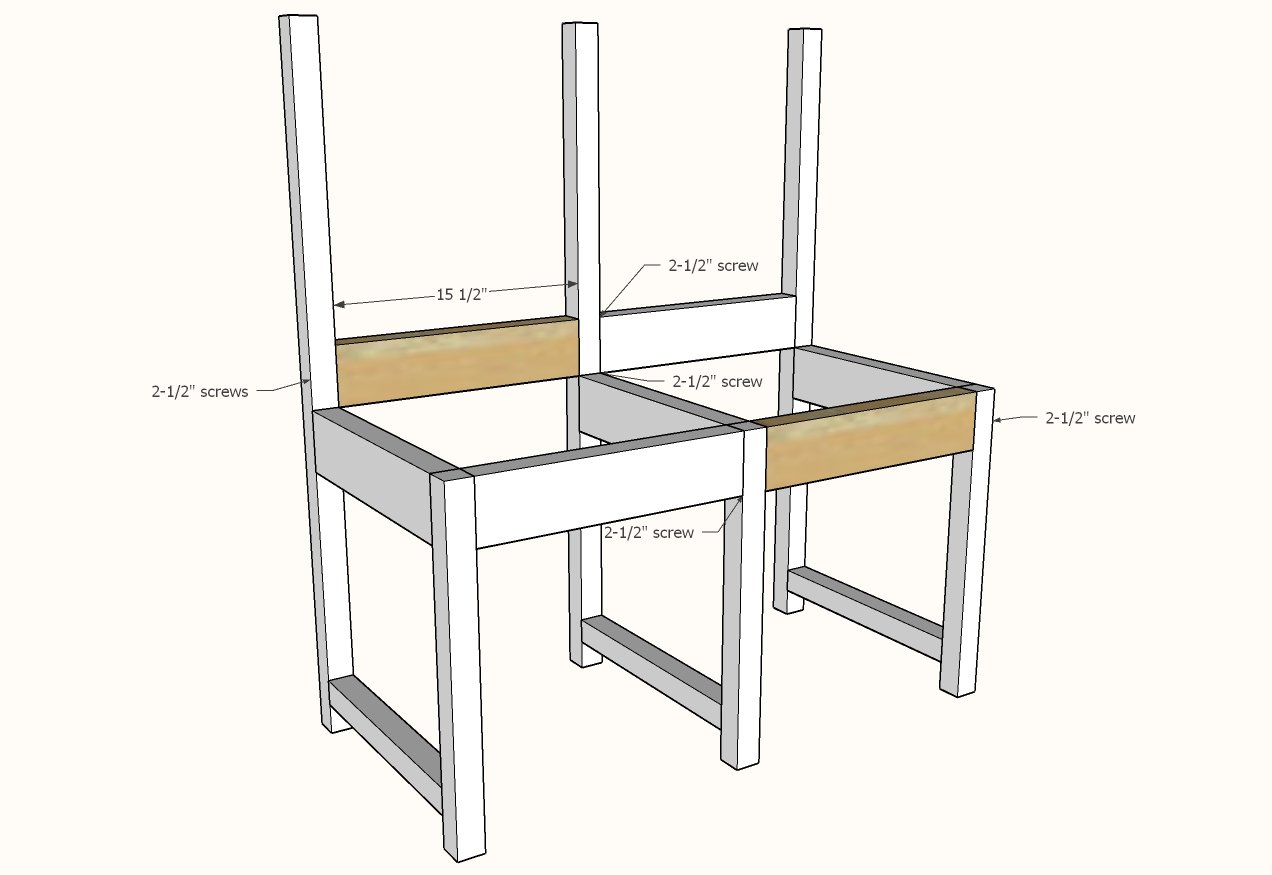
Attach the three leg sets together with one front and one back with two screws per joint.
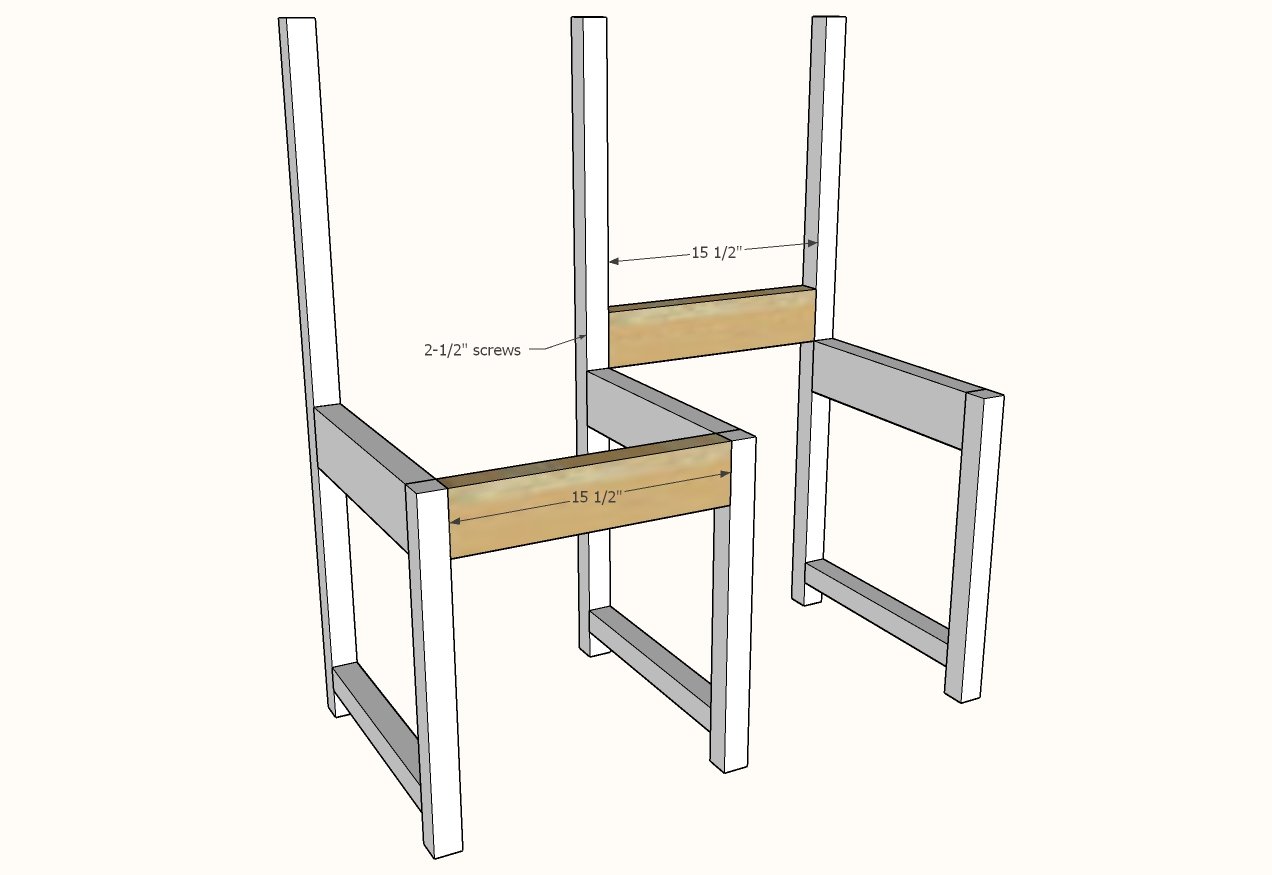
Step 3
Add remaining supports to finish the frame for the mud kitchen.
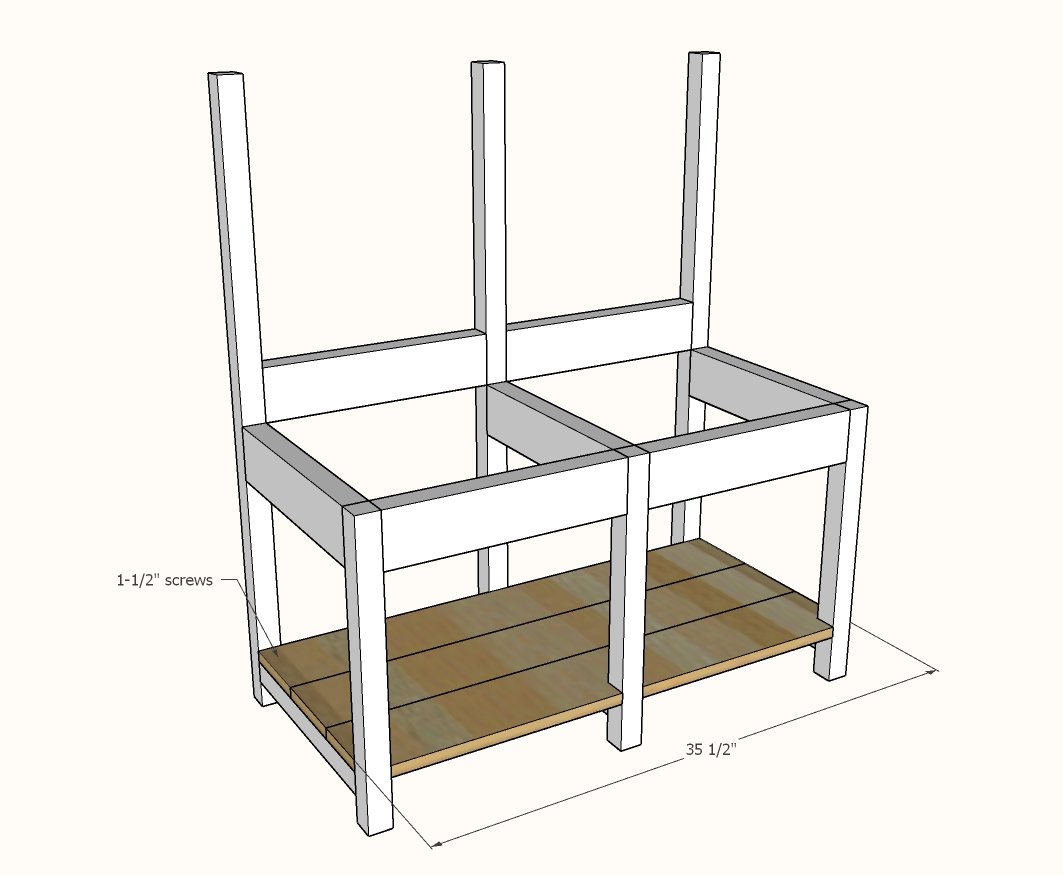
Layout the bottom shelf 1x6 boards and notch out the front one around the 2x2 legs.
Screw down, leaving even gaps for water drainage in between.
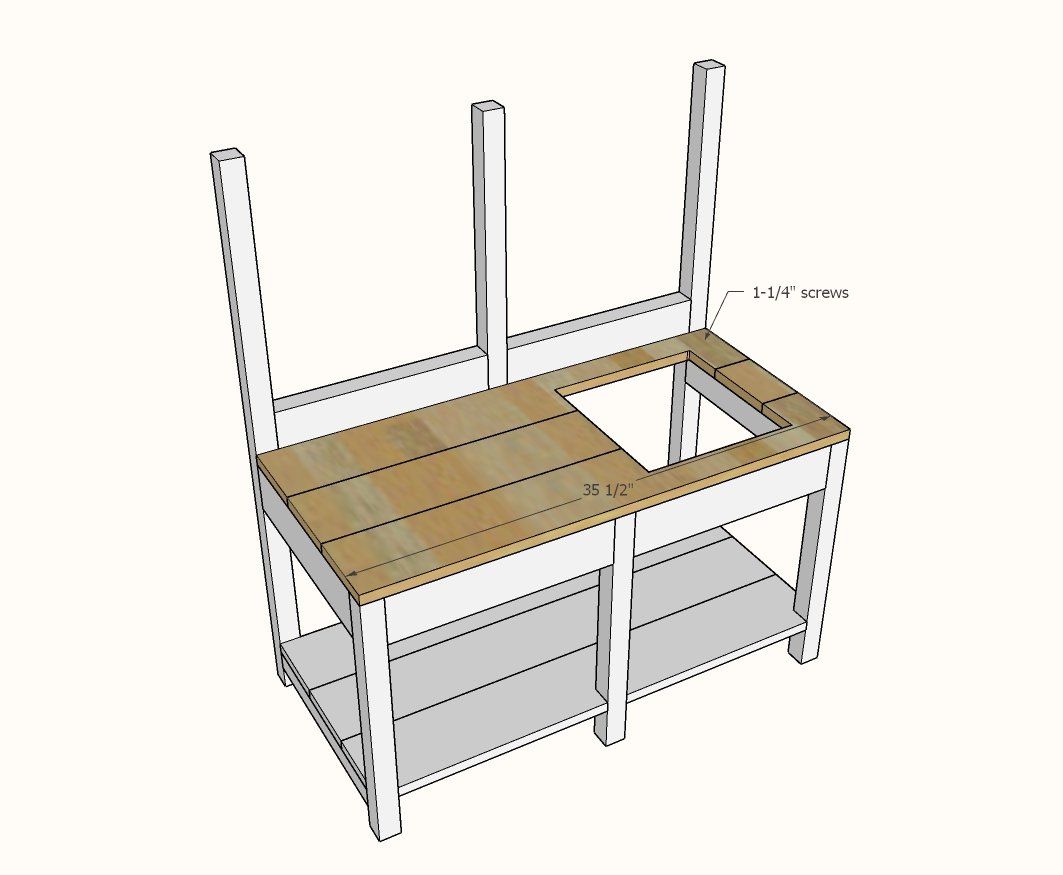
Layout top boards with even gaps in between and screw down.
Cut sink out.
Step 6
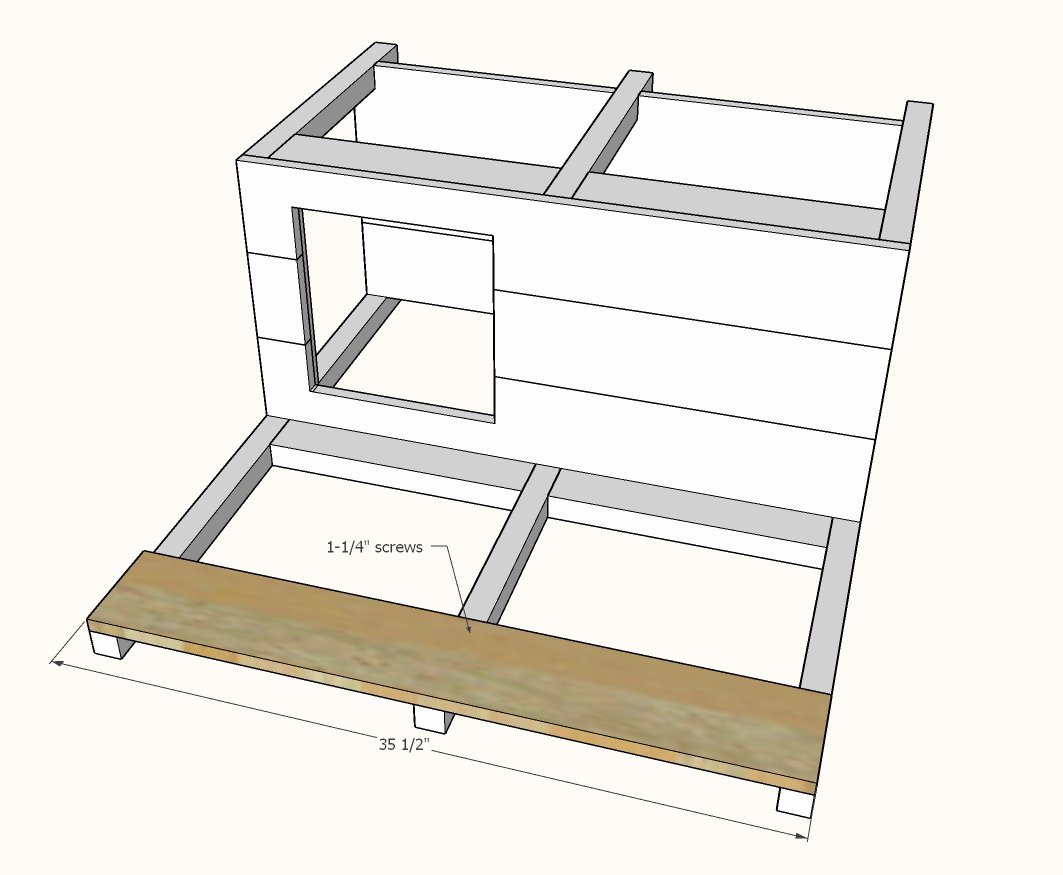
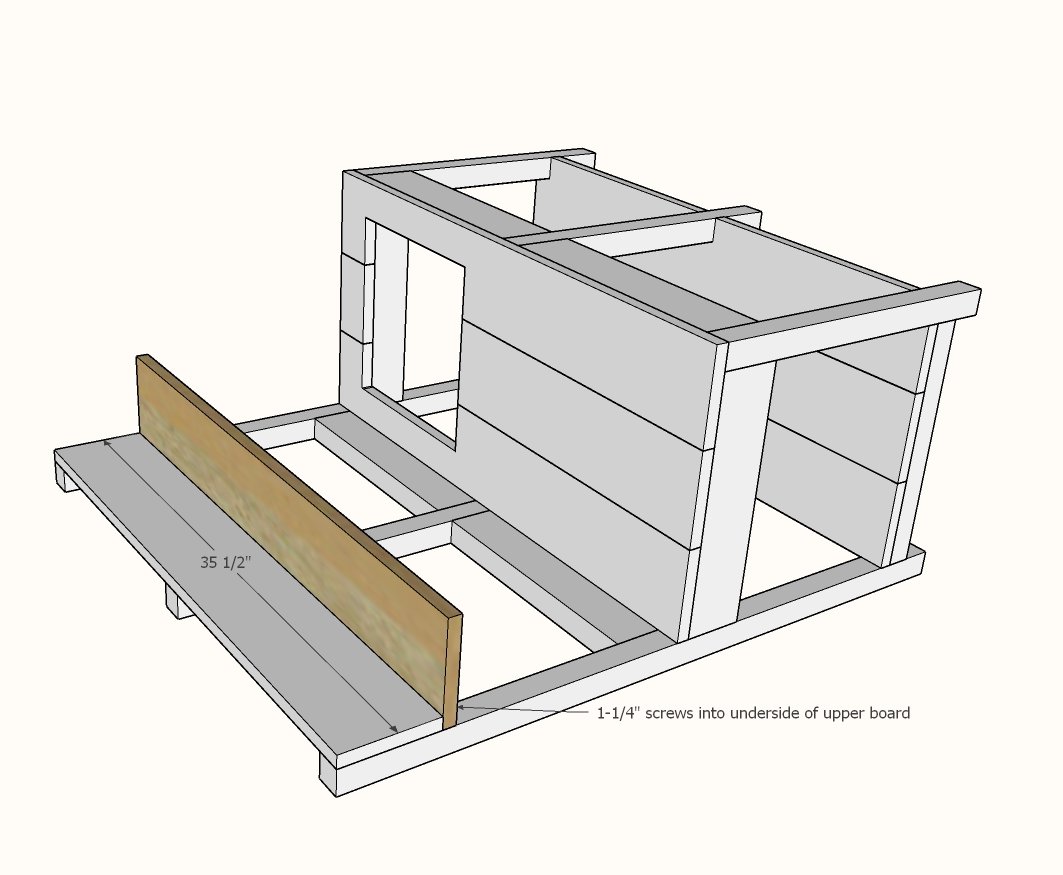
Attach top shelf back board to 2x2 legs, flush to top.
Step 7
Attach top shelf shelf board to bottom of the back board.
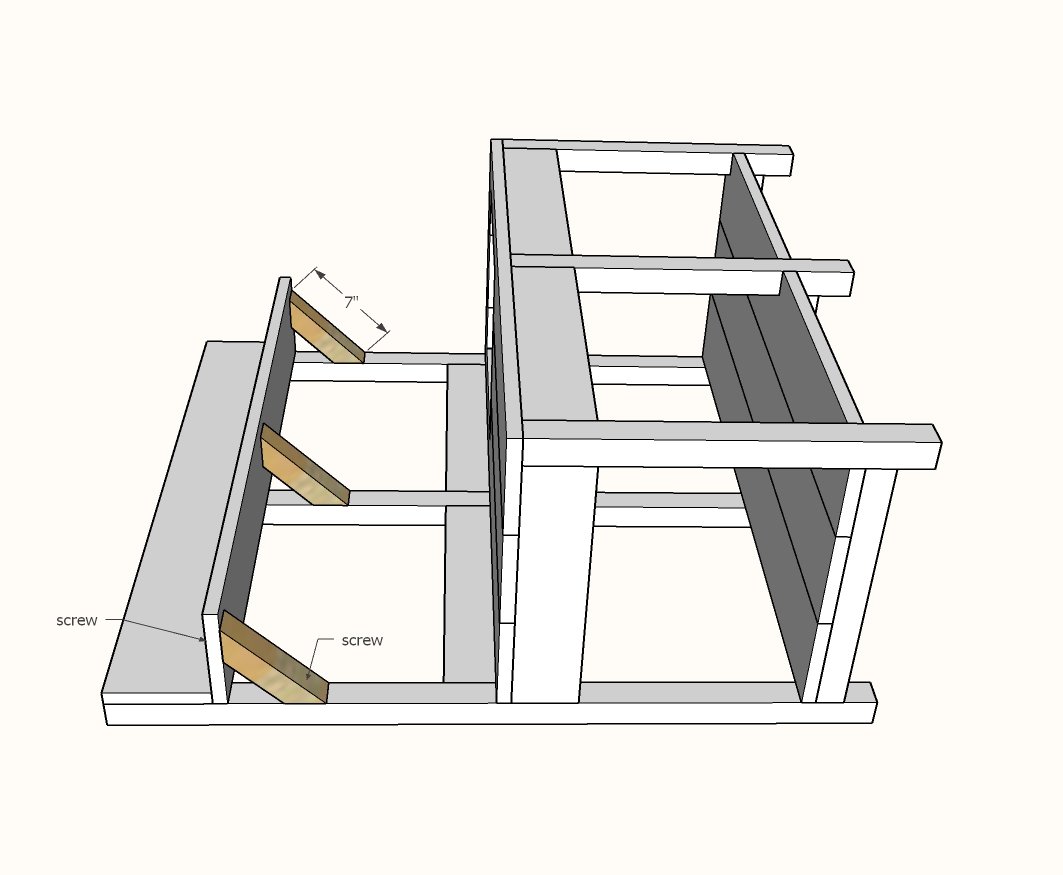
Step 8
Attach shelf support brackets to the underside of the top shelf.
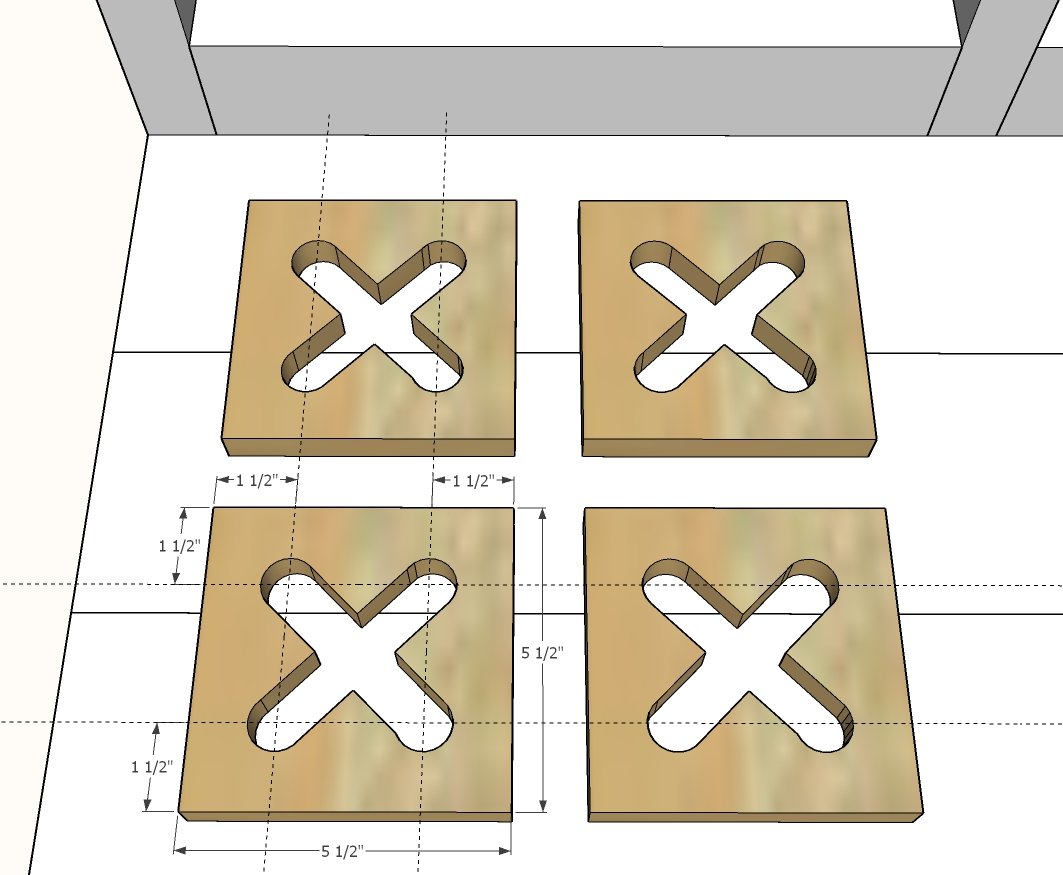
Step 9
If desired, cut out stovetop pieces from 1x6 scraps. As shown, a 1/2" hole is drilled and the holes are connected with a jigsaw.
Finishing
Sand all surfaces, starting with a medium grit and finishing with fine. Wipe off the dust, fill any holes or gaps with wood filler, and sand smooth once dry. Apply primer if you're painting, then finish with your choice of paint or stain and seal with a durable clear topcoat. For outdoor projects, use exterior-rated primer, paint or stain, and sealer so the piece stands up to the weather.
Source (temporary): https://www.ana-white.com/woodworking-projects/mud-kitchen