Mudroom Bench with Easy Drawers
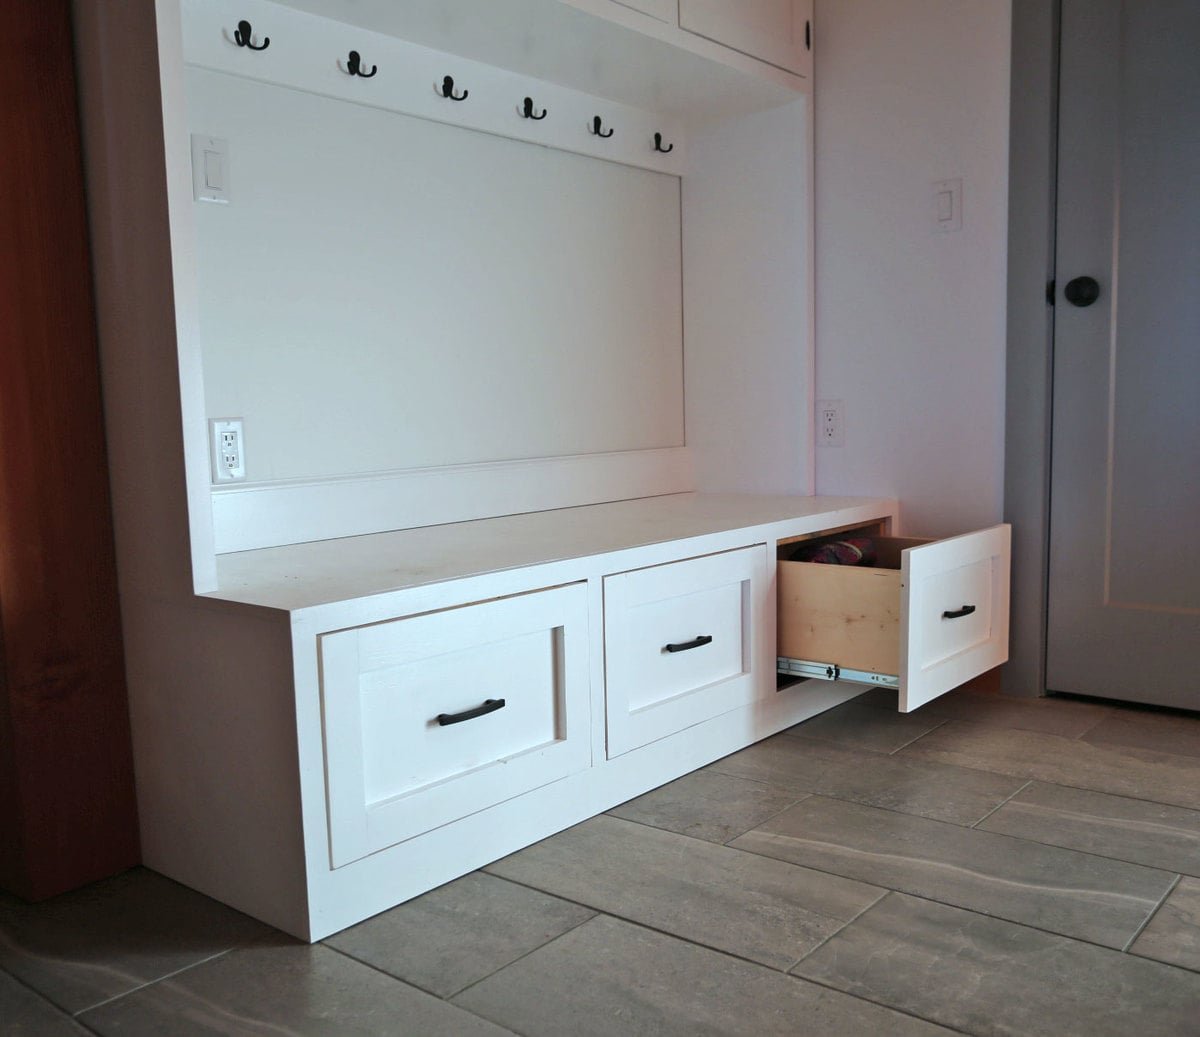
The easiest way to build a drawer bench. Free step by step
Specifications
| Project type | Bench |
|---|---|
| Room | Storage Solutions |
| Style | Cottage Style Furniture Plans |
| Difficulty | Intermediate |
Dimensions
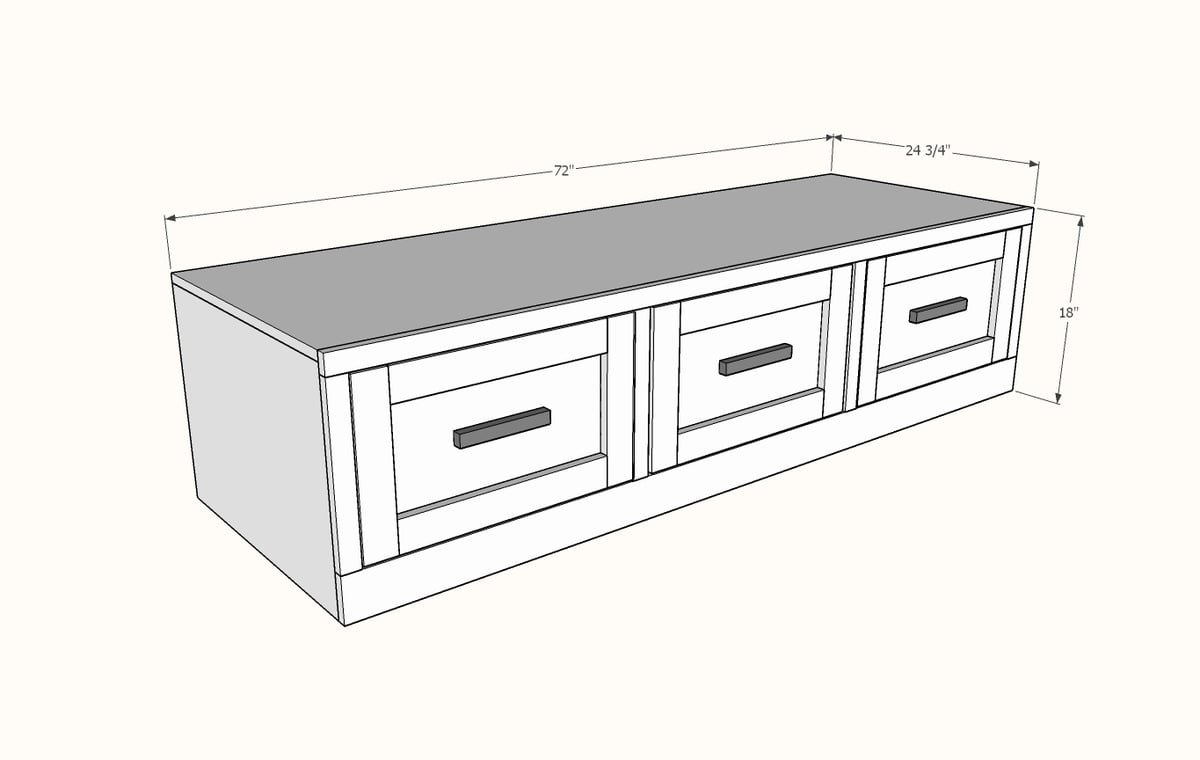
Use the size-specific shopping and cut lists below.
Shopping List
1 -sheet of 3/4" plywood cabinet grade, 48" x 96" - ripped into two strips, 96" x 23-7/8"
5 - 2x4 @ 8 feet long
3 - 1x10 @ 8 feet long
48" x 48" sheet of 1/4" plywood (for drawer bottoms)
12 feet of 1x2 boards
6 feet of 1x4 board
2 - 1x3 @ 8 feet long
3 - full extension side mount drawer slides
3 knobs or handles
3" screws (about 40)
Cut List
FRAMES
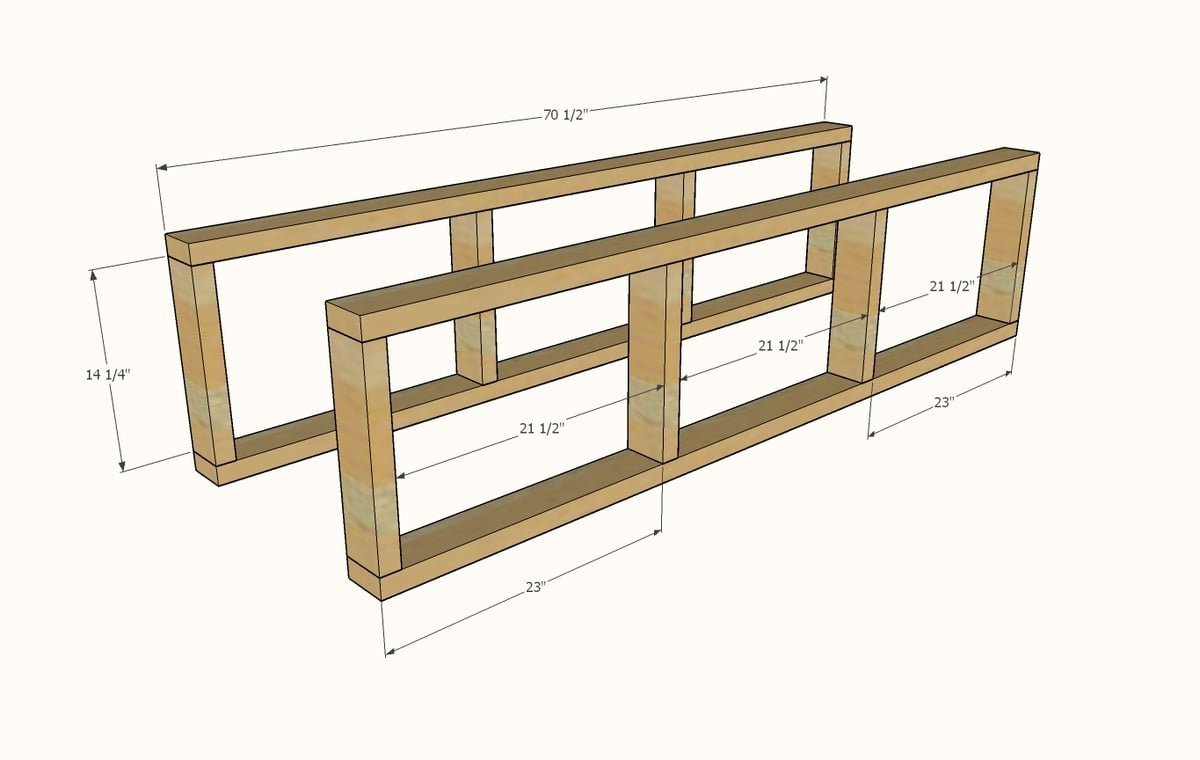
4 - 2x4 @ 70-1/2"
8 - 2x4 @ 14-1/4"
SIDES/TOP
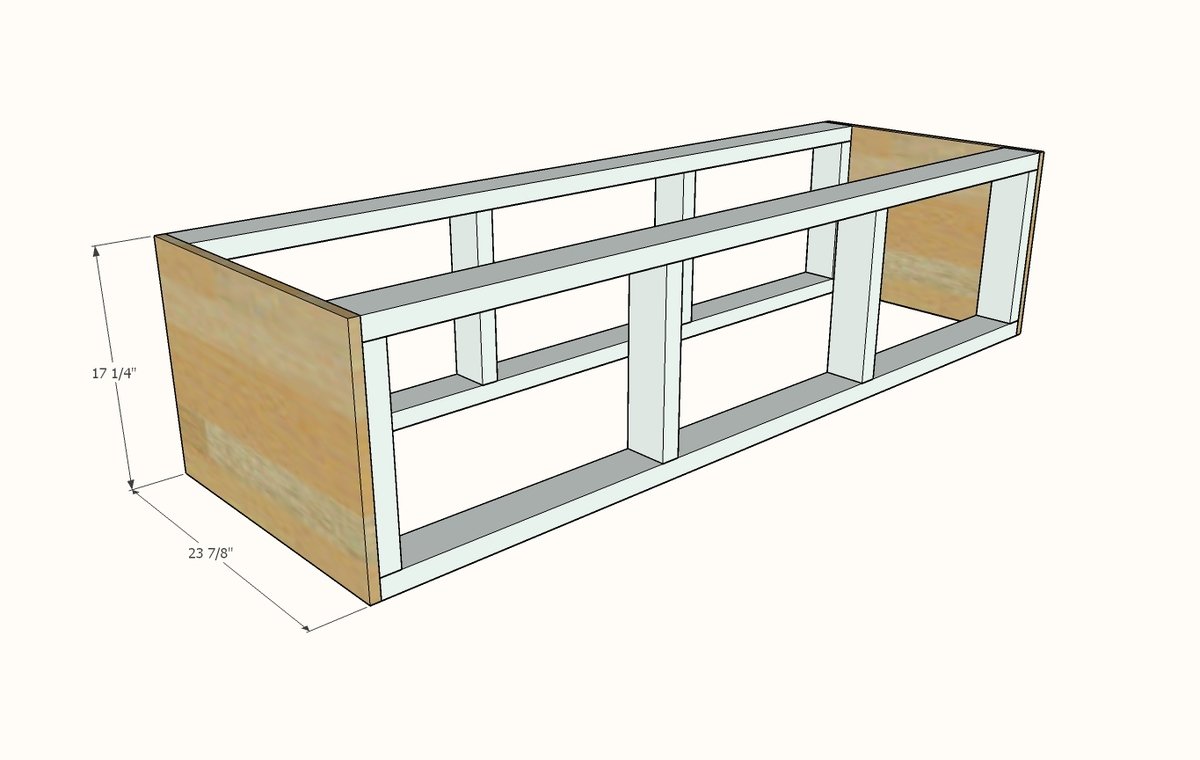
2 - 3/4" plywood @ 23-7/8" x 17-1/4"
1 - 3/4" plywood @ 23-7/8" x 72"
DRAWERS - CUT TO FIT!!!
6 - 1x10 @ 23-7/8"
6 - 1x10 @ 19"
3 - 1/4" plywood @ 23-7/8" x 20-1/2"
FACE FRAME
1 - 1x2 @ 72"
1 - 1x4 @ 72"
4 - 1x2 @ 13"
DOOR FACE FRAMES
6 - 1x3 @ approx 12-3/4"
4 - 1x3 @ approx 17" - end drawers
2 - 1x3 @ approx 16-1/4" - middle drawer
Tools
- measuring tape
- square
- safety glasses
- hearing protection
- kreg-jig
- drill
- circular saw
- compound miter saw
- nailer
- sander
Step-by-step Instructions
Step 1
Cut the 2x4 pieces with a compound miter saw. Build the two frames so they match exactly - this is important for the drawers to slide straight. I used 3" self tapping screws. You can also use a Kreg Jig with the 1-1/2" material setting and 2-1/2" pocket hole screws.
Step 2
Attach the plywood to the ends. I used screws (2" length) but you can also use nails and glue.
Step 3
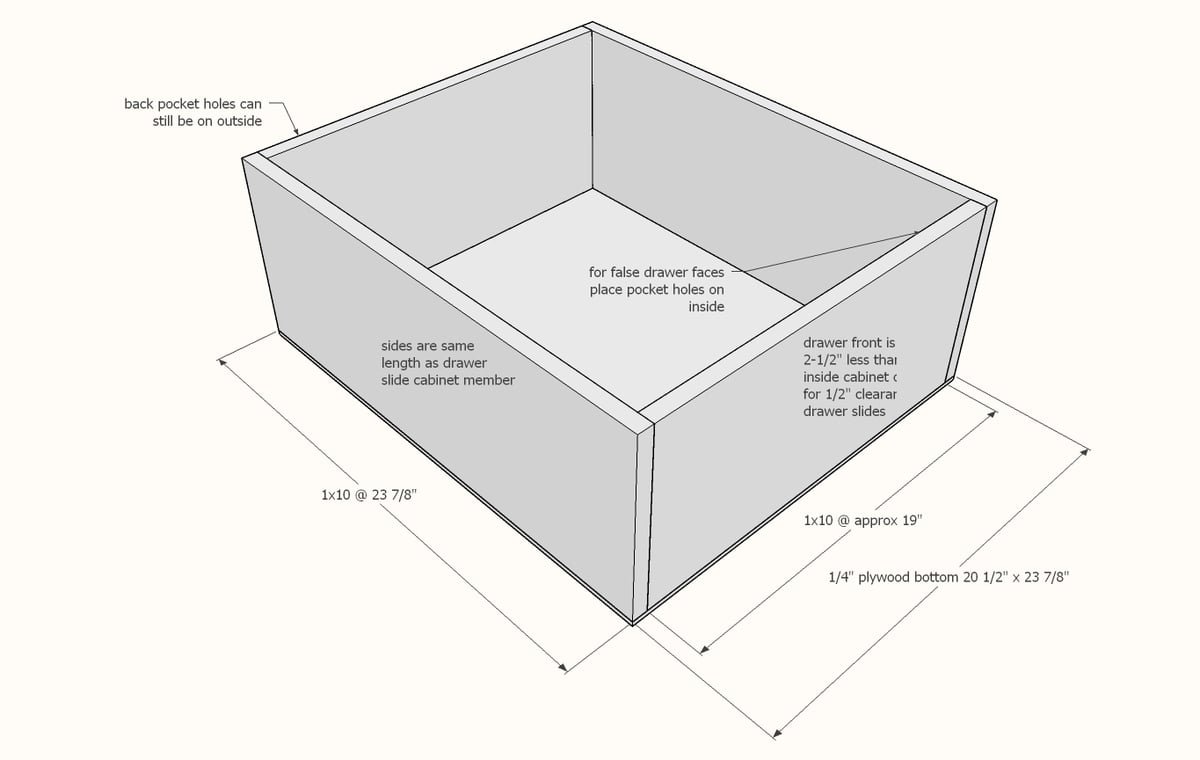
Read the instructions with your drawer slides and build drawers to fit your slides and opening. The measurements show are for standard 1/2" clearance drawer slides with 3/4" thick 1x10s. If using a Kreg Jig to build the drawer box, place pocket holes on the inside of the front of the drawer. You can still place on the outside on the back. I used a Kreg Jig set for 3/4" thick material and 1-1/4" pocket hole screws. I used a stapler with 3/4" narrow crown staples to attach the bottom with glue. You can also use a brad nailer with 3/4" brad nails and glue.
Step 4
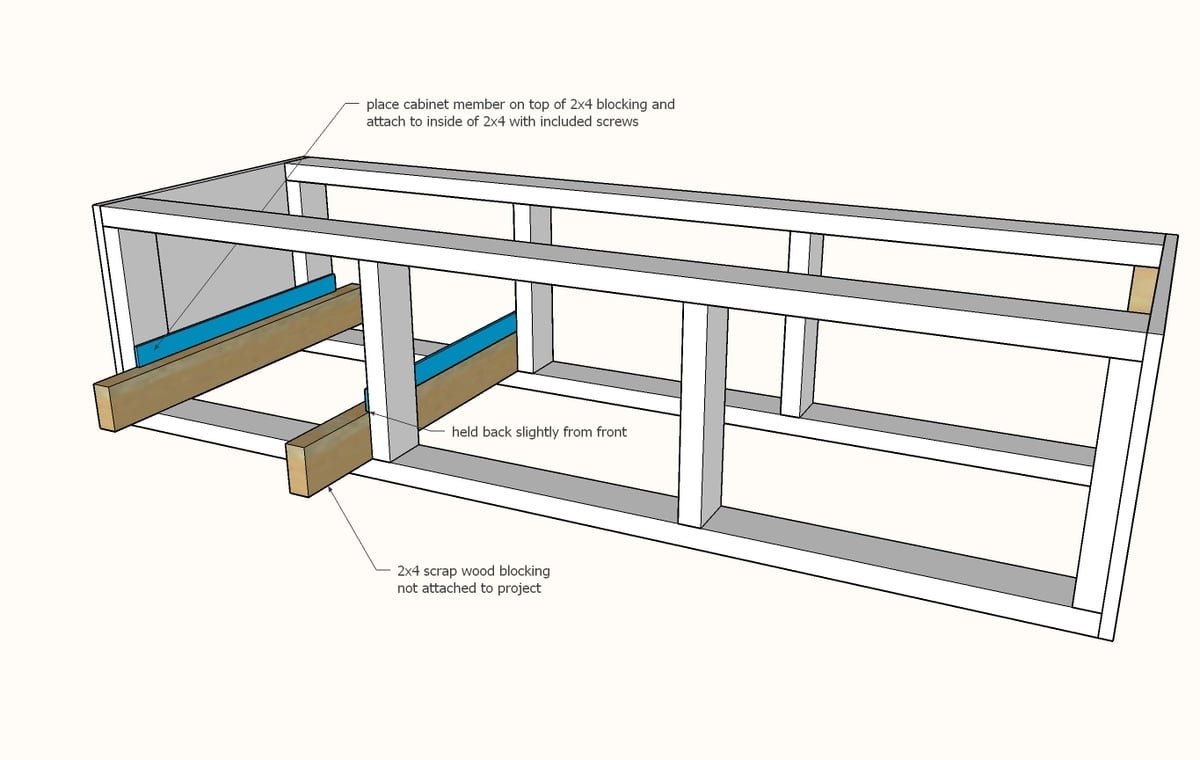
Place 2x4 scraps inside the bench as shown. Place the cabinet member of the drawer slide on top of the 2x4 and attach to the inside of the cabinet.
Step 5
Step 6
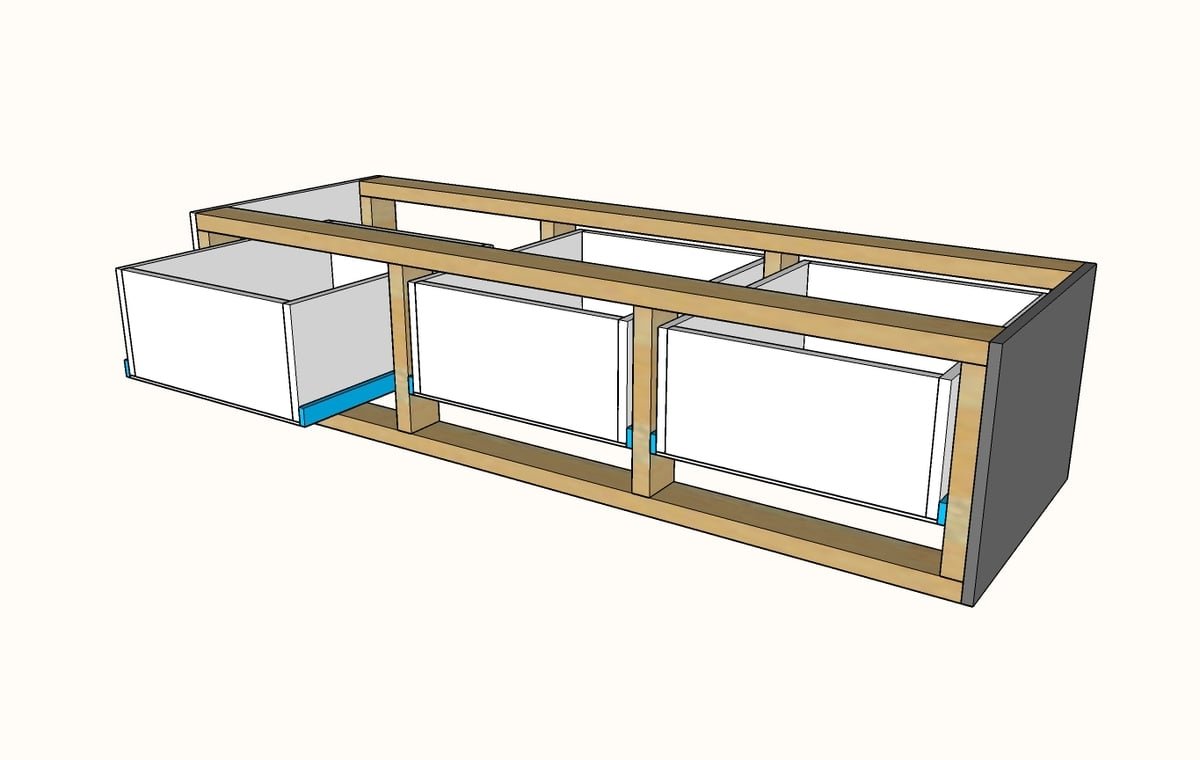
Test the fit of the drawer in the bench. Adjust if necessary until drawer slides smoothly.
Step 7
Attach top to the bench with 1-1/4" brad nails and glue. You can also use screws or staples - they will just be harder to hide.
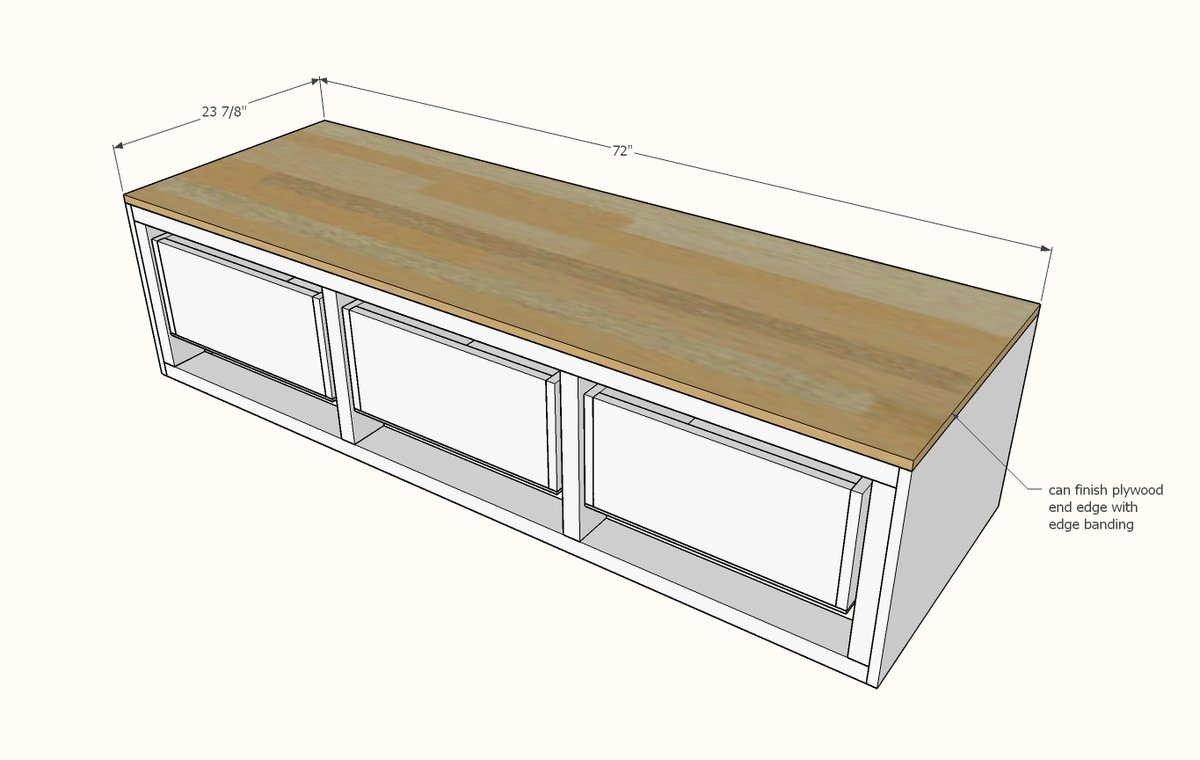
Step 8
Build the face frame first using a Kreg Jig set on the 3/4" setting with 1-1/4" pocket hole screws. Attach the completed face frame to the front of the project with 1-1/4" brad nails and glue.
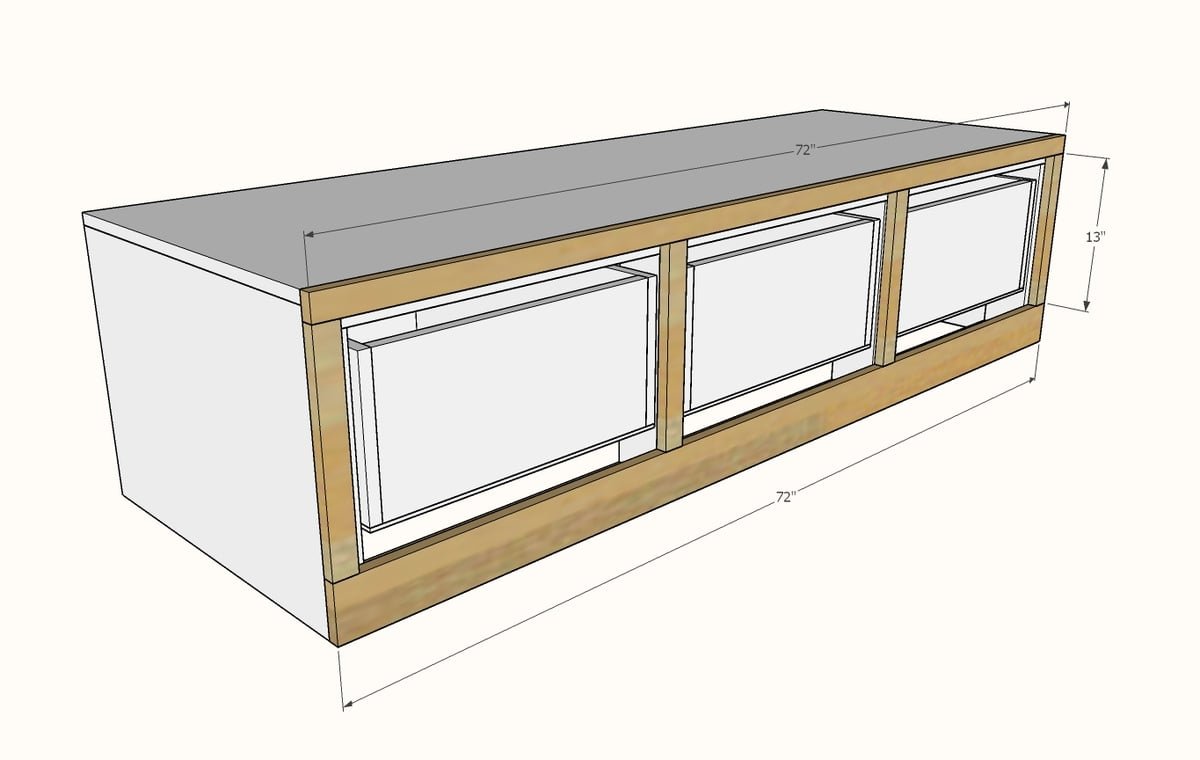
Step 9
Build the drawer face frames and attach to the drawer boxes with an even 1/8" gap on all sides with 1-1/4" brad nails and glue.
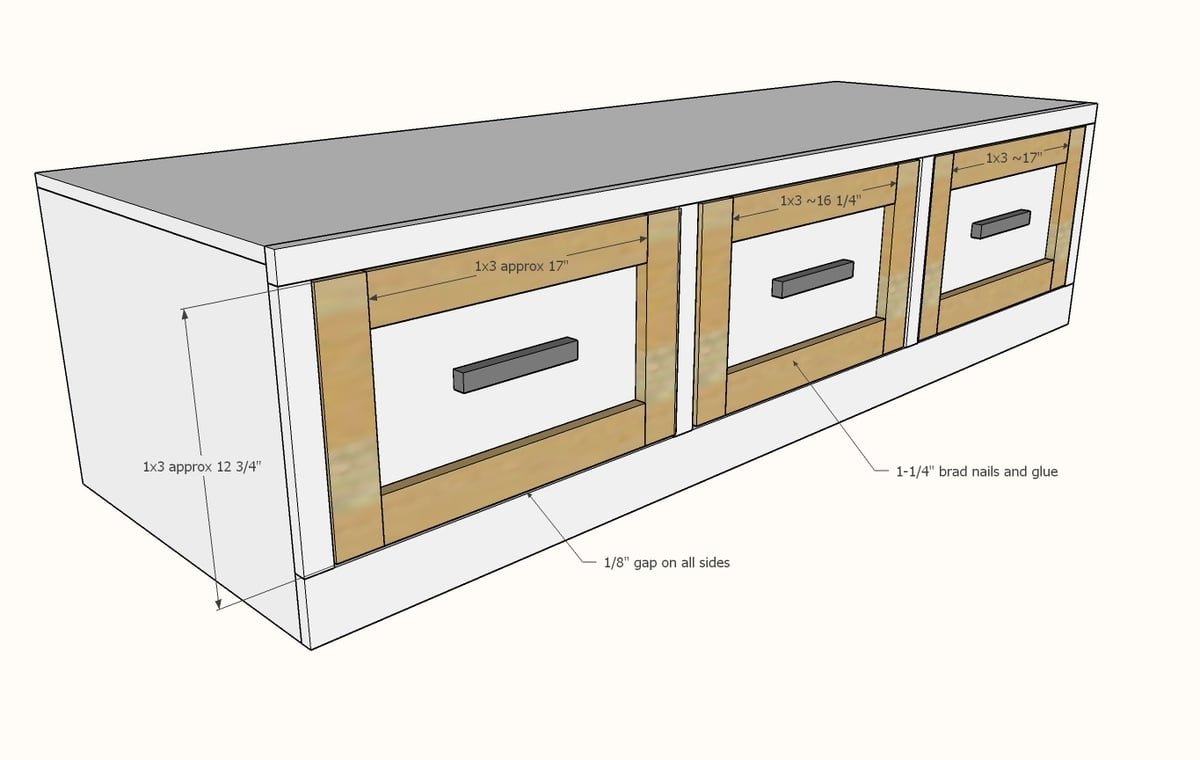
Finishing
Sand all surfaces, starting with a medium grit and finishing with fine. Wipe off the dust, fill any holes or gaps with wood filler, and sand smooth once dry. Apply primer if you're painting, then finish with your choice of paint or stain and seal with a durable clear topcoat. For outdoor projects, use exterior-rated primer, paint or stain, and sealer so the piece stands up to the weather.
Source (temporary): https://www.ana-white.com/woodworking-projects/mudroom-bench-easy-drawers