Narrow Depth Secretary Cabinet with Mail Slots
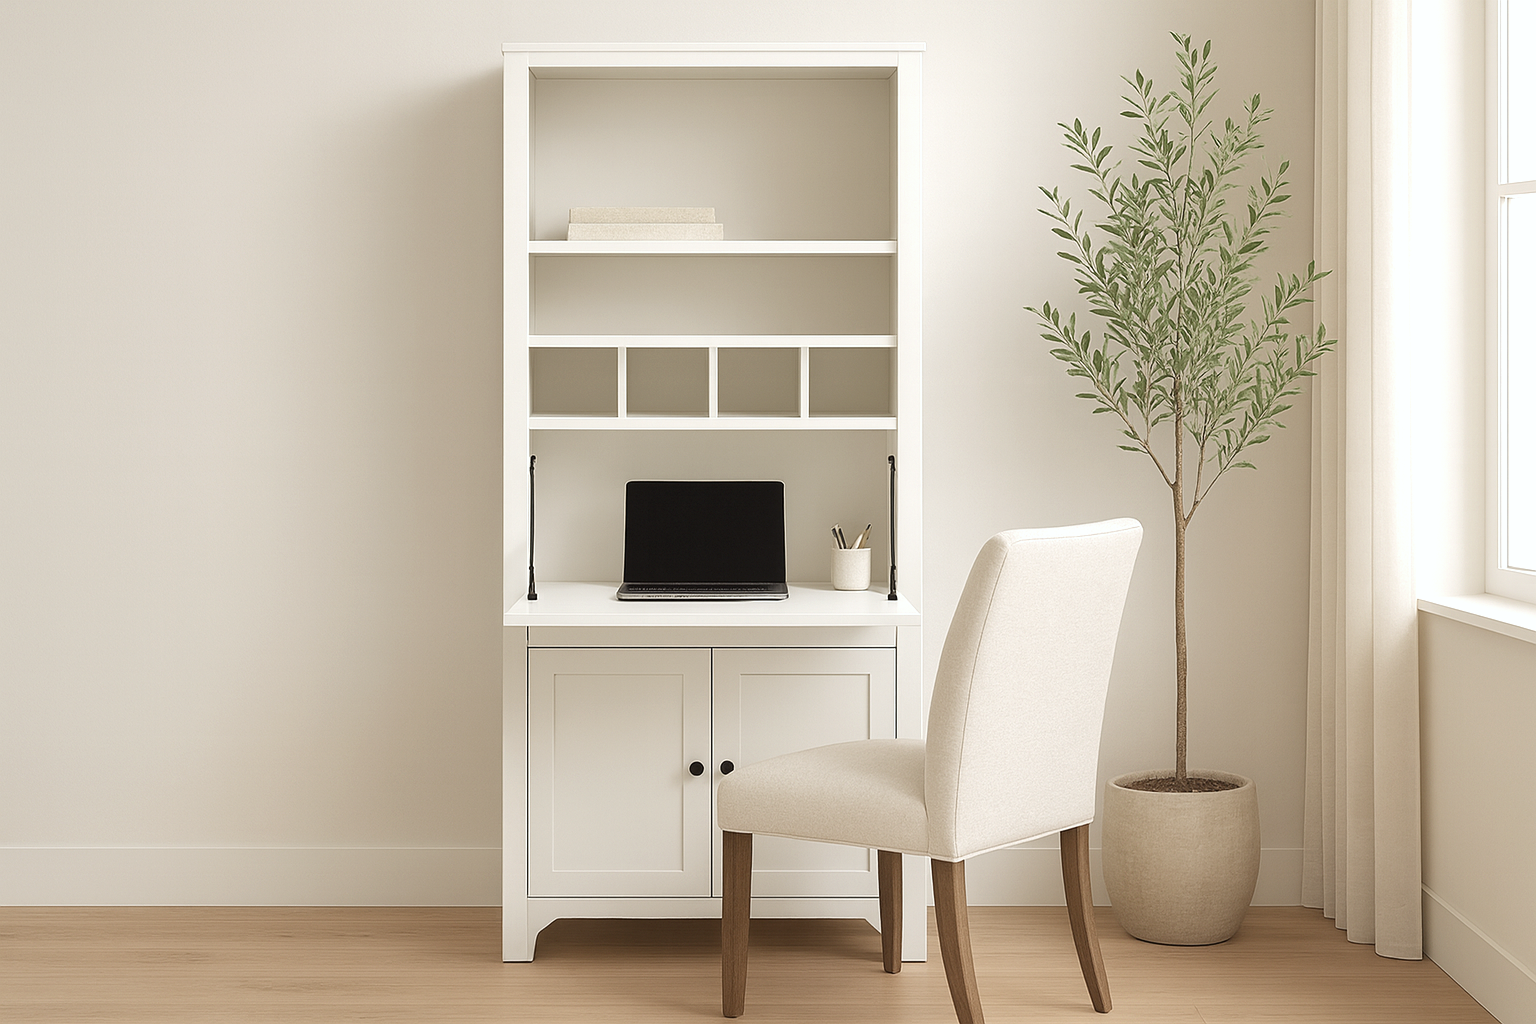
Fold Down Secretary Cabinet – Build your own beautiful and functional Fold Down Secretary Cabinet with. This clever design combines storage and workspace in one stylish piece. The tall, narrow profile makes it a perfect solution for tight spaces, while still offering generous storage and a fold-down desk surface. The top provides open shelving, the middle features cubbies and drawers for organization, and the bottom includes closed cabinet storage. The highlight is the fold-down secretary desk surface, which opens at table height—ideal for writing, using a laptop, or keeping organized. include: • Step-by-step instructions with detailed diagrams • A full cut list and shopping list • Real build photos from readers for inspiration and confidence • Tips to customize the depth and size to fit your home Beginner-friendly yet professional in appearance, the Fold Down Secretary Cabinet is a versatile piece for offices, living rooms, or entryways—especially when you need furniture that works in smaller or narrow spaces. 👉 Get the and start building your own secretary cabinet today!
Specifications
| Project type | Hutch Plans |
|---|---|
| Room | Storage Solutions |
| Style | Farmhouse Furniture |
| Difficulty | Intermediate |
| Estimated cost | $100-$150 |
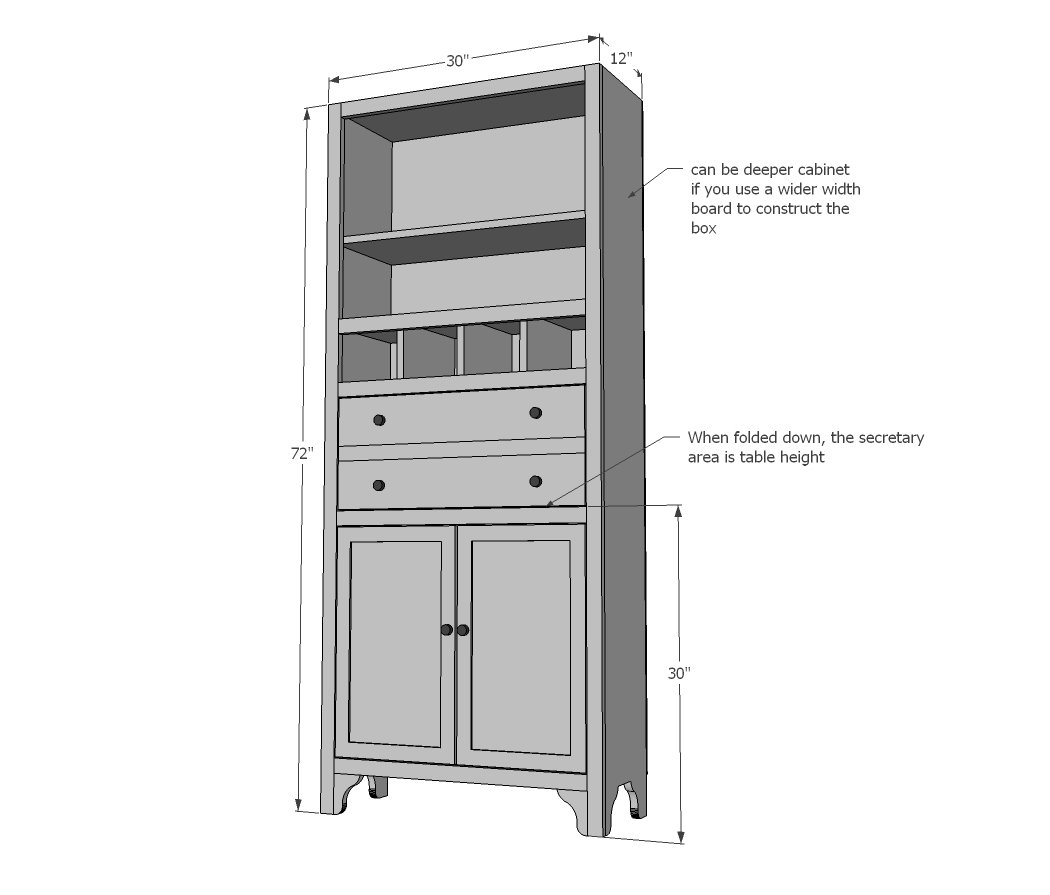
Dimensions
Use the size-specific shopping and cut lists below.
Shopping List
- 5 - 1x12 @ 8 feet long OR 1 1/4 sheets of 3/4" plywood cut into strips 11 1/4" wide (referred to as 1x12s in this plan)
- 1 - sheet 1/4" plywood
- 2 - 1x2 @ 6 feet long
- 4 - 1x2 @ 8 feet long
- 1 - 1x2 @ 4 feet long
- 12 feet of 1x3s minimum for doors
- 2 sets of inset hinges for face framed cabinets:
- 1 set of euro style inset hinges for flip down secretary
- We constructed the box and face frame with 1 1/4" pocket hole screws, and also attached the face frame and back with 1 1/4" finish nails and wood glue.
Cut List
BOX
- 3 - 1x12 @ 5 3/4" (dividers for mail slots)
- 7 - 1x12 @ 28 1/2" (shelves)
- 2 - 1x12 @ 72" (sides)
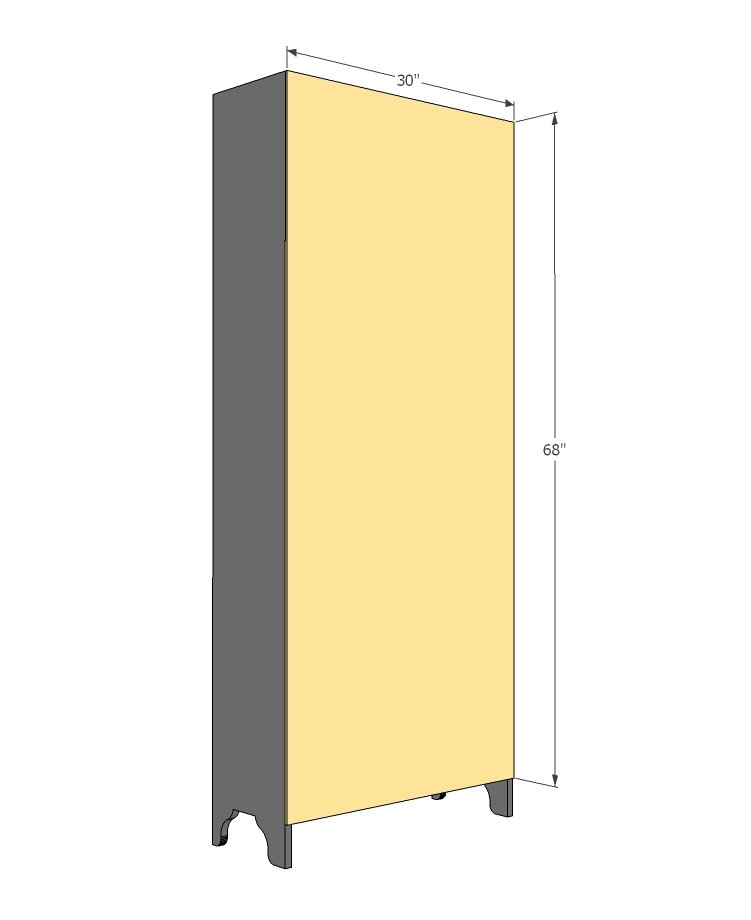
- 1 - 1/4" plywood @ 30" x 68"
FACE FRAME
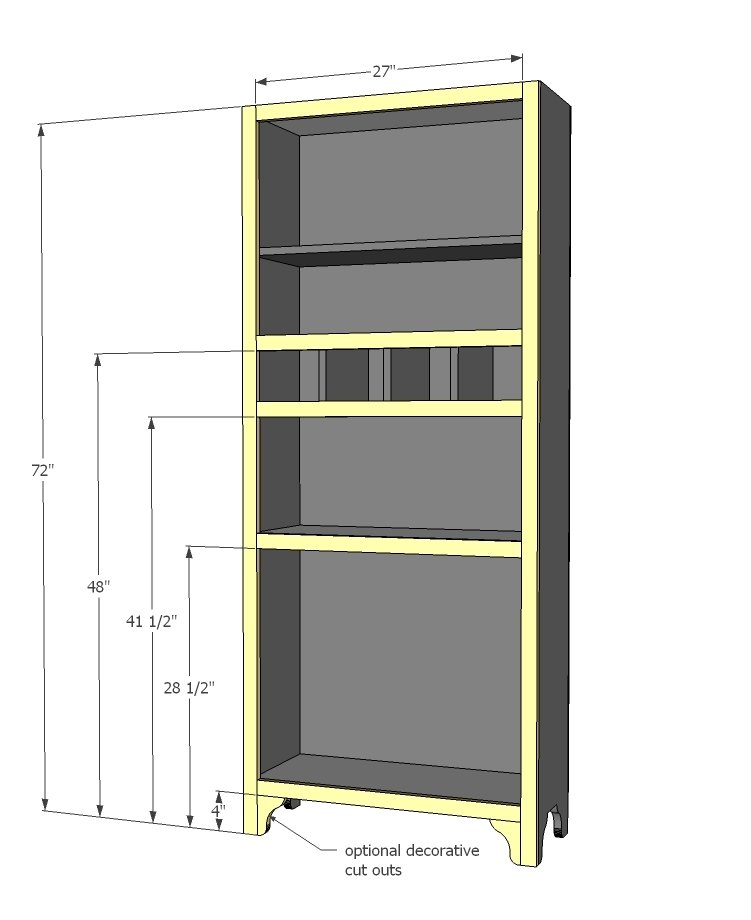
- 2 - 1x2 @ 72"
- 5 - 1x2 @ 48"
DOOR
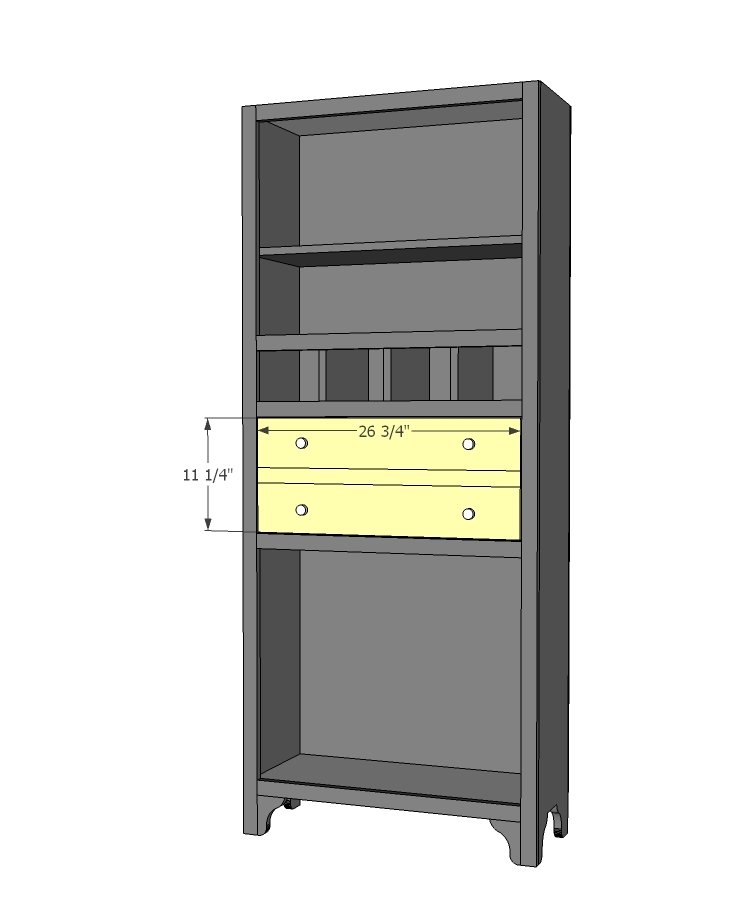
- 1 - 1x12 @ 26 3/4"
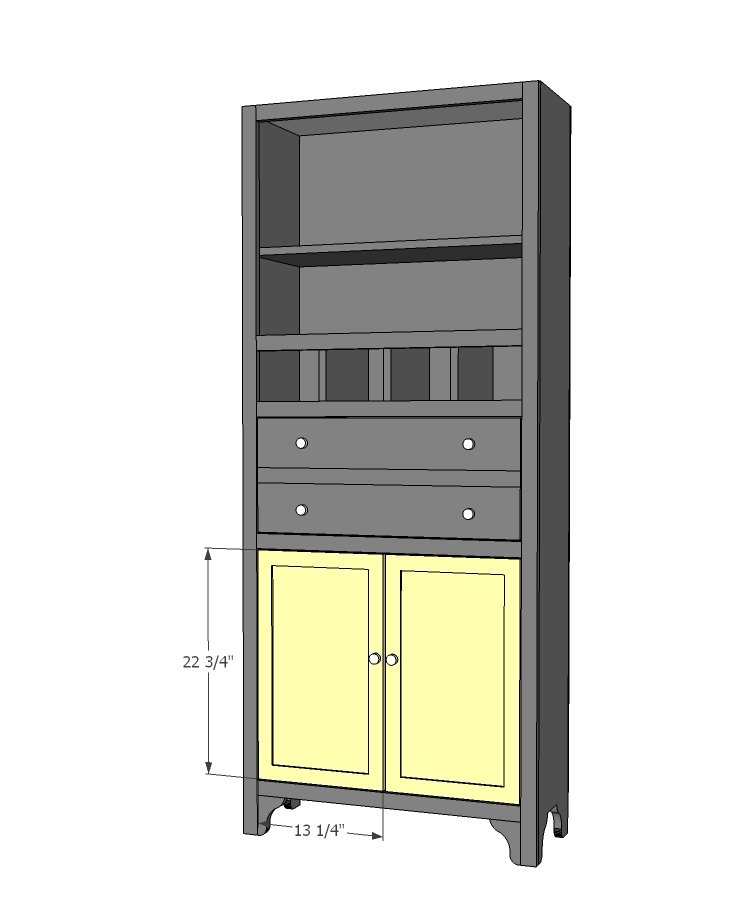
- Cut bottom doors to fit
Tools
- measuring tape
- square
- pencil
- safety glasses
- hearing protection
- kreg-jig
- drill
- circular saw
- nailer
- sander
Step-by-step Instructions
Step 1
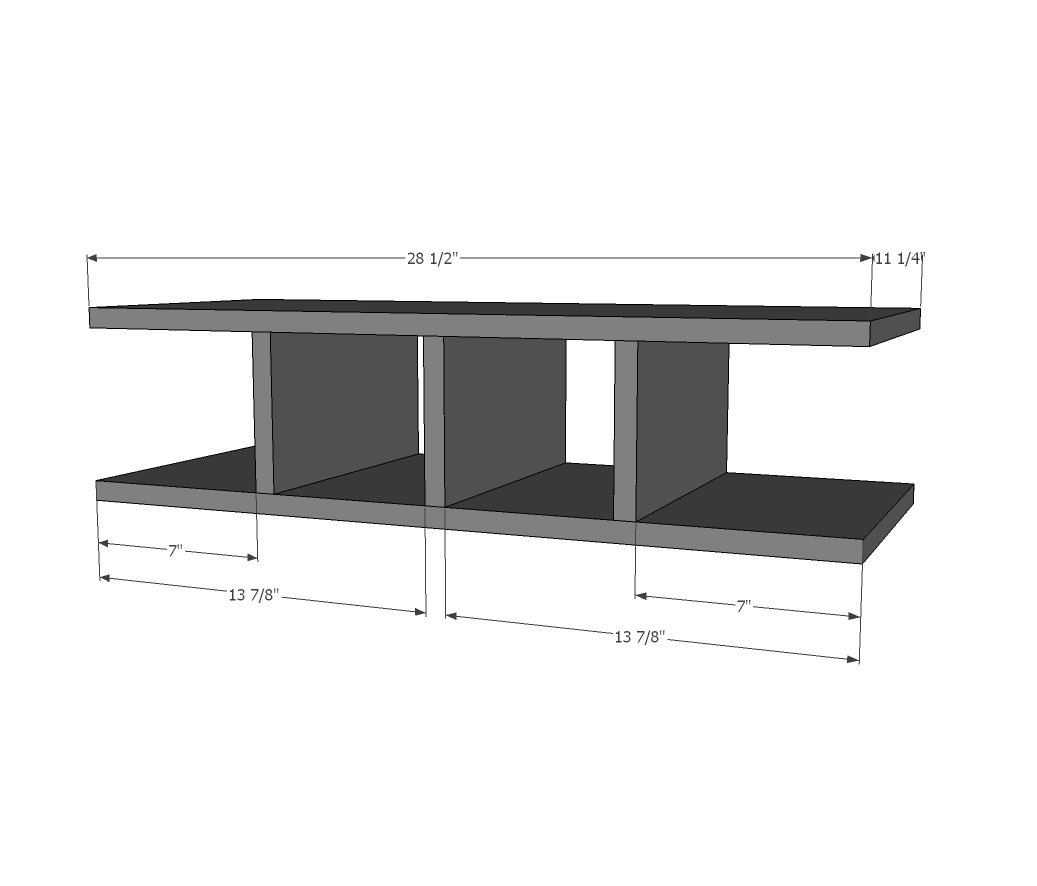
You'll want to build the divider area first because it will be super difficult to reach in later and add them. We nailed the divider boards to the shelves. NOTE: If you are using pocket holes, drill first on ends of shelves.
Step 2
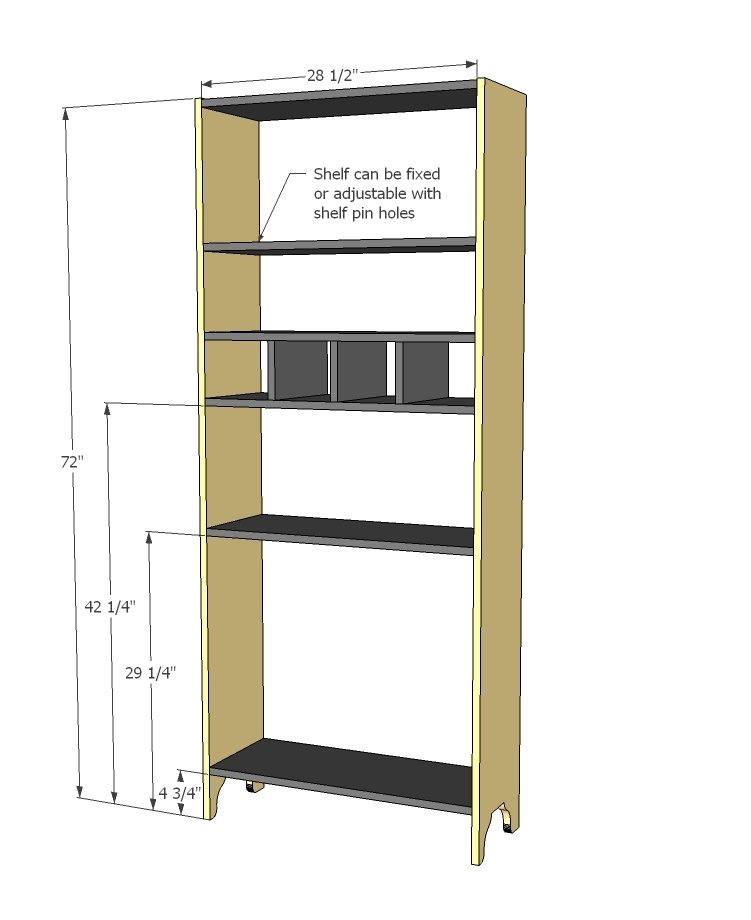
Then we attached all shelves to the sides. NOTE: we used a shelf pin jig (see below) to attach the top shelf and shelves (not shown) behind cupboard doors.
Step 3
And checked for square and attached back with 1 1/4" finish nails and glue to all fixed shelves.
Step 4
We built the face frame seperately, and then attached the completed face frame to the front of the cabinet.
Step 5
Step 6
Doors should be cut to fit, leaving about 1/8" (depends on your hinges) around all sides.
Step 7
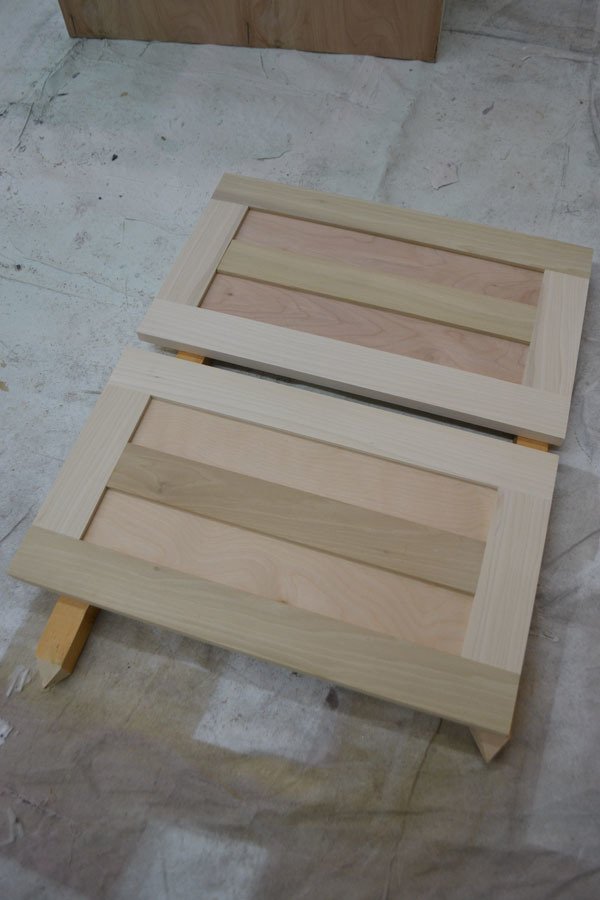
We actually built our doors with 1x3 for the frame and center, with 1/4" plywood panels leftover from the back as panels.
Finishing
Sand all surfaces, starting with a medium grit and finishing with fine. Wipe off the dust, fill any holes or gaps with wood filler, and sand smooth once dry. Apply primer if you're painting, then finish with your choice of paint or stain and seal with a durable clear topcoat. For outdoor projects, use exterior-rated primer, paint or stain, and sealer so the piece stands up to the weather.
Source (temporary): https://www.ana-white.com/woodworking-projects/narrow-depth-secretary-cabinet-mail-slots