Narrow Farmhouse Table
Some dining spaces (or even work spaces) require a long thin table. This rustic simple table is easy to build, yet sturdy and stylish. Special thanks to Deux Maison for sharing their amazing photos. Make sure you stop over to see more photos and read about their building experience.
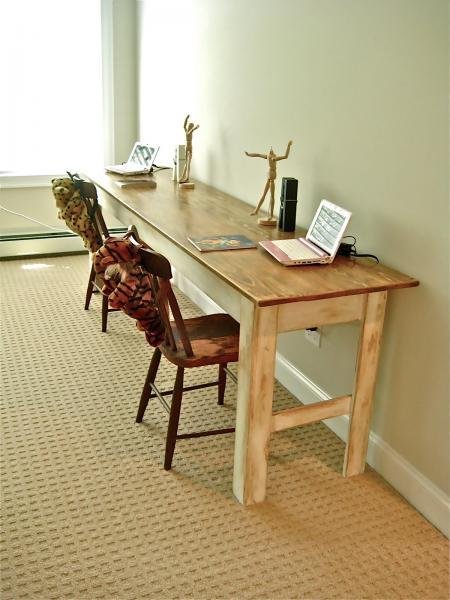
Specifications
| Project type | Dining Table Plans |
|---|---|
| Room | dining room |
| Style | Farmhouse Furniture |
| Difficulty | Beginner Projects |
| Estimated cost | $20 - $50 |
Dimensions
Use the size-specific shopping and cut lists below.
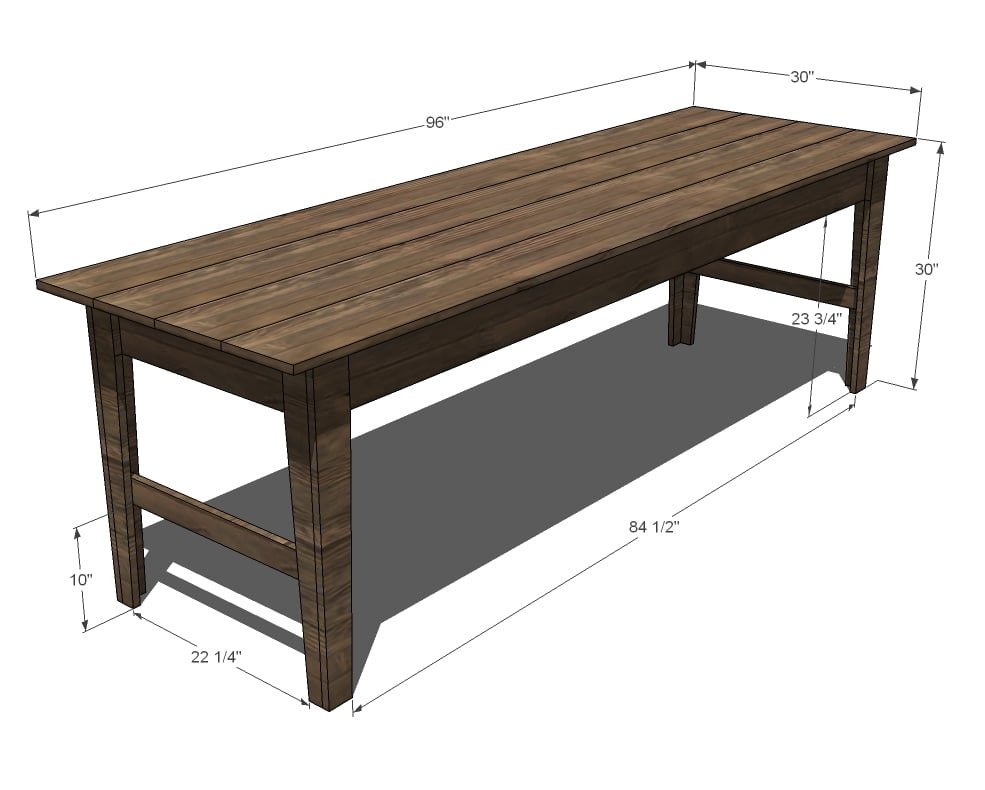
Shopping List
2 – 2×2 Boards, 8′ Long ($2 Each for pine)
4 – 1×8 Boards, 8′ Long ($7 Each for pine)
2 – 1×3 Boards, 8′ Long ($1.50 Each for pine)
1 – 1×4 Board, 10′ Long ($4 Each for pine)
2 – 1×6 Boards, 10′ Long ($6 Each for pine)
1 1/4″ and 2″ Finish Nails
2″ Wood Screws (about 100)
2 1/2″ Wood Screws (about 20 screws)
Wood Glue
Wood Filler
Sandpaper
Finishing Supplies
Cut List
4 – 1×3 @ 29 1/4″ (Table End Legs)
4 – 1×4 @ 29 1/4″ (Table Side Legs)
2- 1×6 @ 88″ (Side Aprons)
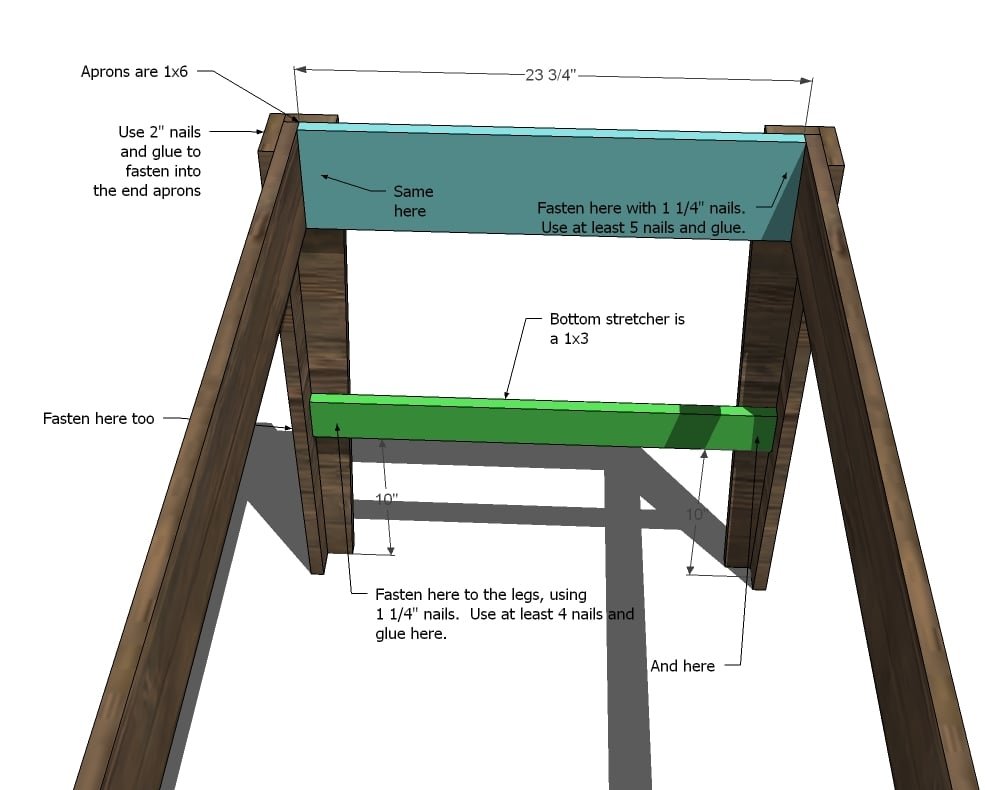
2 – 1×6 @ 23 3/4″ (End Aprons)
2 – 1×3 @ 23 3/4″ (End Stretcher)
8 – 2×2 @ 23 3/4″ (Under Tabletop Supports)
Tools
- measuring tape
- square
- pencil
- safety glasses
- hearing protection
- drill
- circular saw
- nailer
- sander
Step-by-step Instructions
Step 1
End Legs. Taper your end leg pieces as shown above. Cut the taper in a straight line, starting 5 1/2″ from the top, and tapering in 1″ at the bottom. This is shown above. Do this on all four legs. The end legs are made of 1×3 boards.
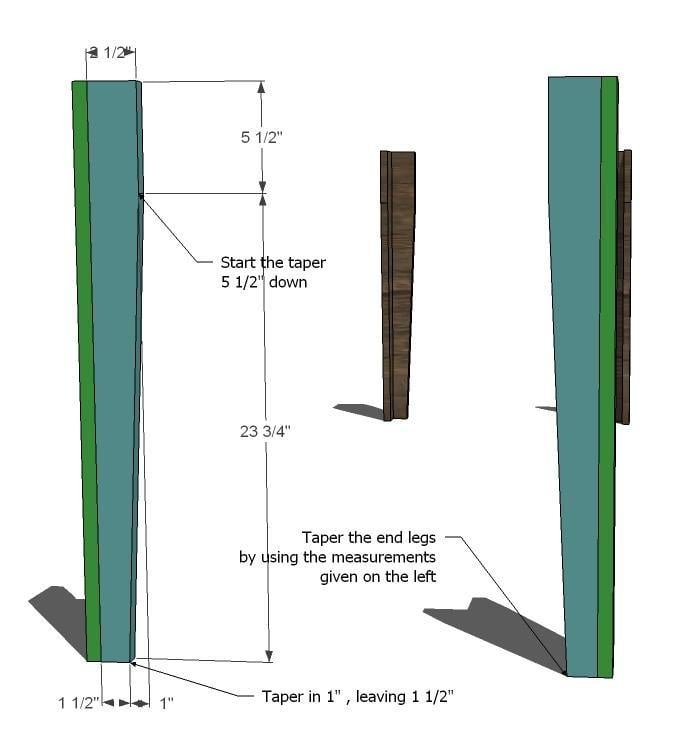
Step 2
Side Legs. Taper the side legs as you did the end legs from step 1. The side legs are made of 1x4s. Use the measurements above to guide you.
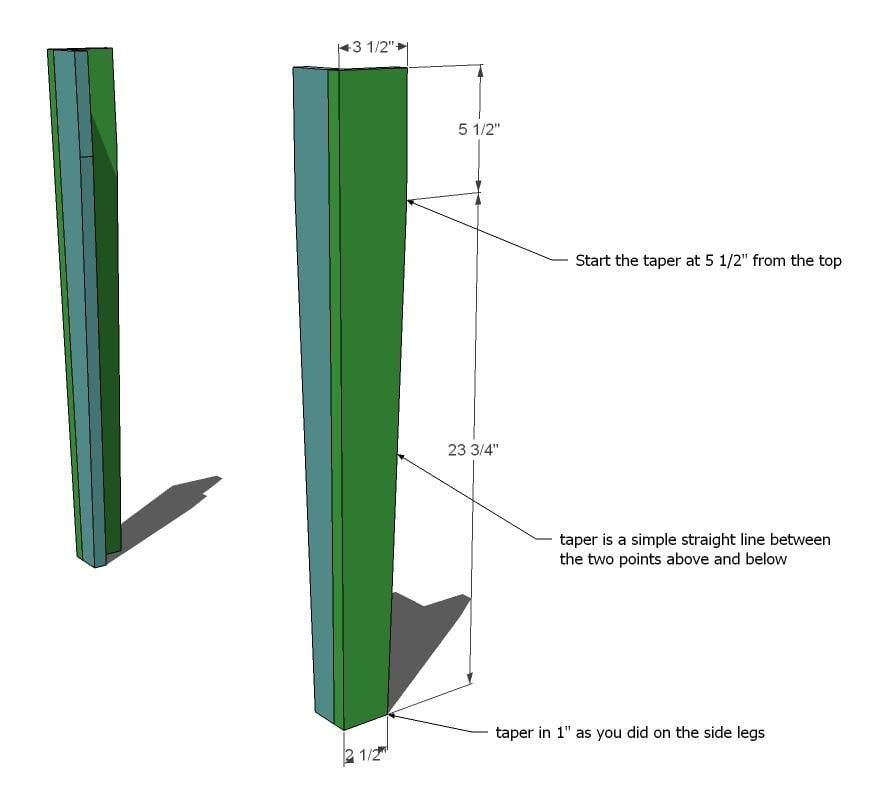
Step 3
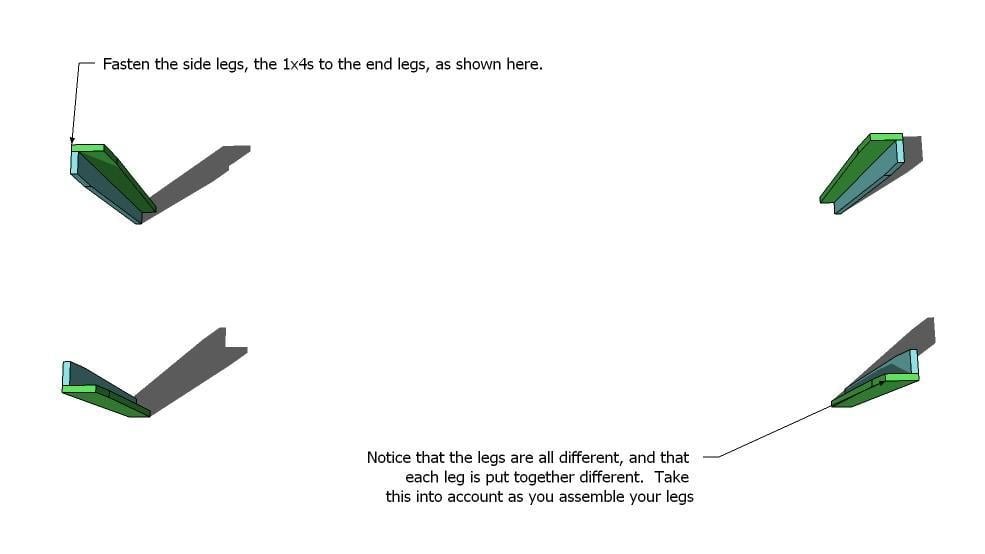
Leg Assembly. Assembly your legs as shown above. Be aware of the leg postion on the table as you assemble, as the legs will be assembled different depending on the position. Remember, the 1×3 leg sides are on the ends, the 1×4 leg sides are on the sides of the table. This is shown above.
Step 4
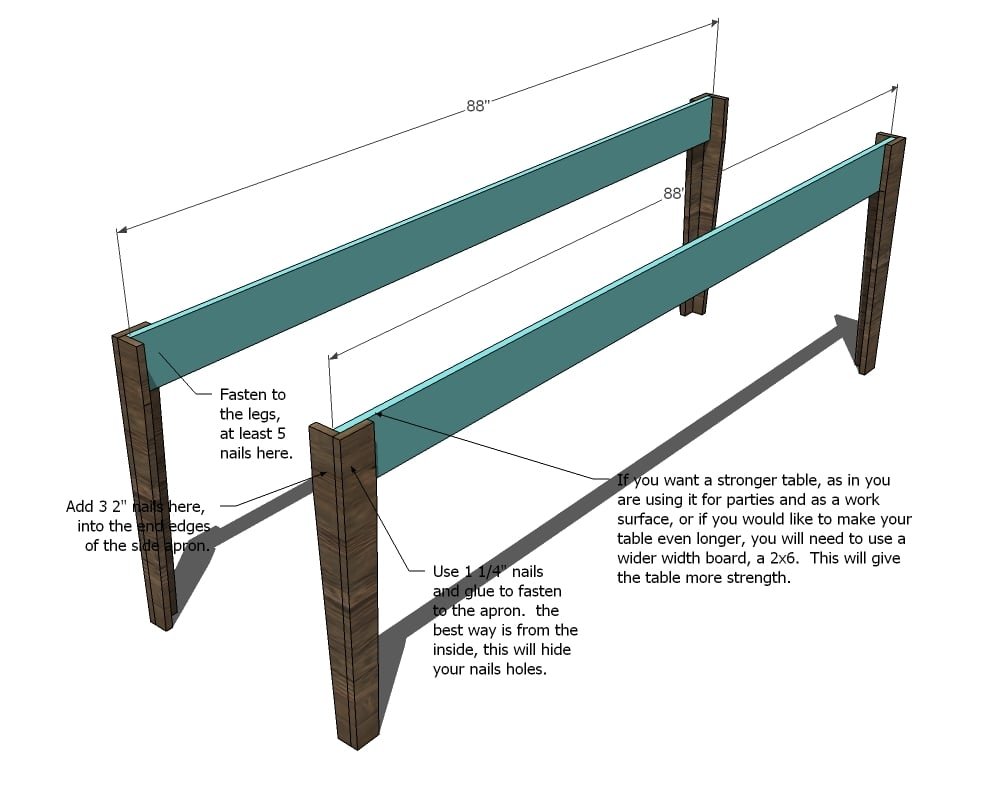
Side Aprons. Fasten the side aprons in place as shown above. Make sure you take a square of the legs as you do this. This is shown above.
Step 5
Step 6
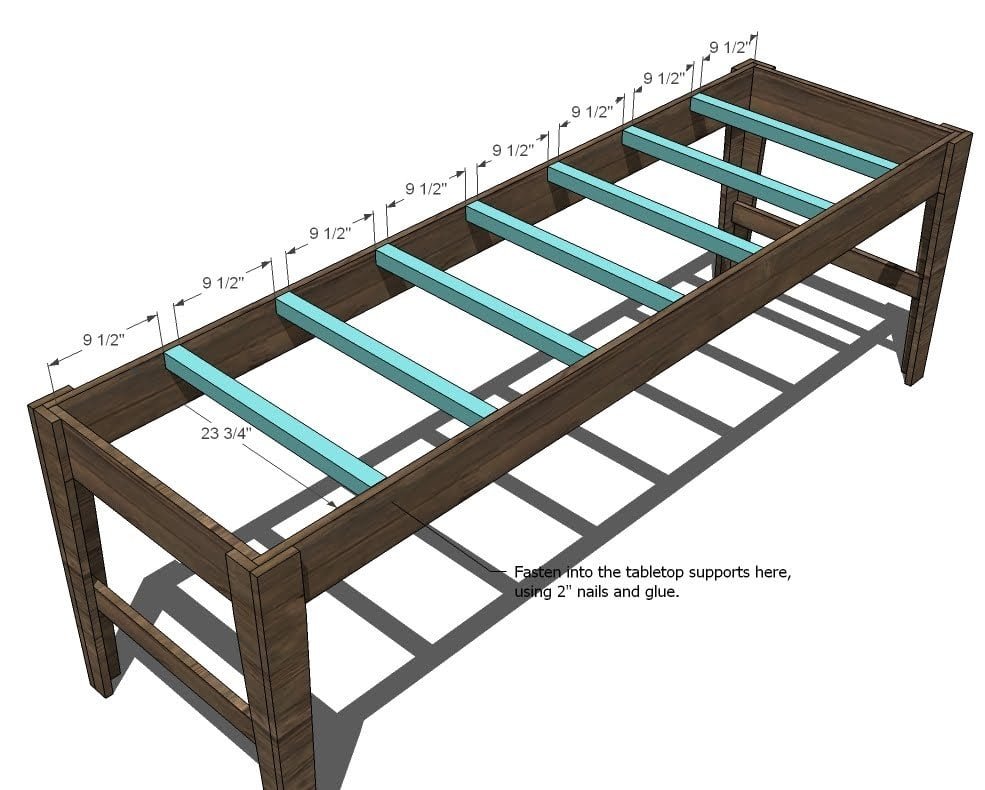
Under Tabletop Supports. Attach the tabletop supports as shown here. Use the measurements above to guide you.
Step 7
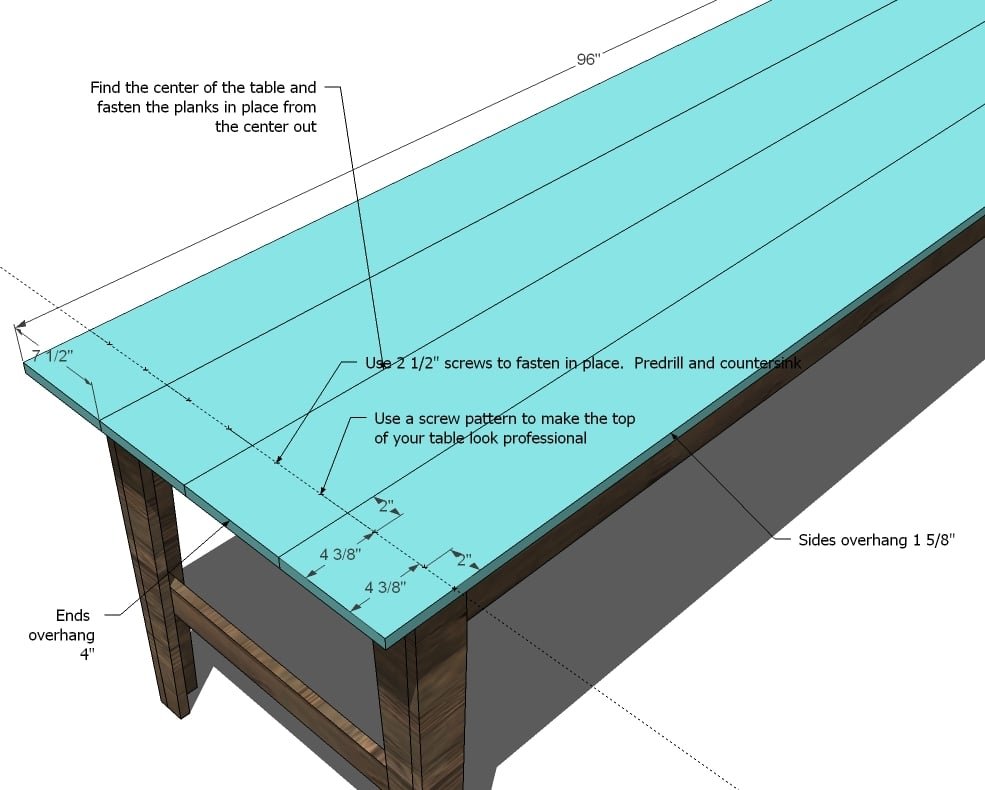
Tabletop Pieces. Start by finding the center of your table. Mark and place your table top piece, using the center mark for your first boards. Only attach on the ends in this step, using the screw pattern above. DO NOT ATTACH IN THE CENTER. Attach the remaining tabletop pieces on the ends only.
Step 8
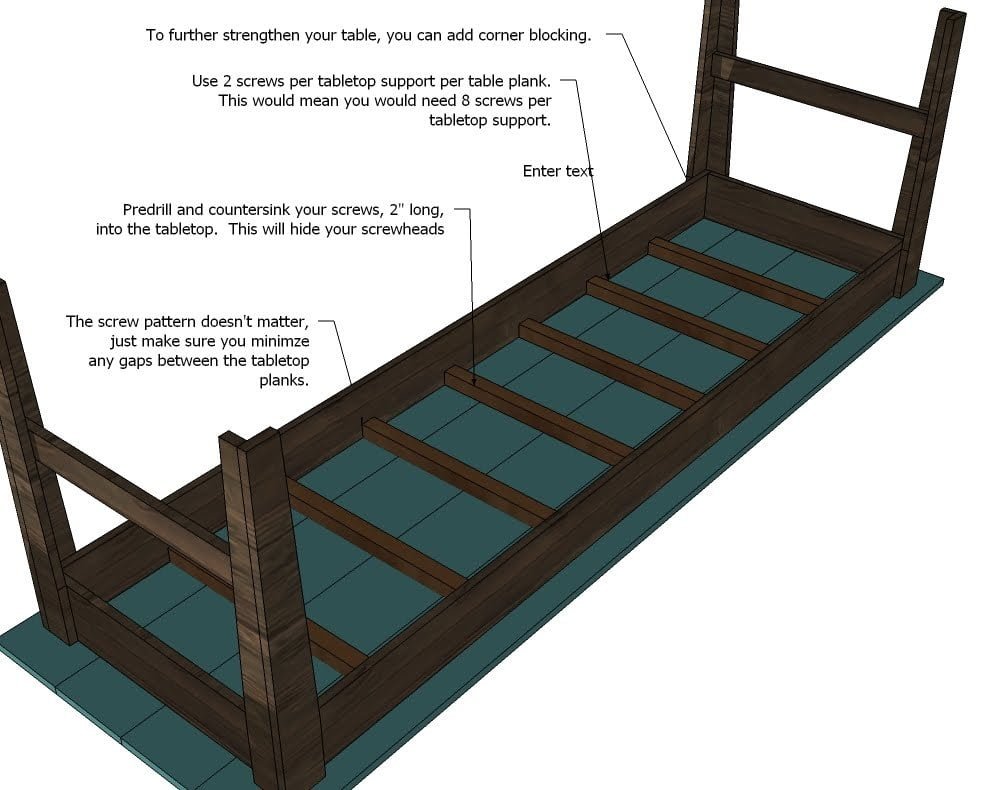
Tabletop Pieces. From the underside, fasten through the under tabletop support pieces into the tabletop pieces. Start with the middle boards and work your way out. Minimize any gaps between the boards. Predrill and countersink your screws. To further strengthen the table, you can add simpson strong tie corner brackets to the corners.
Finishing
Sand all surfaces, starting with a medium grit and finishing with fine. Wipe off the dust, fill any holes or gaps with wood filler, and sand smooth once dry. Apply primer if you're painting, then finish with your choice of paint or stain and seal with a durable clear topcoat. For outdoor projects, use exterior-rated primer, paint or stain, and sealer so the piece stands up to the weather.
Source (temporary): https://www.ana-white.com/woodworking-projects/narrow-farmhouse-table