Nativity Stable
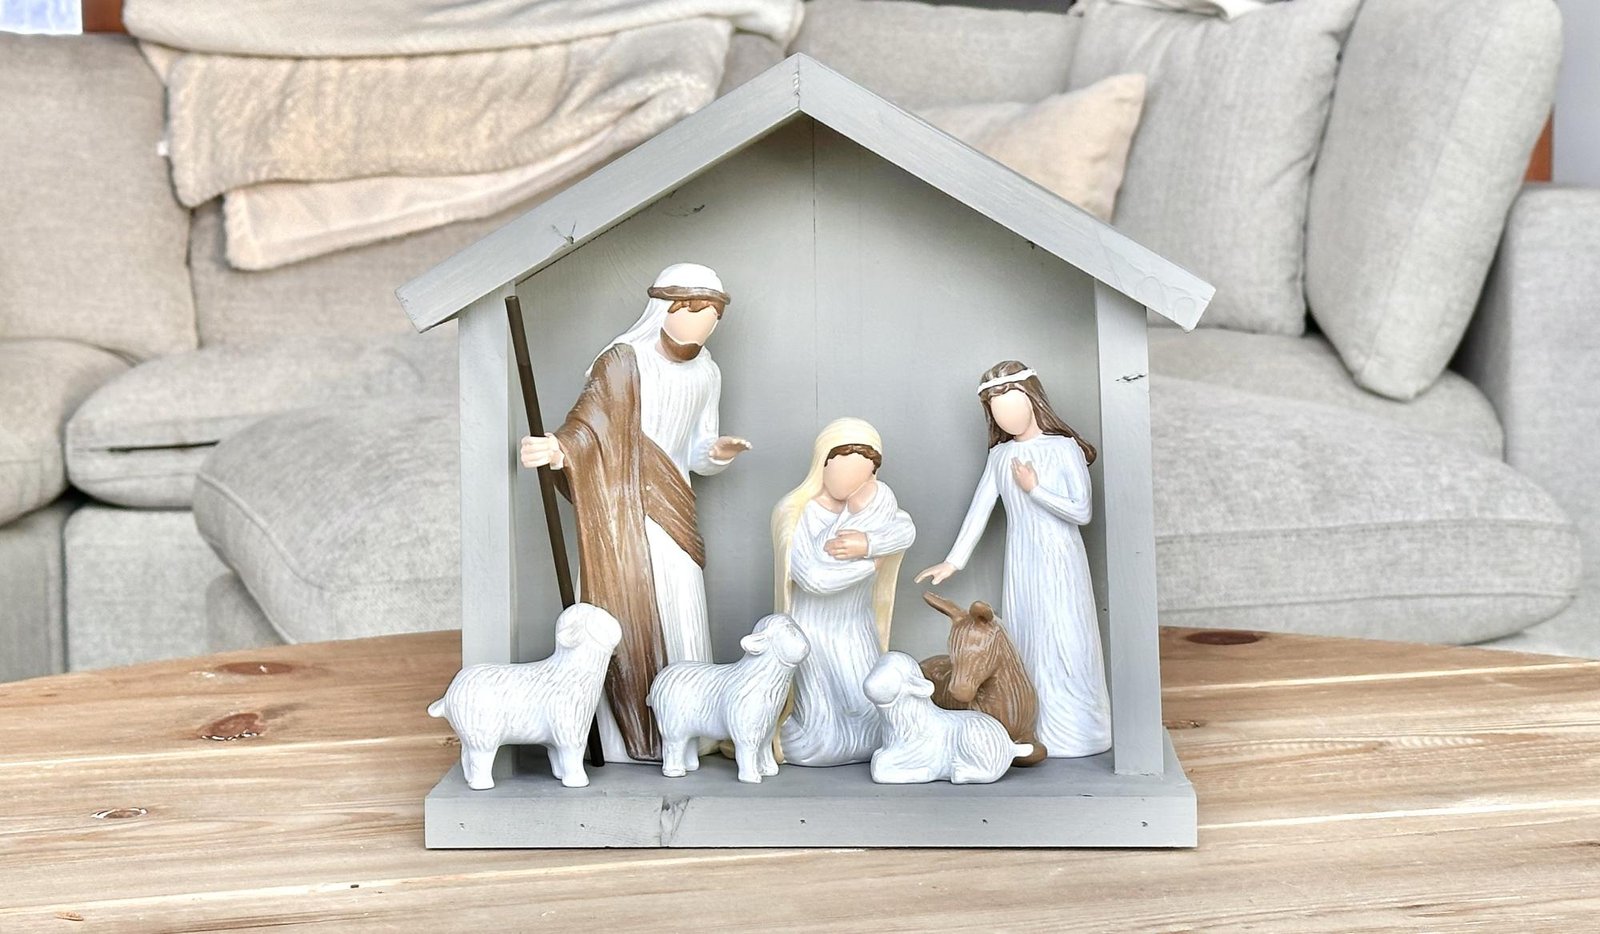
From one fence picket, you can craft your own nativity stable. This beautiful, nativity stable works as the foundation for Christmas Nativity scene. Stain a rustic wood color, or paint as we did any color or your choice. Our free, step by step plans are easy to follow with basic tools and beginner skills. Includes shopping list, cut list, photos and video tutorial from
Specifications
| Project type | Home Decor |
|---|---|
| Room | Decor for Any Room |
| Difficulty | Beginner Projects |
Dimensions
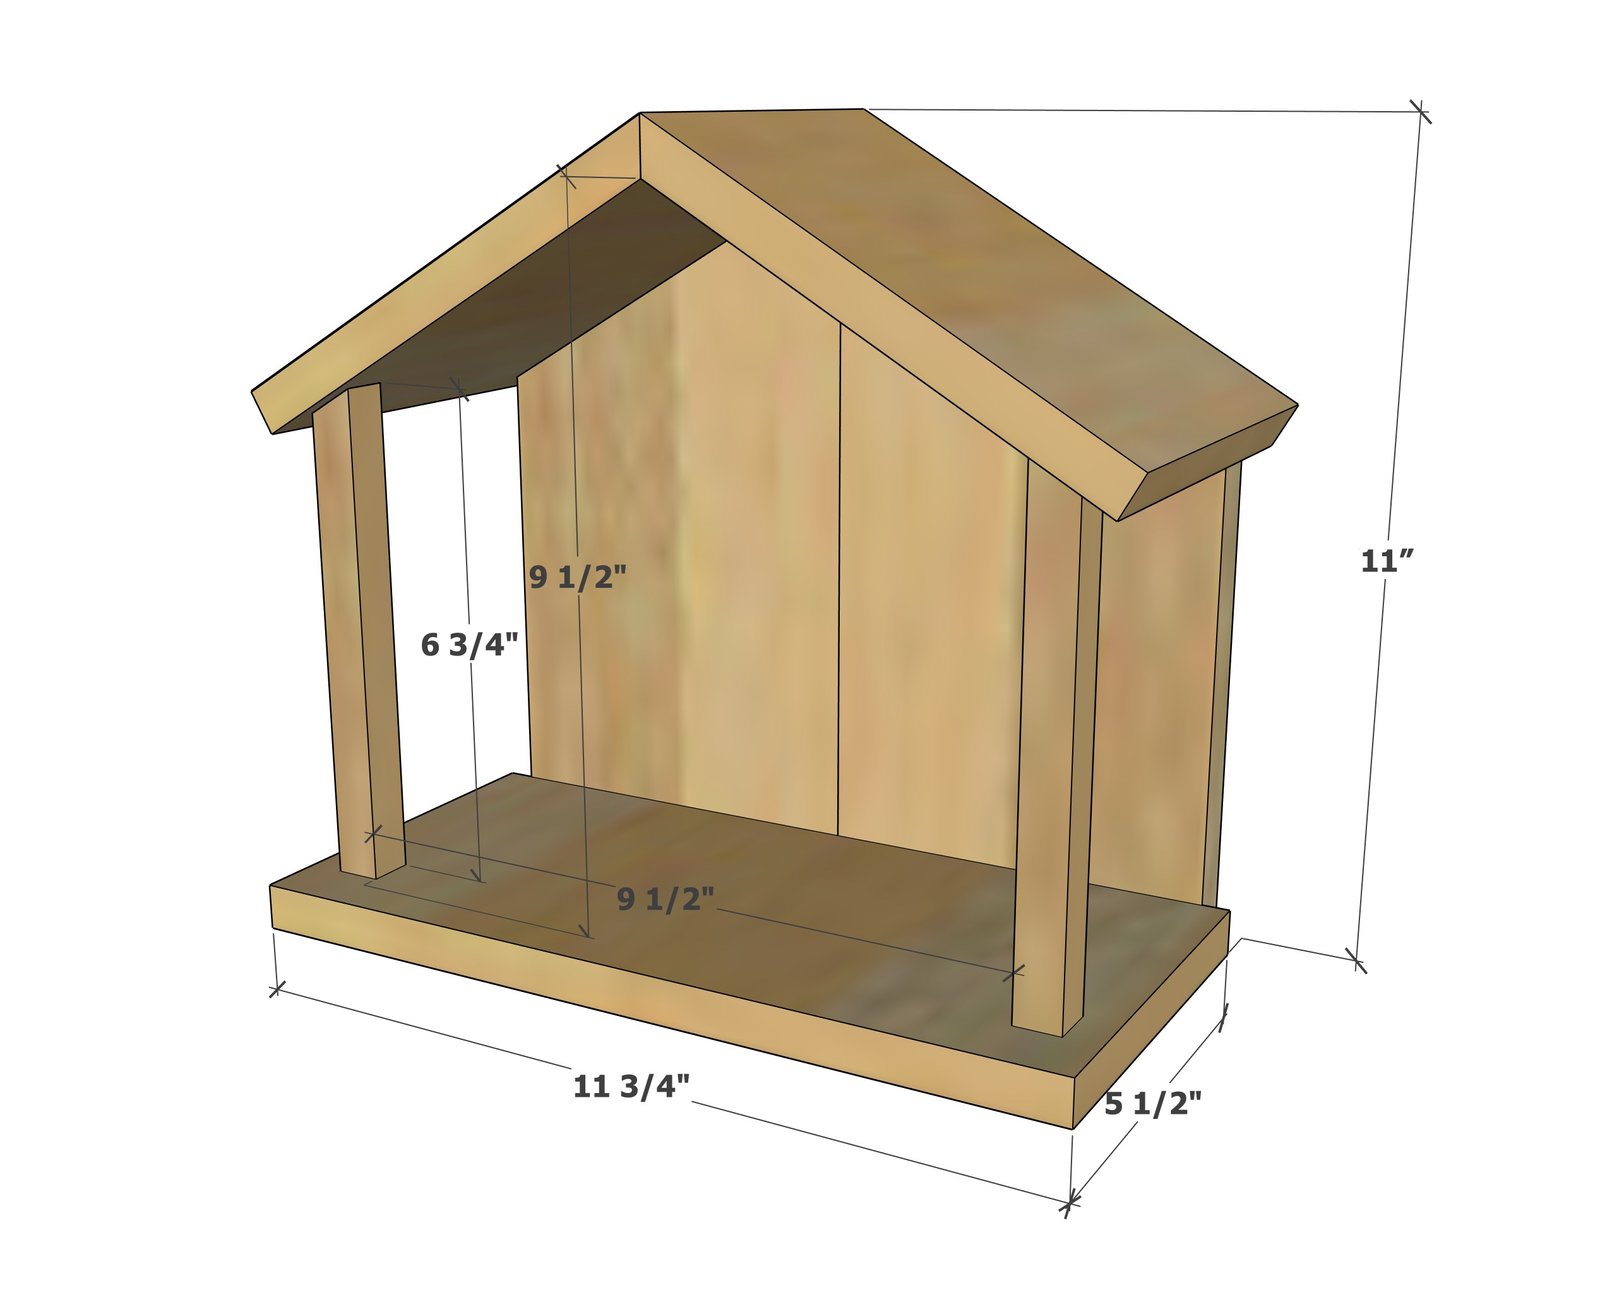
Use the size-specific shopping and cut lists below.
Shopping List
- 1 - cedar fence picket, not dog eared (5-1/2" x 72")
- 1 - 3/4" x 3/4" wood dowel, 16" long
- 1-1/4" brad nails
- wood glue
- wood stain
Cut List
All cuts from fence pickets
- 1 @ 11-3/4" (floor)
- 2 @ 10-1/8" - long point measurement, one end cut at 30 degrees off square (side back pieces)
- 2 @ 7" - long point measurement, one end cut at 30 degrees BEVEL off square
- 2 - 3/4" wood dowels @ 6-3/4" - long point measurement, one end cut at 30 degrees off square
Tools
- measuring tape
- square
- safety glasses
- compound miter saw
- nailer
- sander
Step-by-step Instructions
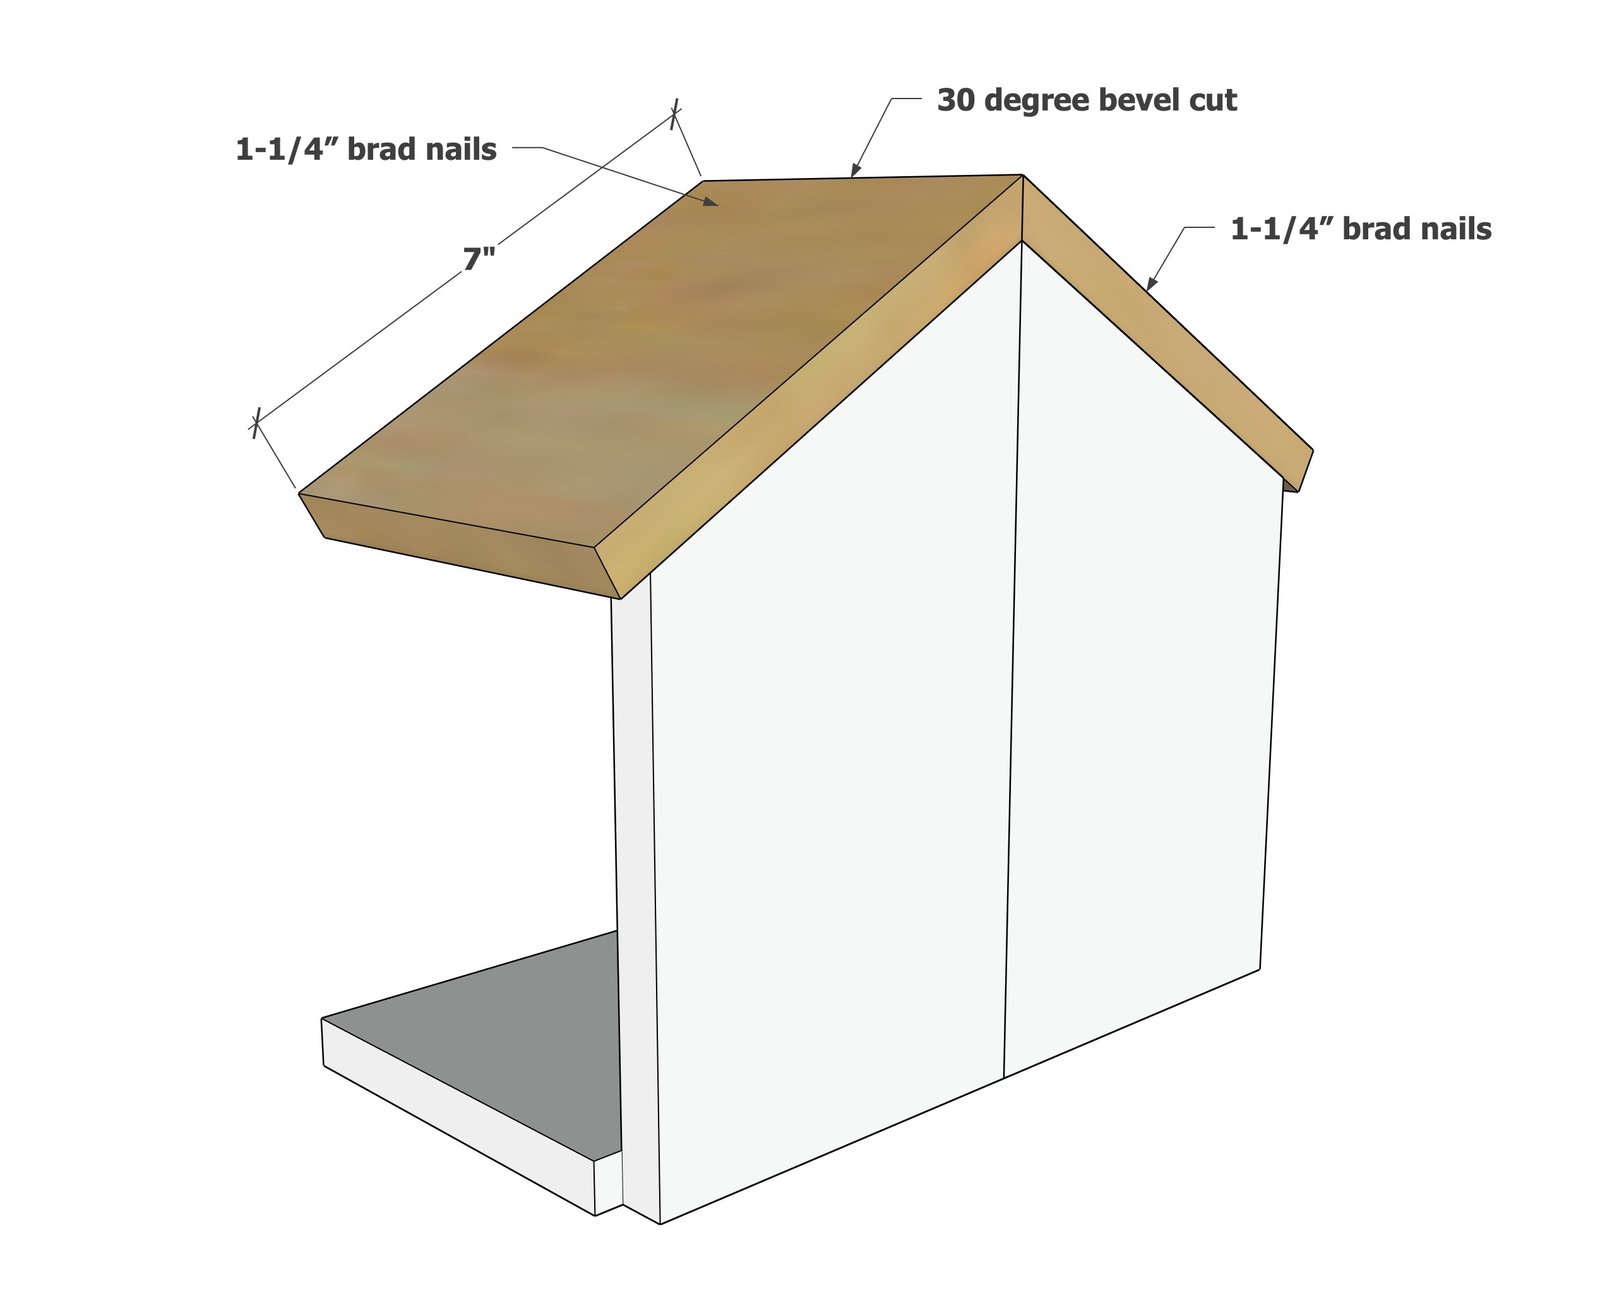
Glue the back pieces together. Nail to the floor piece.
Glue the roof and wall joints together. Nail together.
Step 2
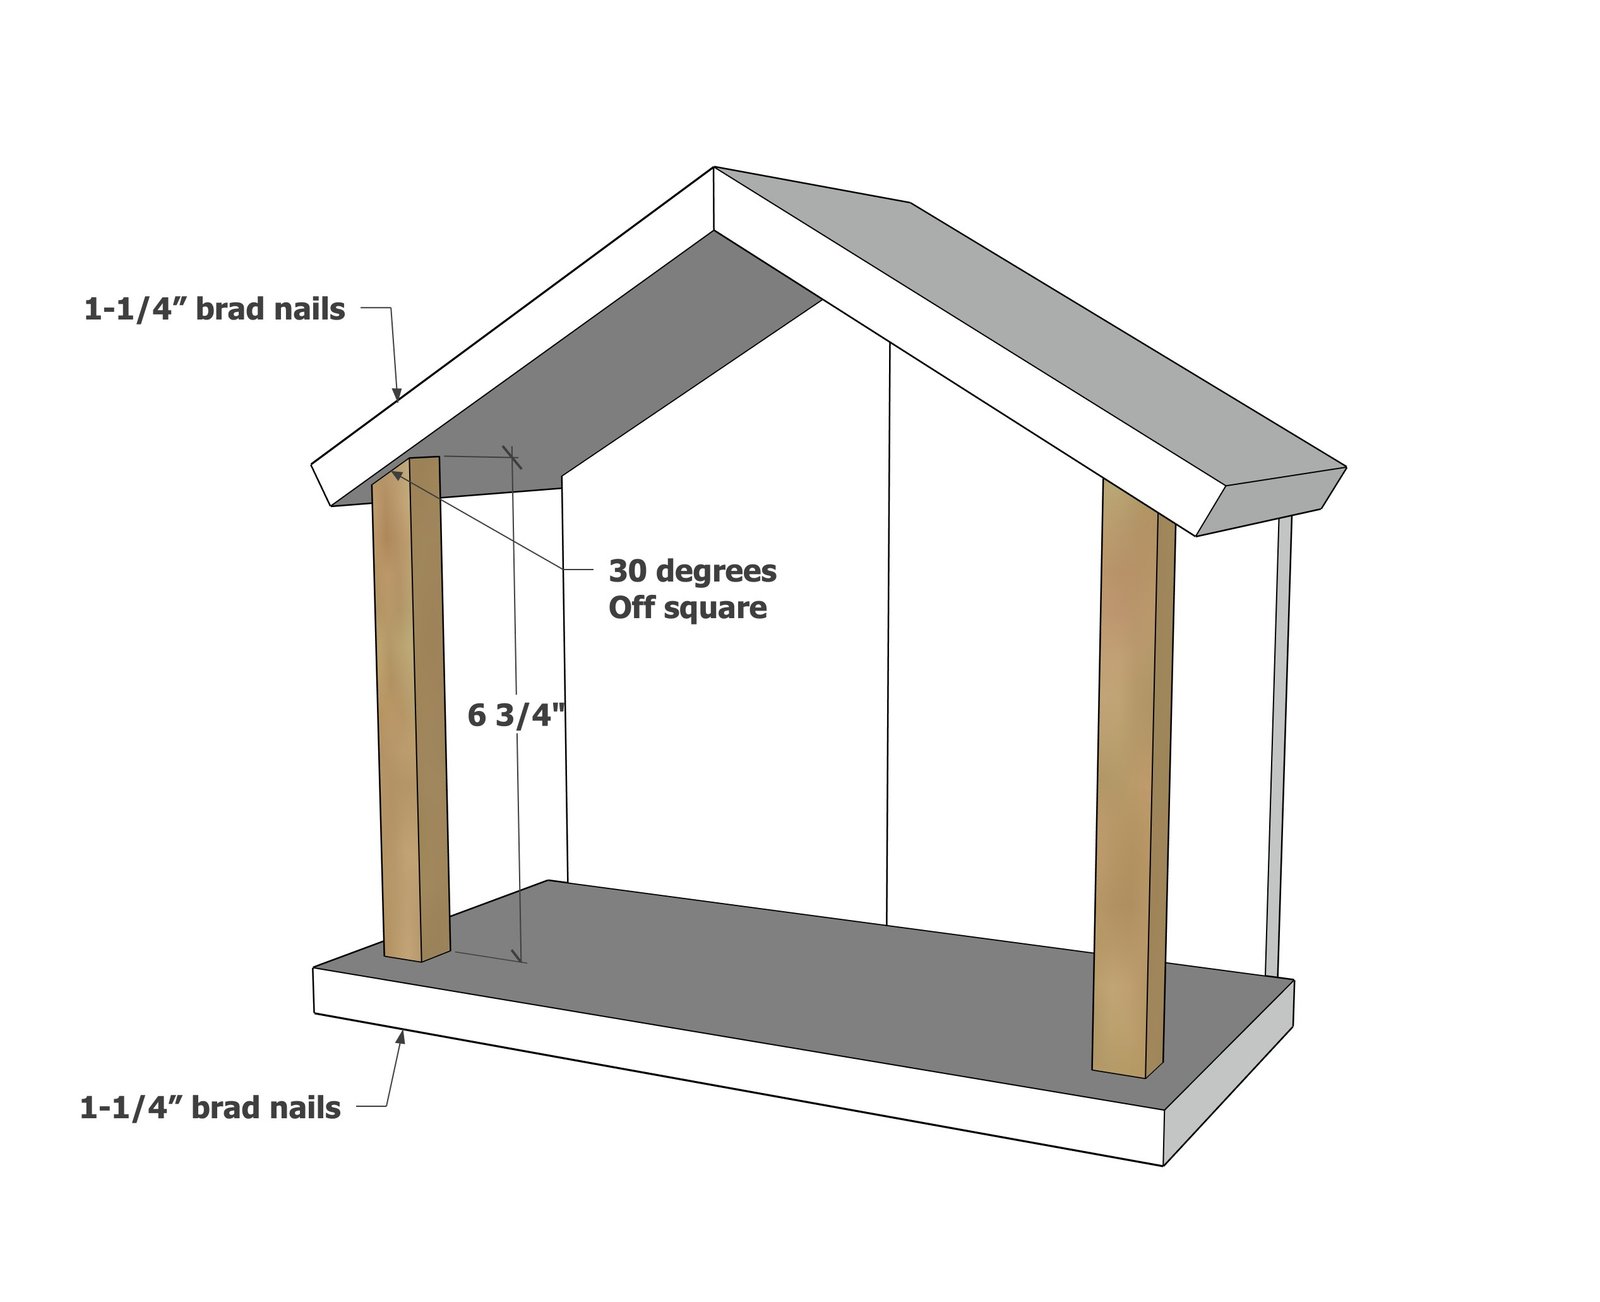
Add the posts at the front.
Finishing
Sand all surfaces, starting with a medium grit and finishing with fine. Wipe off the dust, fill any holes or gaps with wood filler, and sand smooth once dry. Apply primer if you're painting, then finish with your choice of paint or stain and seal with a durable clear topcoat. For outdoor projects, use exterior-rated primer, paint or stain, and sealer so the piece stands up to the weather.
Source (temporary): https://www.ana-white.com/woodworking-projects/nativity-stable-fence-picket-craft-project