The New Dollhouse
Delight your children with this modern dollhouse! Customize to suit your child's needs.
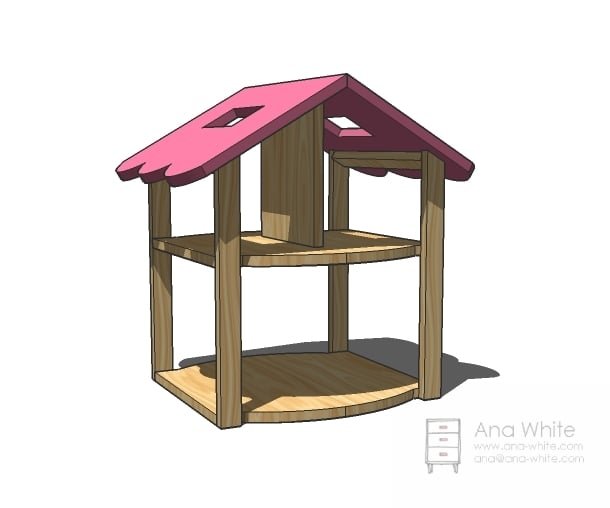
Specifications
| Project type | Toys |
|---|---|
| Room | Kids and Toys |
| Style | Children's and Kid's Room Furniture and Toy Plans |
| Difficulty | Intermediate |
| Estimated cost | Under $20 |
Shopping List
1 – 72″ Long 18″ wide Pine Project Panel (Try both Blue and Orange, they carry different sizes)
1 – 1×2
1 – 1×10 scrap 12″ long
Cut List
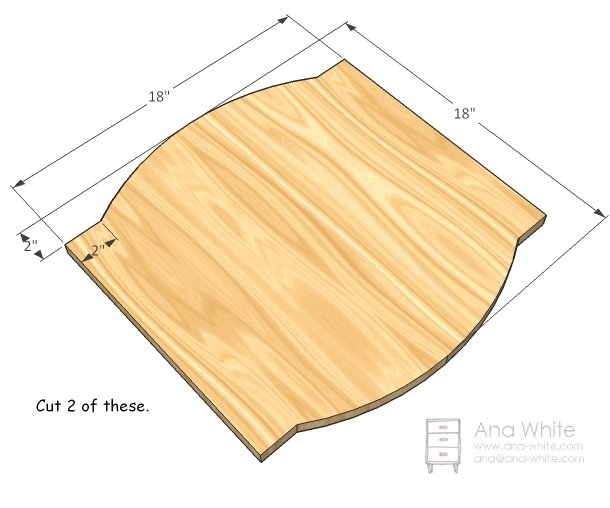
2 – Project Panel Pieces @ 18″ x 18″ (Floors)
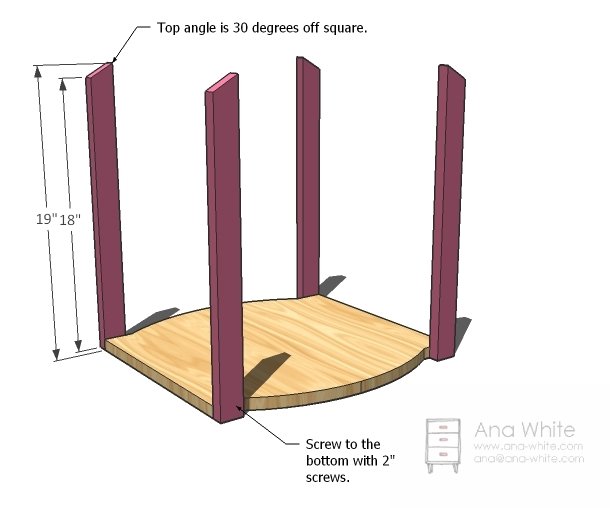
4 – 1×2 @ 19″ (Legs, top end cut at 30 degrees off square)
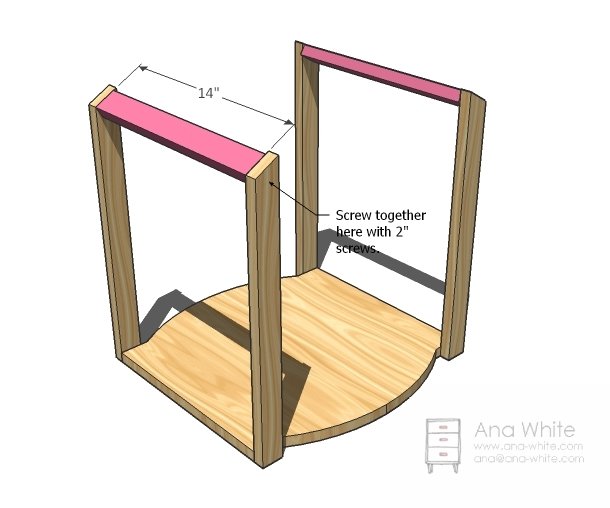
2 – 1×2 @ 14″ (Eaves)
1 – 1×10 @ 11 1/4″ (Second Story Wall)
2 – Project Panel Pieces @ 18″ x 14″ (Roof)
Step-by-step Instructions
Floors
Cut the floors with a jigsaw as shown above. Sand the edges well at this stage – will be much easier than when assembled!
Legs
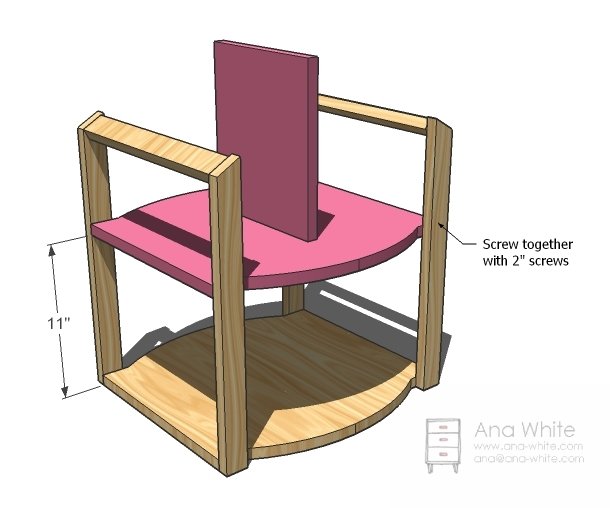
Attach the legs to one of the floors as shown above. Use glue for a permanent bond, and two screws per leg. Predrill and countersink your screw holes.
Eaves
Attach the tops of the legs to the eaves as shown above with 2″ screws and glue.
Second Story
Screw the 1×10 center wall to the remaining floor as shown above. Use 2″ screw and glue. Screw from the underside.
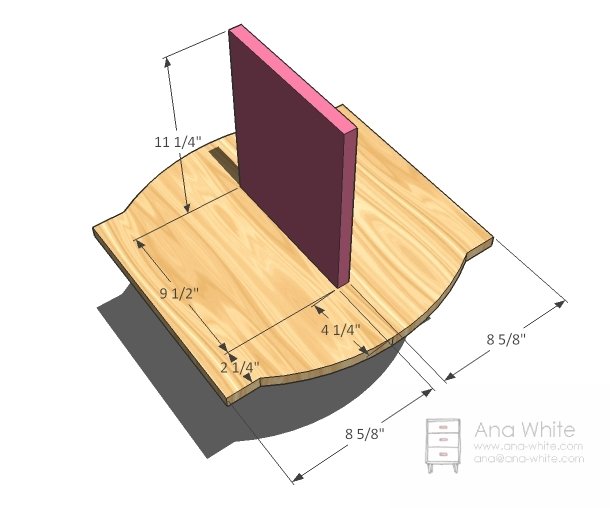
Step 5
Roof
Cut the roof boards out as shown above. To get the angle on the top, adjust either your circular saw, jigsaw or tablesaw to a 30 degree angle and cut edge. Use a jigsaw to cut out the scallops and the skylights.
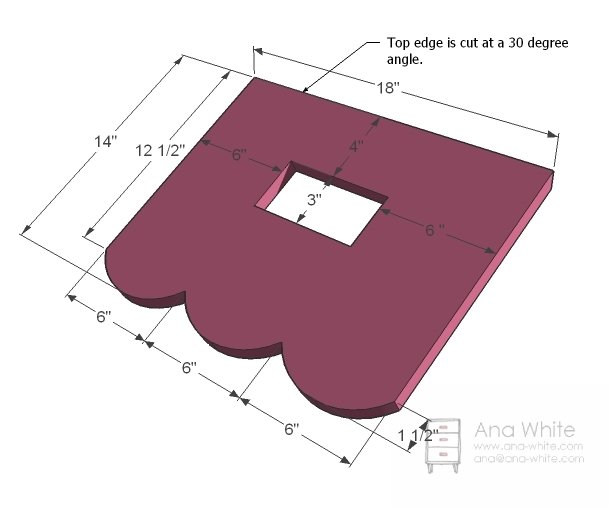
Roof
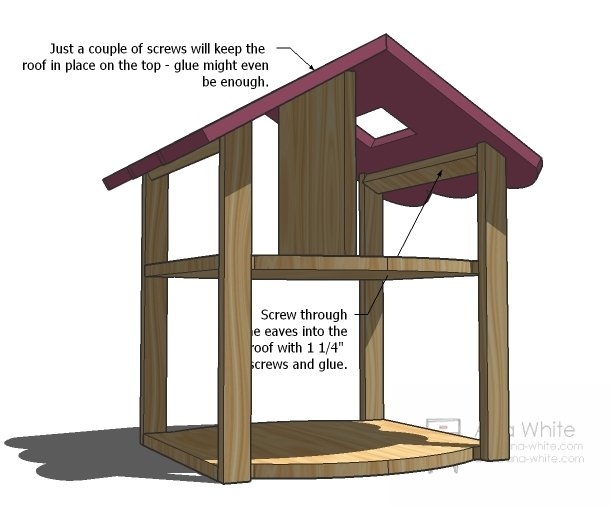
Attach the roof with 1 1/4″ screws and glue.
Finishing
Sand all surfaces, starting with a medium grit and finishing with fine. Wipe off the dust, fill any holes or gaps with wood filler, and sand smooth once dry. Apply primer if you're painting, then finish with your choice of paint or stain and seal with a durable clear topcoat. For outdoor projects, use exterior-rated primer, paint or stain, and sealer so the piece stands up to the weather.
Source (temporary): https://www.ana-white.com/woodworking-projects/new-dollhouse