No Sew Cayden Nailhead Bar Height Stool
How to build a no sew nailhead leather upholstered stool.. This plan shows how to build with pocket holes.
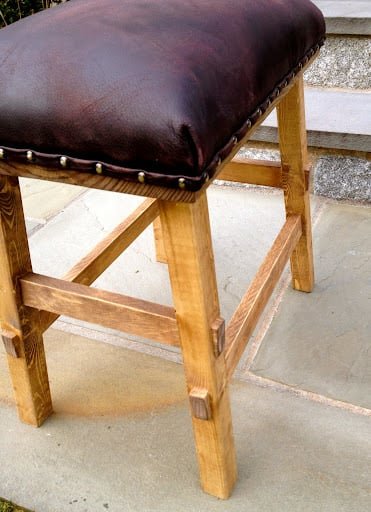
Specifications
| Project type | Stools |
|---|---|
| Room | kitchen |
| Style | Farmhouse Furniture |
| Difficulty | Intermediate |
| Estimated cost | $20 - $50 |
Dimensions
Use the size-specific shopping and cut lists below.
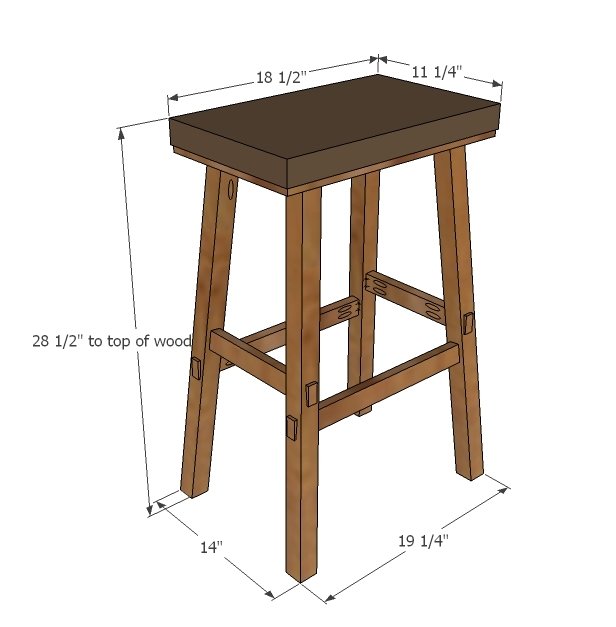
Shopping List
1 - 2x12 @ 18 1/2" long
1 - 2x2 @ 10 feet long
1 - 1x2 @ 8 feet long
2" foam pad, at least 18 1/2" x 11 1/2"
batting to cover foam pad
staples
leather or fabric
decorative nails (available at most hobby stores)
This plan is shown built with pocket holes. To build without pocket holes, please review this plan
Cut List
1 - 2x12 @ 18 1/2"
4 - 2x2 @ 27 1/2" (long point to short point, ends cut parallel at a 5 degree double bevel)
2 - 1x2 @ 8 7/8" (long point to long point, ends NOT parallel, ends cut at 5 degrees off square)
2 - 1x2 @ 14 3/8" (long point to long point, ends NOT parallel, ends cut at 5 degrees off square)
8 - 1x2 @ 1/2" - one end cut at 5 degrees off square
Tools
- measuring tape
- square
- pencil
- safety glasses
- hearing protection
- kreg-jig
- drill
- compound miter saw
- sander
- level
Step-by-step Instructions
Step 1
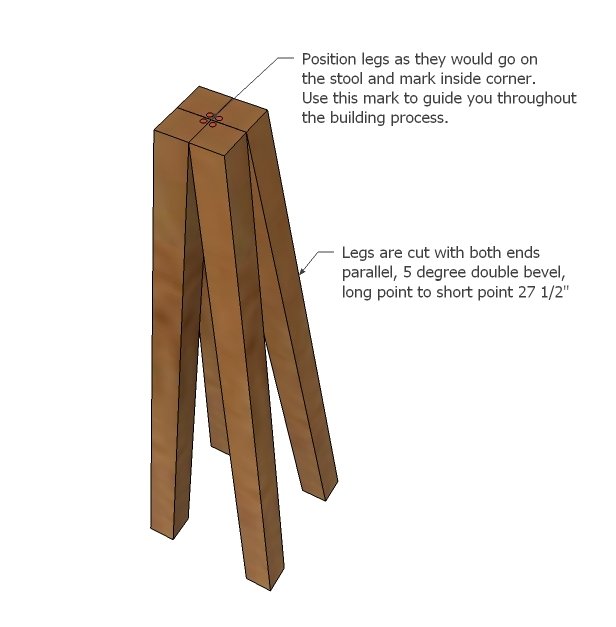
To cut legs, set your miter saw for a five degree double bevel - meaning the saw cuts at a 5 degree angle and 5 degree bevel at the same time. Cut the end of the 2x2 off, as close as possible to the end. Then without rotating the 2x2, slide down 27 1/2" and cut. This is one leg. Simply slide the 2x2 down another 27 1/2" and cut again. This is another leg. Continue until you have all four legs. Once you have all four legs, position as the legs would be on the stool. Mark inside corners. Trust me - once you start building, it will be difficult to judge which way the leg angles go.
Step 2
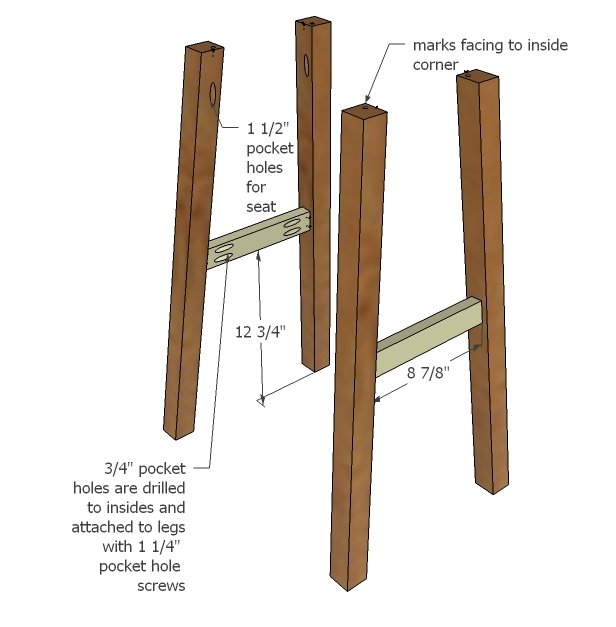
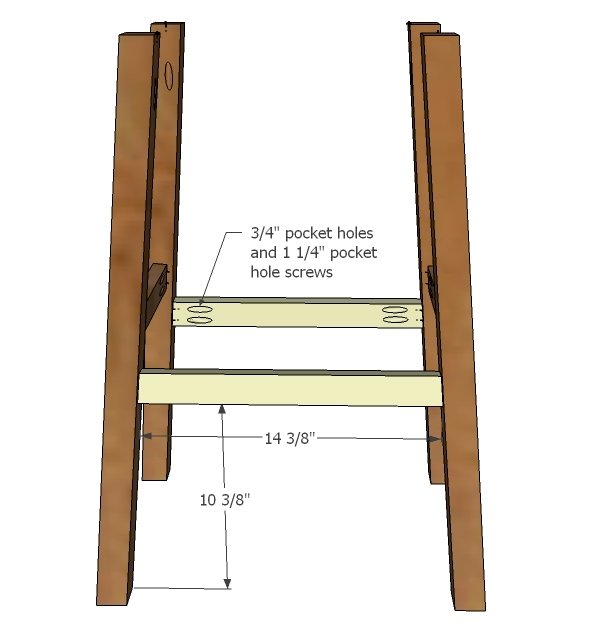
As noted earlier, this plan is designed for Kreg Jig users, but if you do not own a pocket hole jig, no worries, the bench height plan has the step by step on how to put together this stool with countersunk screws. The stretchers are a little tricky because the distance they are measured up is from the floor, not up the side of the angled leg. The best way to do this is to position legs against a flat square edge. Elevate the stretcher on perhaps a piece of 3/8" plywood. Then adjust until the distance between base and bottom of stretcher is correct. Then attach. Take your time here, being off can result in a crooked stool.
Step 3
Now it will even get a little trickier because you are working with a 3D project. Just take your time and get it right.
Step 4
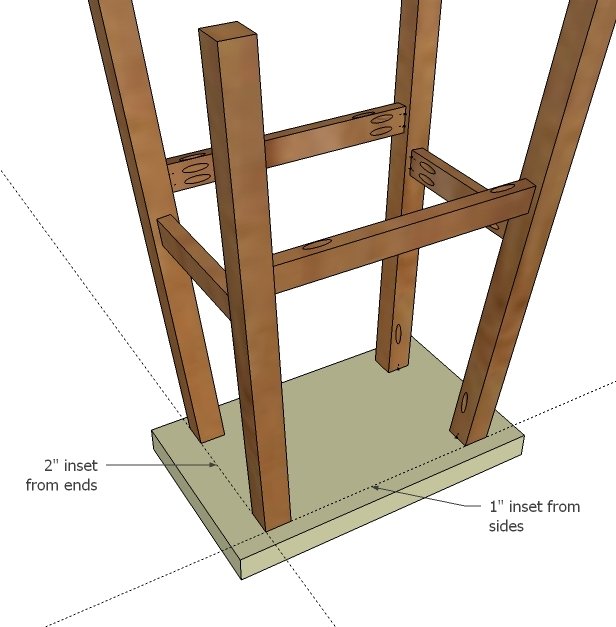
Mark the bottom edge of the seat underside as shown in diagram and attach the seat.
Step 5
Step 6
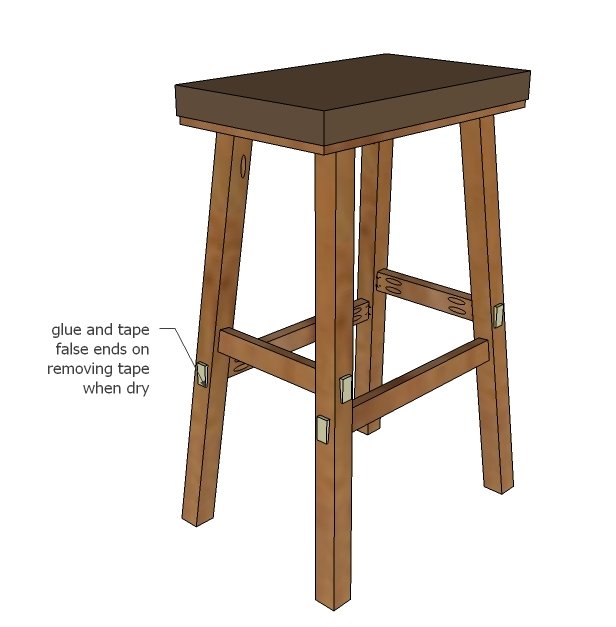
For the upholstery step, Jaime has created a super awesome no sew tutorial that I recommend you hopping over and following.
Finishing
Sand all surfaces, starting with a medium grit and finishing with fine. Wipe off the dust, fill any holes or gaps with wood filler, and sand smooth once dry. Apply primer if you're painting, then finish with your choice of paint or stain and seal with a durable clear topcoat. For outdoor projects, use exterior-rated primer, paint or stain, and sealer so the piece stands up to the weather.
Source (temporary): https://www.ana-white.com/woodworking-projects/no-sew-cayden-nailhead-bar-height-stool