No Sew Cayden Nailhead Stool
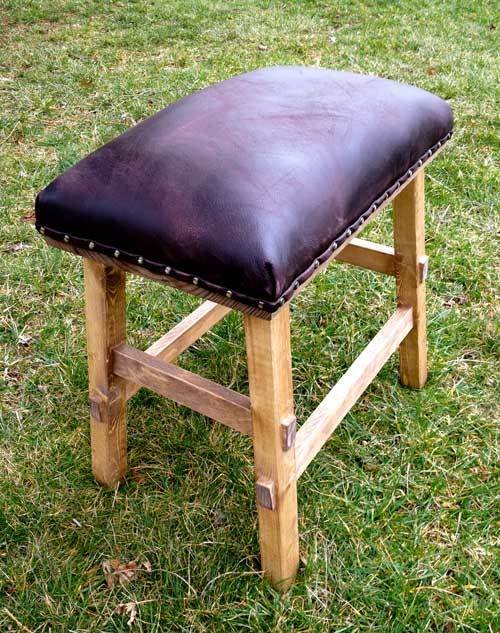
to build No Sew Upholstered Stools inspired by Pottery Barn Caden Nailhead stools.
Specifications
| Project type | Stools |
|---|---|
| Room | dining room |
| Style | Farmhouse Furniture |
| Difficulty | Intermediate |
| Estimated cost | $20 - $50 |
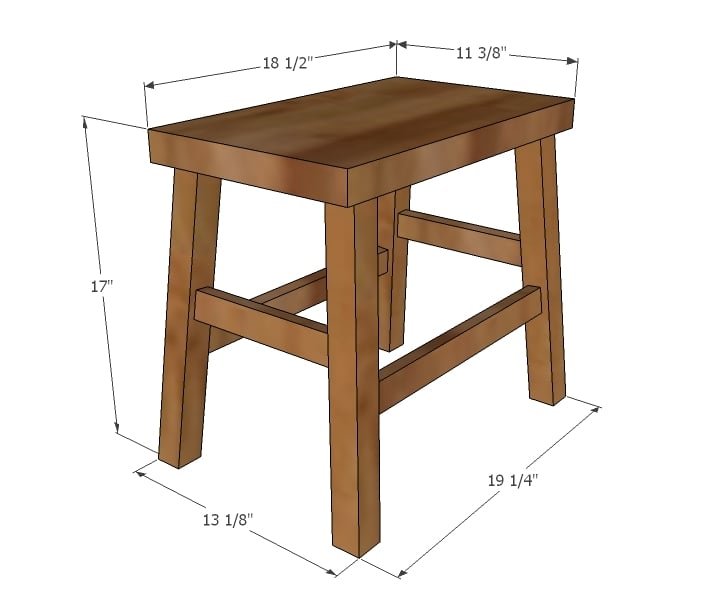
Dimensions
Use the size-specific shopping and cut lists below.
Shopping List
1 - 2x2 @ 8 feet long
1 - 1x2 @ 8 feet long
1 - 2x12 @ 18 1/2" long
Either use 1 1/4" pocket hole screws or 2 3/4" trim screws countersunk
Cut List
4 – 2x2 @ 16 3/8” both ends cut parallel to each other, 5 degree bevel/5 degree angle off square, short point to long point
2 – 1x2 @ 8 5/8” Long point to long point, both ends cut at 5 degrees off square, NOT parallel to each other
2 – 1x2 @ 14 7/8” Long point to long point, both ends cut at 5 degrees off square, NOT parallel to each other
1 – 2x12 @ 18 1/2”
Tools
- measuring tape
- square
- pencil
- safety glasses
- hearing protection
- kreg-jig
- drill
- compound miter saw
- sander
- countersink drill bit
Step-by-step Instructions
Marking Legs
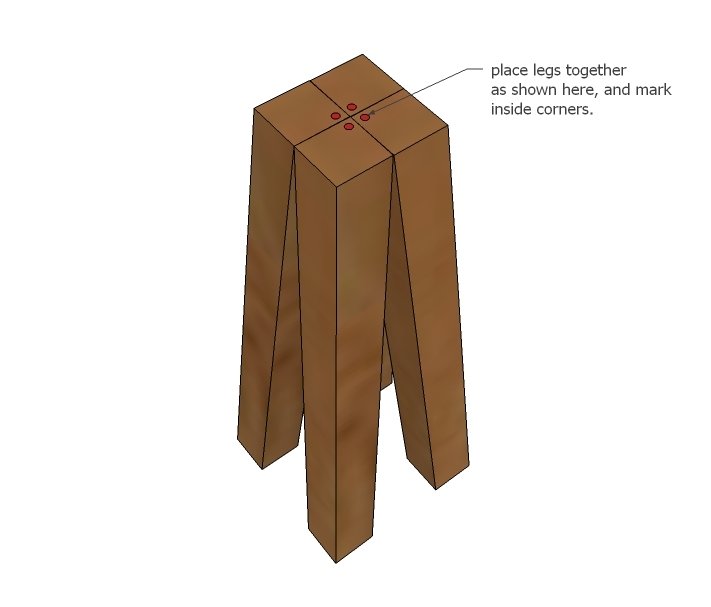
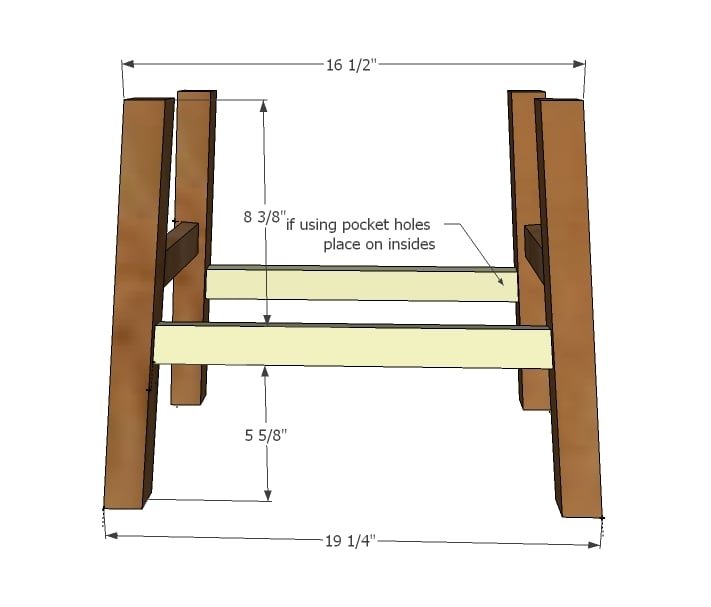
To cut legs accurately, set miter saw for a five degree bevel and five degree angle. Cut just enough off the end of the 2x2 to cut the angle into the end (less than 1”). Then just slide the board down 16 3/8” (long point to short point, so one end to the next along the edge) and cut. Slide down 16 3/8” and cut again. The slide and cut two more times until all four of your legs are cut. Once cut, line up so legs splay outward as shown in diagram. Mark the inside corners. With a five degree bevel/angle, you’ll be glad you did this – it can be hard to tell what way the legs go!
First Side Stretchers
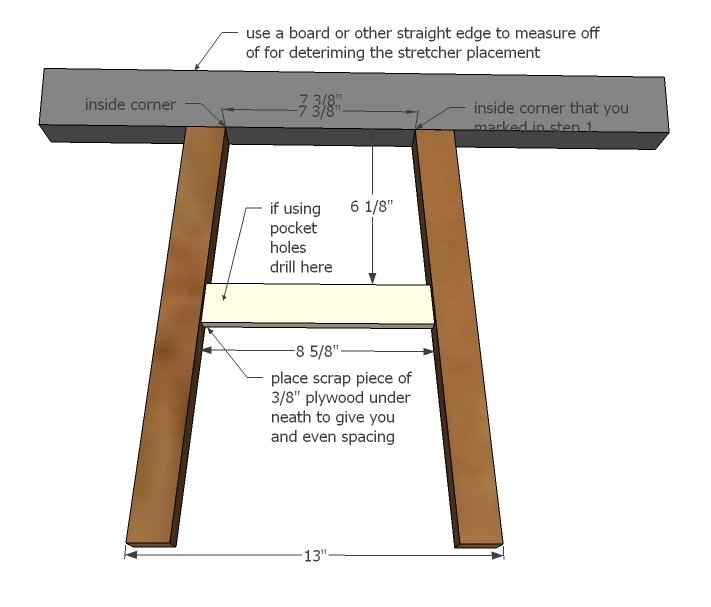
Lay a board – even just the seat – down on your work surface. With the inside corners of legs facing upward and inward, rest on work surface, meeting up with the gray board. NOTE: on back edge, will not meet up because of angle cuts. Measure down and place top stretcher. Mark joints clearly, marking outside joint as well. Predrill holes – pocket holes would be great here – and attach with screws and glue. TIP: Check the bottom distance and top to make sure your legs are properly positioned. Repeat on opposite side.
Side Stretchers
It’s going to get a little tougher here because now we are working with a 3d stool base. And easy way to do this – especially if you are making multiples – is to cut a scrap 2x board (how about leftovers from the seat boards?) at 5 5/8” long. Then you can rest under the stretcher as you prepare your joint. Predrill holes – again, pocket holes would be great on the insides – and attach with screws. If you are using countersunk screws, you will need some long ones! NOTE: If you are using countersunk screws, you may consider using 2x2s for the stretchers just to give you a little board to screw into. This would not change the cut list.
Top
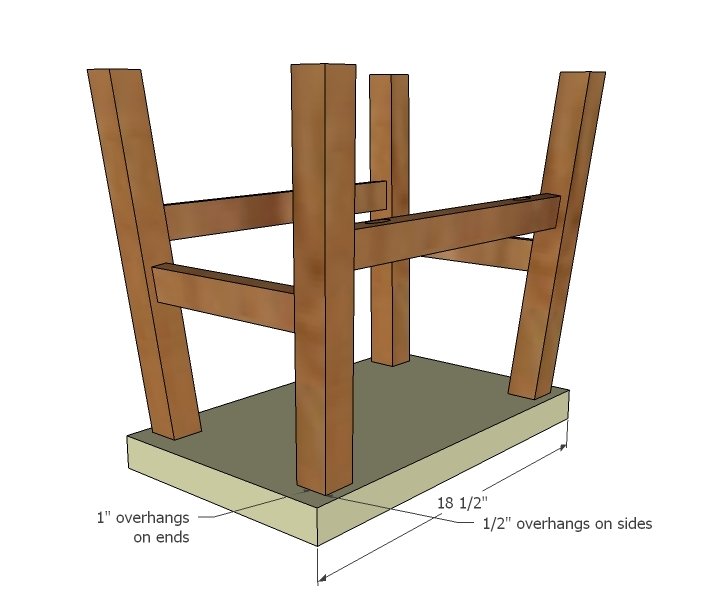
Mark location of legs and predrill holes. Attach with screws and glue.
Step 5
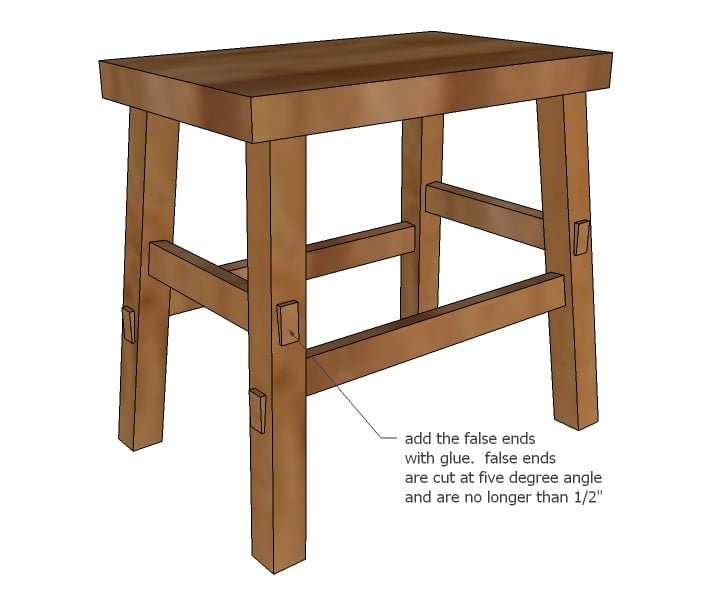
Top Upholstery
For a step by step tutorial on the NO SEW top upholstery, please visit Jaime for complete instructions and support.
Finishing
Sand all surfaces, starting with a medium grit and finishing with fine. Wipe off the dust, fill any holes or gaps with wood filler, and sand smooth once dry. Apply primer if you're painting, then finish with your choice of paint or stain and seal with a durable clear topcoat. For outdoor projects, use exterior-rated primer, paint or stain, and sealer so the piece stands up to the weather.
Source (temporary): https://www.ana-white.com/woodworking-projects/no-sew-cayden-nailhead-stool