Number 1 Shelf
to build a Number 1 Shelf - from
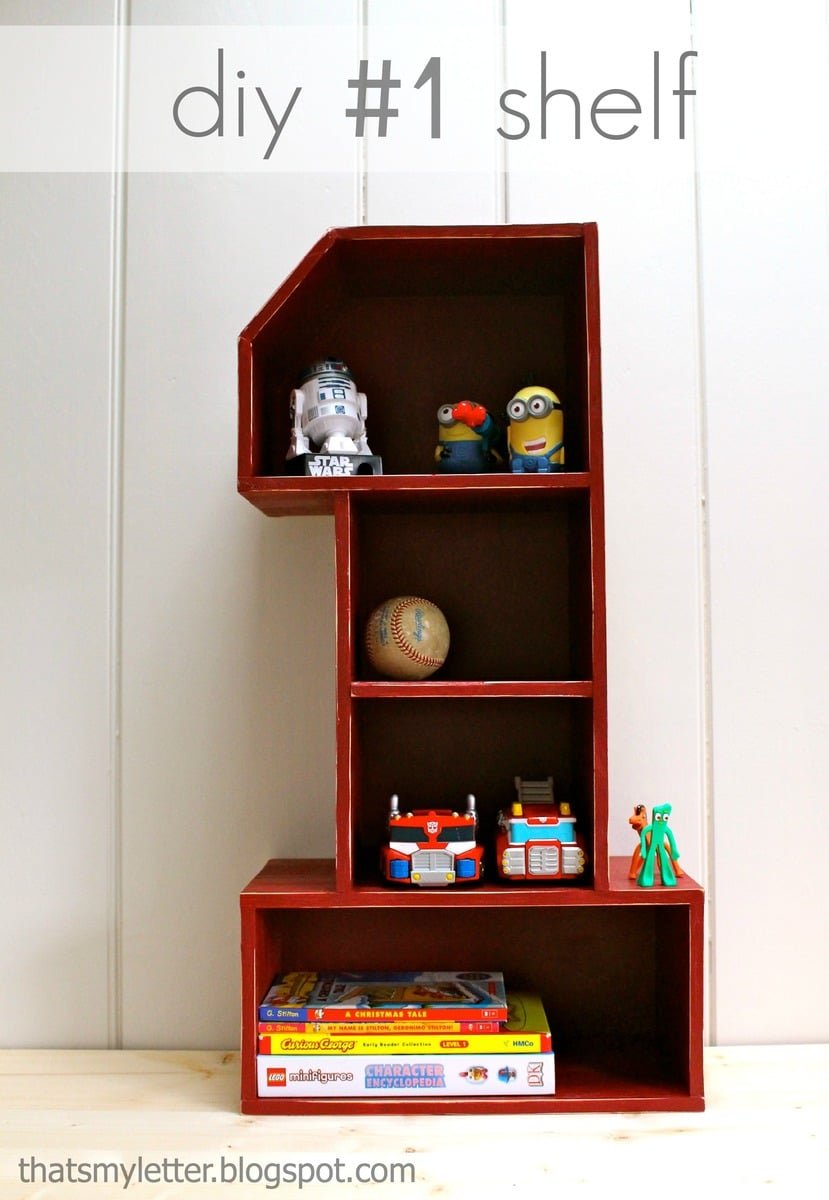
Specifications
| Project type | shelves |
|---|---|
| Room | Teens |
| Style | Children's and Kid's Room Furniture and Toy Plans |
| Difficulty | Intermediate |
| Estimated cost | Under $20 |
Dimensions
Use the size-specific shopping and cut lists below.
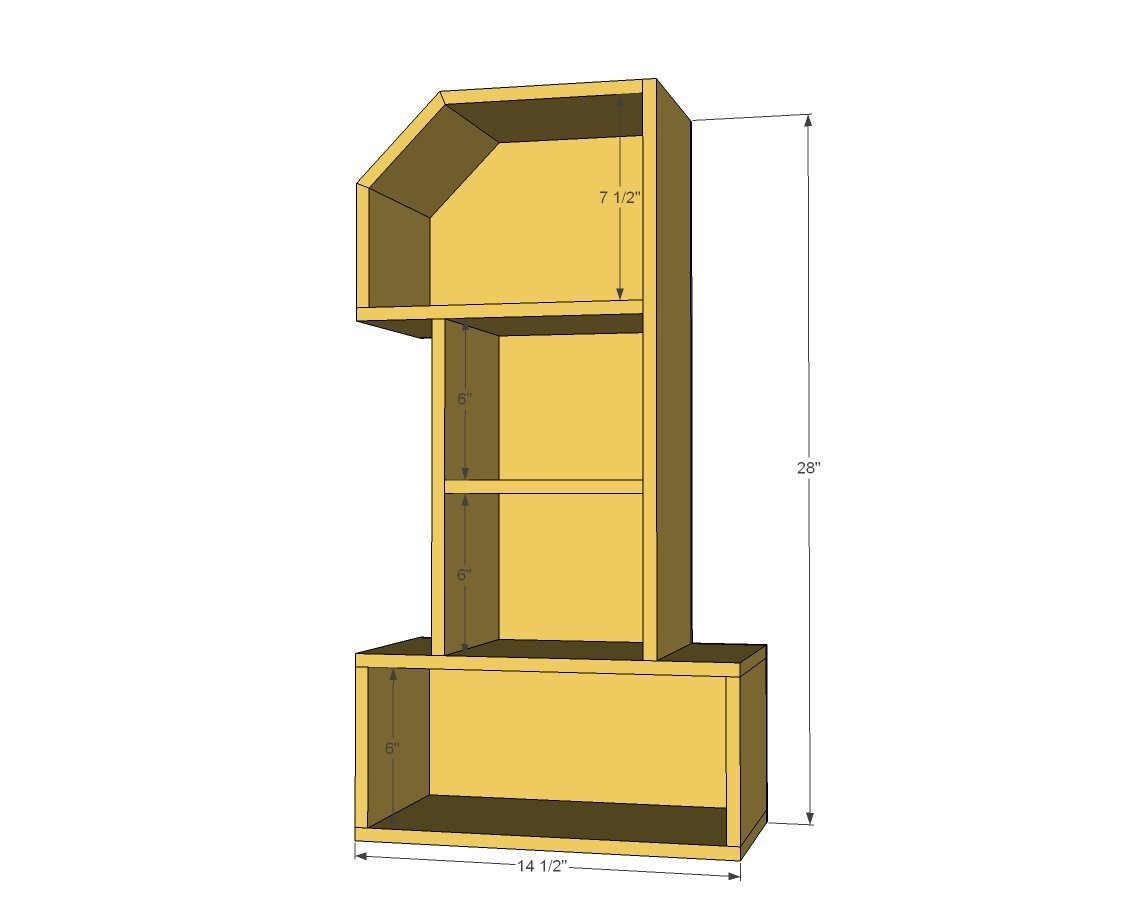
Shopping List
8-9 feet of 1/2" thick plywood cut into strips 7-1/2" wide (width can vary depending on desired depth of shelf)
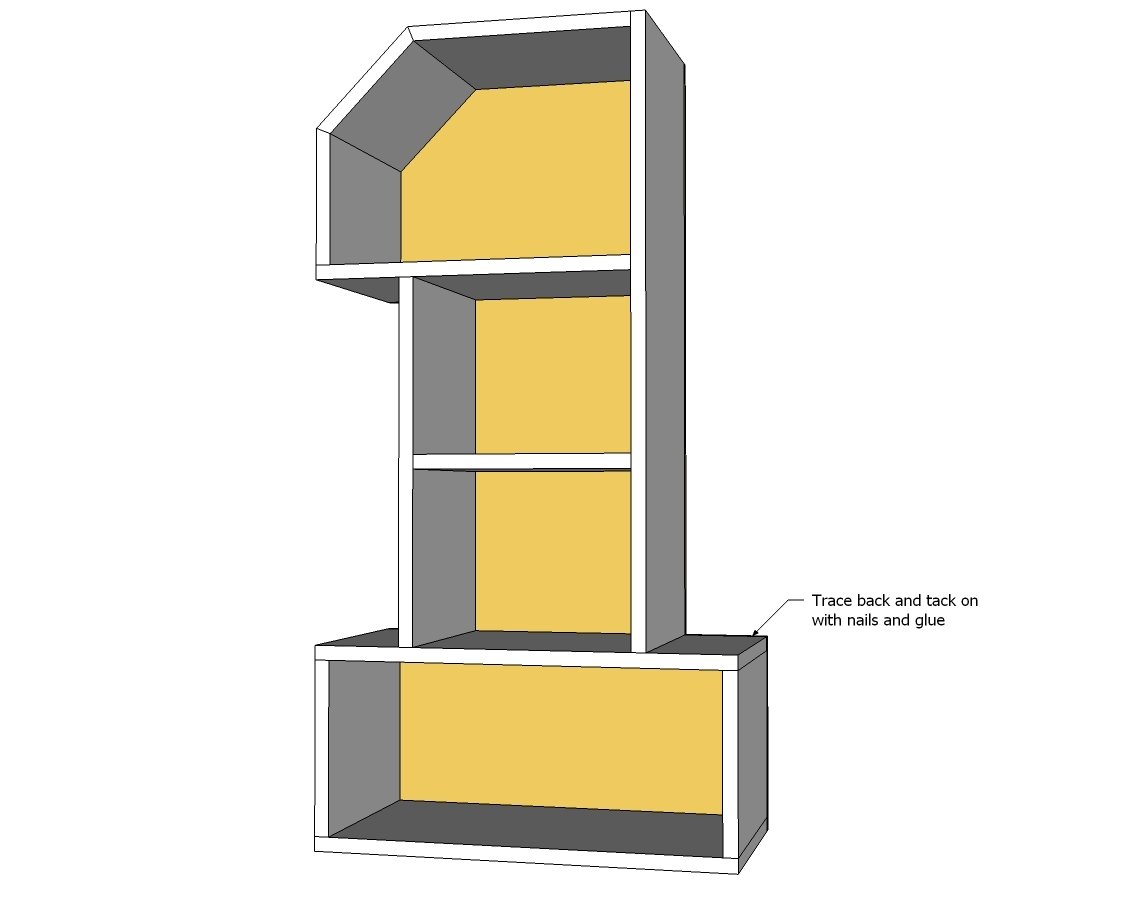
1/4" plywood or other material for the back - minimum size 14-1/2" x 28"
Cut List
CUT LIST - ALL 1/2" plywood 7 1/2" width
1 - 1/2" plywood @ 7-1/2" x 12-1/2" long
1 - 1/2" plywood @ 7-1/2" x 21" long
1 - 1/2" plywood @ 7-1/2" x 7-1/2" long
1 - 1/2" plywood @ 7-1/2" x 11" long
2 - 1/2" plywood @ 7-1/2" x 14-1/2" long
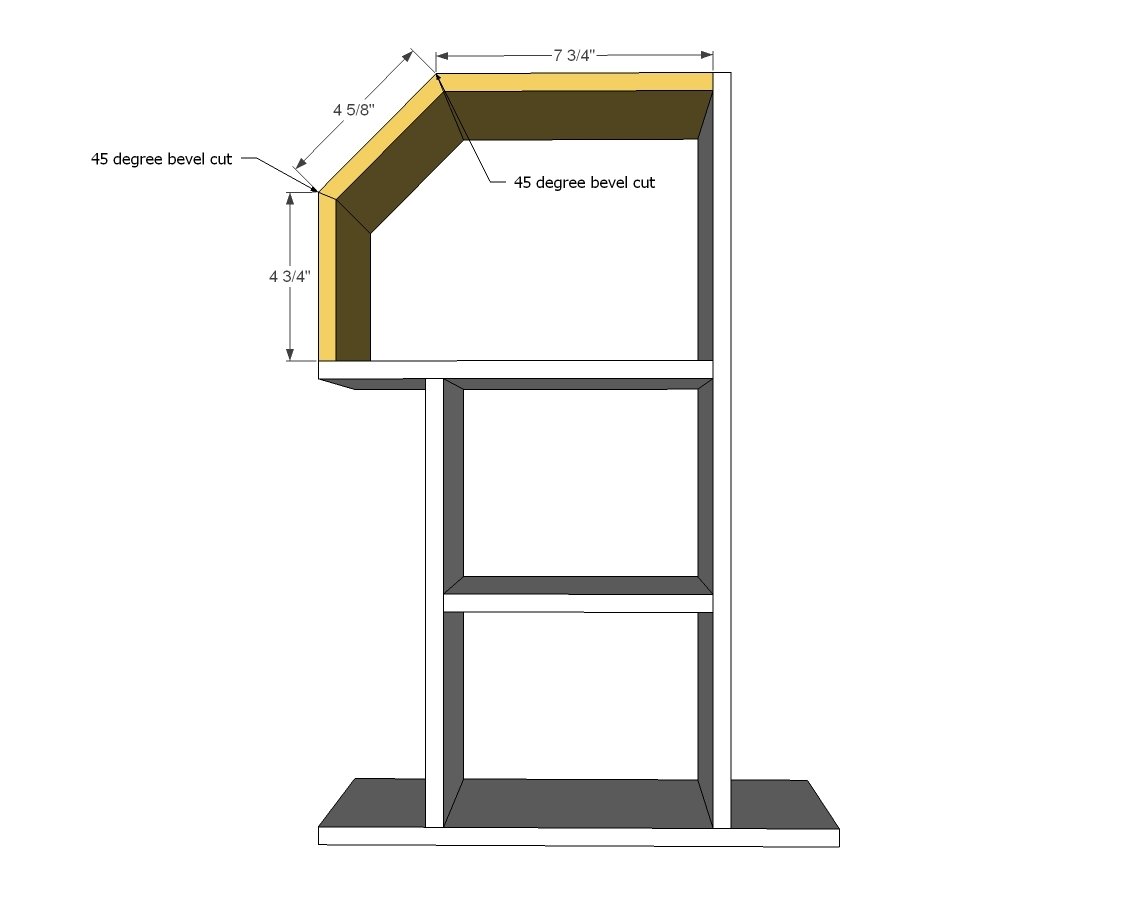
1 - 1/2" plywood @ 7-1/2" x 7-3/4" long (long point measurement, one end cut at 45 degree bevel)
1 - 1/2" plywood @ 7-1/2" x 4-5/8" (long point measurement, both ends cut at 45 degree bevels)
1 - 1/2" plywood @ 7-1/2" x 4-3/4" long (long point measurement, one end cut at 45 degree bevel)
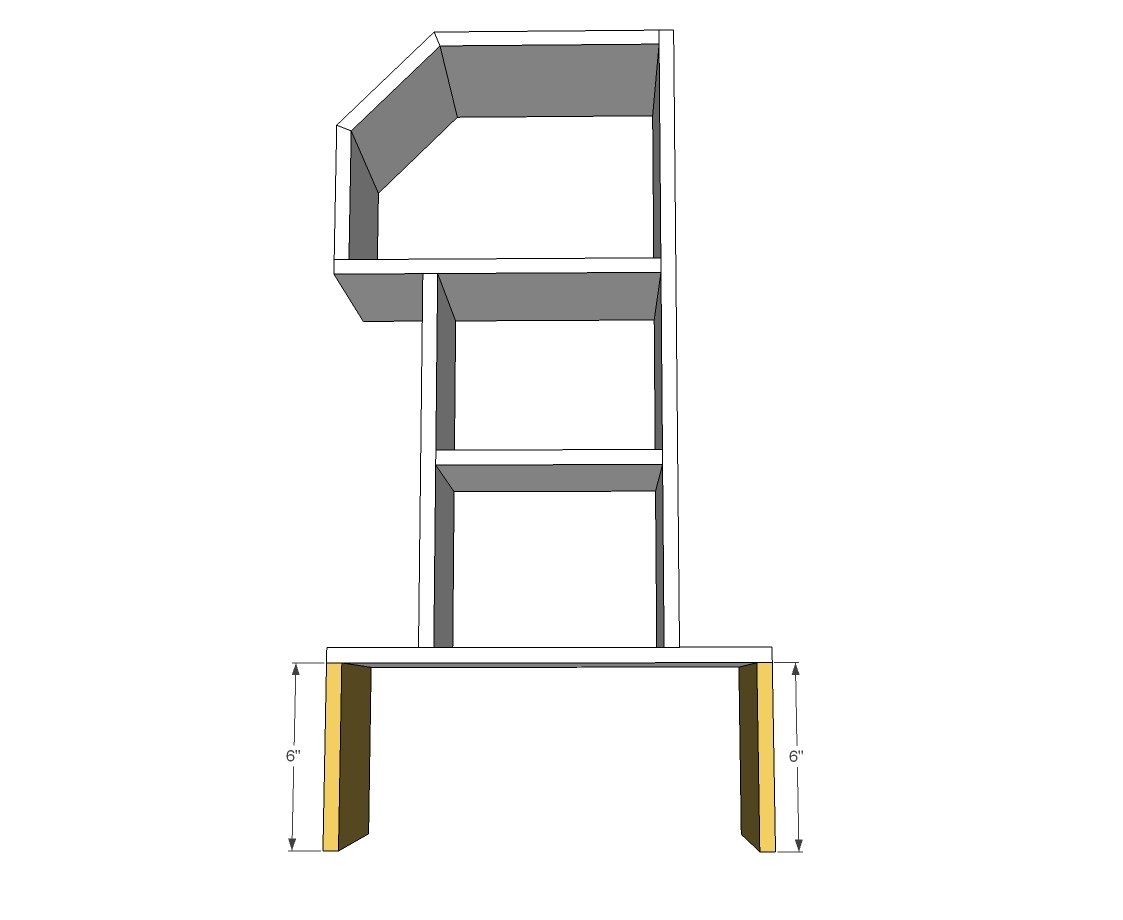
1 - 1/2" plywood @ 7-1/2" x 6" long
Back plywood minimum size is 14-1/2" x 28"
Tools
- measuring tape
- square
- pencil
- safety glasses
- hearing protection
- circular saw
- compound miter saw
- nailer
Step-by-step Instructions
Step 1
There's countless ways to put this shelf together - the deeper your shelves - and if you are hanging it on the wall - or if you are planning on placing especially heavy objects inside like books - then you should definitely error on the side of overbuilding. Screws recommended, or you can use a pocket hole jig on the 1/2" setting with 1" pocket hole screws. If you are planning to use this shelf without hanging, then you could get away with nails or staples and GLUE. This plan calls for using 1/2" plywood, but you could also use cedar fence pickets, 3/4" stock (1x boards) or alter the depth - you may need to alter some of the cuts, though. Start in the middle and work your way outward, so it's easy to assemble. Remember, this plan assumes your boards are 1/2" thick.
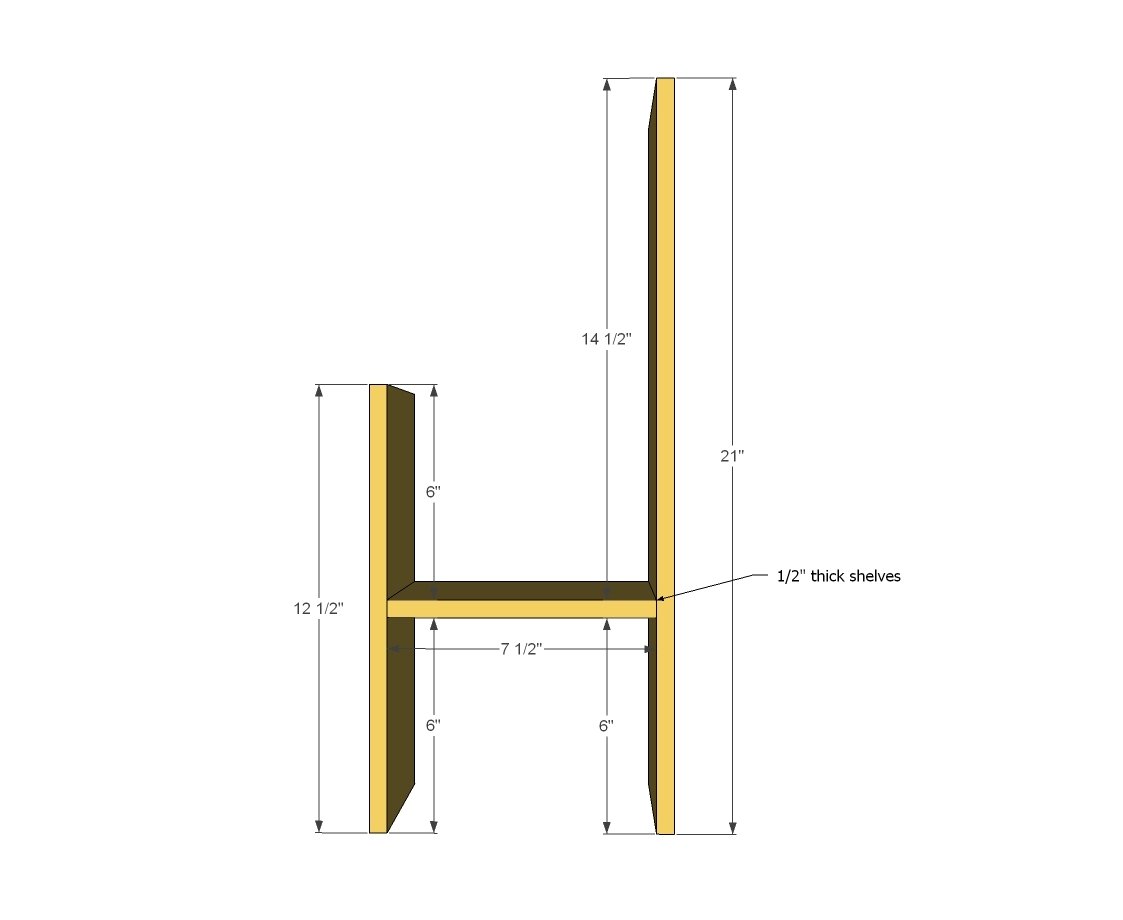
Then from the middle portion, add the next rows of shelves.
NOTE: For a hanging shelf, I recommed adding a 1x2 on the underside of this top shelf, attached inset, flush to back. Then you can just screw through that 1x2 into your wall hanging system.
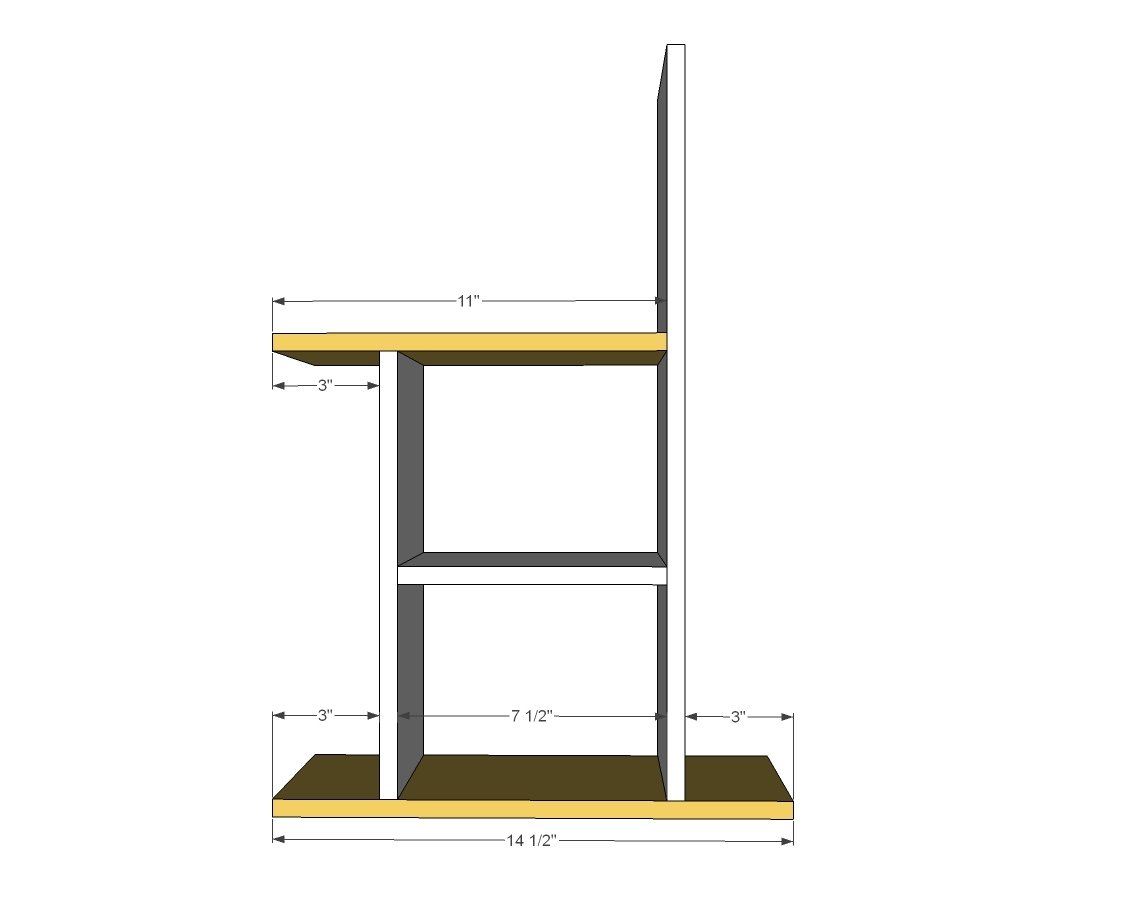
Step 3
Cut these guys and fit. When you are ahppy with them, attach.
Now let's build up the base with the two sides.
NOTE: For wall hanging, I recommend adding another 1x2 cleat between these two side pieces, flush to inside, top, back.
Step 5
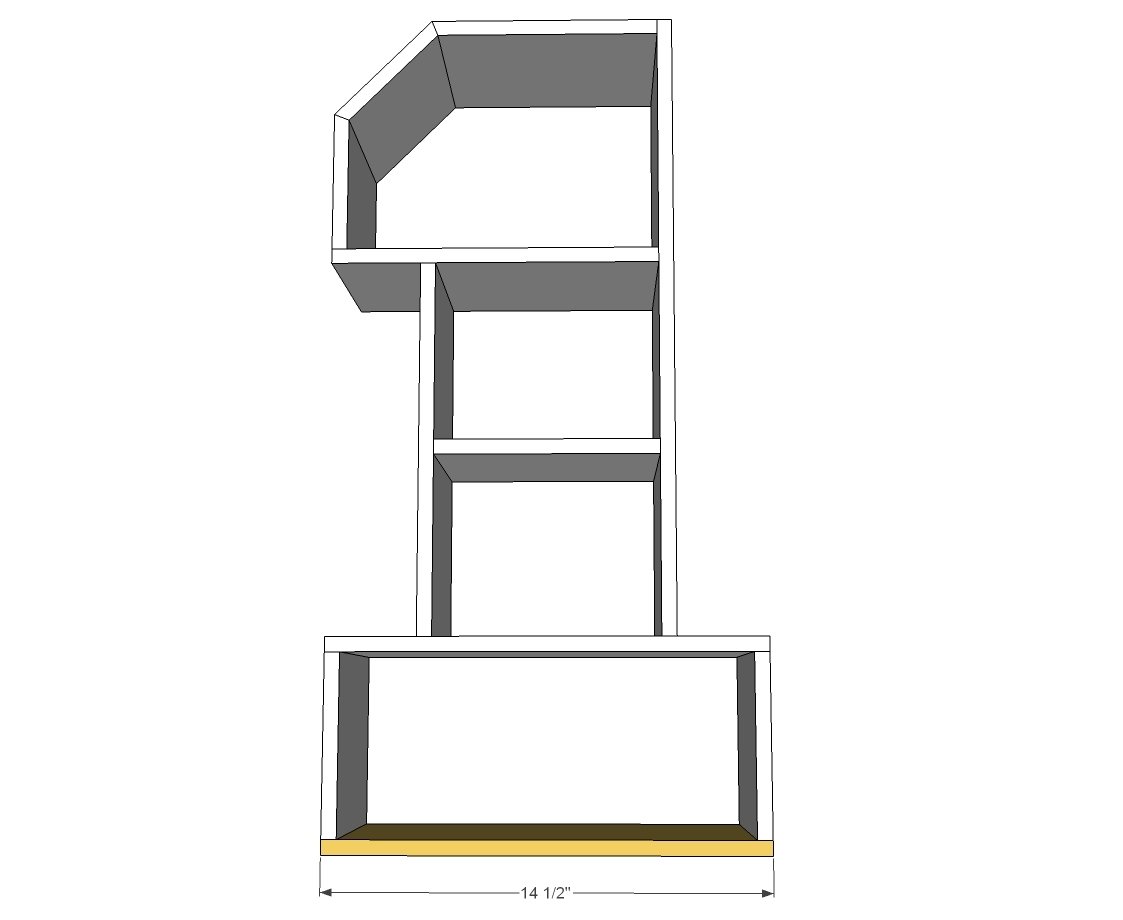
Step 6
Trace the shelf out on your back and cut out. Glue and nail or screw to back of shelf.
Finishing
Sand all surfaces, starting with a medium grit and finishing with fine. Wipe off the dust, fill any holes or gaps with wood filler, and sand smooth once dry. Apply primer if you're painting, then finish with your choice of paint or stain and seal with a durable clear topcoat. For outdoor projects, use exterior-rated primer, paint or stain, and sealer so the piece stands up to the weather.
Source (temporary): https://www.ana-white.com/woodworking-projects/number-1-shelf