Numbered Cubbies on the Wall
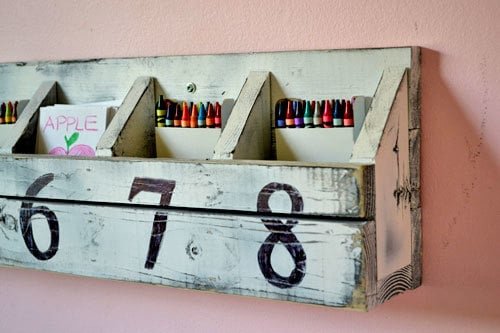
Plans to build a Pottery Barn Kids inspired Number Cubby Shelf. This shelf features eight small cubbies in a vintage paint finish. Free simple step by step plans use standard lumber and simple tools. Build this Number Cubby Shelf for under $10.
Specifications
| Project type | shelves |
|---|---|
| Room | Bedroom |
| Style | Cottage Style Furniture Plans |
| Difficulty | Starter Projects |
| Estimated cost | Under $20 |
Dimensions
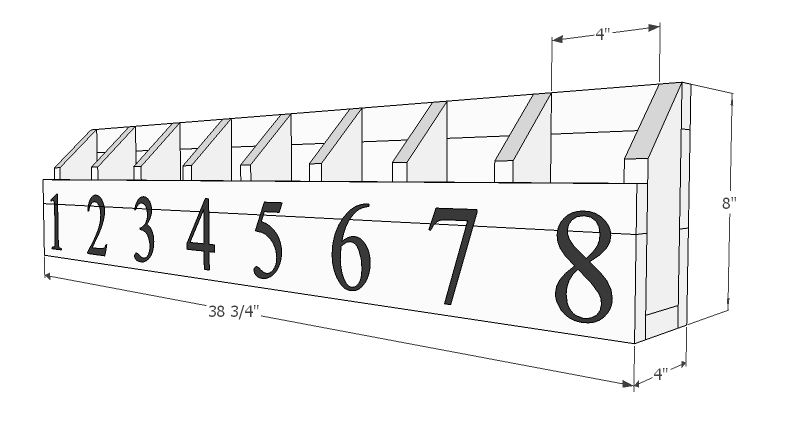
Use the size-specific shopping and cut lists below.
Shopping List
3 - 1x3 @ 8 feet long
1 - 1x2 @ 8 feet long
Cut List
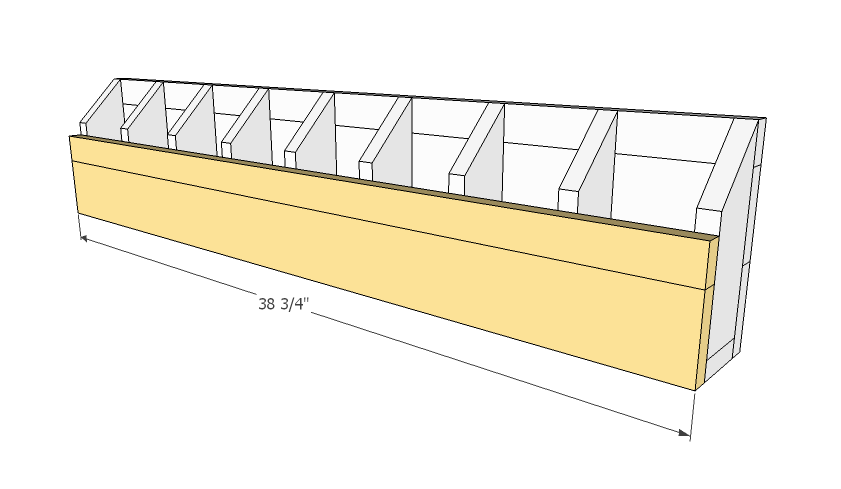
4 - 1x3 @ 38 3/4"
2 - 1x2 @ 38 3/4"
9 - 1x3 @ 7 1/4" (One end cut at 45 degrees off square, long point measurement)
Tools
- measuring tape
- square
- pencil
- safety glasses
- hearing protection
- compound miter saw
- sander
- level
Step-by-step Instructions
Step 1
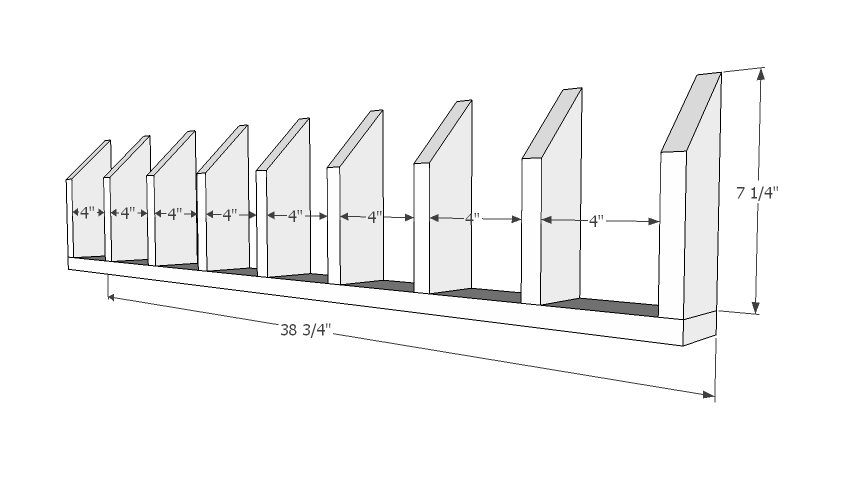
I cut a scrap 1x3 to 4" length and used it as a block to help me space the dividers. Then I nailed the dividers to the bottom, spaced 4" apart. This part was a bit tricky, because my nailer requires me to push really hard (it's battery powered) so you may just want to mark screw holes, predrill, and attach with screws. Don't forget your glue.
Step 2
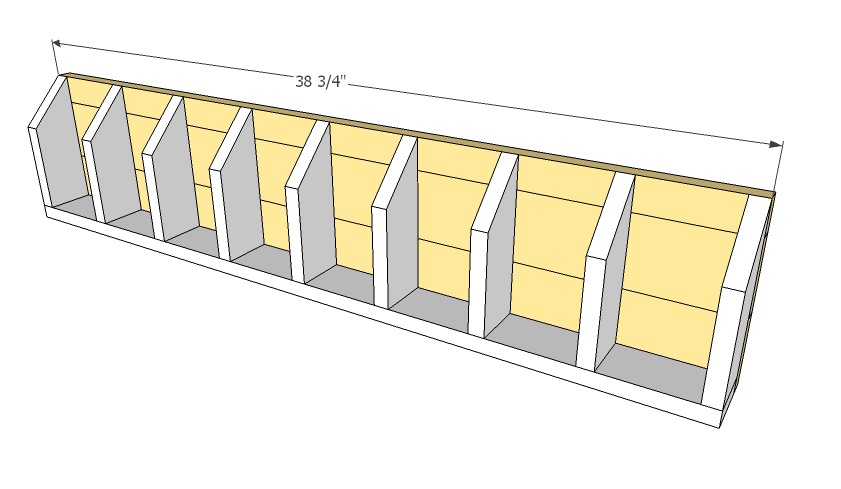
Now you still want to make sure the back is 4" spaced at the top. Attach the back boards to the cubby dividers and bottom with 2" finish nails and glue. As you near the top, use 1 1/4" finish nails because the miter cut will not give you enough clearance for the 2" nails.
Step 3
And now nail the front boards on, again, using the 4" block as a guide.
Finishing
Sand all surfaces, starting with a medium grit and finishing with fine. Wipe off the dust, fill any holes or gaps with wood filler, and sand smooth once dry. Apply primer if you're painting, then finish with your choice of paint or stain and seal with a durable clear topcoat. For outdoor projects, use exterior-rated primer, paint or stain, and sealer so the piece stands up to the weather.
Source (temporary): https://www.ana-white.com/woodworking-projects/numbered-cubbies-wall