Office Corner Desktop
Corners in offices can be great ways to expand your space - whether you use the corner for a computer or a workspace. With this easy plan, you can build your own corner desktop. Build bases to suit your storage needs to create the perfect corner desk system! Shown with open shelf base and open bases with drawers. See all plans in the Modular Office Collection to customize your corner desk top with the perfect bases.
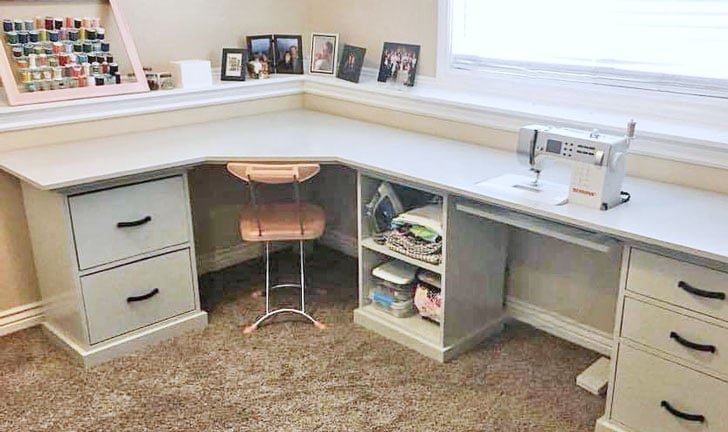
Specifications
| Project type | Desk, Desk Systems and Project Table Plans |
|---|---|
| Room | Storage Solutions |
| Style | Cottage Style Furniture Plans |
| Difficulty | Beginner Projects |
| Estimated cost | $50 - $100 |
Dimensions
Use the size-specific shopping and cut lists below.
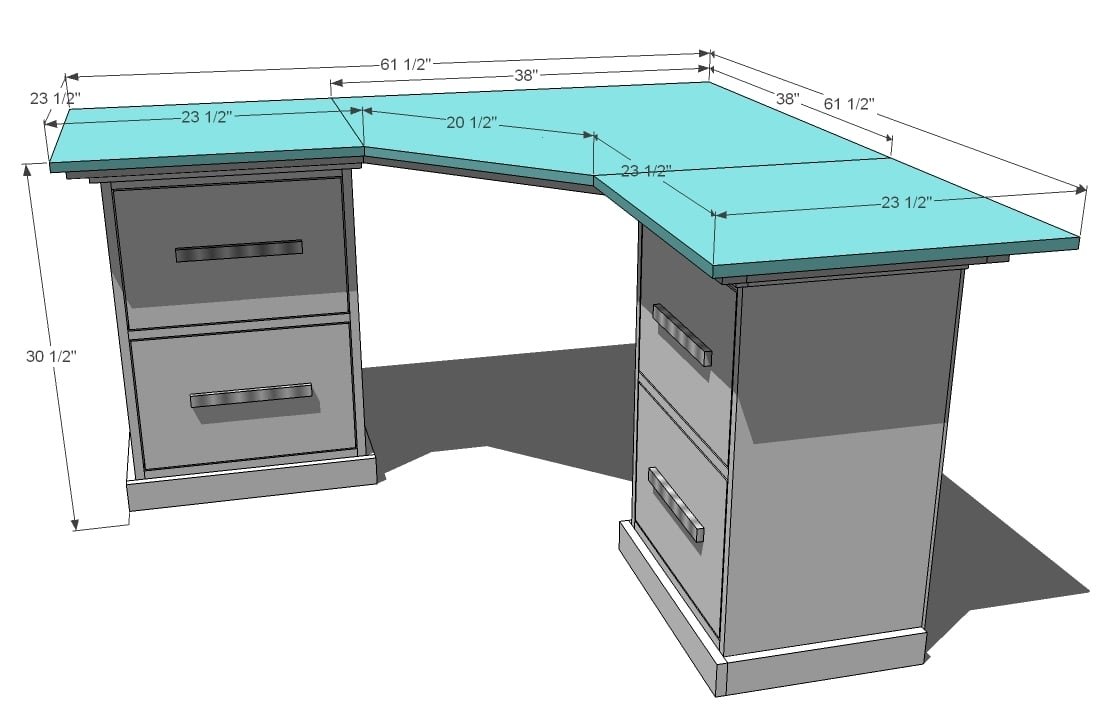
Shopping List
- 1 – Sheet of 3/4″ MDF or hardwood plywood
- Edge Banding if you are using hardwood plywood
- 4 – 1×2 Boards
- 1 – 1×3 Board
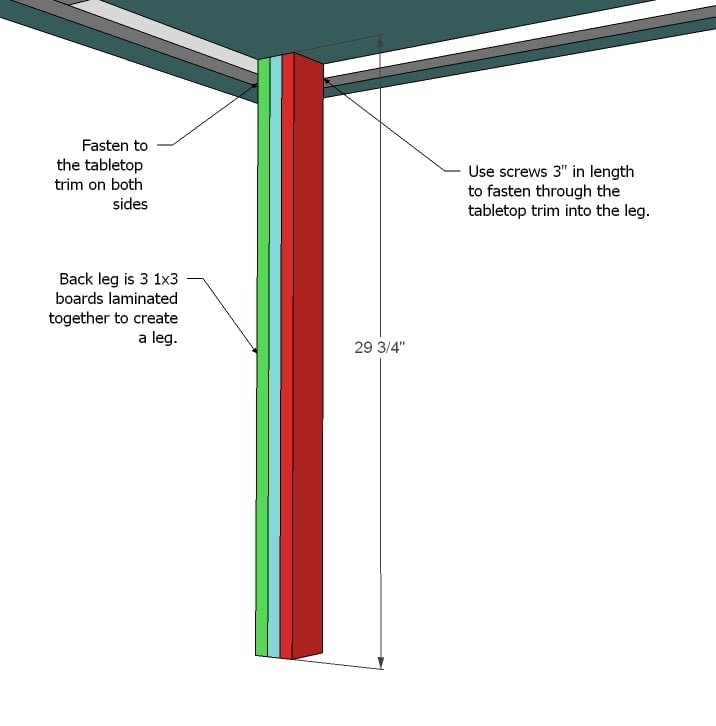
- 3″ screws for attaching the back leg OR corner brackets and screws to attach the back leg with hardware
Cut List
Cut List for Tabletop Pieces
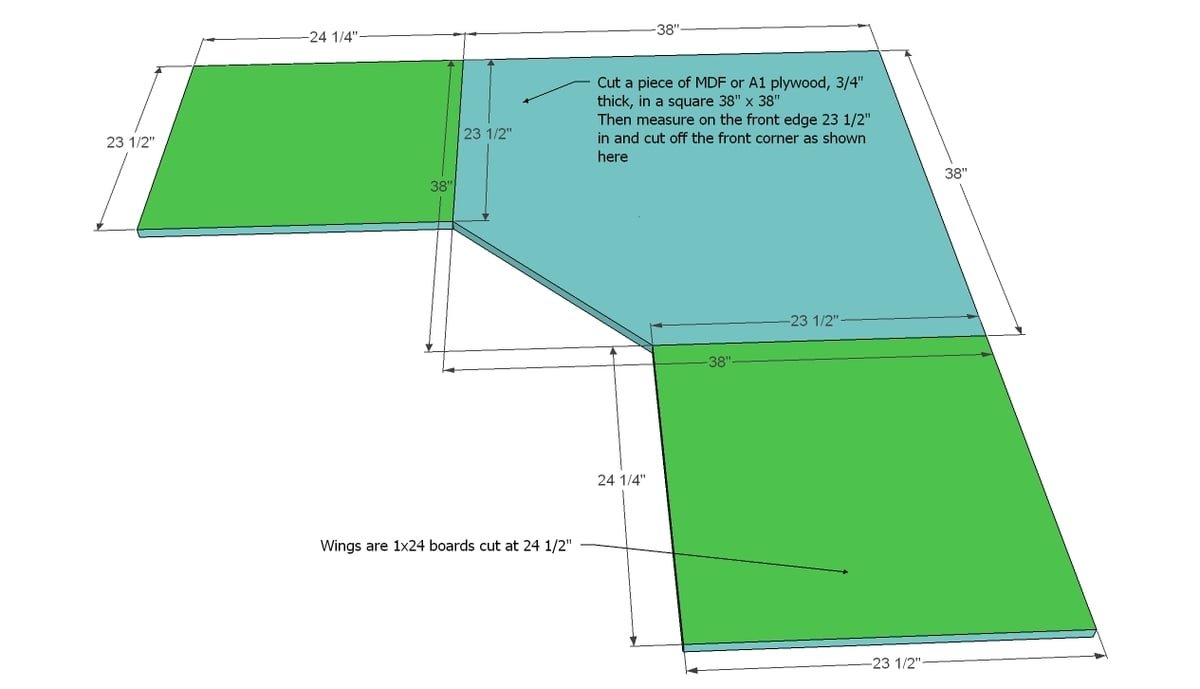
- 1 – 3/4″ MDF or Hardwood Plywood cut in a 38″ x 38″ square (you will cut off one corner in step 1)
- 2 – 1×24 boards @ 24 1/4″ (you can cut the pieces out of your scraps from the corner, dimensions 23 1/2″ x 24 1/4″)
Cut List for Trim Under Tabletop
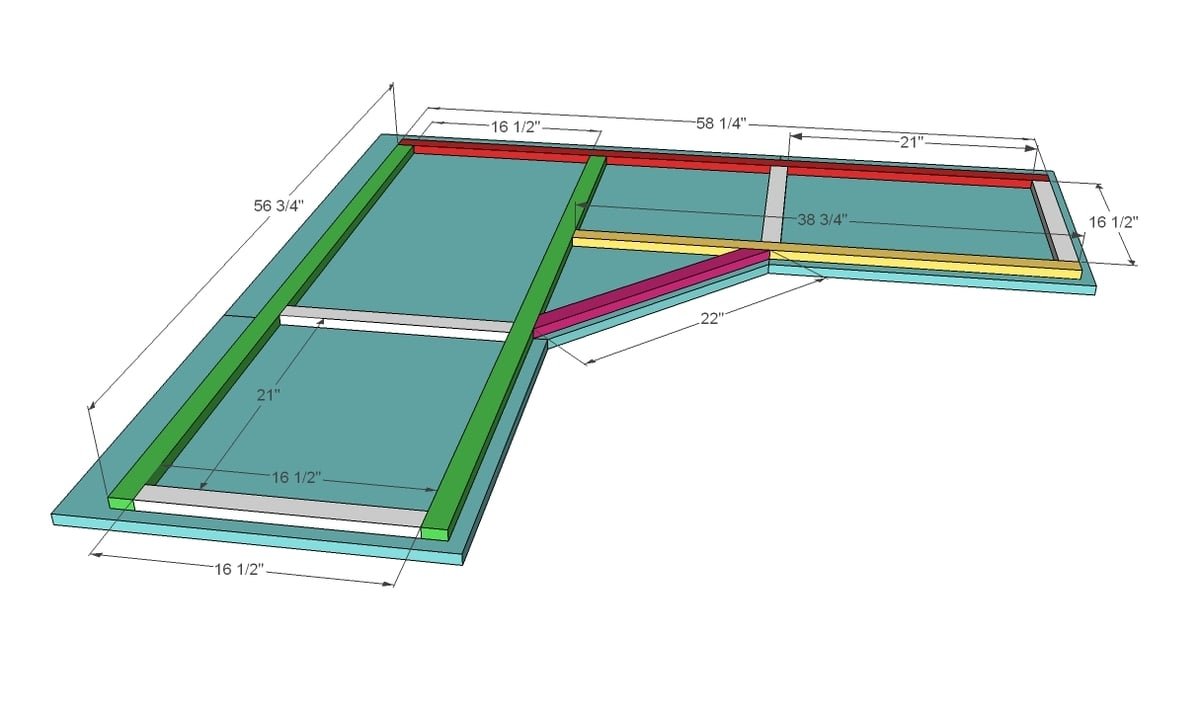
- 1 – 1×2 @ 58 1/4″ (trim in red)
- 2 – 1×2 @ 56 3/4″ (trim in green)
- 4 – 1×2 @ 16 1/2″ (trim in blue)
- 1 – 1×2 @ 38 3/4″ (trim in yellow)
- 1 – 1×2 @ 22″ (trim in pink, cut to measurement, mitering ends 45 degrees)
Cut List for Leg
- 3 – 1×3 @ 29 3/4″ (leg pieces)
Tools
- measuring tape
- square
- pencil
- hammer
- safety glasses
- hearing protection
- kreg-jig
- circular saw
- sander
Step-by-step Instructions
Step 1
Measuring the tops. Measure the tops of your bases and make sure they will fit in a 15 1/2″ x 21″ opening. If they will not, adjust the trim lengths to fit in step 3.
Step 2
Tabletop Pieces. Cut out your tabletop pieces as shown above. For the corner, blue, cut a 38″ x 38″ square. Then mark on 2 sides 23 1/2″ from the back. Draw a 45 degree angle between the two points and cut off the corner.
Step 3
Trim Pieces. On the underside of the tabletop, fasten the trim pieces using the 1 1/4″ screws and glue. Start with the red board, fastening it 3″ from the back edge and 1″ from the front side edge as shown above. Then fasten the green boards, leaving a 16 1/2″ gap between the two green boards. Next, fasten the white boards. Where the white boards span the tabletop joint, make sure you fasten to both the corner and side tabletop pieces. Then fasten the yellow trim piece in place. Finally, measure and cut the pink piece, mitering ends in 45 degrees. Use glue and let the glue dry with the piece laying flat.
Step 4
Leg. Build the leg by fastening 2 of the 1×3 boards together with glue, 1 1/4″ screws, and clamps. Let dry and fasten the remaining 1×3, again with glue and clamps and screws. Let dry. You can attach the leg to the tabletop by screwing through the top, screwing through the trim, or using corner brackets.
Finishing
Sand all surfaces, starting with a medium grit and finishing with fine. Wipe off the dust, fill any holes or gaps with wood filler, and sand smooth once dry. Apply primer if you're painting, then finish with your choice of paint or stain and seal with a durable clear topcoat. For outdoor projects, use exterior-rated primer, paint or stain, and sealer so the piece stands up to the weather.
Source (temporary): https://www.ana-white.com/woodworking-projects/office-corner-desktop-plans