One Piece Play Kitchen
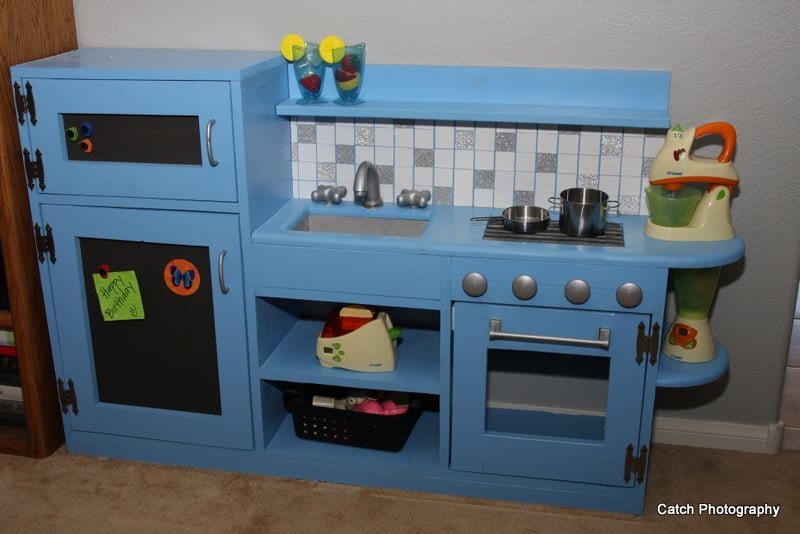
Hi Everyone, a huge thank you today to Rebecca for building this project! The goal of this plan is to create a play kitchen that is one piece, perhaps a little more compact without losing the storage. Rebecca did such an amazing job on it! Thanks Rebecca! Ana and I talked quite a bit about what my first project would be. I was planning on making the play kitchen for my daughter for her birthday and Ana mentioned she had this already drawn out. AWESOME, considering that her birthday was two weeks away at this point and I had another project I still needed to paint taking up all the room in my garage. I also love this one because it had that little extra storage space and counter space. I am listing this as an intermediate project really only because you will be using a few different tools, there are a lot of different cuts, and there is a vast a mount of "thinking" that should go into this. I learned this the hard way. I am normally pretty good at thinking things through. However, I am going to just say it. This is definitely a project that you should look at the final product in your head WAY before you start doing anything. All the little details make a big difference when building this.
Specifications
| Project type | Play Kitchen Collection |
|---|---|
| Room | Kids and Toys |
| Style | Children's and Kid's Room Furniture and Toy Plans |
| Difficulty | Intermediate |
| Estimated cost | $50 - $100 |
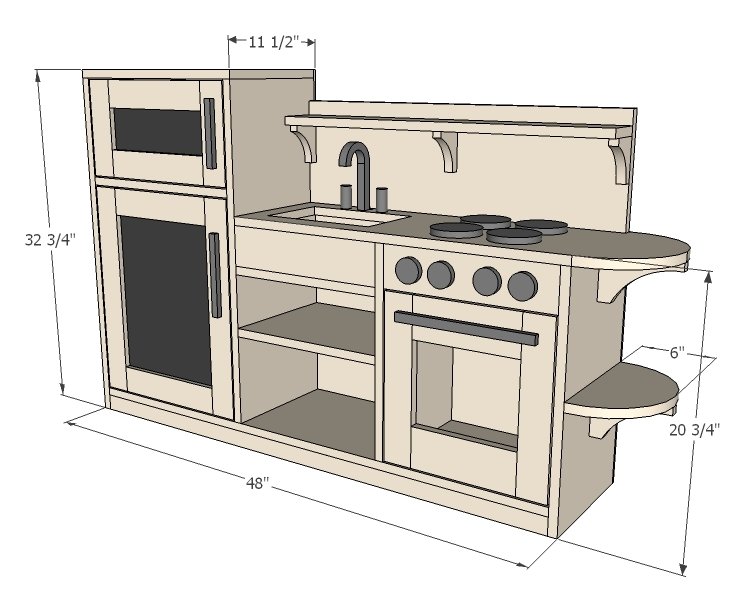
Dimensions
Use the size-specific shopping and cut lists below.
Shopping List
3 1x12's @ 8'
1 1x4 @ 8'
2 1x3's @ 8'
1 1x2 @ 8'
1 4x4 sheet of 1/4" plywood
1 8"x10" piece of acrylic plastic
Cut List
1x12's
1 @ 46 1/2"
1 @ 36" (sink and rounded edge)
1 @ 32"
1 @ 30"
1 @ 29 3/4"
1 @ 20"
1 @ 18"
1 @ 17 3/4"
1 @ 16 1/2"
2 @ 14 1/4"
1 @ 6"
1x4's
1 @ 30"
2 @ 14 1/4"
2 @ 9"
2 @ 5 1/4"
3 @ 2 3/4"
1x3's
2 @ 19 3/4"
2 @ 14"
4 @ 11 1/4"
2 @ 8 3/4"
1x2's
1 @ 46 1/2"
1/4" Plywood
48" x 32 3/4" Kitchen Backing
12 1/4" x 9 3/4" Freezer door backing
12 1/4" x 20 3/4" Fridge door backing
Tools
- measuring tape
- square
- pencil
- hammer
- safety glasses
- hearing protection
- kreg-jig
- drill
- jigsaw
- compound miter saw
- nailer
- sander
- countersink drill bit
Step-by-step Instructions
Step 1
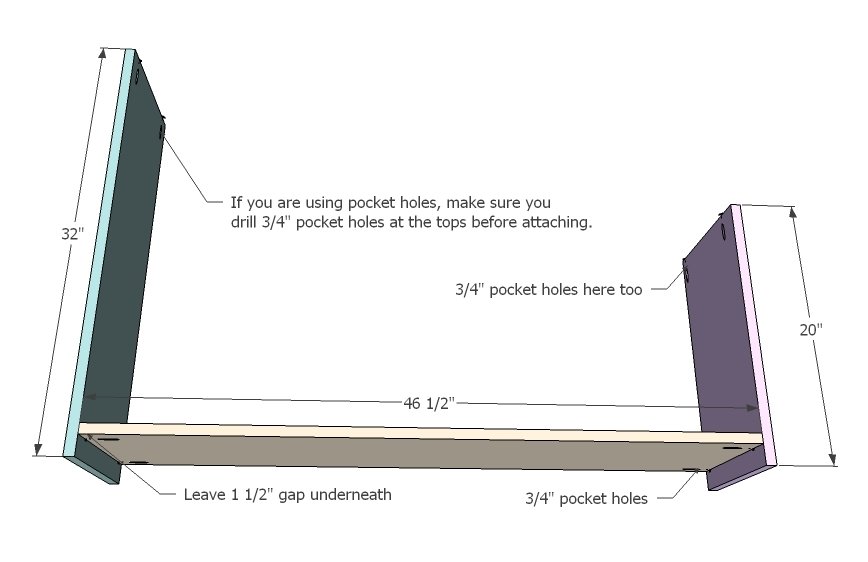
Step 2
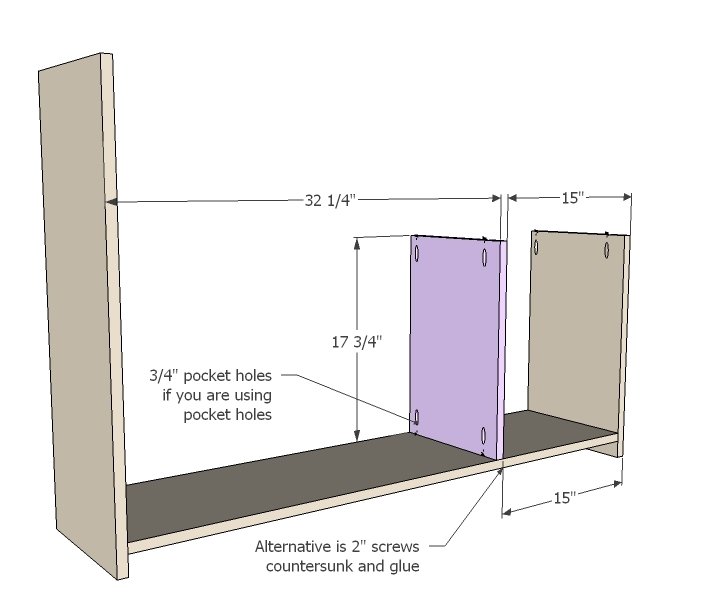
Step 3
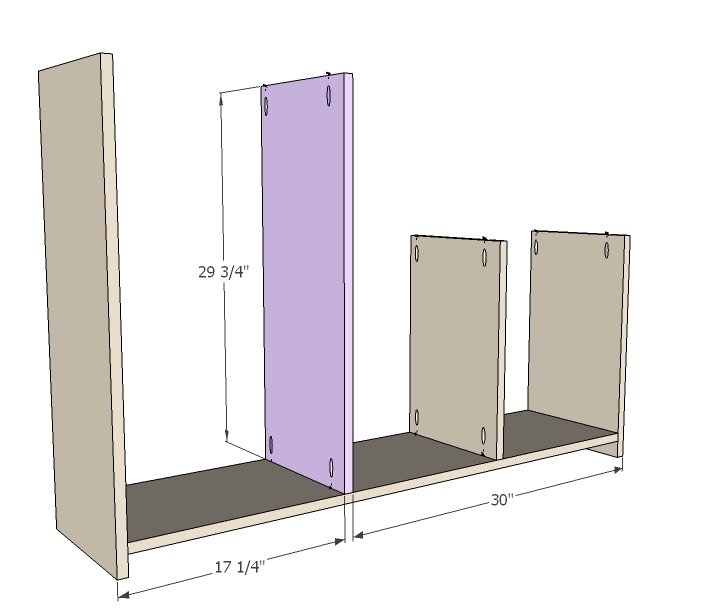
Step 4
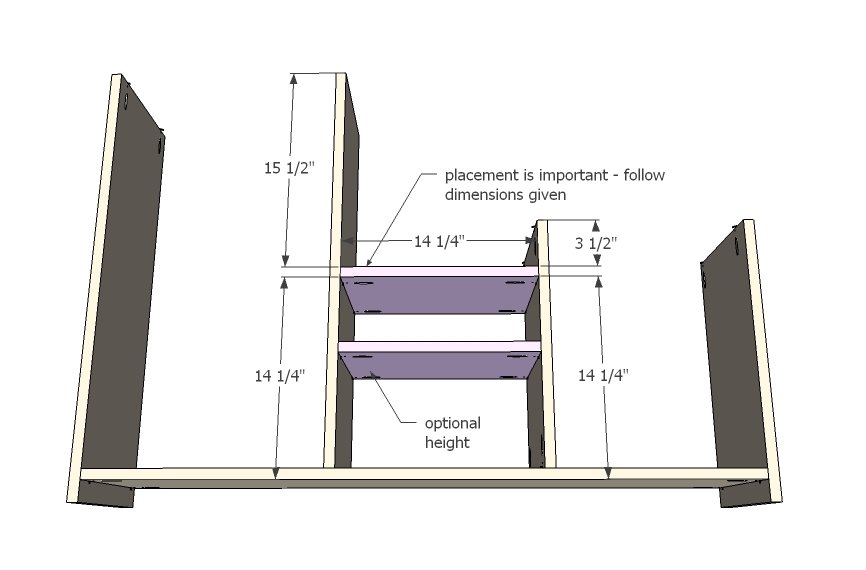
Step 5
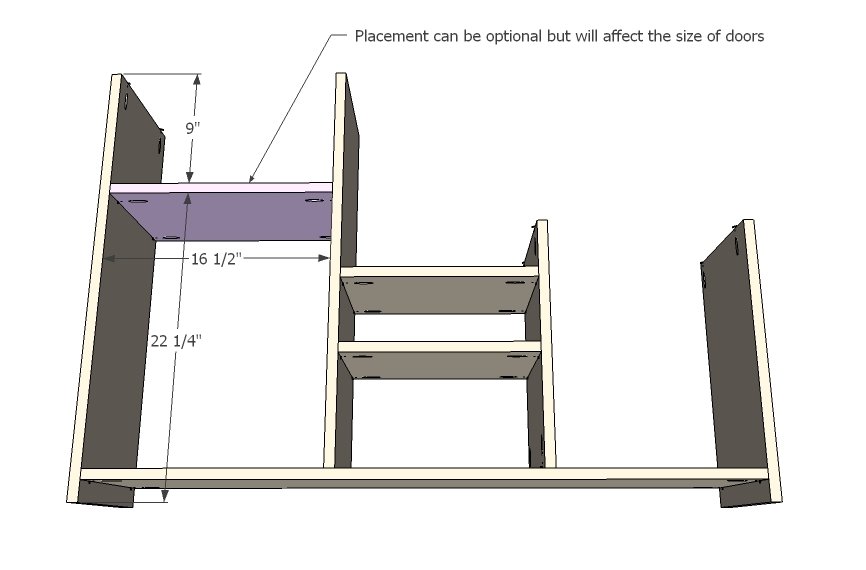
Step 6
Remember to do this step BEFORE adding the shelf
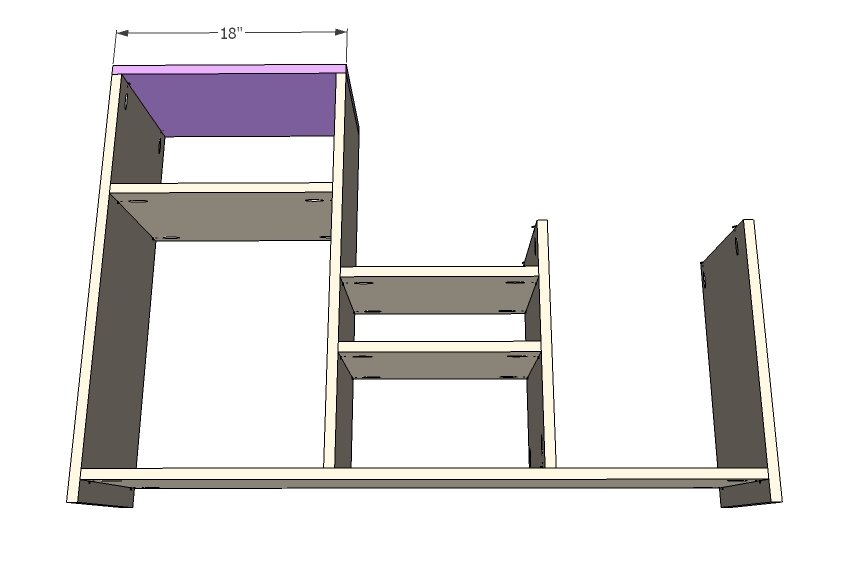
Step 7
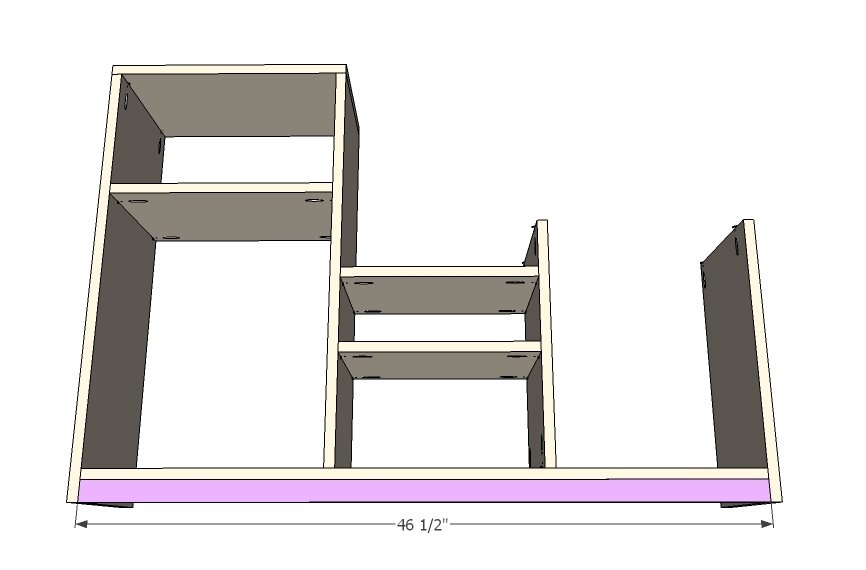
Step 8
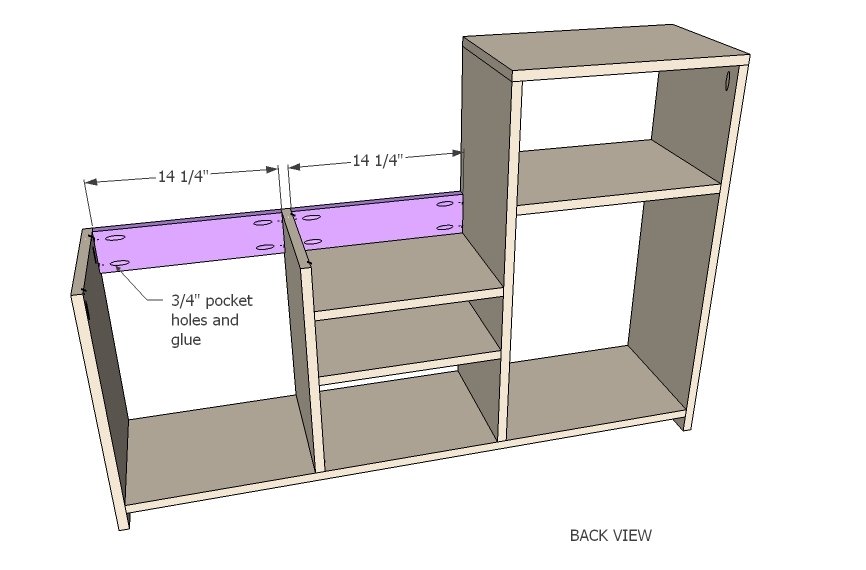
Step 9
THINK about this step. Choose your sink faucet and knobs BEFORE you make this cute. I went ahead and cut this without thinking about it and did not have quite enough room for my faucet and knobs. Remember that you will be adding a back onto the top of this section so that will take out some room. I also did not have a sink before I cut, so then I had to improvise and ended up building a "under-mount" sink. If you do it like this, then I would make it an inch less deep so hat there is 3 3/4" inches in the back where your faucet will go.
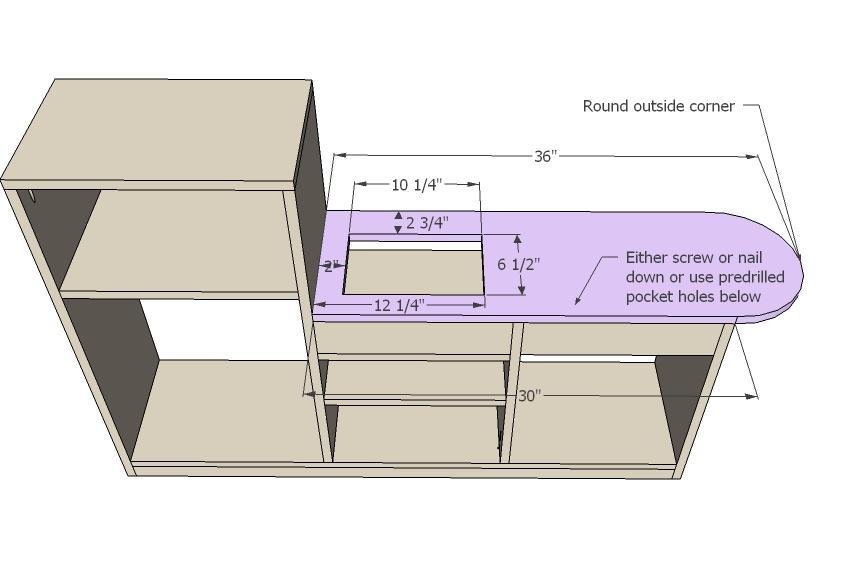
Step 10
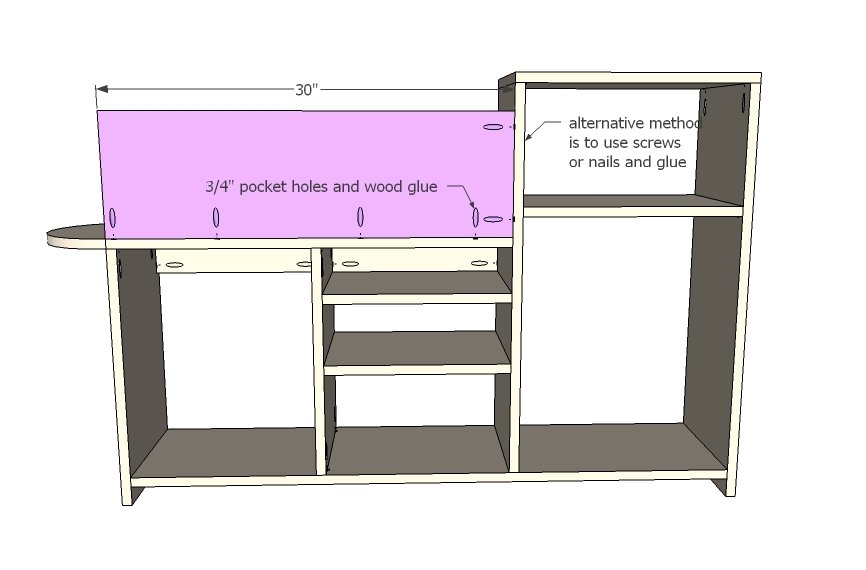
Step 11
I did not end up adding the bottom supports. I just did some pocket holes to put the shelf as floating since I went for a more modern look.
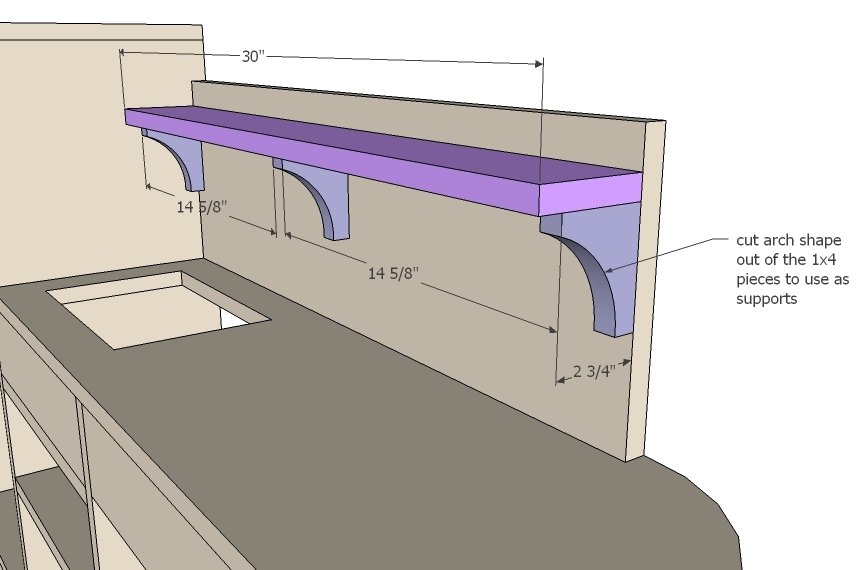
Step 12
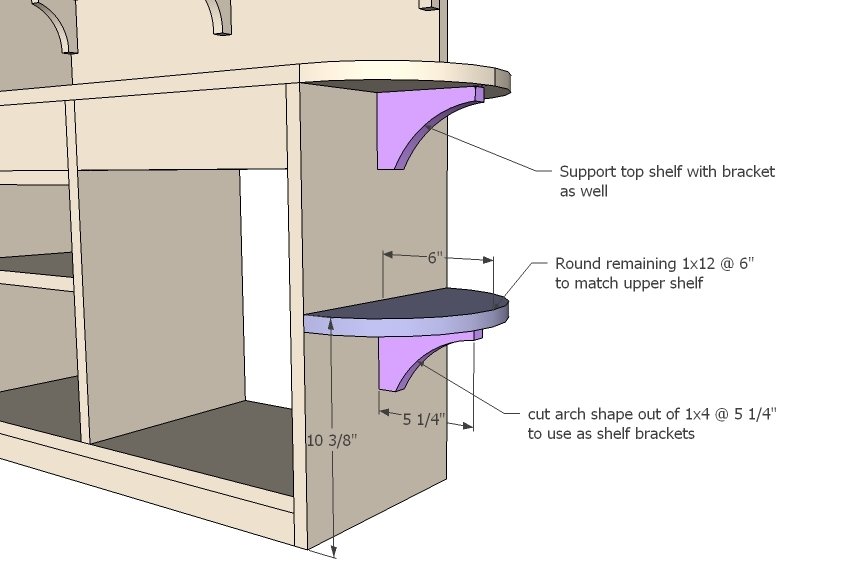
Step 13
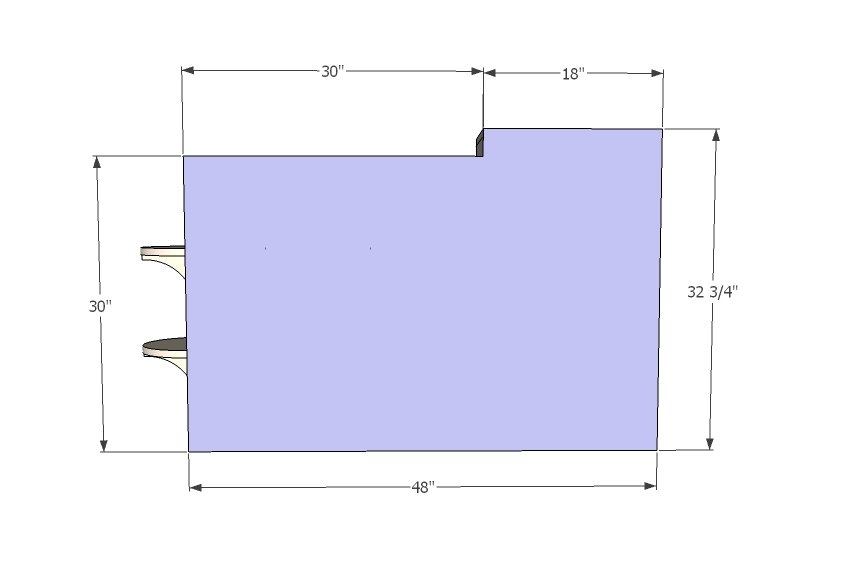
Step 14
I just glued my door backings on for now. Eventually I will get a rabbet router bit so they will be more inset into the back of the door.
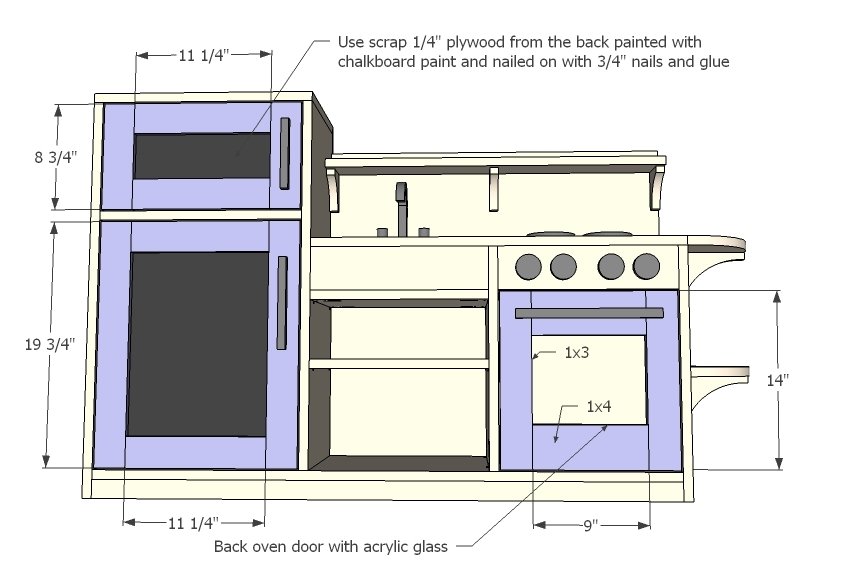
Step 15
This is how I cut my 1x12's for best efficiency.
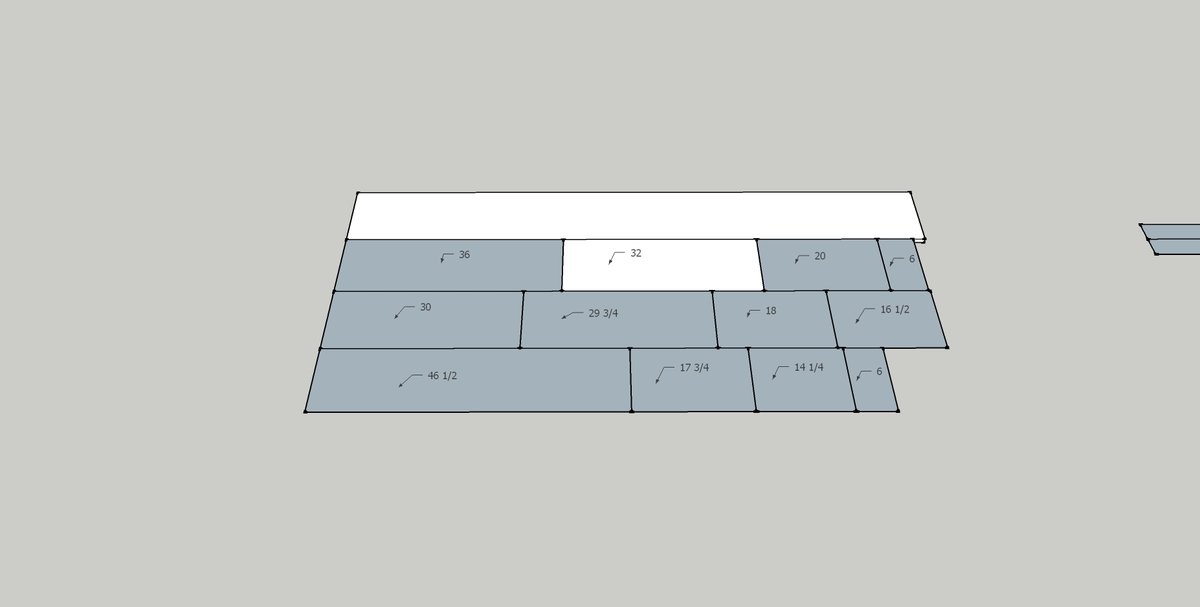
Step 16
Here is a pic of my "under-mount" sink. This was my solution for cutting a hole and not finding a sink to fit in that hole. I of course had to measure and cut VERY specifically to get it flush and then still had to do some very close "shaving" on the table saw to get it to fit exactly. My back splash is really just a few different kinds of scrapbook paper cut into squares and mode podged onto the wood under the shelf. I wanted a tile affect and am pleased that it turned out so well for like $2 extra dollars.
Step 17
I loved the idea of doing a grill like a fancy stove would have. I just cut an extra hole same size as the sink and then glued a 1/4" piece of plywood to the bottom of it. I cut a dowel to size and then drilled the same size holes (as the dowel) into a 1x2 and then cut it down the middle on the table saw so I had two pieces with half a hole just perfect for the dowel. I spray painted black and then a slight mist of silver over the top to get that "grill " look.
Step 18
I used magnetic paint on the insets of the fridge and freezer. I did three coats and still should have done a few more. You have to lay it on thick.
Finishing
Sand all surfaces, starting with a medium grit and finishing with fine. Wipe off the dust, fill any holes or gaps with wood filler, and sand smooth once dry. Apply primer if you're painting, then finish with your choice of paint or stain and seal with a durable clear topcoat. For outdoor projects, use exterior-rated primer, paint or stain, and sealer so the piece stands up to the weather.
Source (temporary): https://www.ana-white.com/woodworking-projects/one-piece-play-kitchen