One Sheet of Plywood Hall Tree
This diy hall tree is built from one sheet of plywood! Get the free template and plans with step by step instructions, diagrams, shopping and cut list and build this.
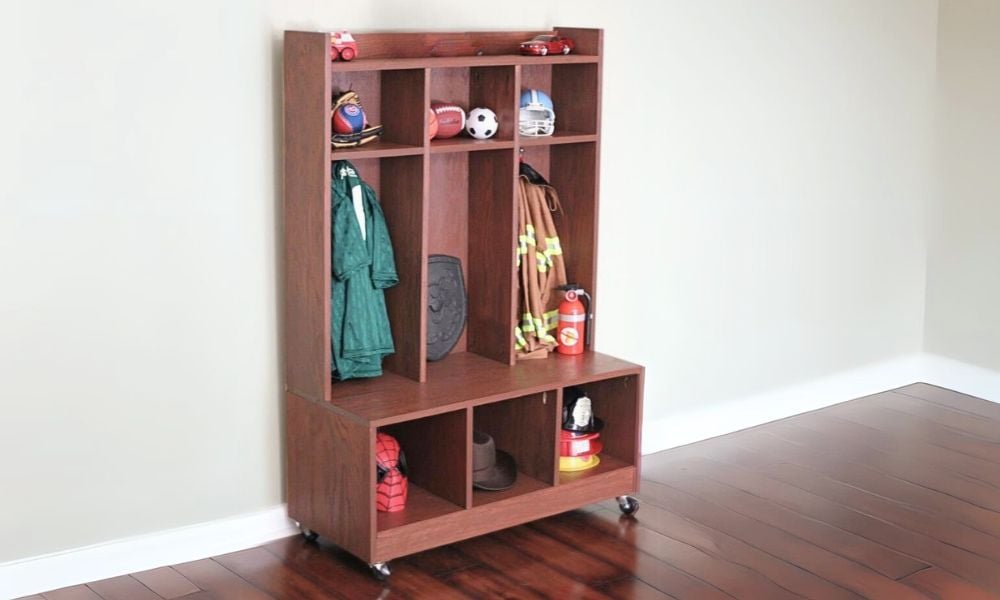
Specifications
| Project type | Lockers |
|---|---|
| Room | Kids and Toys |
| Style | Children's and Kid's Room Furniture and Toy Plans |
| Difficulty | Intermediate |
Dimensions
Use the size-specific shopping and cut lists below.
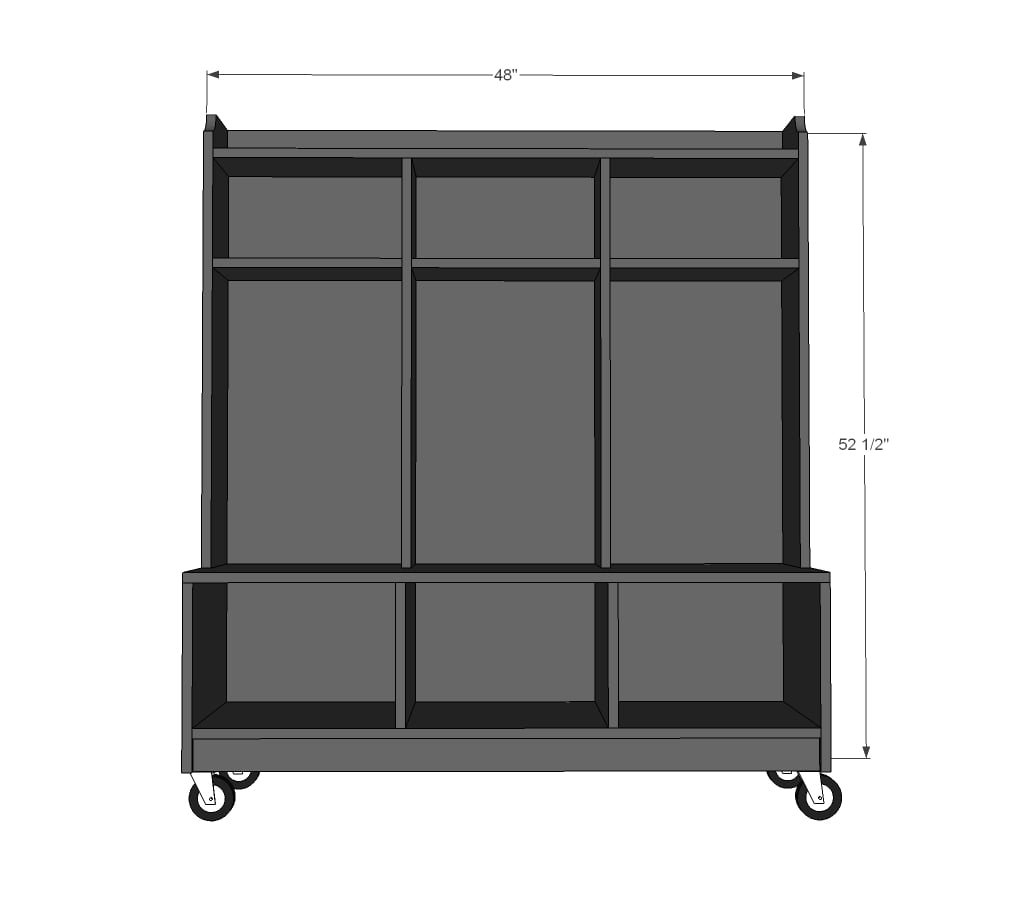
Shopping List
- 1 – sheet ¾” thick plywood
- 4 – 4 feet long 1x3 boards in matching species
- 1 – half sheet ¼” plywood in matching species
- 4 – caster wheels with plates
- 1 ¼” Pocket hole screws
- 1 ¼” brad nails
- Wood glue
- 3/4" Edge Banding in matching wood veneer
Cut List
- 1 – 3/4" plywood @ 15-3/4" x 48”
- 2 – 3/4" plywood @ 15-3/4" x 14”
- 2 – 3/4" plywood @ 15-3/4" x 10 3/4”
- 1 – 3/4" plywood @ 15-3/4" x 46 1/2”
- 3 – 1x3 @ 46-1/2"
- 2 – 3/4" plywood @ 7-3/4" x 36-1/4”
- 1 – 3/4" plywood @ 7-3/4" x46-1/2”
- 2 – 3/4" plywood @ 7-3/4" x 33”
- 1 – ¼” plywood 48” x 48”
- 3 – 3/4" plywood @ 7-3/4" x 15”
Tools
- measuring tape
- square
- pencil
- safety glasses
- hearing protection
- kreg-jig
- drill
- circular saw
- sander
- countersink drill bit
Step-by-step Instructions
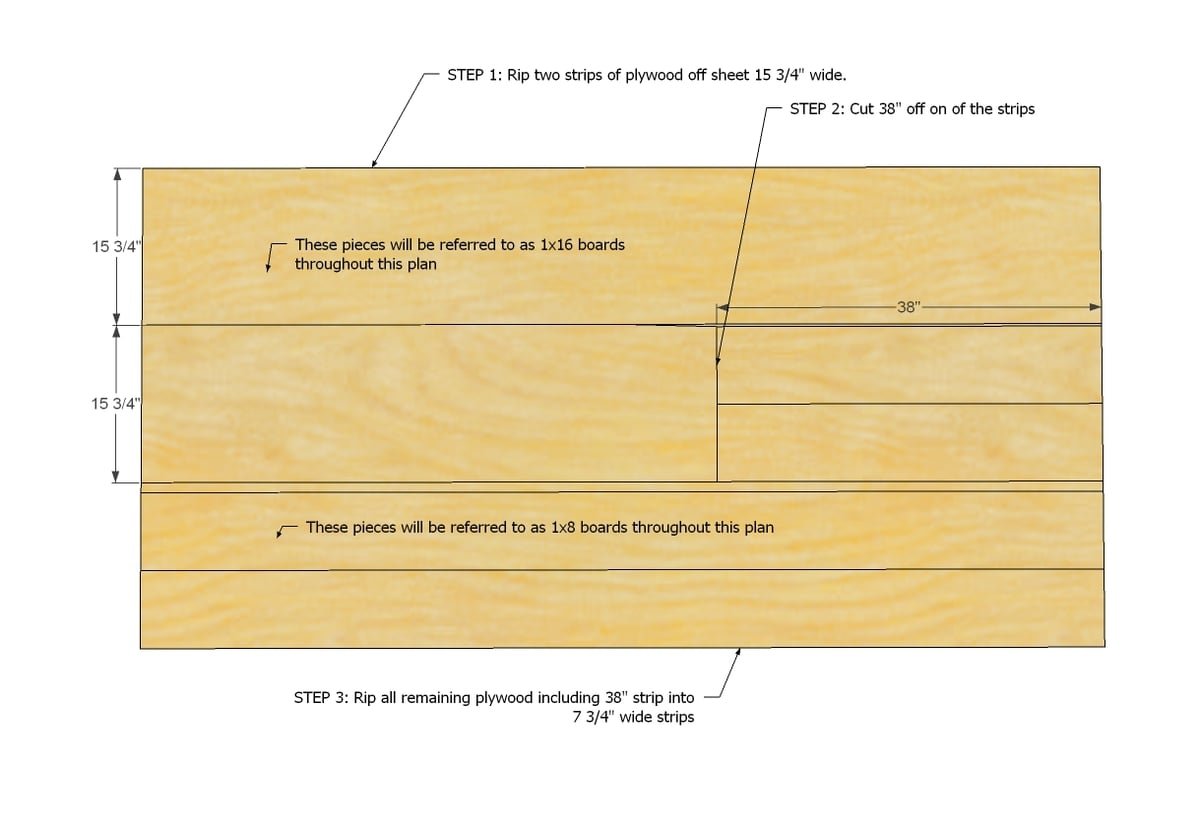
The first step is to break the plywood panel down in size.
Rip two strips, 8 feet long by 15-3/4" wide. Then cross cut 38" off one of the strips. Rip the remaining strip and the 38" strips into pieces 7-3/4" wide. If you don't have a tablesaw, here is a method of using the circular saw to make good rip cuts:
Step 2
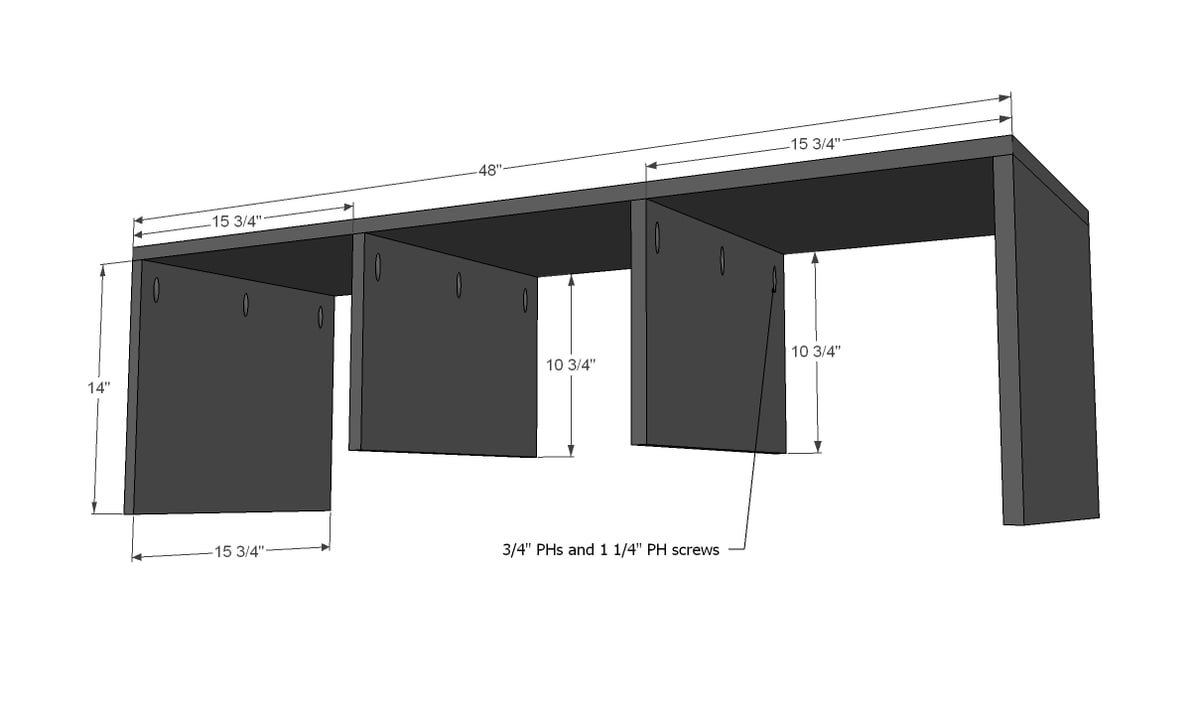
Start by assembling the base storage compartments as shown above. Measure and mark out the joint locations with a square and attach with 3/4" pocket holes and 1-1/4" pocket hole screws.
Step 3
Mark out the cubby divider locations with a square, and then attach this time with countersunk screws.
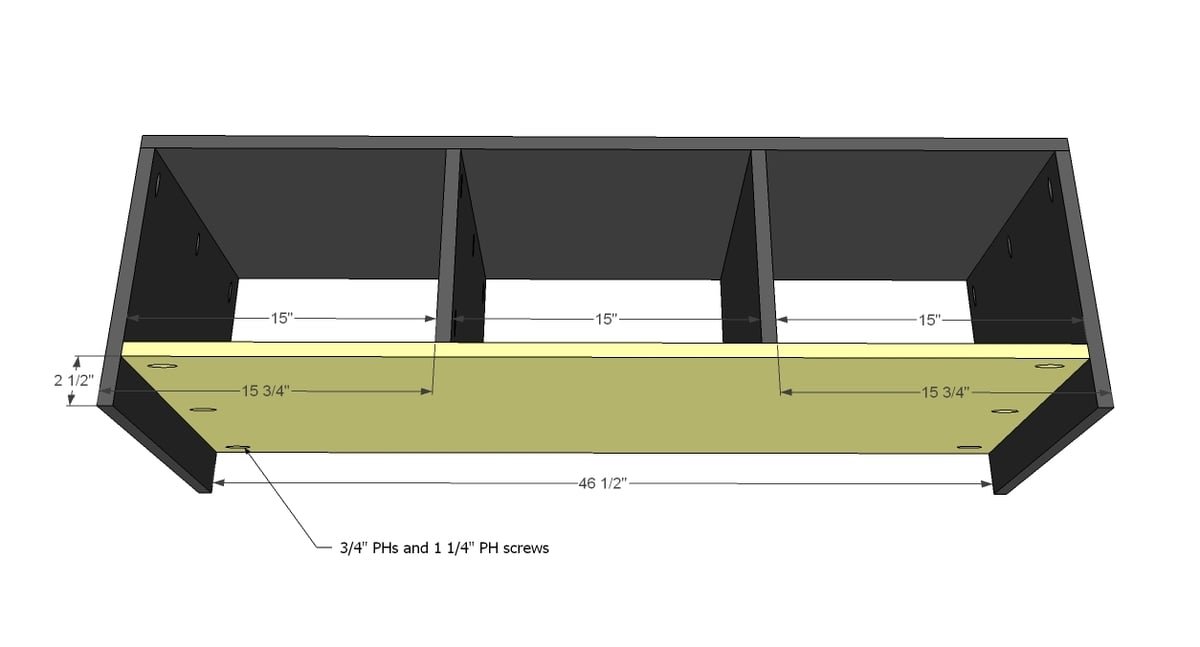
Drill 3/4" pocket holes along top edge and ends of the footers. Attach inset slightly to the base.
An alternative attachment method is 1-1/4" brad nails and wood glue.
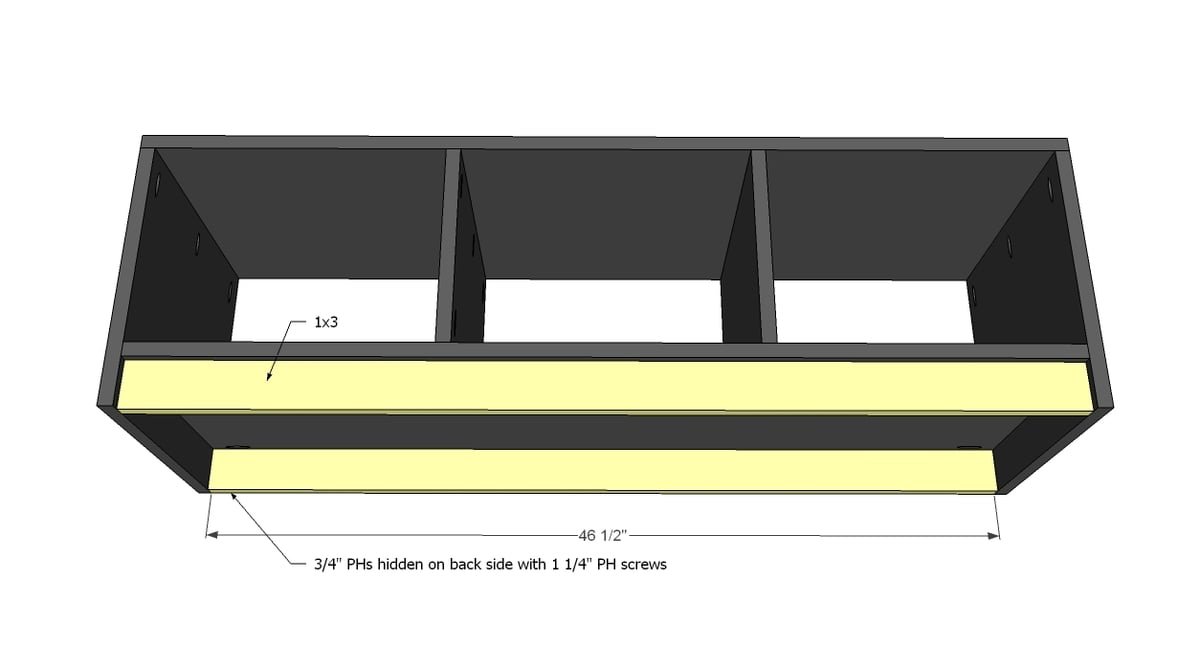
Step 5
Attach the 1x3s under the bench with 1-1/4" brad nails and wood glue.
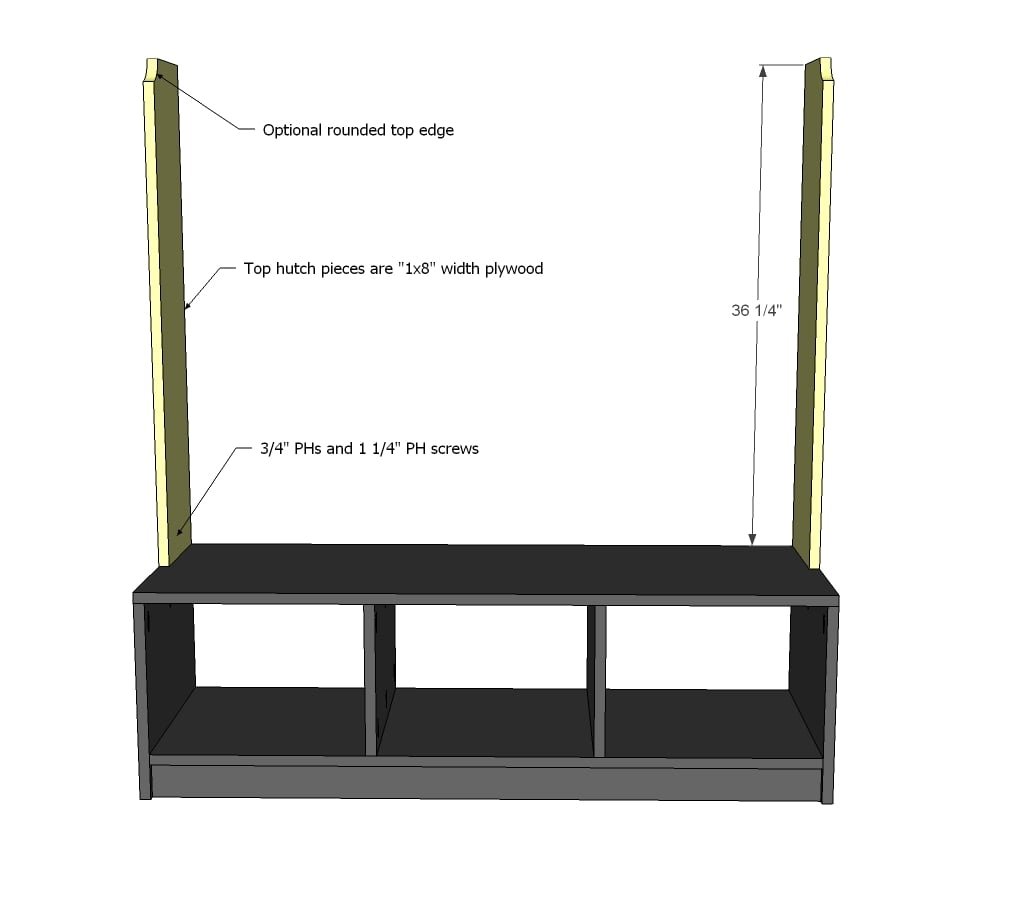
Step 6
Build the upper hutch with 3/4" pocket holes and 1-1/4" pocket hole screws.
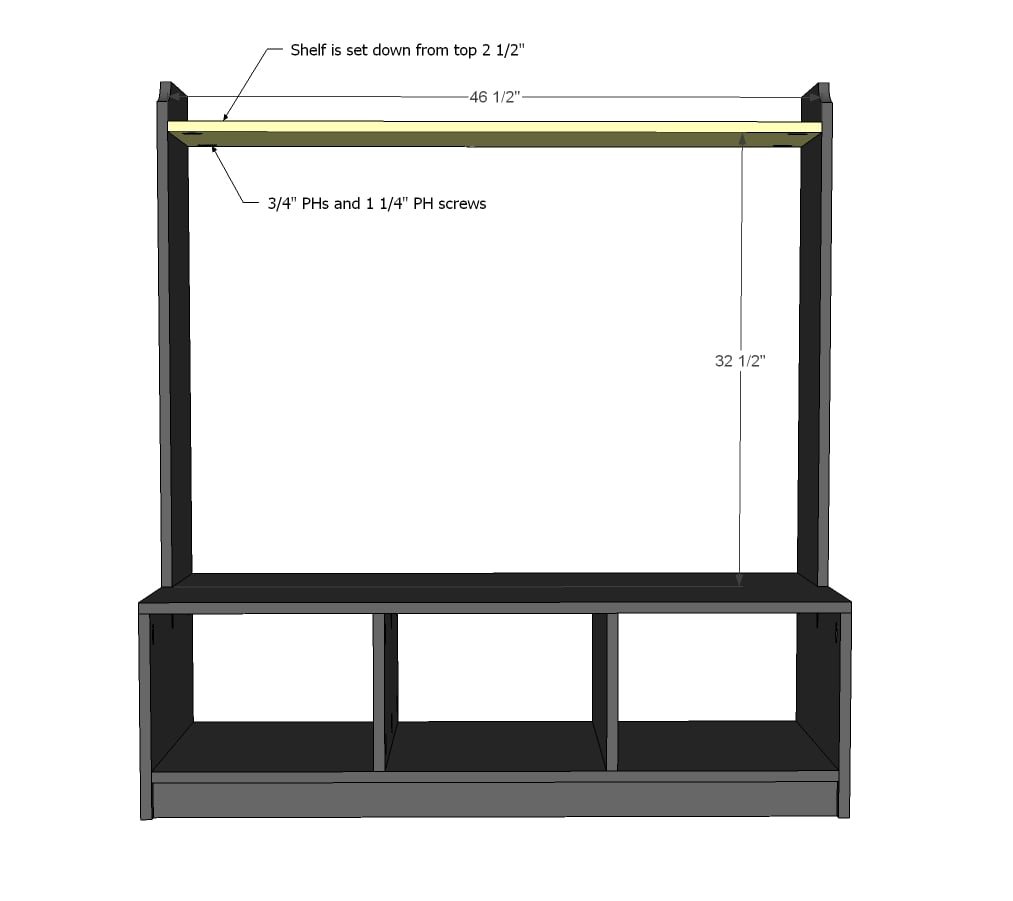
Step 7
And then attach the dividers. NOTE: These should actually be 33" long.
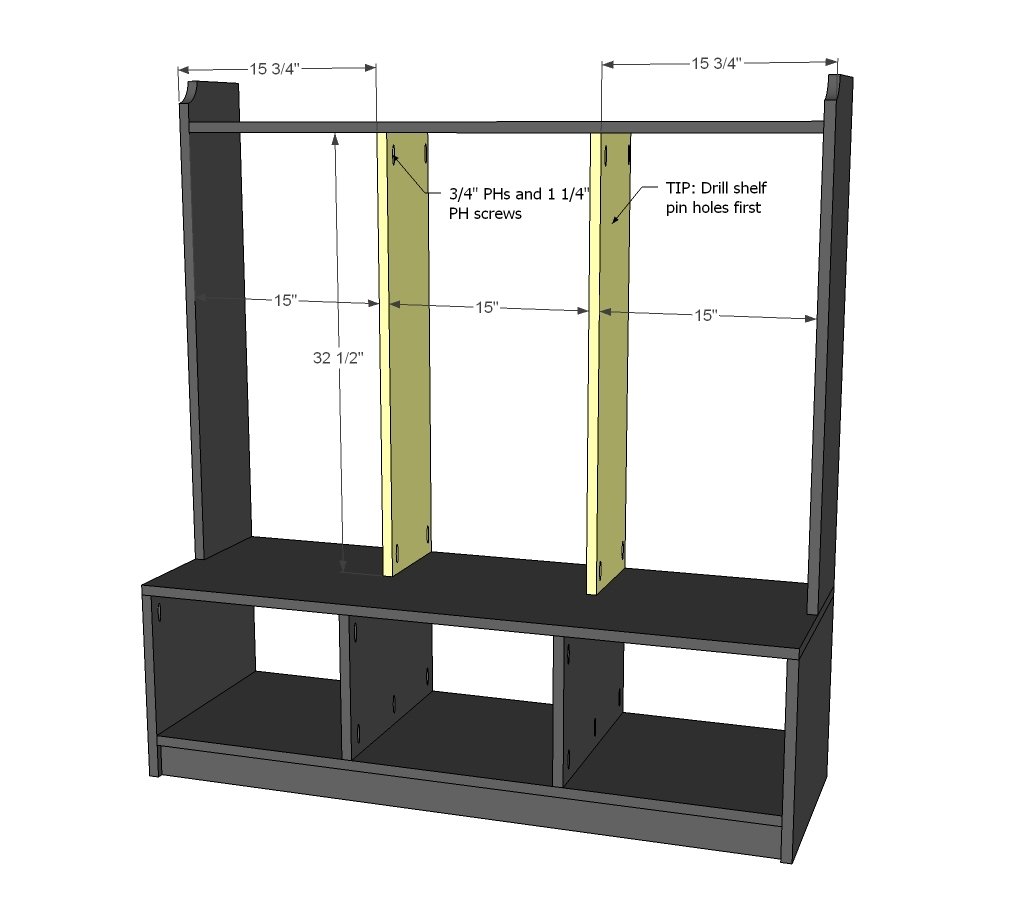
Step 8
Followed by the back header - do the same, drill 3/4" pocket holes along ends and bottom edge and attach as you did the footers.
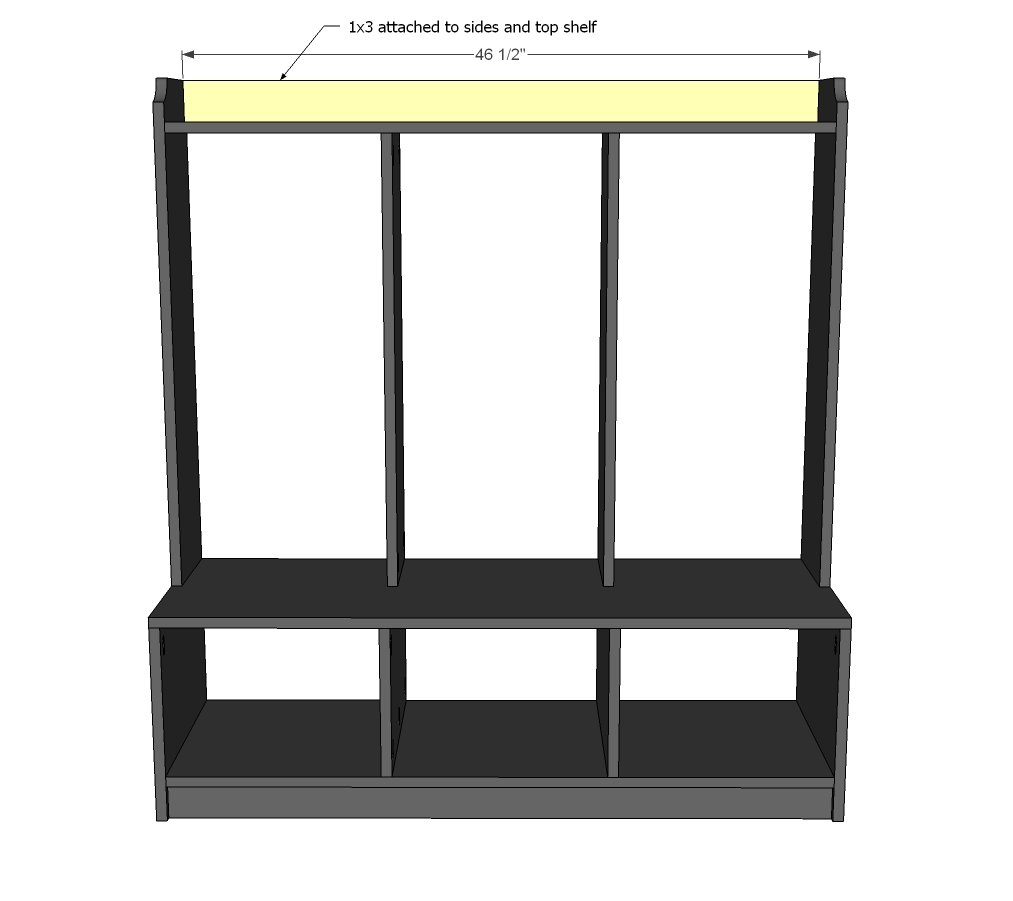
Step 9
Finally, attach back with glue and nails.
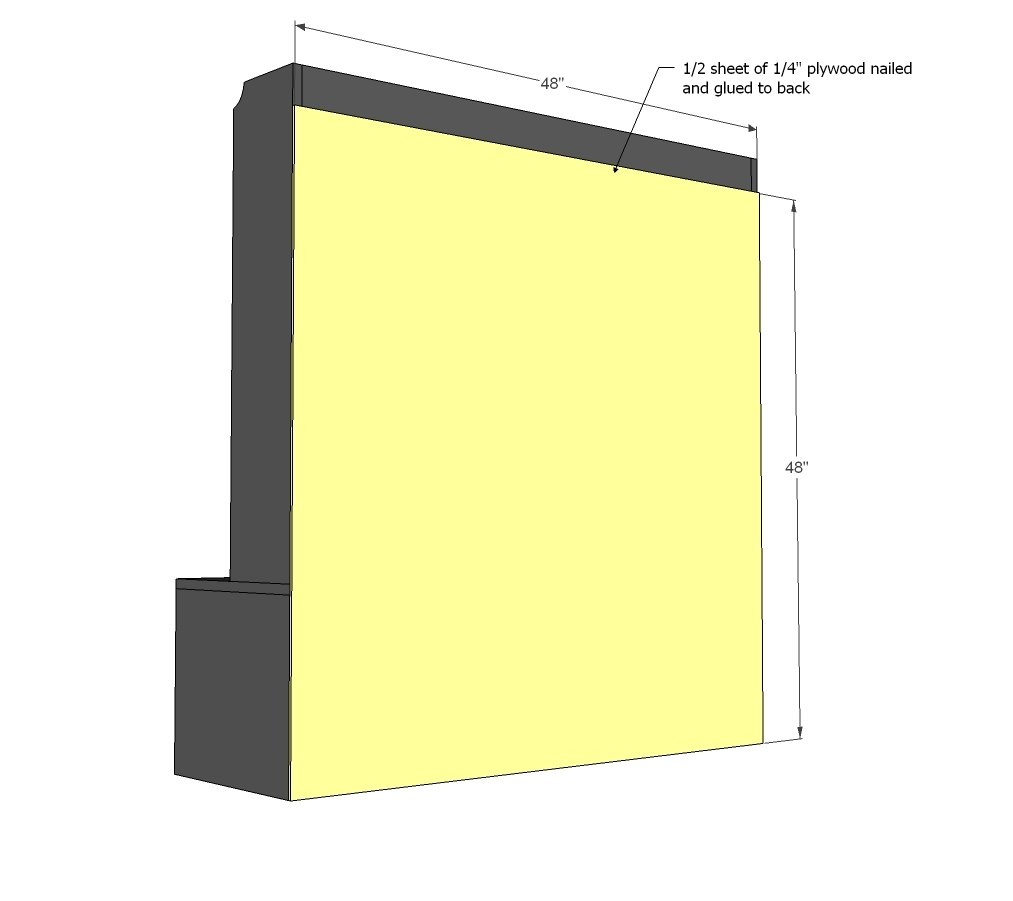
Step 10
NOTE: For the shelves, I used shelf pins and recommend attaching a 1x3 to back underside of the shelf to attach hooks to. Then when you move your shelf down or up, the hook goes too.
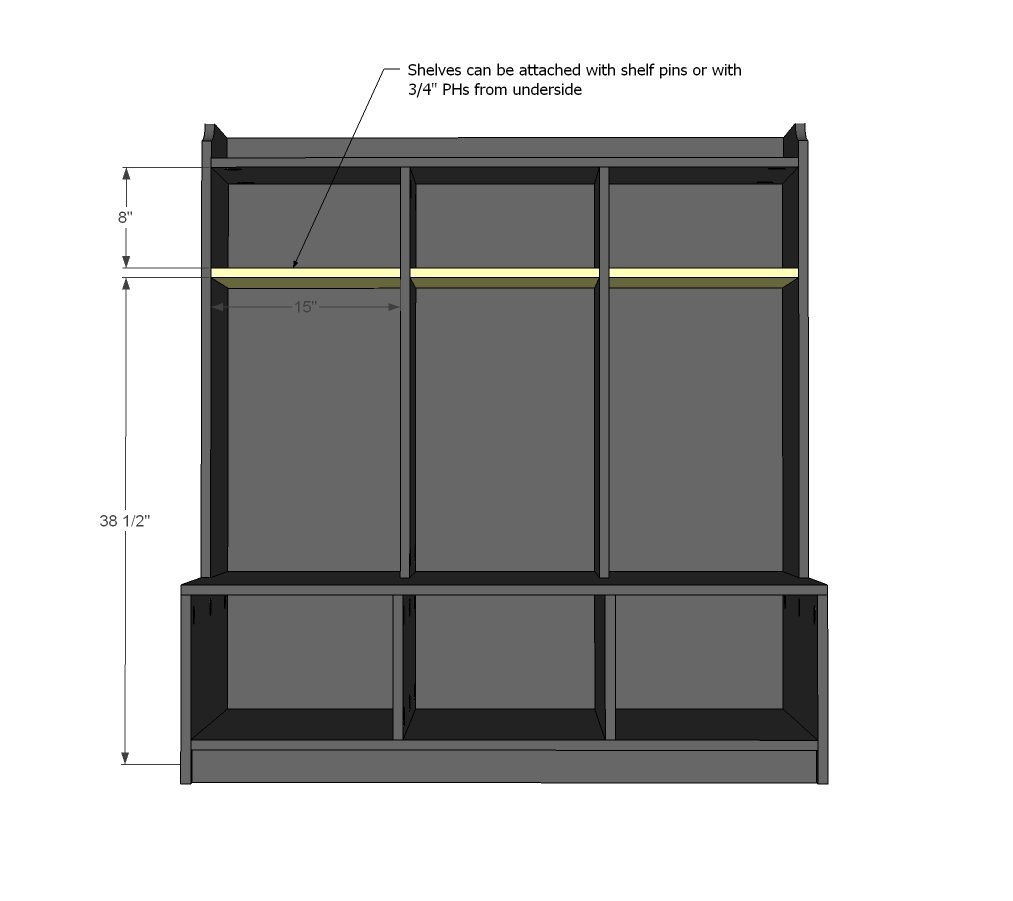
Finishing
Sand all surfaces, starting with a medium grit and finishing with fine. Wipe off the dust, fill any holes or gaps with wood filler, and sand smooth once dry. Apply primer if you're painting, then finish with your choice of paint or stain and seal with a durable clear topcoat. For outdoor projects, use exterior-rated primer, paint or stain, and sealer so the piece stands up to the weather.
Source (temporary): https://www.ana-white.com/woodworking-projects/one-sheet-plywood-hall-tree