Open Base Unit for Modular Playroom Storage Wall
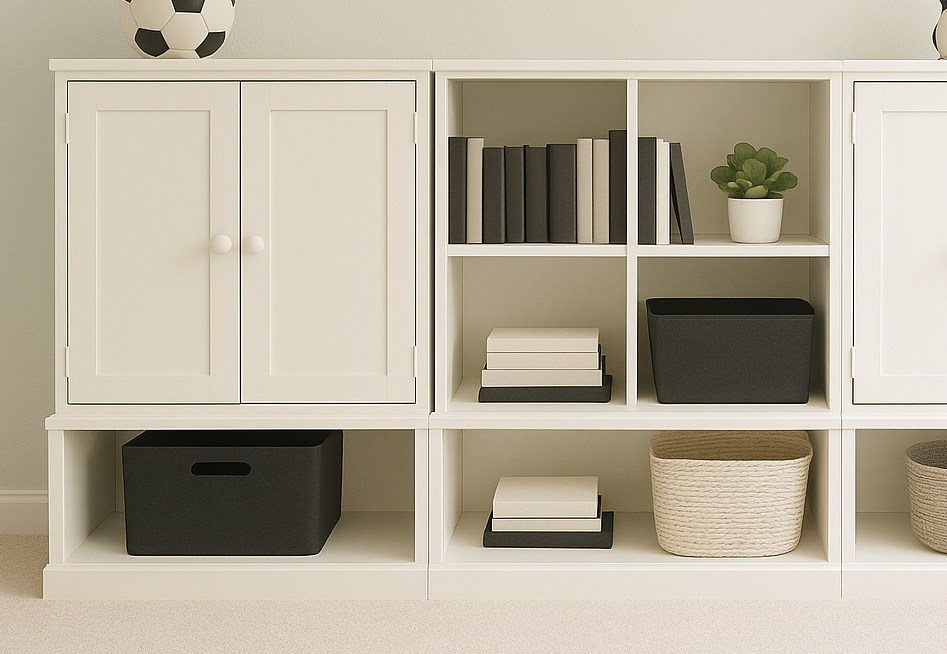
Open Base for Modular Playroom Storage System Looking to create a beautiful, functional storage wall for your playroom? We’ve got you covered inspired by the Pottery Barn Kids Cameron system! This sturdy open base is the foundation for your dream storage wall. Built from durable 3/4" plywood, it’s made to last, easy to refinish, and simple to repair—perfect for growing families. Add as many base units as you need to fit your space and storage goals. Part of our Modular Playroom Storage Wall Collection, this open base doubles as a bench and works perfectly with the matching drawer unit, cubby hutches, or media console to create your own customized setup. design image is rendered from plans Related Plans: Explore the full Modular Playroom Storage Wall Collection »
Specifications
| Project type | Media and Entertainment Centers |
|---|---|
| Room | Storage Solutions |
| Style | Children's and Kid's Room Furniture and Toy Plans |
| Difficulty | Beginner Projects |
| Estimated cost | $20 - $50 |
Dimensions
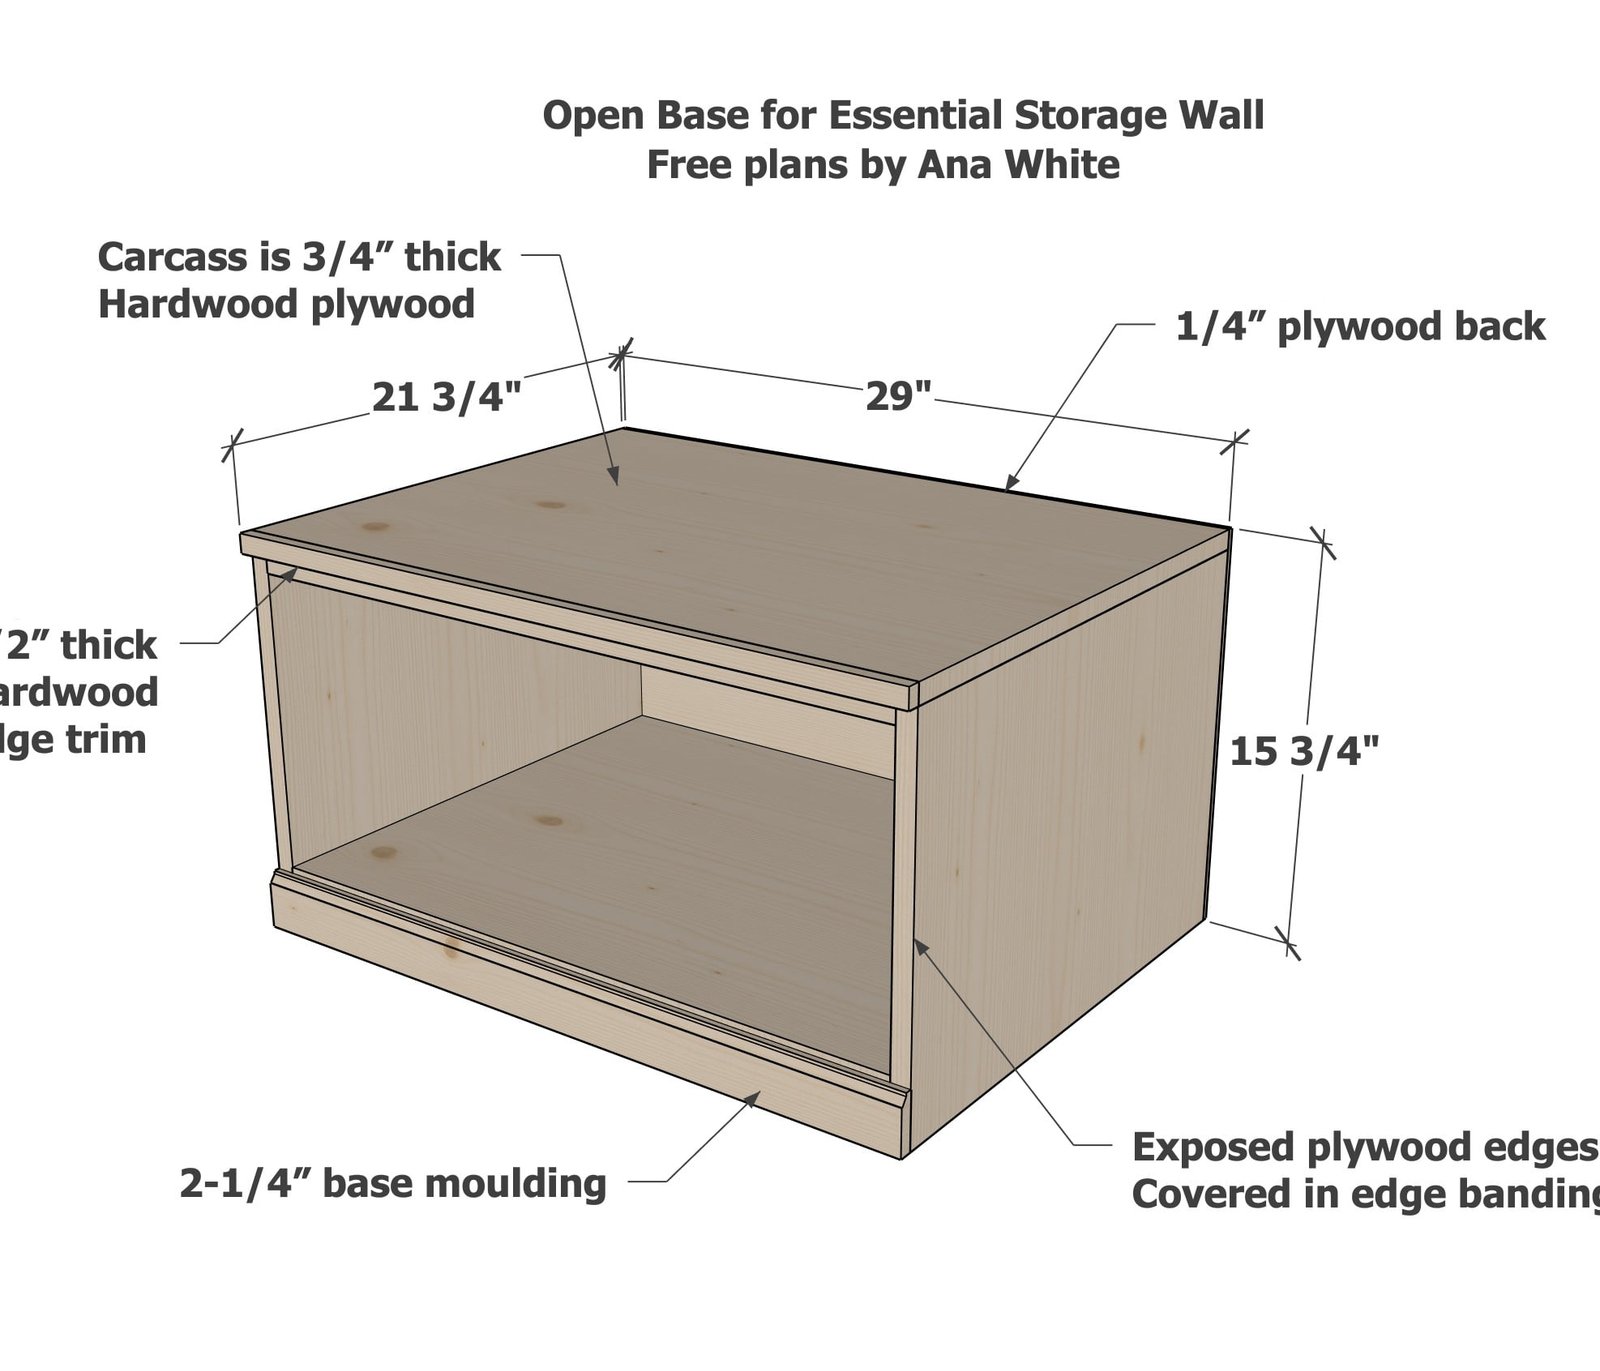
Use the size-specific shopping and cut lists below.
Shopping List
- 1 sheet of cabinet grade 3/4" thick plywood, ripped into strips 21" wide (you'll need strip 8 feet long, per base, you will have an extra strip leftover)
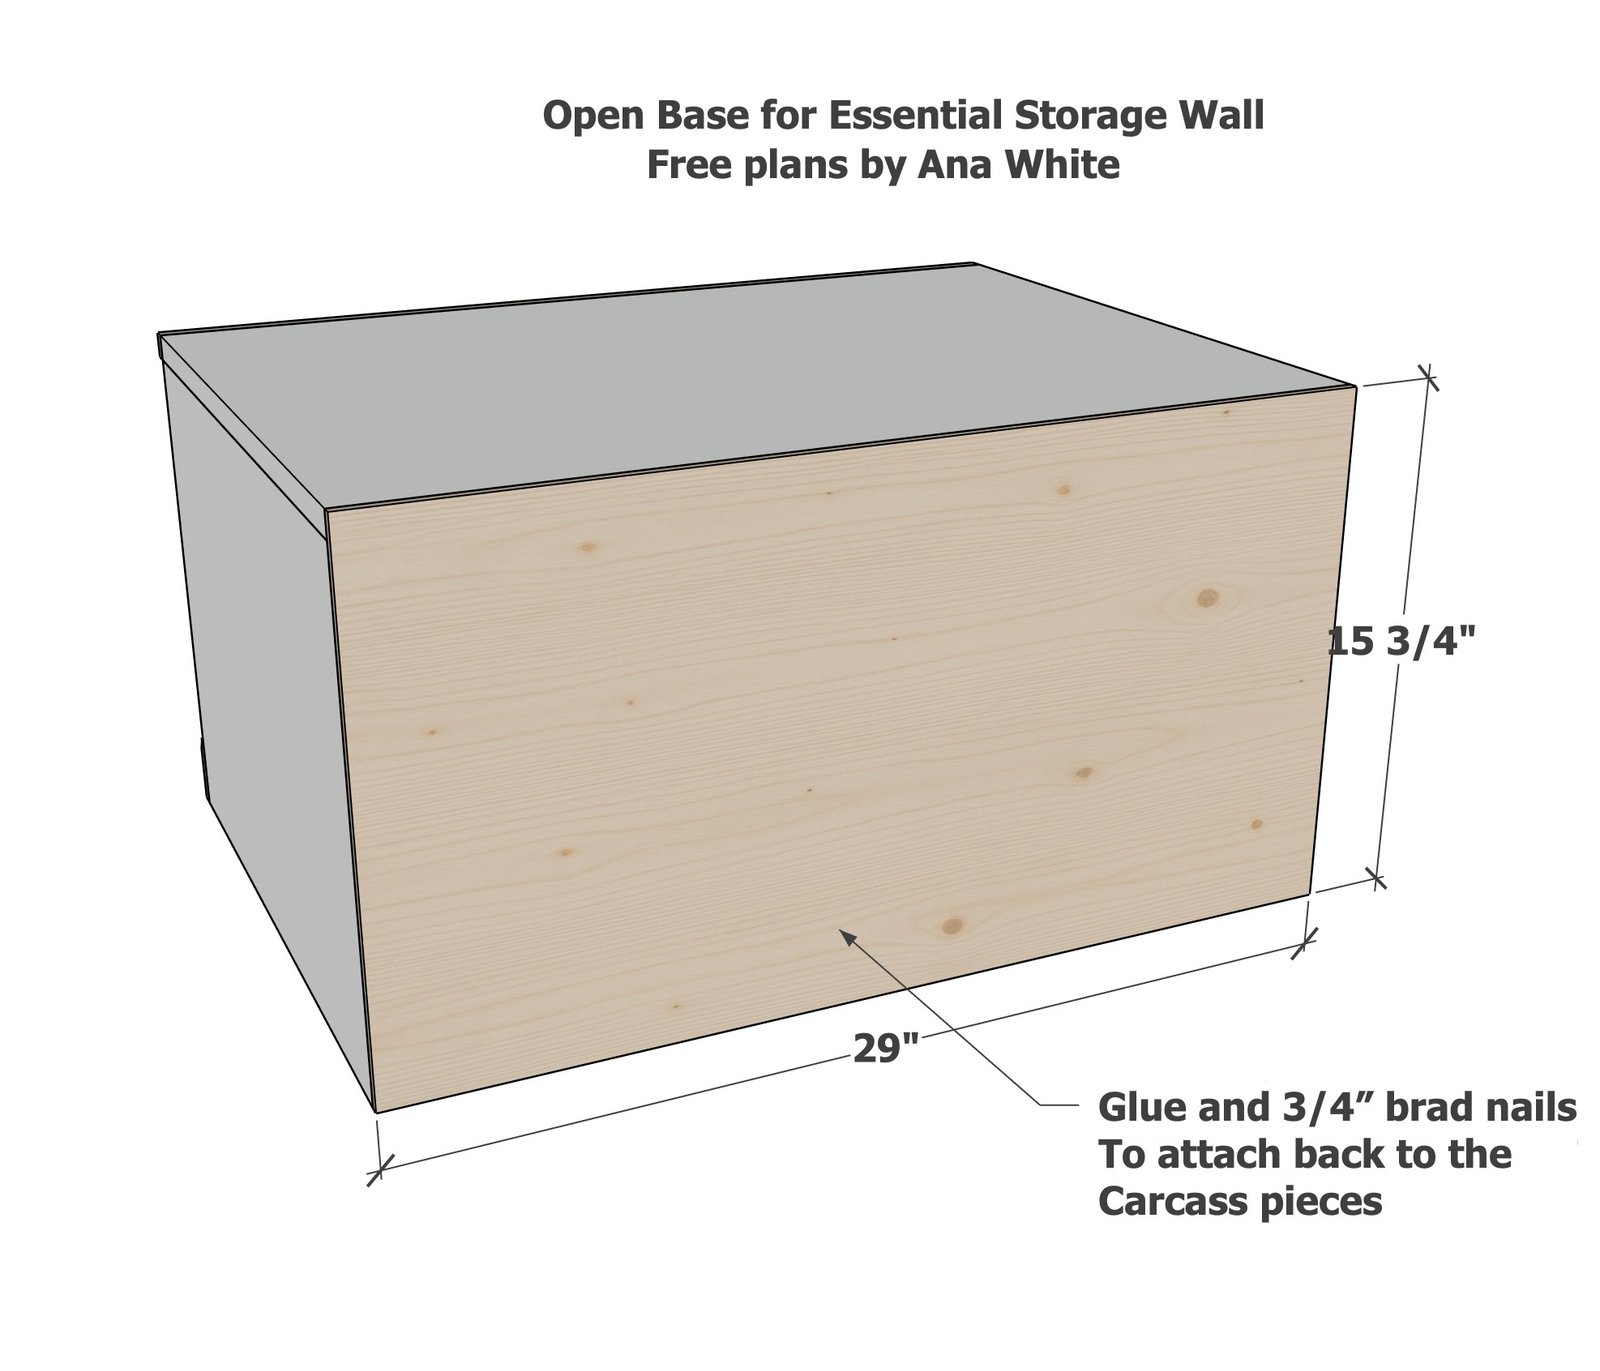
- 1/4" plywood piece, 29" x 15-3/4" (for the back)
- 1x3 @ 5 feet long (can use furring strips)
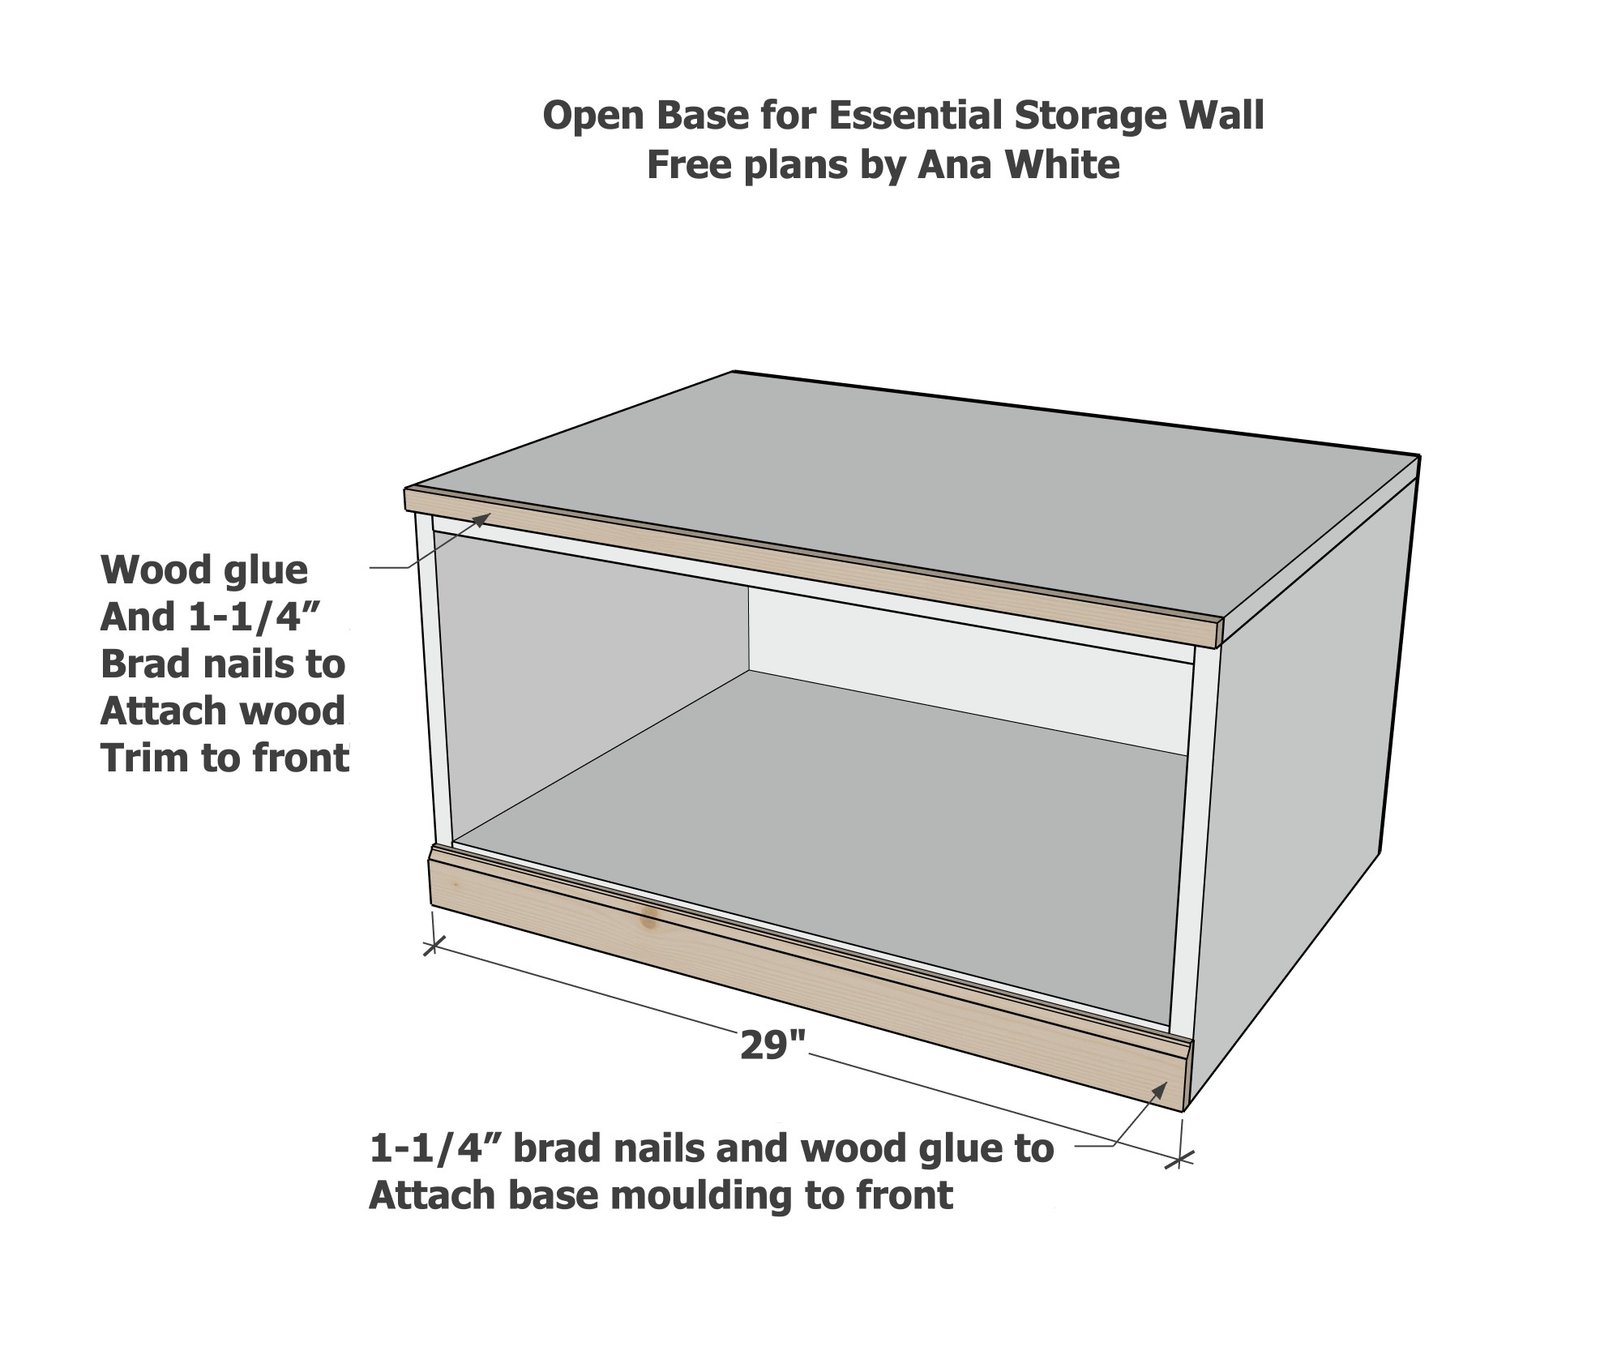
- 30" of 2-1/4" base moulding
- 30" of 1/2" x 3/4" square dowel or wood trim
- 5-8 feet of 3/4" wide edge banding for finishing plywood front edges
- 1-1/4" pocket hole screws (about 25)
- 1-1/4" brad nails
- 3/4" brad nails
- wood glue
- sand paper
- finishing supplies
Cut List
- 2 – 3/4″ plywood ripped into strips 21" wide @ 14-3/4″ (Sides) *
- 1 - 3/4" plywood ripped into strips 21" wide @ 27-1/2" (Bottom Shelf)
- 1 - 3/4" plywood ripped into strips 21" wide @ 29" (Top)
- 2 - 1x3 @ 27-1/2" - inner supports
- 1 - 1/4" plywood @ 29" x 15-1/2" (back)*
- 1 - 2-1/4" base moulding @ 29" (base trim)
- 1 - 3/4" x 1/2" wood trim piece @ 29" (top front trim)
*I took 1/4" off these measurements so if adding a drawer box with drawer face, a 11-1/4" wide (1x12) drawer face would be a perfect fit. This is a change from the diagrams.
Tools
- measuring tape
- square
- pencil
- safety glasses
- kreg-jig
- compound miter saw
- table saw
- nailer
- sander
- Iron
Step-by-step Instructions
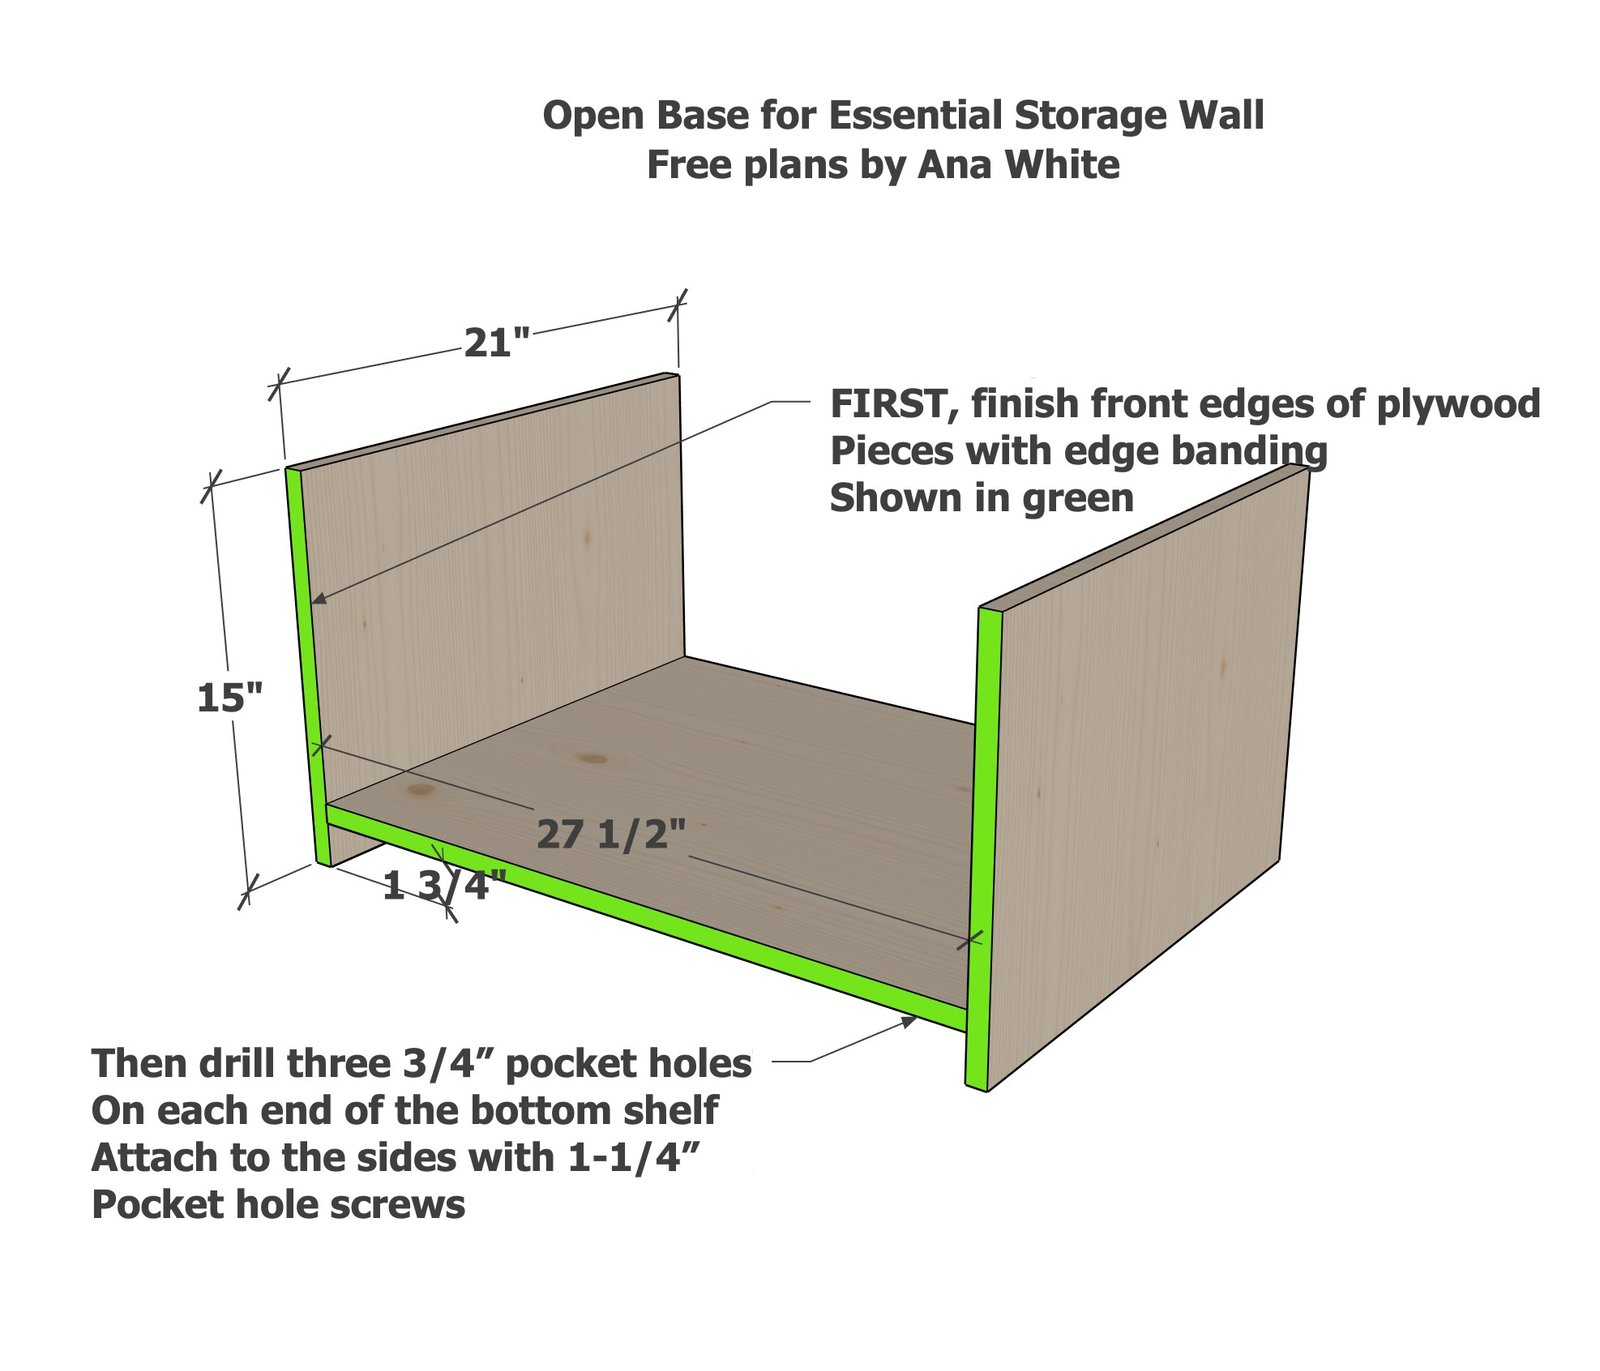
Drill three pocket holes on ends of the bottom shelf, evenly spaced.
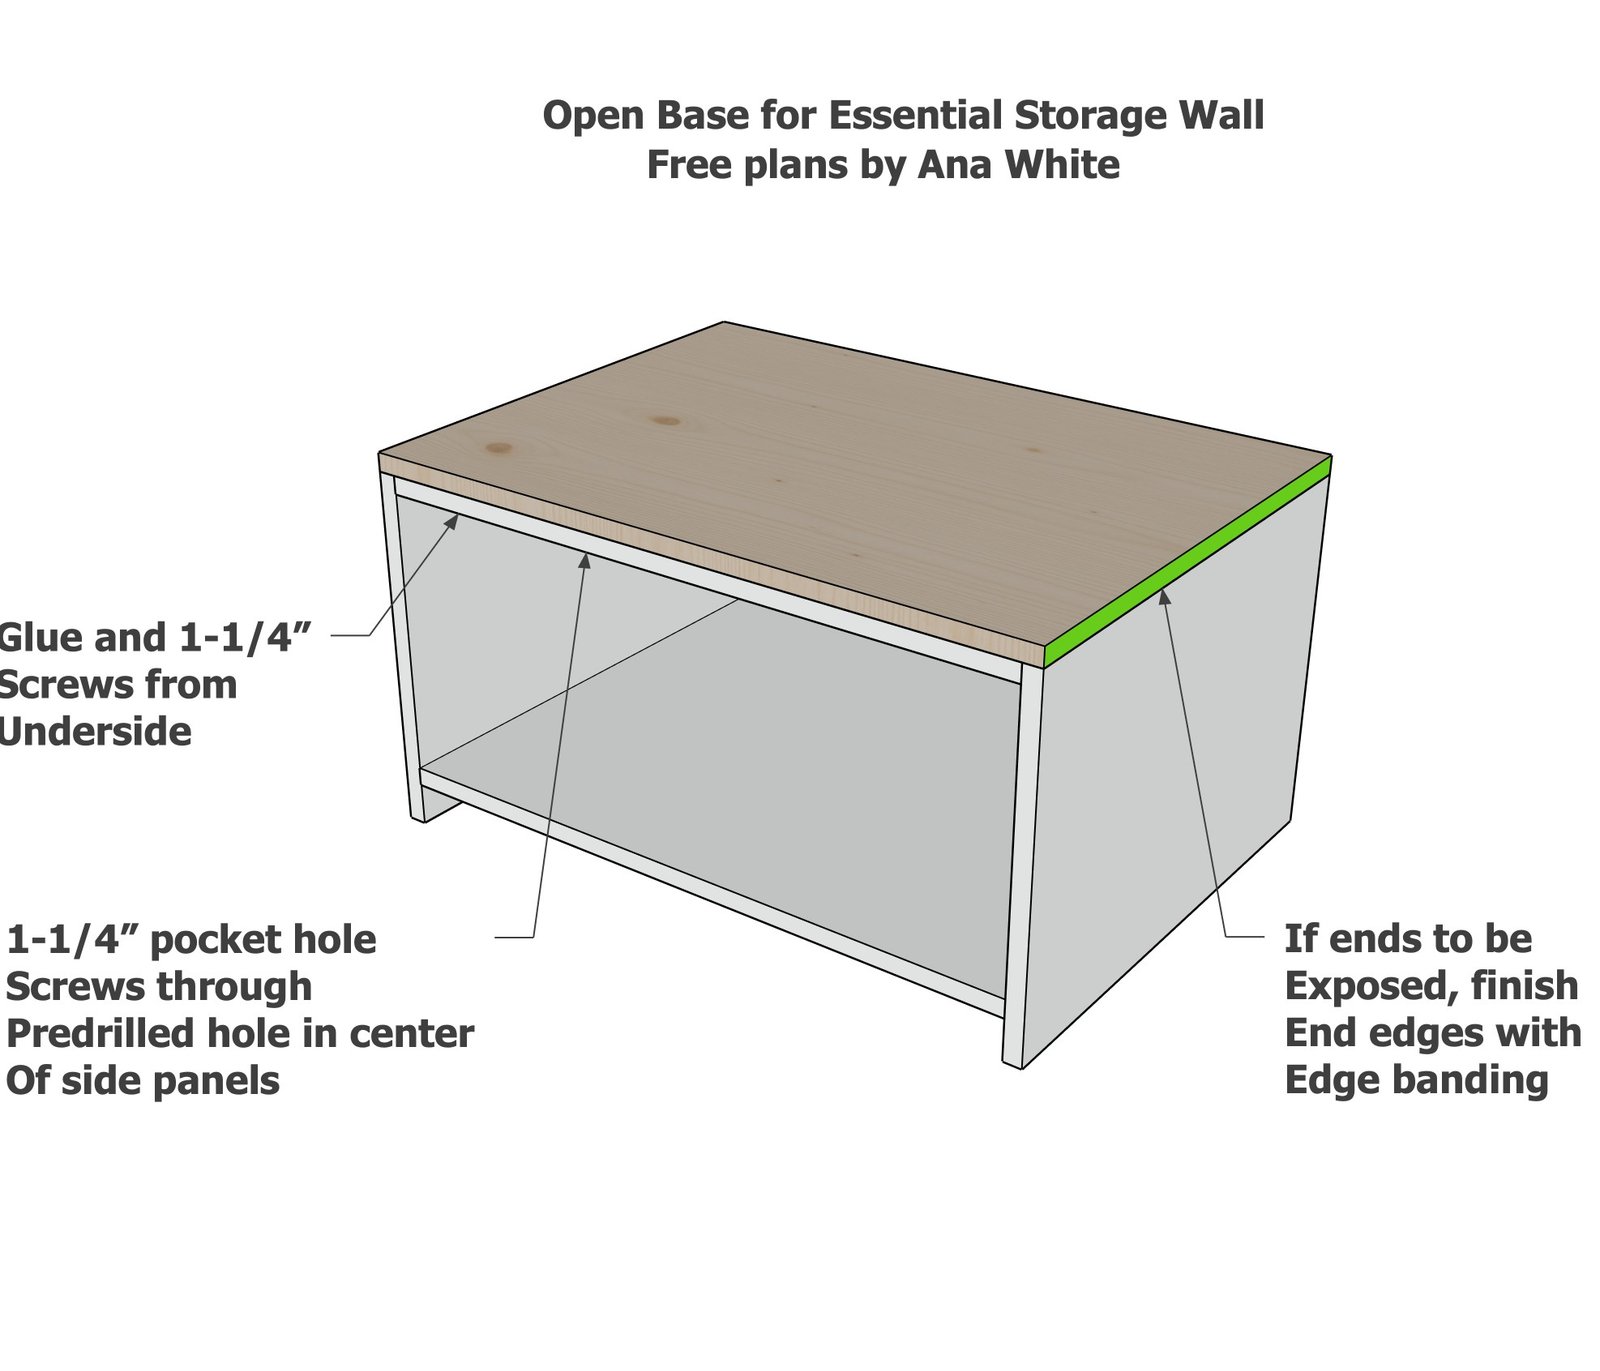
Drill ONE pocket hole in the middle of the sides (for attaching the top in later steps). Attach the bottom shelf to the sides, with a 1-3/4" gap under the bottom shelf. Make sure the pocket hole drilled in the sides is on the inside, the edge banded edges are to the front, all edges flush to the front.
Step 2
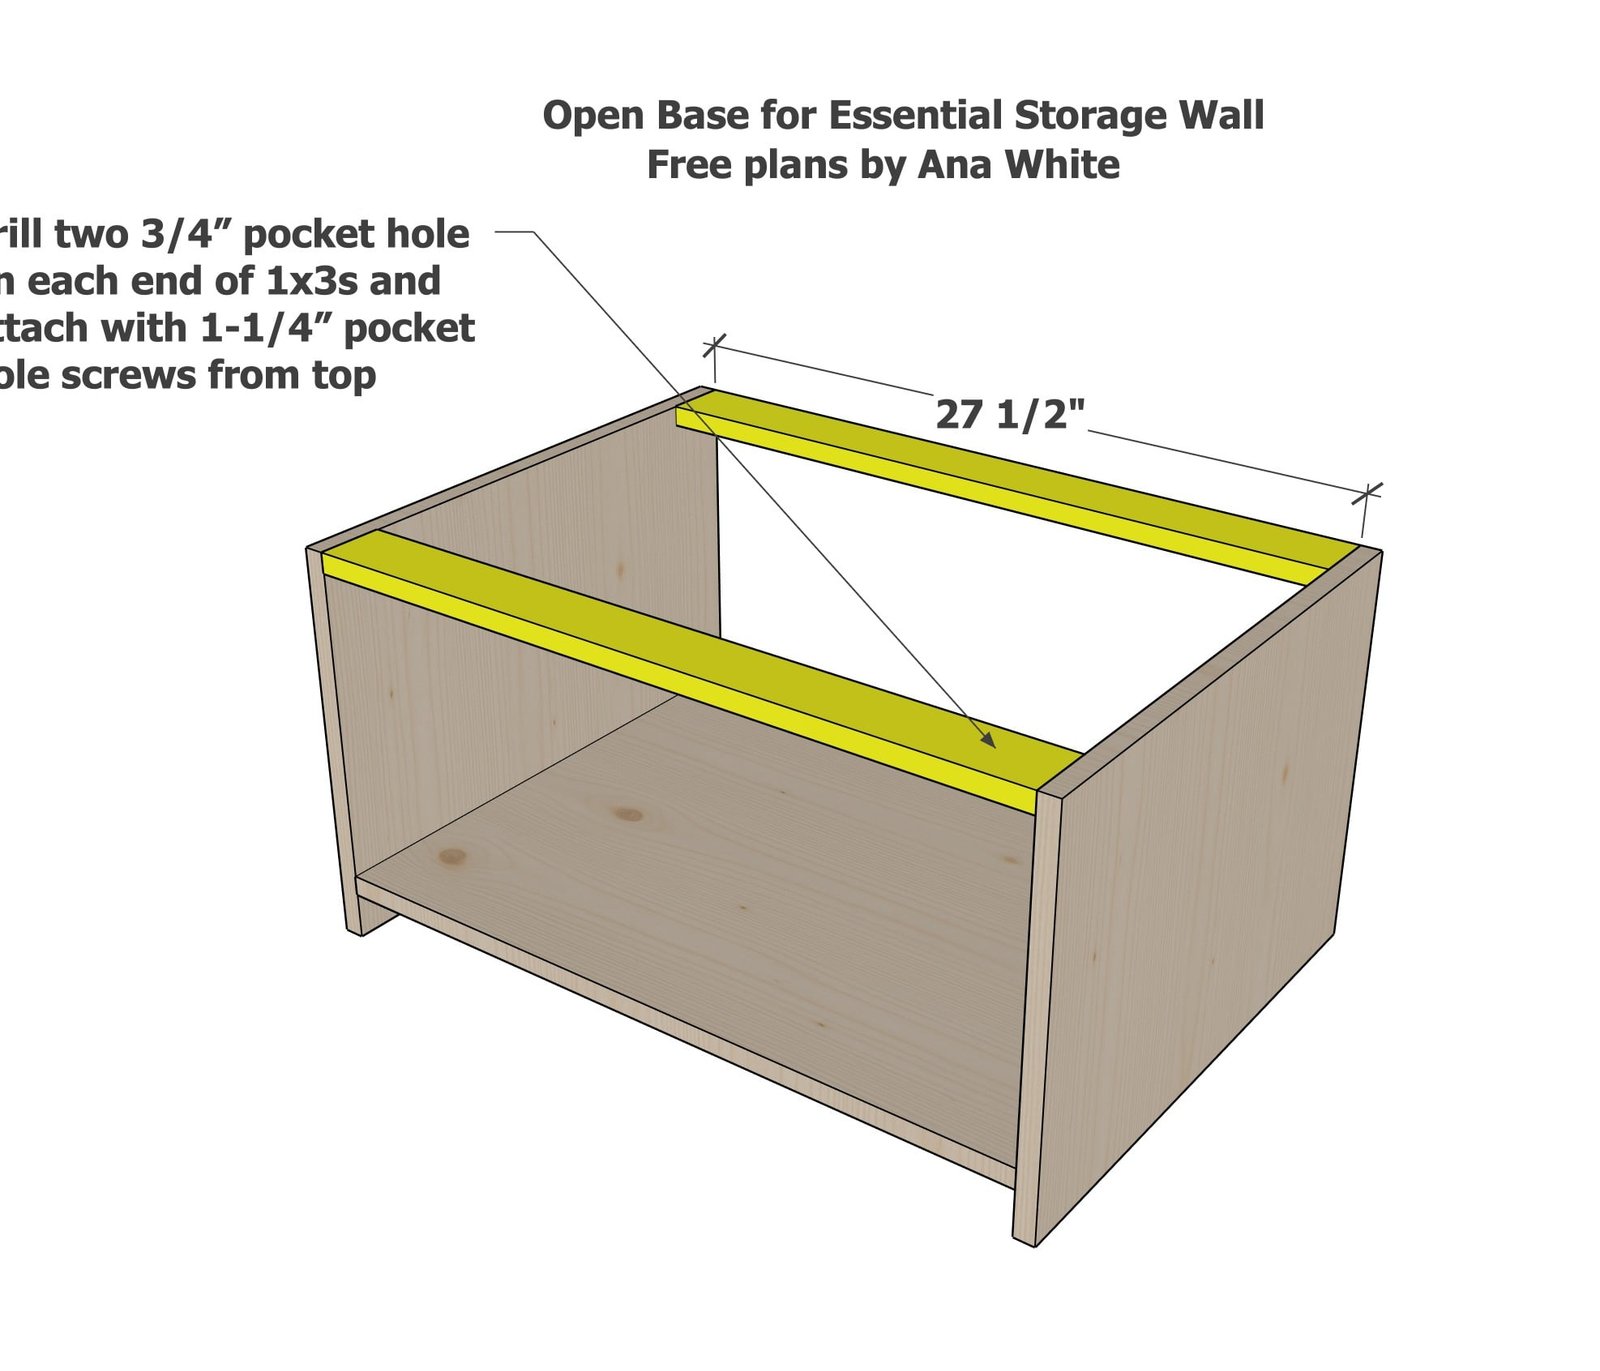
Attach the 1x3 pieces to the top as shown.
Edge band the sides of the top if will be exposed.
Attach to the top with 1-1/4" screws (can use pocket hole screws), and through the pocket holes in the center of the sides (drilled in step 1)
Step 4
Attach 1/4" plywood to the back with 3/4" brad nails and glue. Use the plywood to square up the back.
Step 5
Add the front trim pieces with glue and brad nails. Sand well, so there are no rough edges that could catch and cause the top trim to fail.
Finishing
Sand all surfaces, starting with a medium grit and finishing with fine. Wipe off the dust, fill any holes or gaps with wood filler, and sand smooth once dry. Apply primer if you're painting, then finish with your choice of paint or stain and seal with a durable clear topcoat. For outdoor projects, use exterior-rated primer, paint or stain, and sealer so the piece stands up to the weather.
Source (temporary): https://www.ana-white.com/woodworking-projects/open-base-unit-modular-playroom-storage-wall