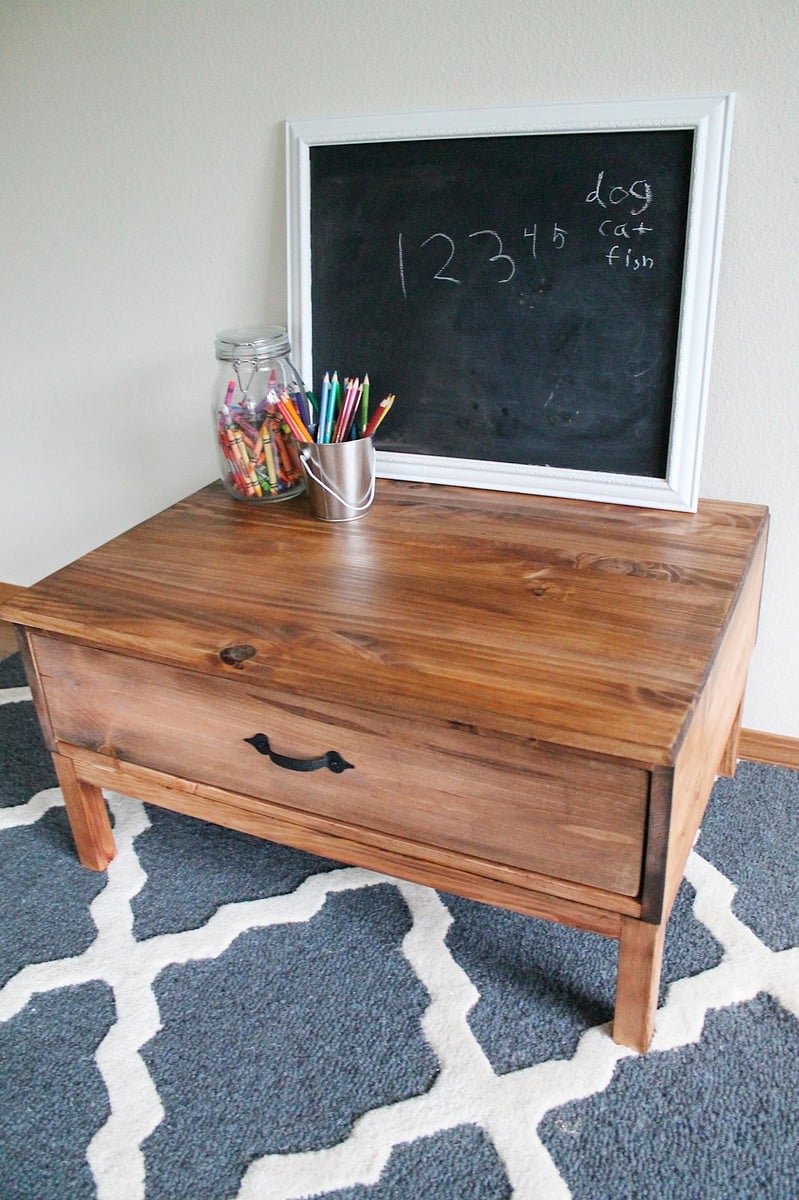
Open Drawer Base
to build an open drawer base for media wall from
Specifications
| Project type | Media and Entertainment Centers |
|---|---|
| Room | Teens |
| Style | Farmhouse Furniture |
| Difficulty | Intermediate |
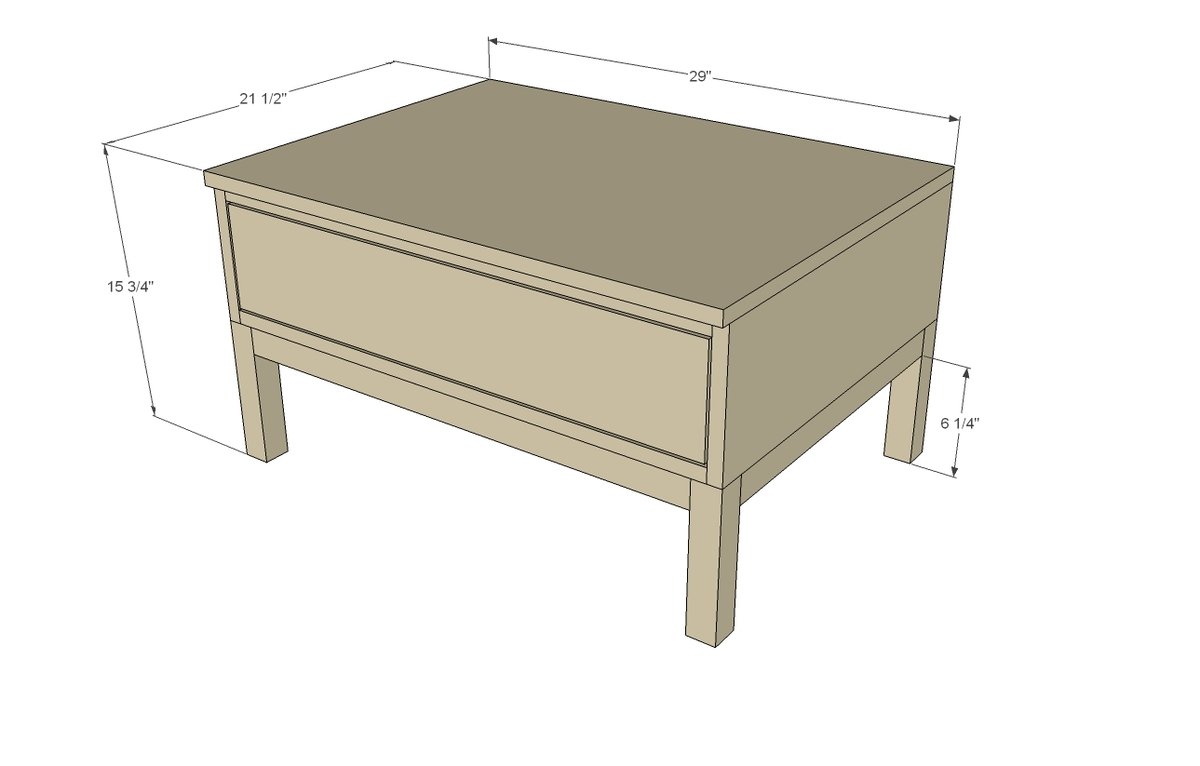
Dimensions
Use the size-specific shopping and cut lists below.
Shopping List
1 - 1/4 sheet of 3/4” hardwood plywood - or can use pine boards 1x8s for sides
2 - 1x2 @ 8 feet long
2 - 2x2 @ 8 feet long
1 - 1x4 @ 8 feet long
1 - 1x6 @ 3 feet long
1 1/4” and 2 1/2” PH screws
Cut List
2 - 3/4” plywood 7 1/4” x 21” (could also use 1x8s for these)
4 - 1x2 @ 27 1/2”
4 - 2x2 @ 7 3/4”
2 - 2x2 @ 26”
2 - 2x2 @ 18”
1 - 3/4” plywood @ 29” x 21 1/2” (top)
DRAWER
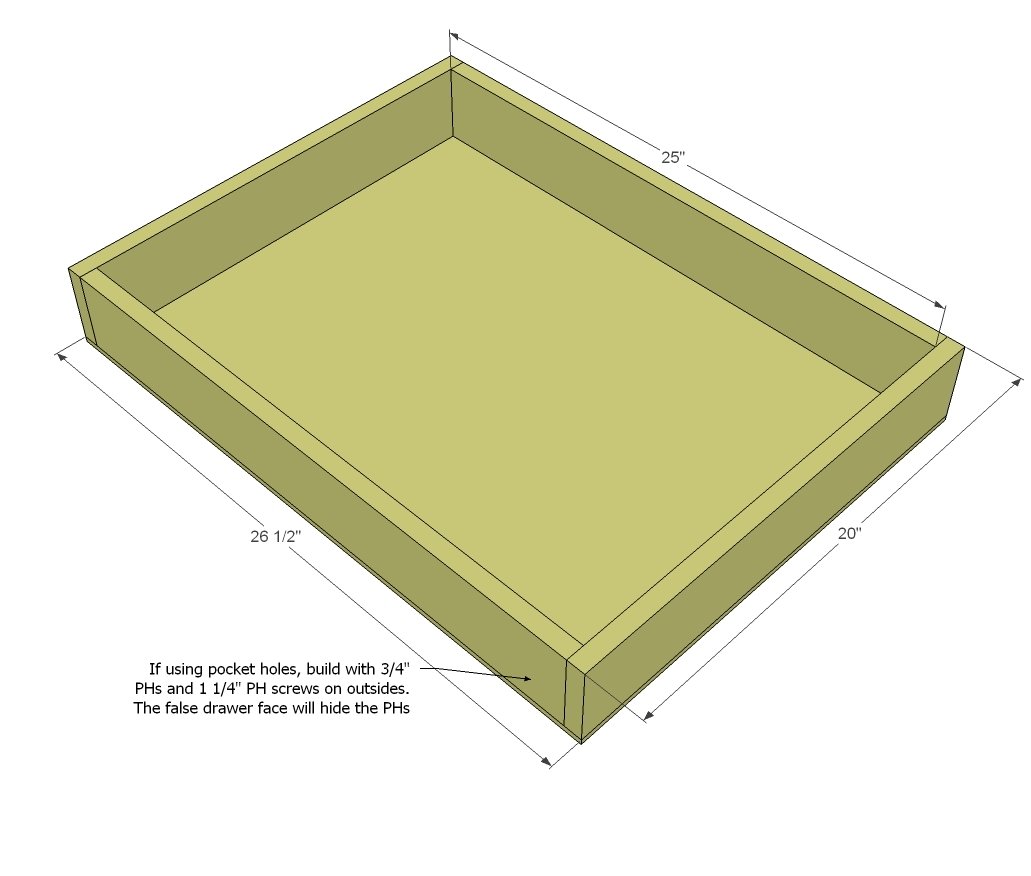
2 - 1x4 @ 25”
2 - 1x4 @ 20”
1 - 1x6 @ 27 1/4”
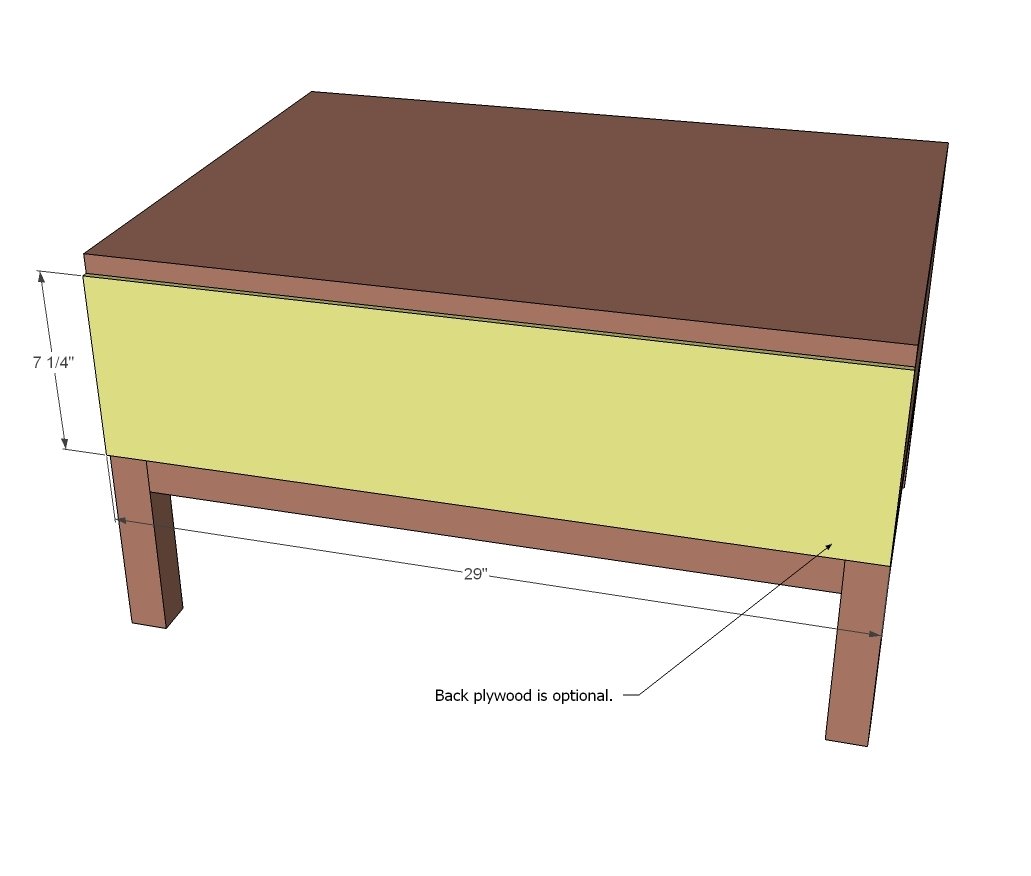
Back is optional - 7 1/4” x 29”
Tools
- measuring tape
- square
- pencil
- safety glasses
- hearing protection
- kreg-jig
- drill
- circular saw
- sander
- countersink drill bit
Step-by-step Instructions
Step 1
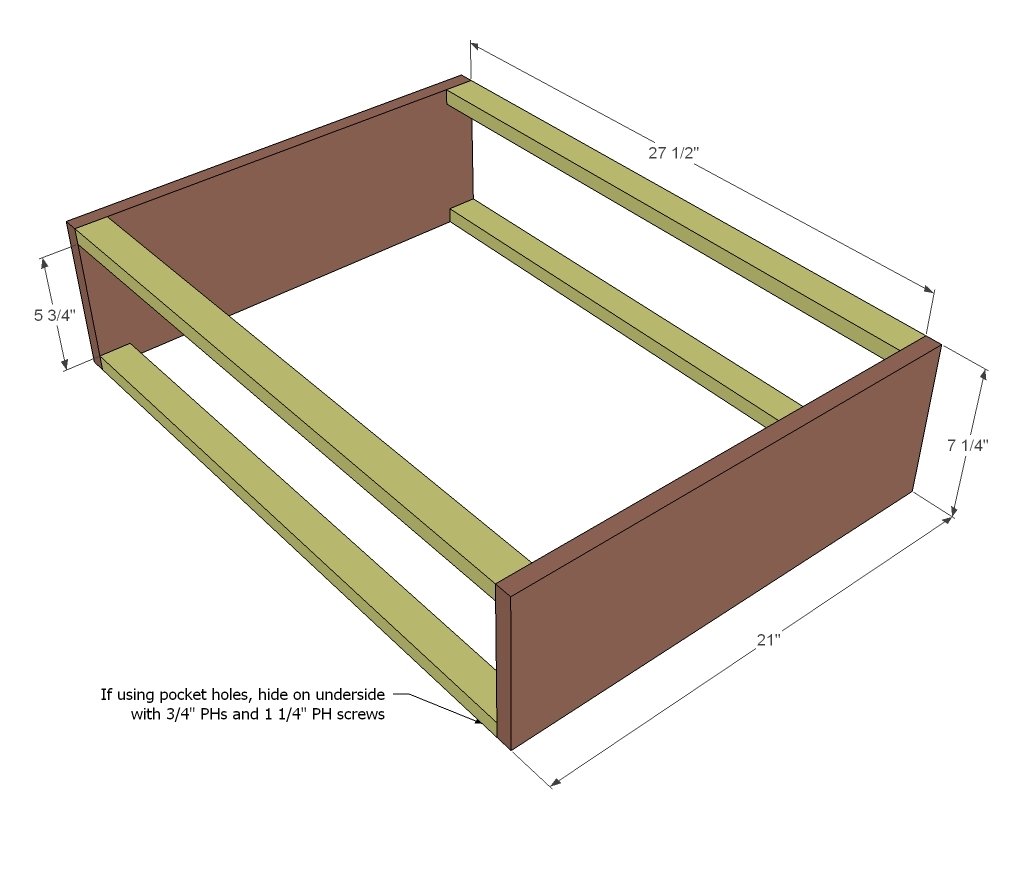
Start by attaching sides together with the four 1x2s. If you use pocket holes, keep to outsides for a stronger joint that will be hidden in later steps. CHECK FOR SQUARE!!!! Set aside.
Step 2
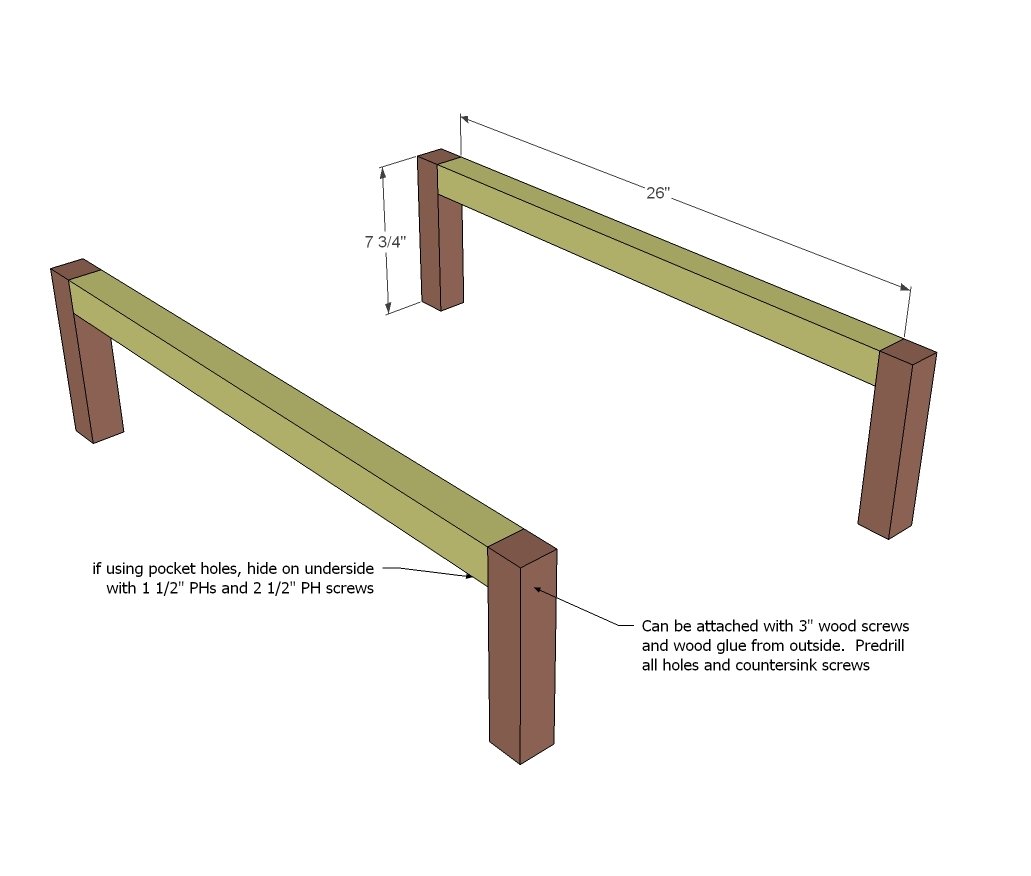
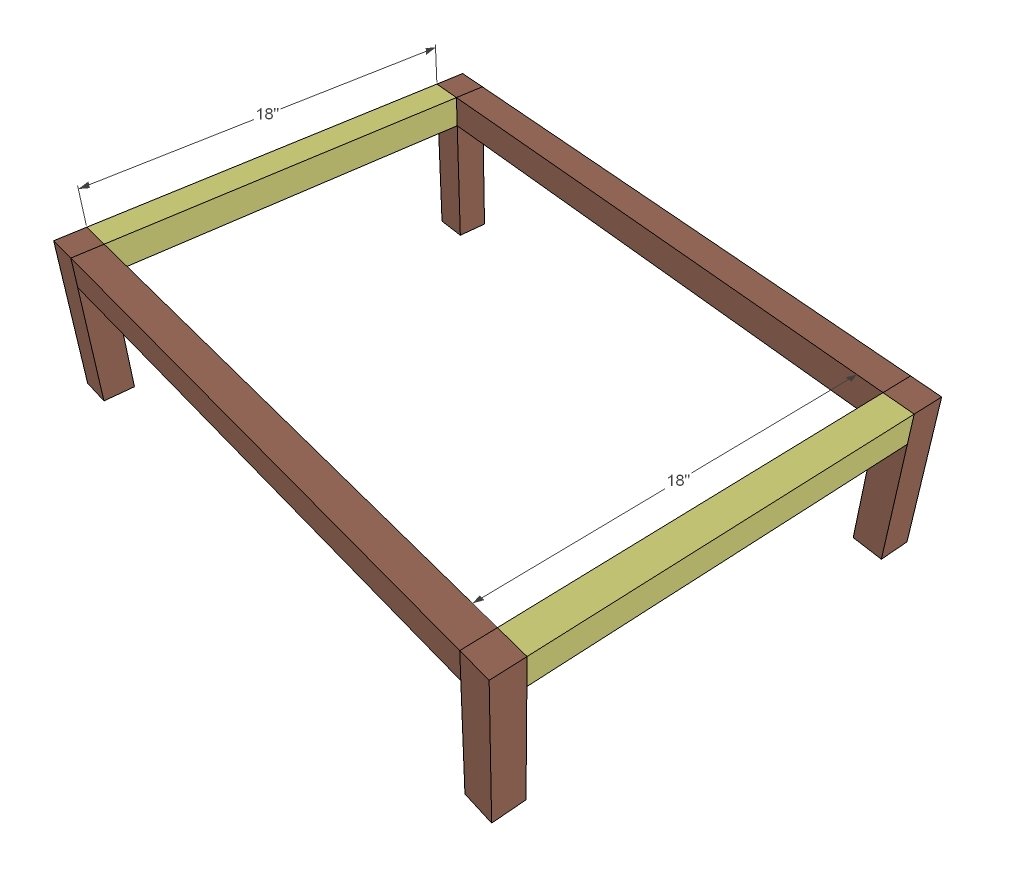
Now lets build the leg bases. Start by attaching the legs to front and back aprons.
Step 3
Then form your leg base by attaching the two side aprons.
Step 4
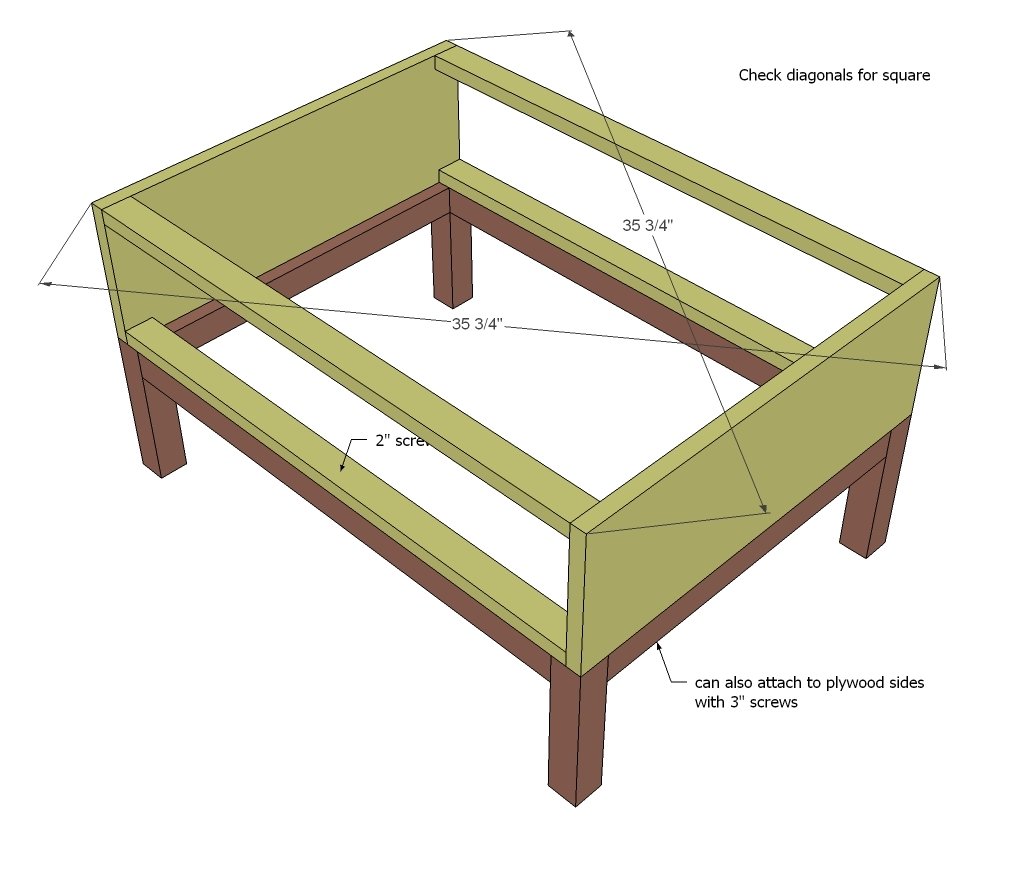
Now it's time to attach the base to the drawer box. Easy stuff, just screws the base to the drawer box. We'll leave the top off for now so we can reach in and get that drawer put on right.
Step 5
Step 6
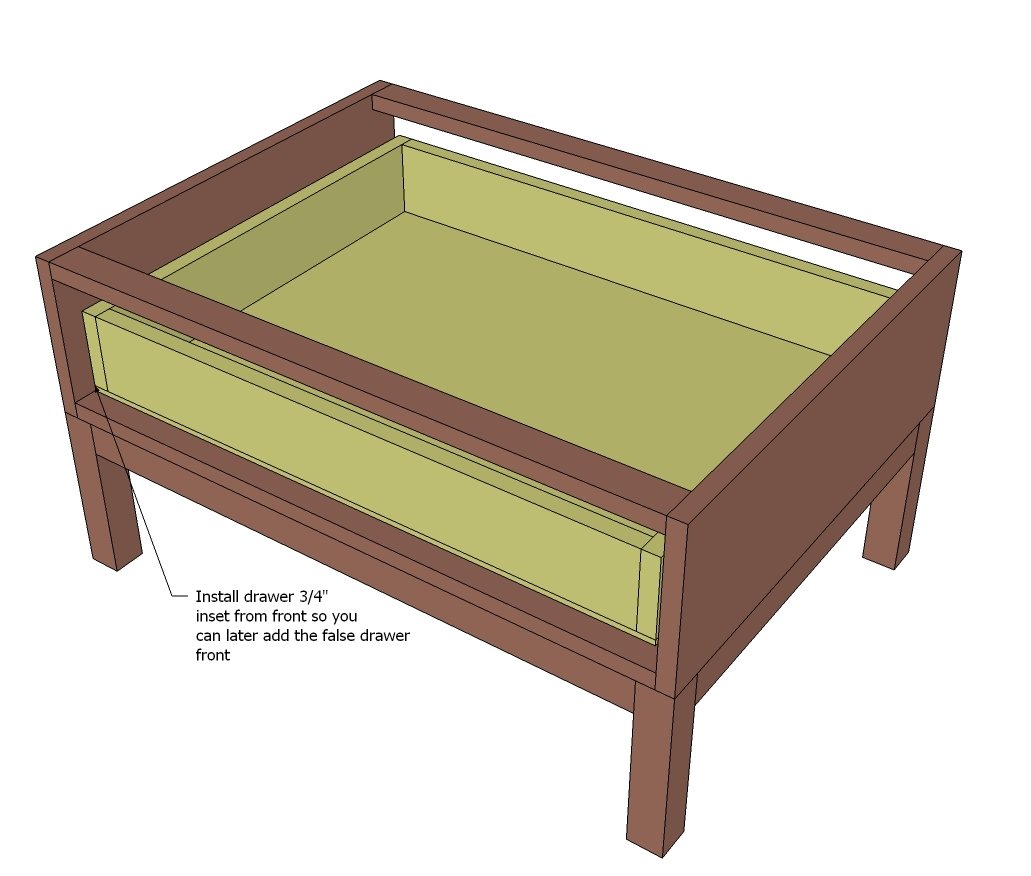
Install the drawer in the cabinet, giving 3/4" clearance to front for the false drawer face. Make sure it slides smoothly. You can shim the slides to get the drawer to slide perfectly.
Step 7
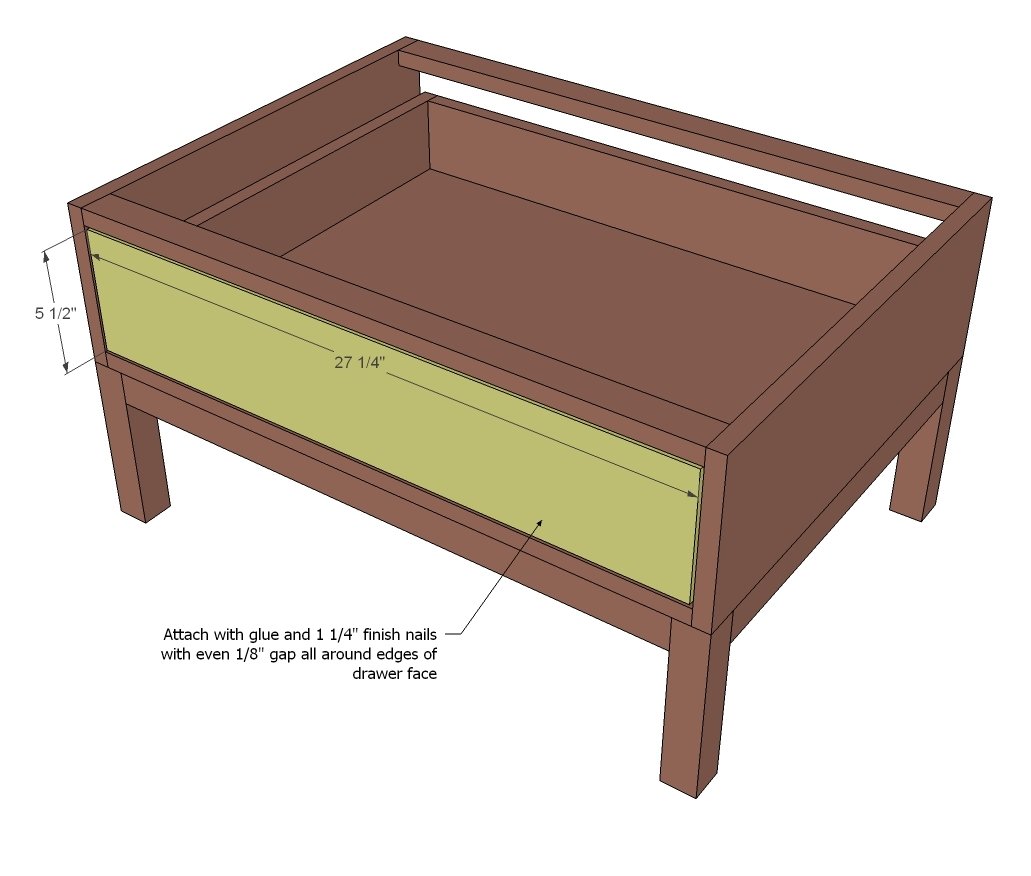
Attach the drawer face to the drawer, keeping an even 1/8" gap on top, bottom and sides. TIP: Attach handles or knobs first unless surface mount to avoid having to get longer knob/handle bolts or boring out the inside drawer face to fit bolt head.
Step 8
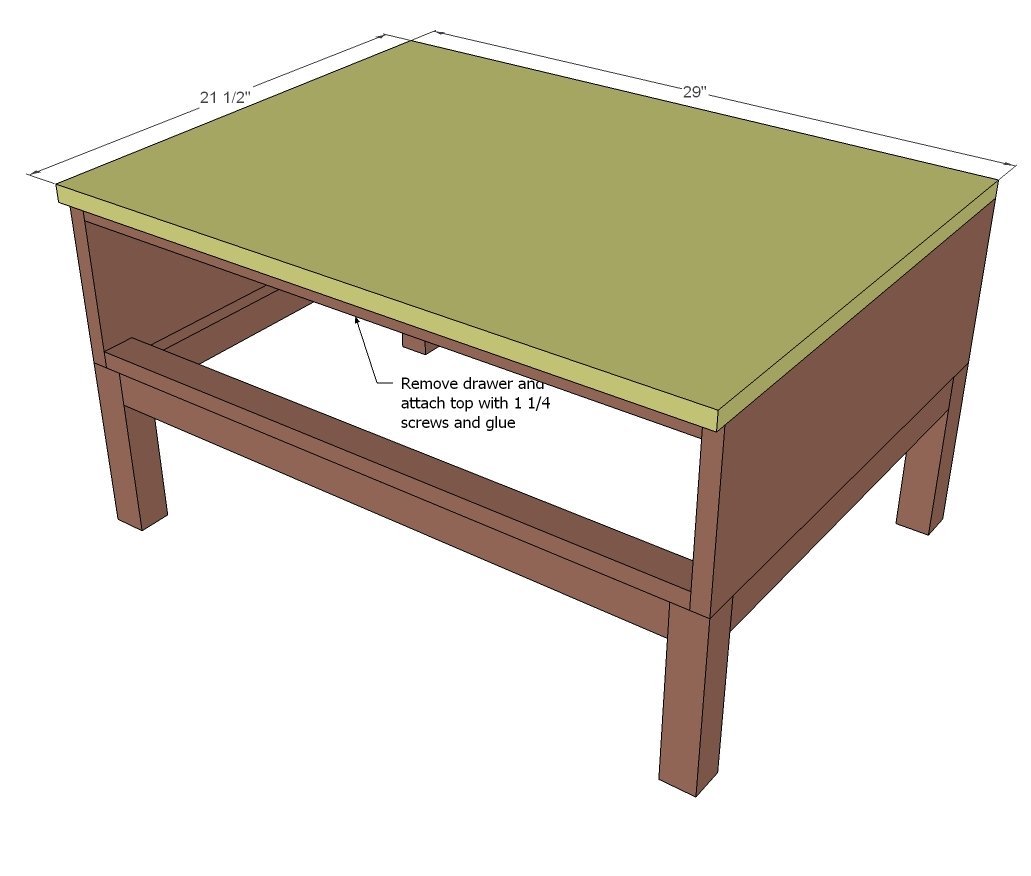
Remove the drawer and attach the top to the base. Reinstall the drawer.
Step 9
The back is optional.
Finishing
Sand all surfaces, starting with a medium grit and finishing with fine. Wipe off the dust, fill any holes or gaps with wood filler, and sand smooth once dry. Apply primer if you're painting, then finish with your choice of paint or stain and seal with a durable clear topcoat. For outdoor projects, use exterior-rated primer, paint or stain, and sealer so the piece stands up to the weather.
Source (temporary): https://www.ana-white.com/woodworking-projects/open-drawer-base-cubby-collection