Open End Kitchen Wall Shelf
Add a custom touch to your kitchen with this DIY open end wall shelf! Designed to finish off a run of upper cabinets, this shelf is open on the front and side—perfect for displaying decor, plants, or everyday essentials. It’s a great solution for tricky cabinet layouts, especially where uppers end over a peninsula or near a dining nook. Build it with just a few tools using, complete with step-by-step diagrams, cut list, and a full shopping list.
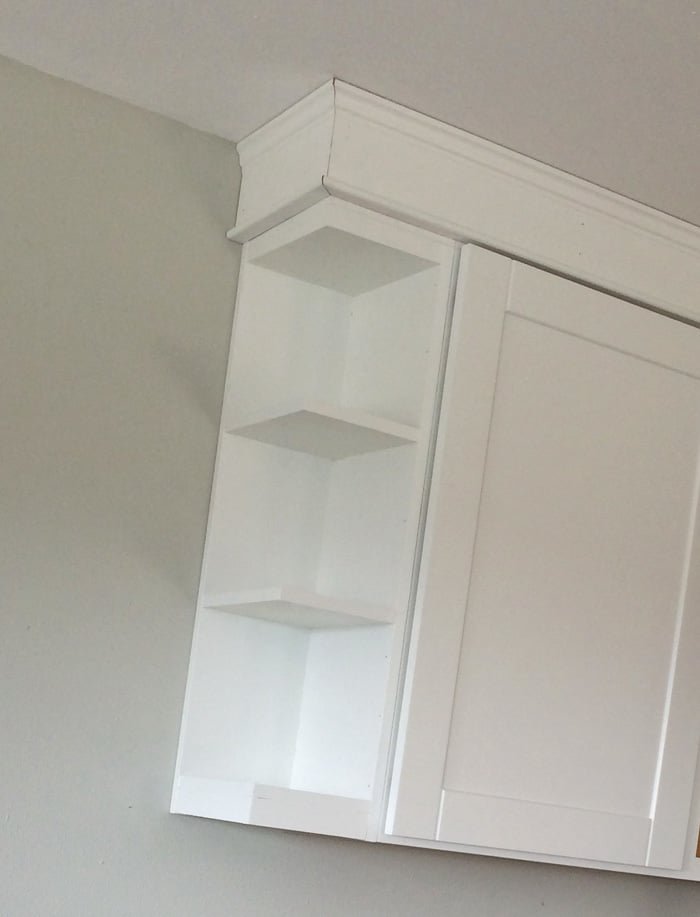
Specifications
| Project type | Kitchen Cabinet Plan, Accessories and Serving |
|---|---|
| Room | kitchen |
| Difficulty | Beginner Projects |
Dimensions
Use the size-specific shopping and cut lists below.
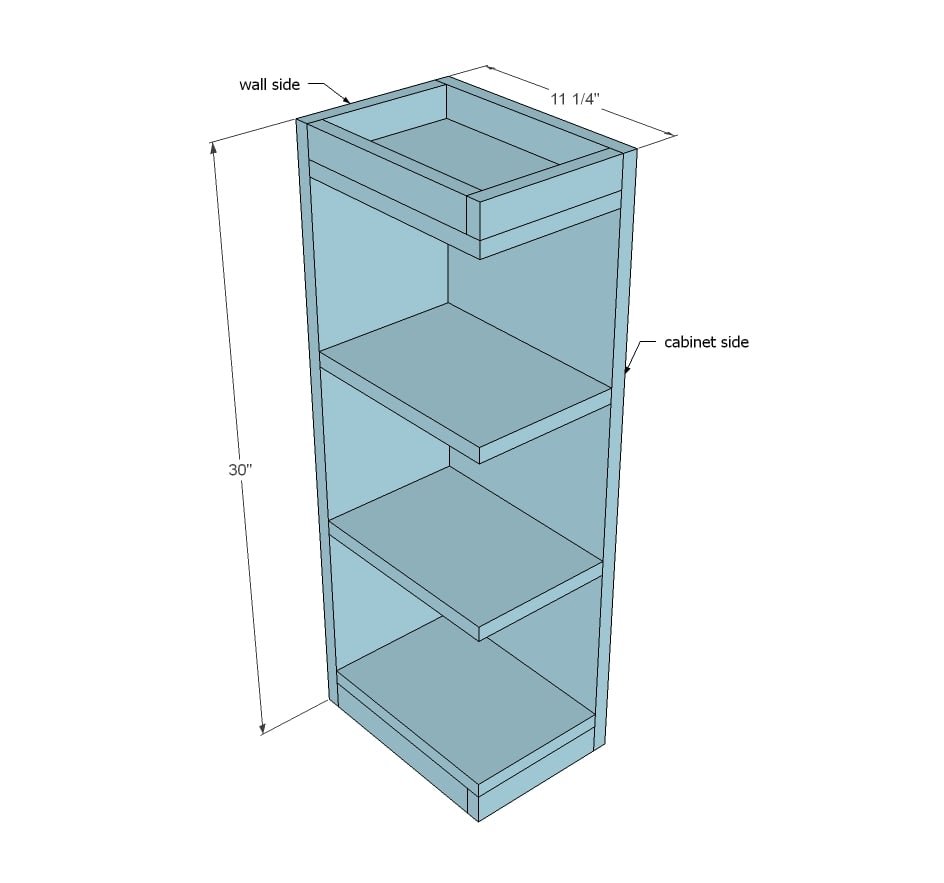
Shopping List
- 1 - 1x12 @ 30" long or 3/4" plywood @ 11-1/4" x 30" (MATCH YOUR CABINETS!!!)
- 1 - 1x8 @ 8 feet long
- 1 - 1x2 @ 4 feet long 1-1/4" nails or staples
- Screws for hanging to adjacent cabinet and studs in wall
*For painted cabinets, use poplar For stained cabinets, choose a wood species to match your cabinets or plywood (maple, oak, alder etc)
Cut List
- 1 - 1x12 @ 30" or 3/4" plywood @ 30" x 11-1/4" (MATCH YOUR CABINETS SIDES!!!)
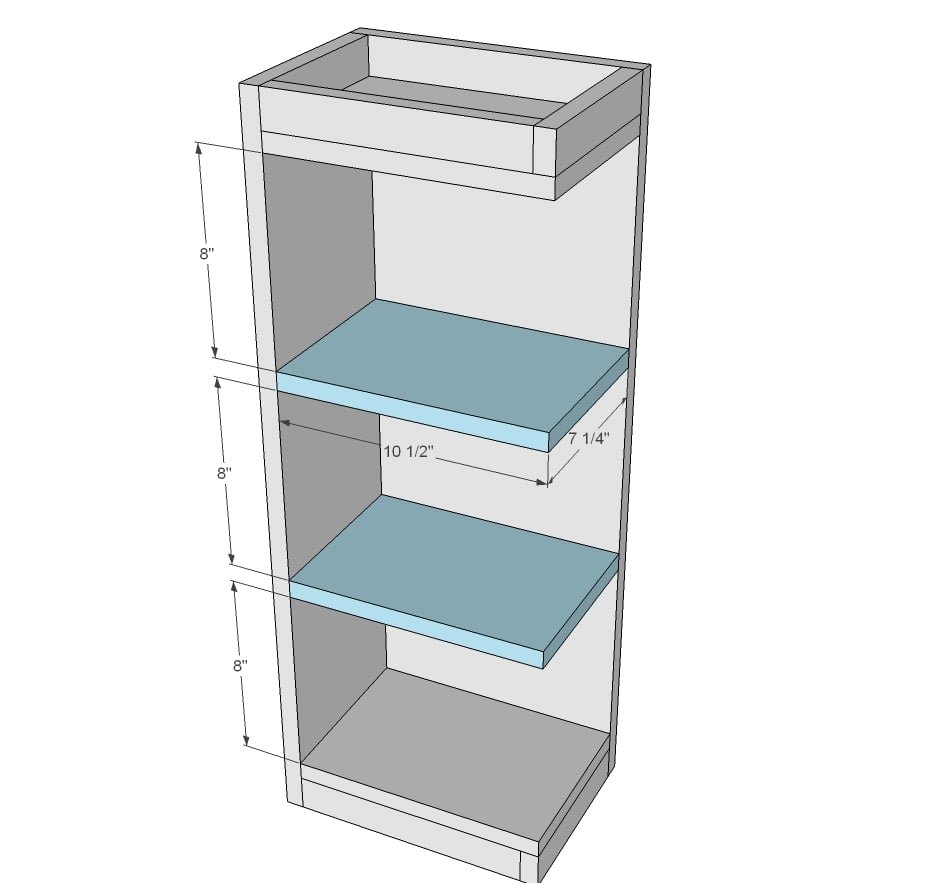
- 1- 1x8 @ 30" 4 - 1x8 @ 10-1/2" (ADJUST TO FIT!!)
- 2 - 1x2 @ 7-1/4" (or width of 1x8)
- 2 - 1x2 @ 9-3/4" (ADJUST TO FIT!!)
Tools
- measuring tape
- square
- pencil
- safety glasses
- hearing protection
- circular saw
- nailer
- staple gun
Step-by-step Instructions
Step 1
We stapled this entire cabinet together because we did not want any pocket holes showing. The cabinet is plenty sturdy. Here we used glue and 1-1/4" staples. The side panel should match your other cabinets, including a face frame and the back if your other cabinets have one. Also check the height of your existing cabinets - 30" is standard. IMPORTANT: Make sure you assemble your cabinet in the correct configuration for installation - As shown, we built a cabinet that is open to the left.
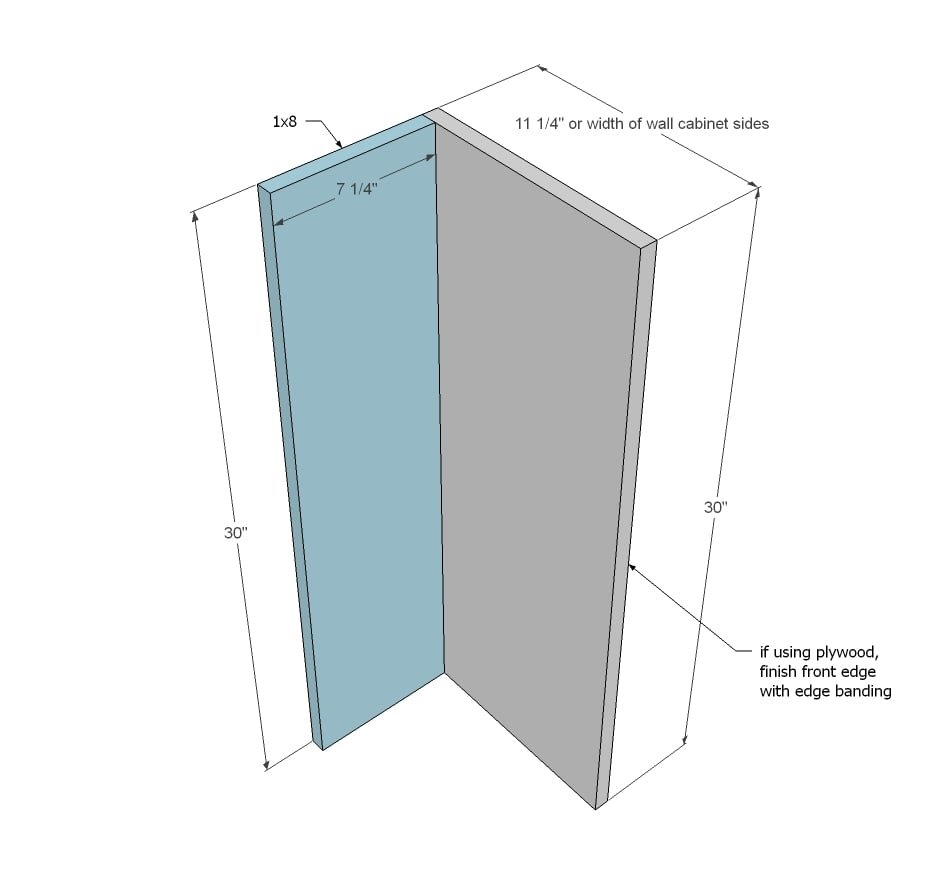
Step 2
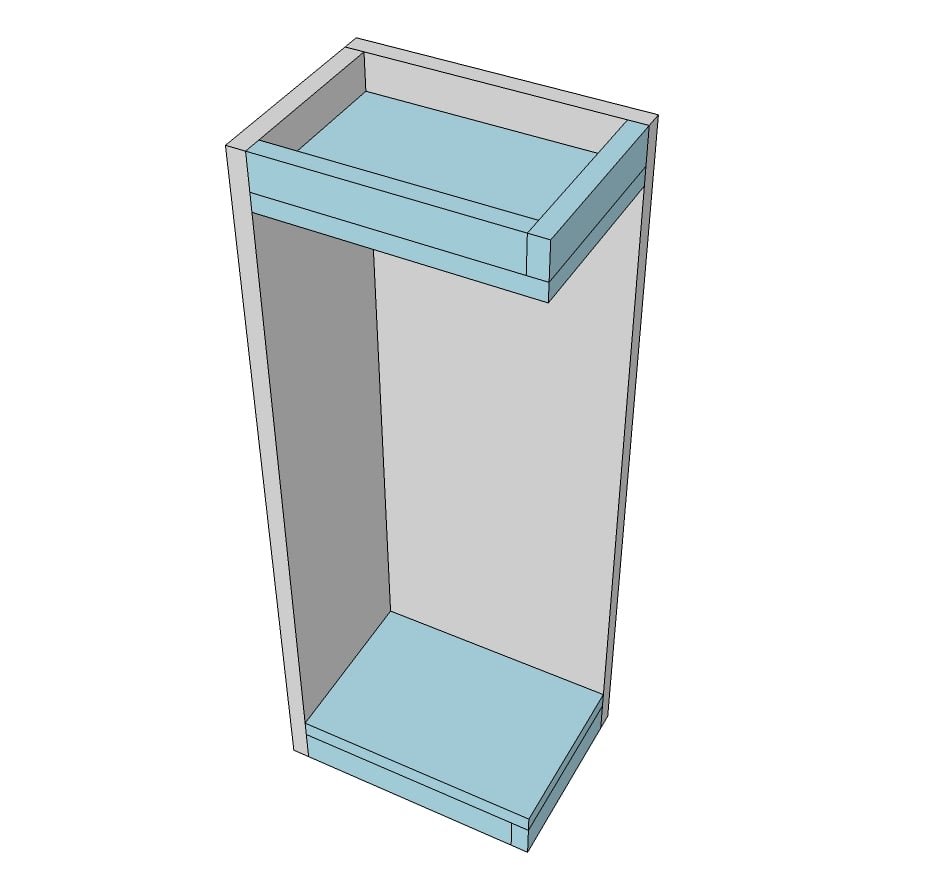
Build the top and bottom shelves first with staples or nails and glue. We used 1-1/4" staples here.
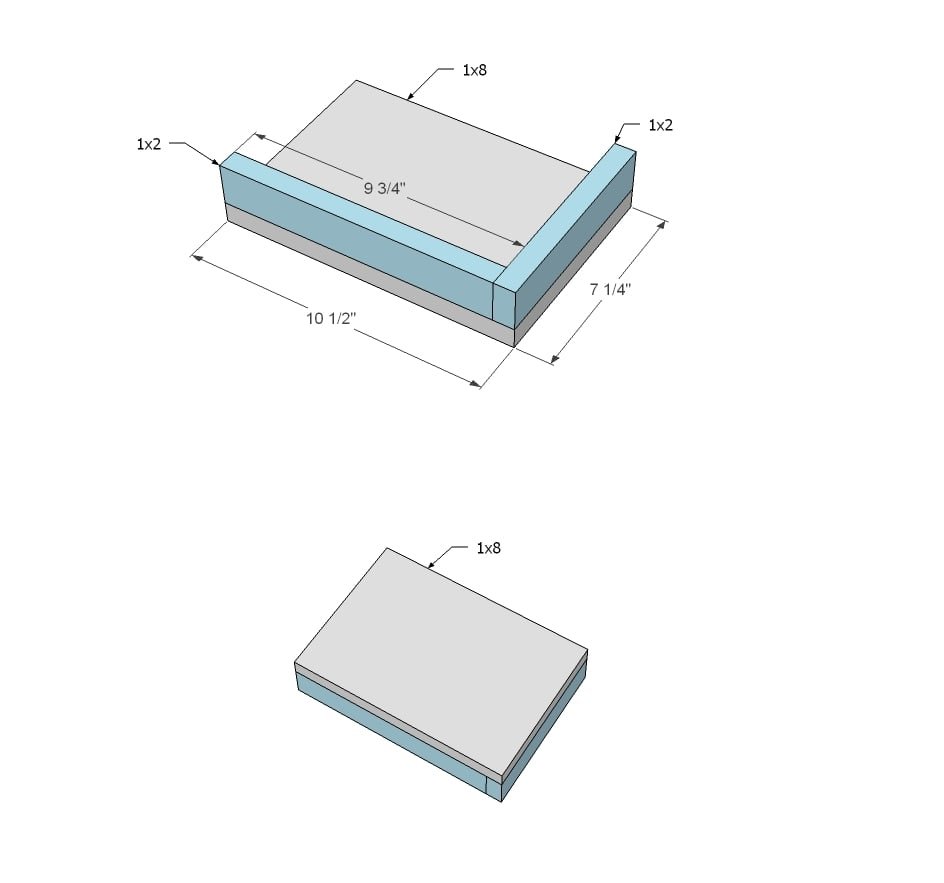
Step 3
Then we glued and attached the top and bottom shelves to the backs.
Then we added the remaining two shelves.
We hung the cabinet by attaching it to both the neighboring cabinet and studs in the wall. If no studs, use a drywall anchoring system.
Finishing
Sand all surfaces, starting with a medium grit and finishing with fine. Wipe off the dust, fill any holes or gaps with wood filler, and sand smooth once dry. Apply primer if you're painting, then finish with your choice of paint or stain and seal with a durable clear topcoat. For outdoor projects, use exterior-rated primer, paint or stain, and sealer so the piece stands up to the weather.
Source (temporary): https://www.ana-white.com/woodworking-projects/open-end-kitchen-wall-shelf-stylish-way-finish-cabinet-run