Open Frame Dollhouse for 12" Dolls
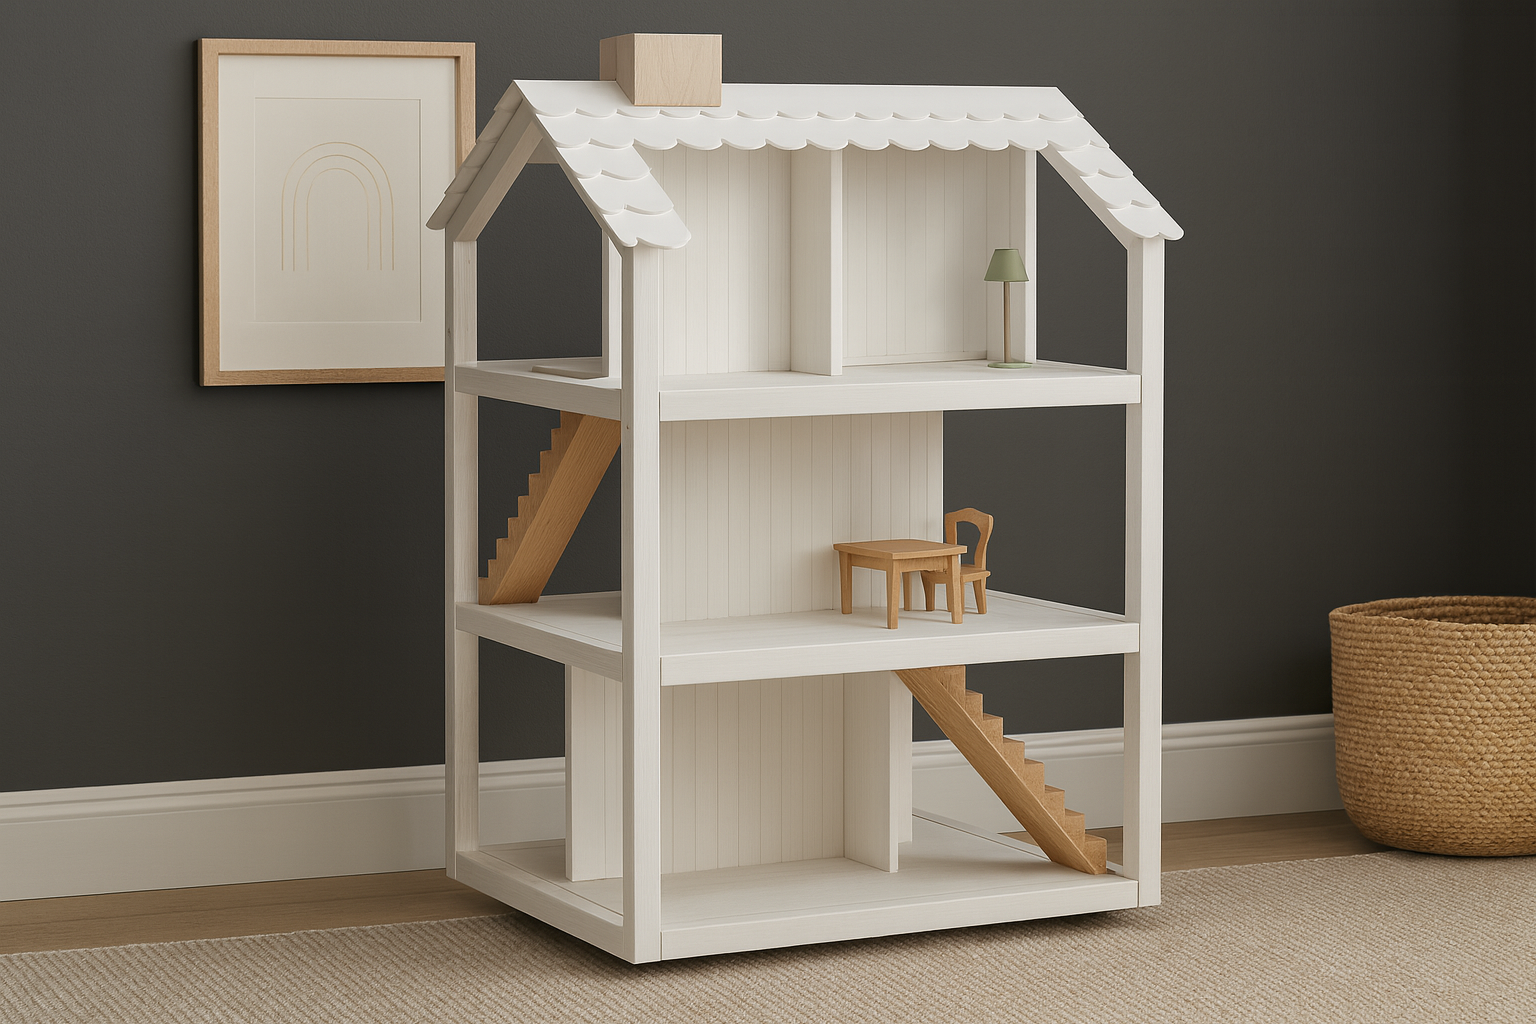
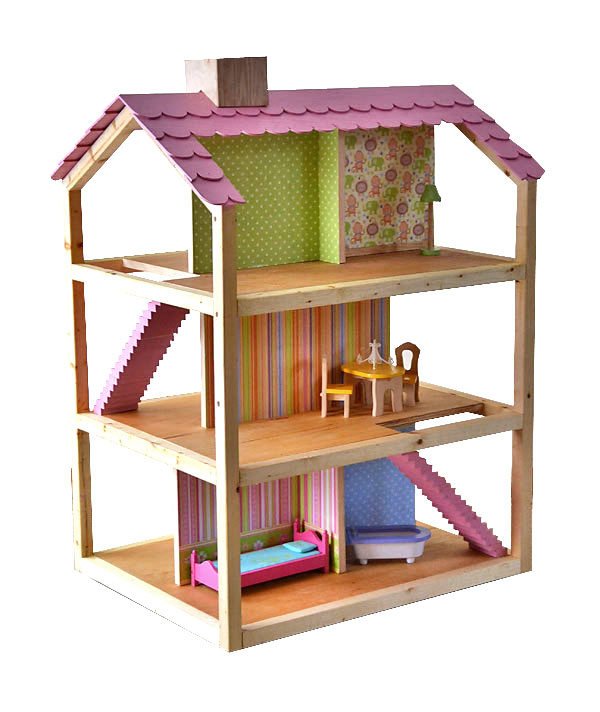
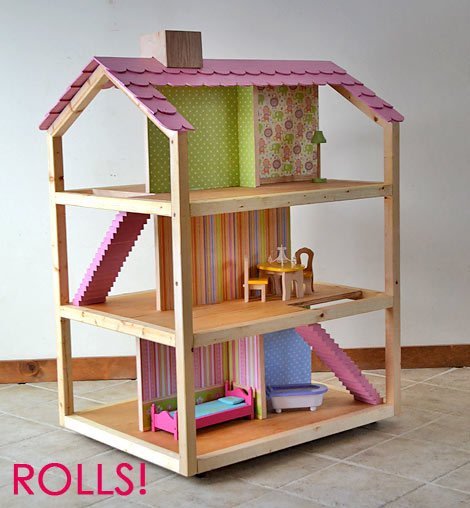
Free DIY Dollhouse Plans – Build a Large Rolling Dollhouse for 12" or Barbie Sized Dolls Create unforgettable playtime with this large rolling dollhouse, designed to fit up to 12 inch dolls comfortably. make it easy to build, even for beginners, using basic tools and affordable materials. This oversized dollhouse includes three spacious levels, an open-sided design for easy access, and caster wheels for rolling mobility, so kids can move it anywhere. The sturdy construction ensures years of use, while the simple design is easy to customize with paint, wallpaper, or furniture to match your child’s style. Perfect for playrooms, classrooms, or shared spaces, this DIY rolling dollhouse is both practical and fun —a project you’ll be proud to build and they’ll love to use every day. with detailed diagrams, shopping and cut list from
Specifications
| Project type | Toys |
|---|---|
| Room | Kids and Toys |
| Style | Children's and Kid's Room Furniture and Toy Plans |
| Difficulty | Intermediate |
| Estimated cost | $50 - $100 |
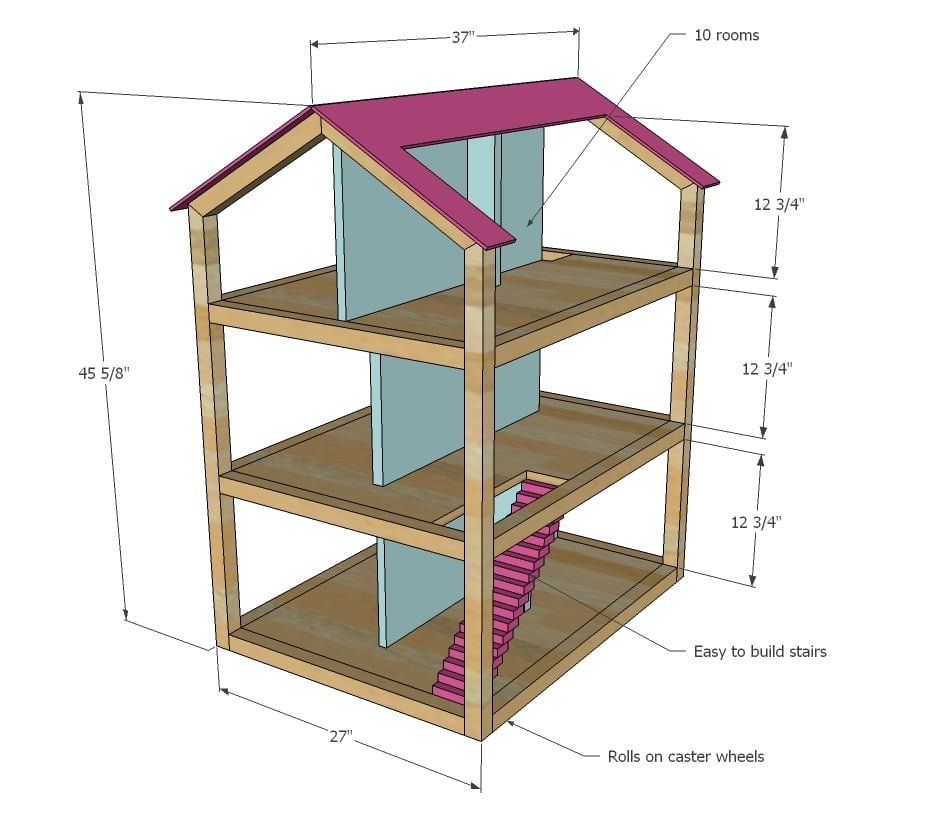
Dimensions
Use the size-specific shopping and cut lists below.
Shopping List
- 1 - sheet 3/4" PureBond Plywood
- 7 - 2x2 @ 8 feet long
- 1/4" plywood scraps for roof
- 2 - 1x2 @ 8 feet long for stairs
- 4 - 2" caster wheels and screws for 3/4" stock
- use either 3" self tapping star bit screws or 2 1/2" pocket hole screws, depending on your joinery technique
Cut List
- 7 - 2x2 @ 32"
- 6 - 2x2 @ 24"
- 4 - 2x2 @ (Both ends cut at 30 degrees off square, ends are NOT parallel, long point measurement)
- 4 - 2x2 @ 37 5/8" (One end cut at 30 degrees off square, long point measurement)
- Plywood cut to diagram
Tools
- measuring tape
- square
- pencil
- hammer
- safety glasses
- hearing protection
- kreg-jig
- drill
- circular saw
- jigsaw
- compound miter saw
- nailer
- sander
- countersink drill bit
Step-by-step Instructions
Step 1
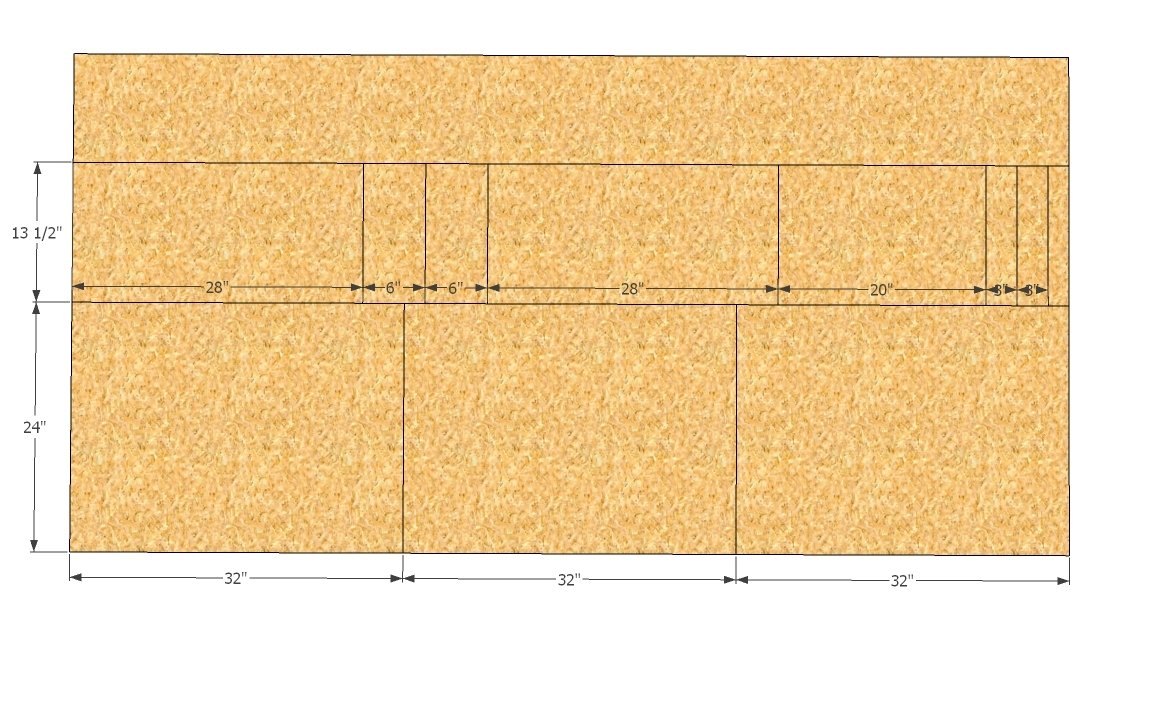
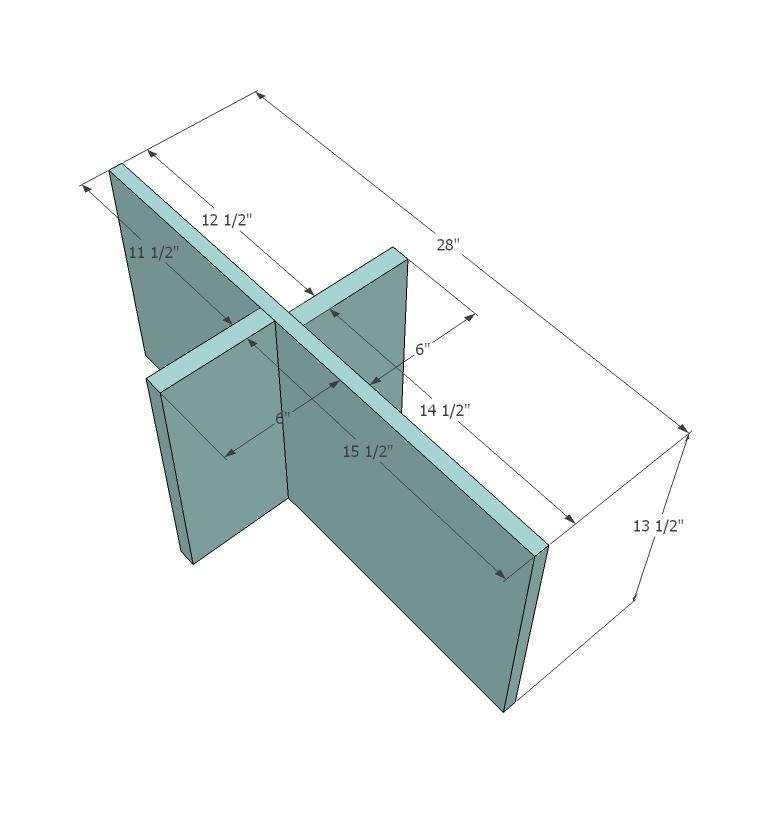
Have your home improvement center rip your plywood into a strip 24" wide and a strip 13 1/2" wide as shown in diagram. Then all you have to do is make the crosscuts. NOTE: I really considered using 1/4" plywood for the floors, but wanted to create a dollhouse that would last and last - and could even be used as a bookshelf later on. The 1/4" plywood is just too flimsy for that. Then I considered 1/2", but the price difference between 1/2" and 3/4" is only a few bucks, and 3/4" is just so much easier to work with because you have a wider area to work with. Of course you can modify this plan - if you made this dollhouse with 1/4" plywood, it would be CHEAP to make... like $30 cheap.
Step 2
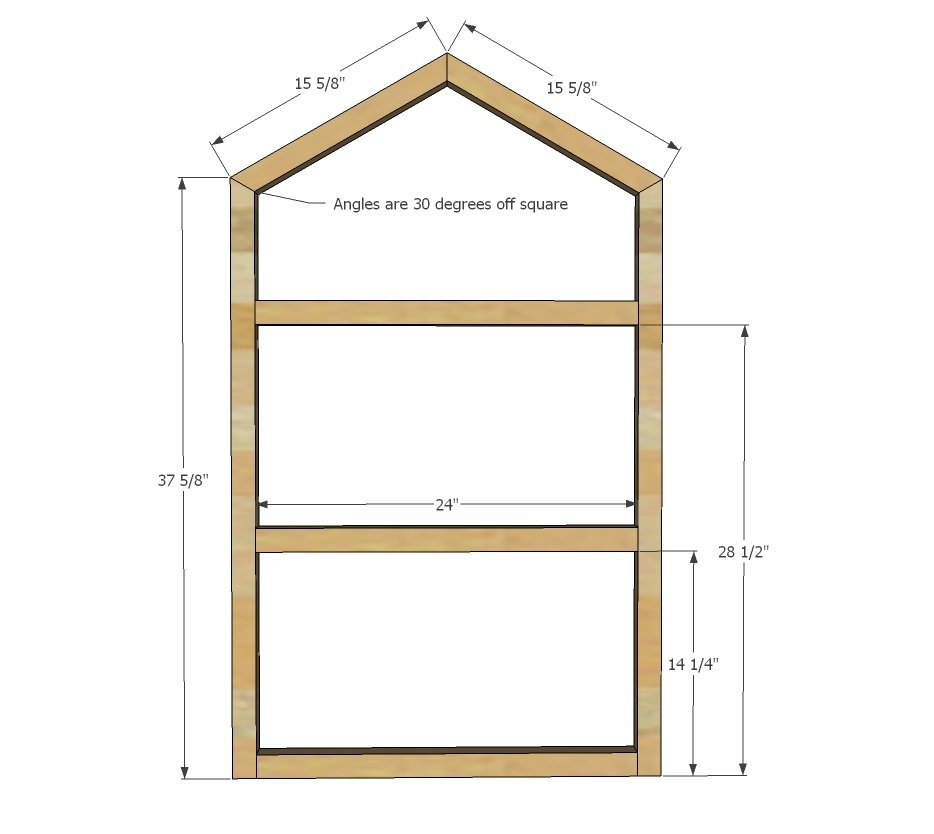
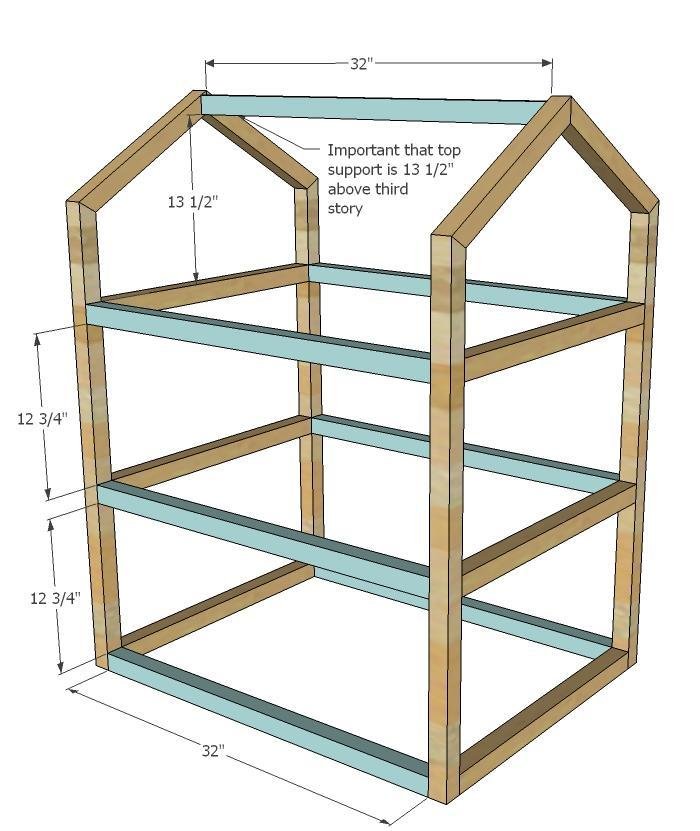
Build the ends as shown above. You can use a countersink bit and 3" screws or the Kreg Jig and 1 1/2" pocket holes and 2 1/2 pocket hole screws. For the angled joints, just clamp, glue and predrill holes with a countersink bit. I only used one screw (and alot of glue) for each joint to avoid splitting the wood. Build two, make sure they match up.
Step 3
Now just join the two sides with the longer 2x2s. This is easy stuff. Just make sure that the top 2x2 is exactly 13 1/2" above the top story 2x2 - this does matter.
Step 4
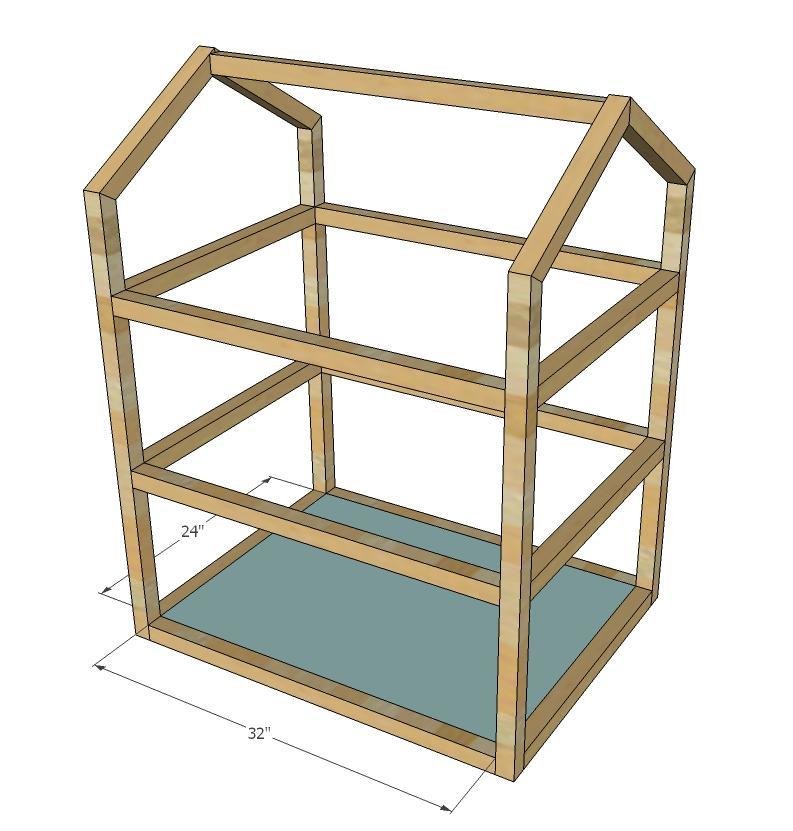
I used pocket holes set for 3/4" stock and 1 1/4" pocket hole screws drilled on all sides of the plywood to secure to the frame. If you do not have a pocket hole jig, you can cut corner braces out of scrap 1x2s and fasten, or countersink (very carefully) long screws into the edges of the plywood.
Step 5
Step 6
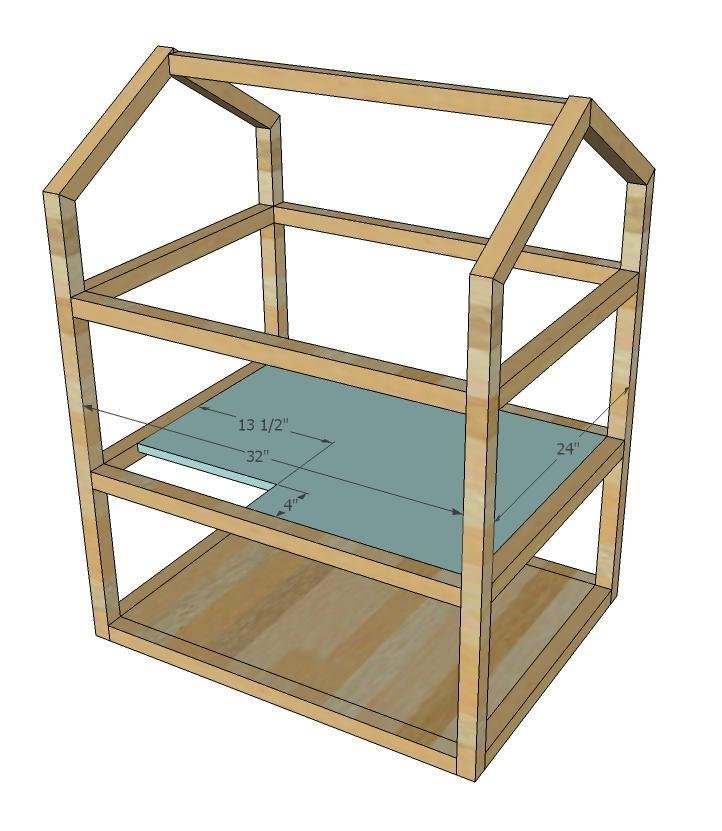
Cut stair openings out as shown in diagram and place 2nd story shelf as you did bottom story shelf.
Step 7
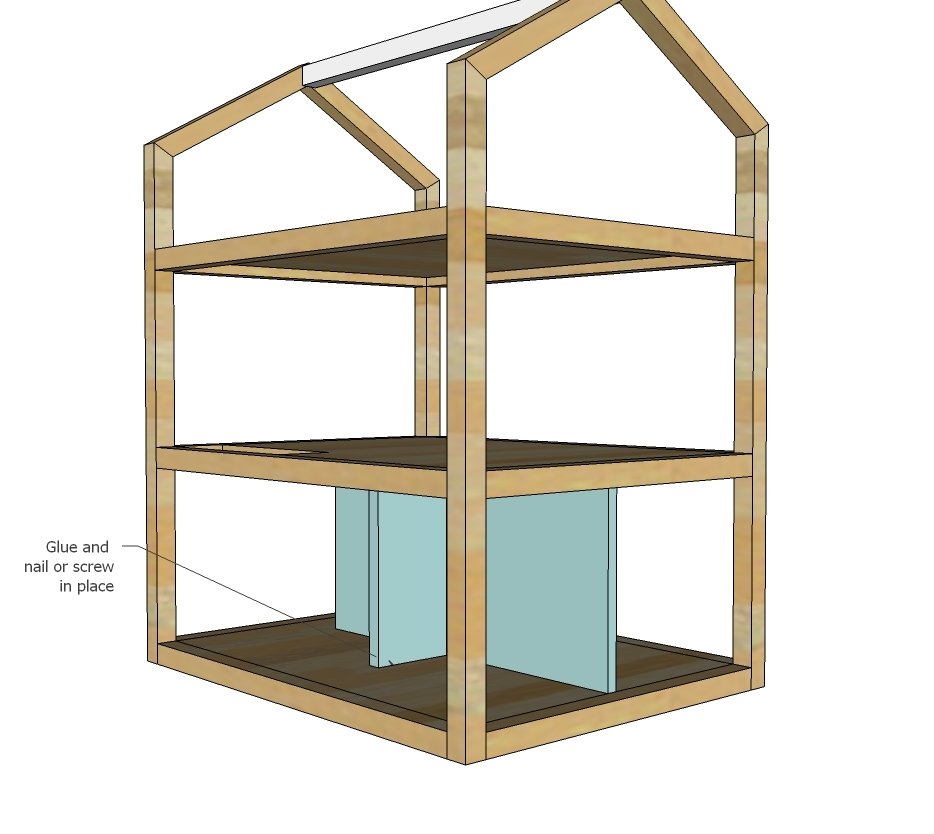
Add the bottom story walls. I used pocket holes, but you can also use nails here. TIP: Offset the walls between stories a tad so you have a spot to nail if you are using nails.
Step 8
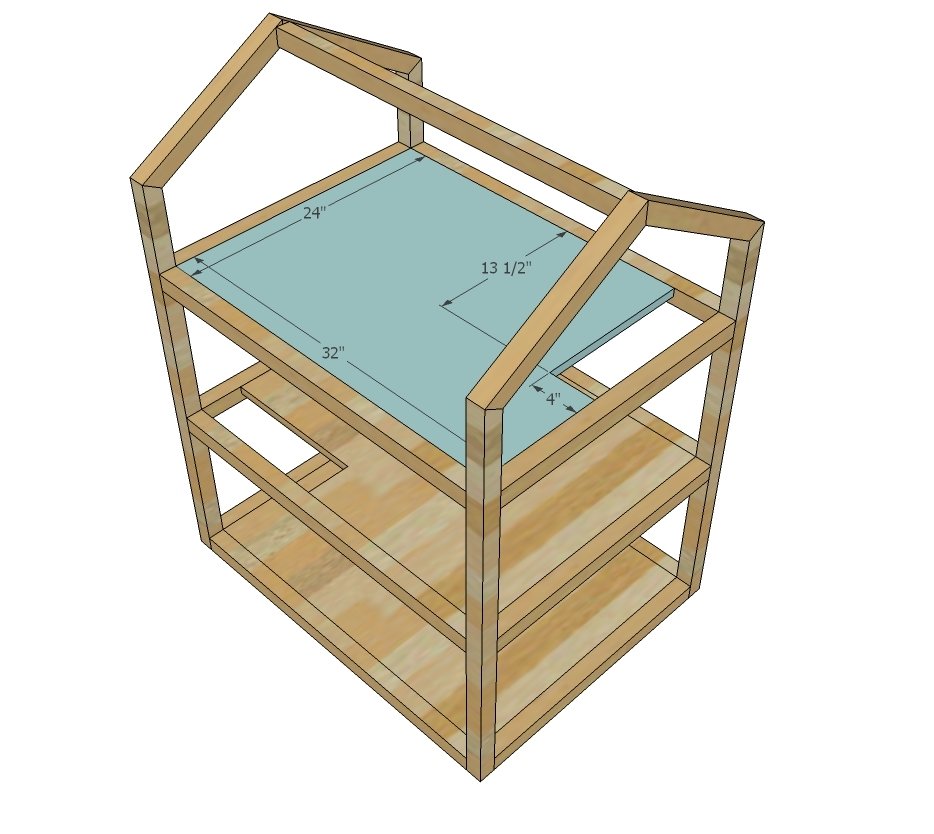
Add the top story as you did the lower two stories.
Step 9
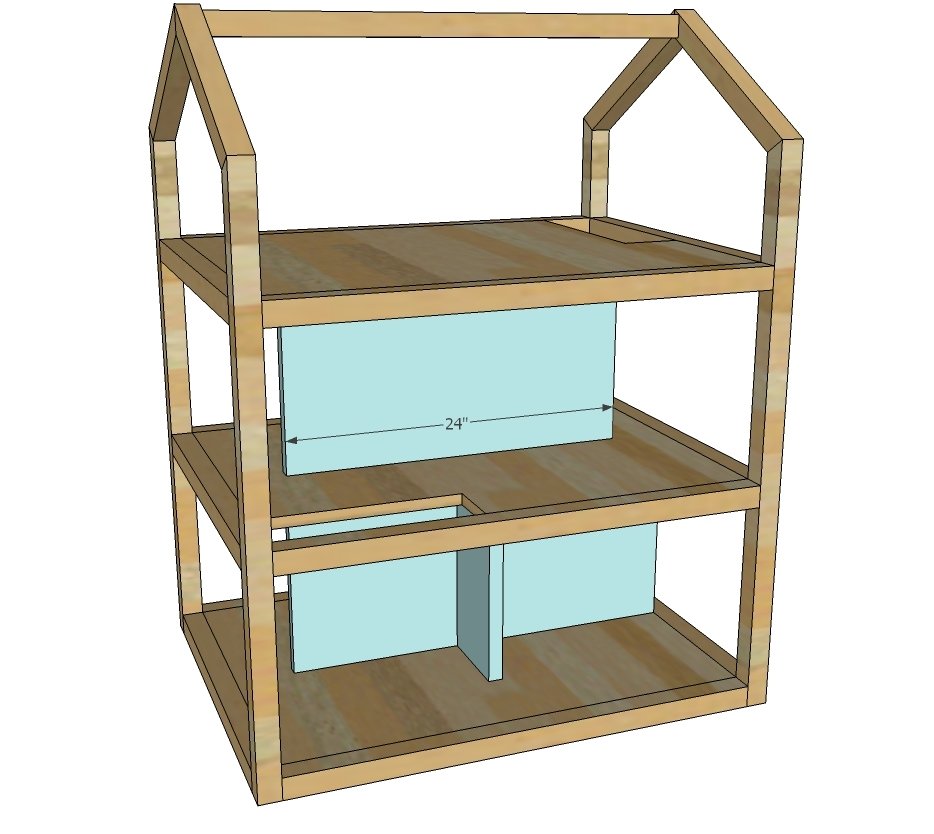
Followed by the middle story interior wall.
Step 10
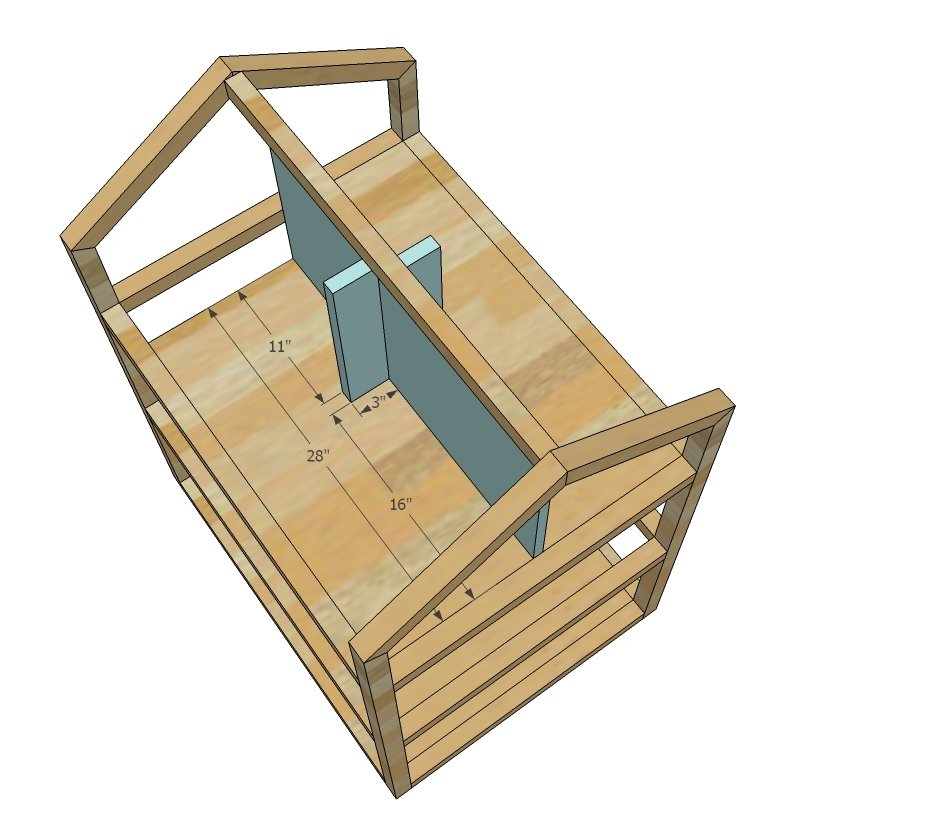
Finally, add the top story interior walls system.
Step 11
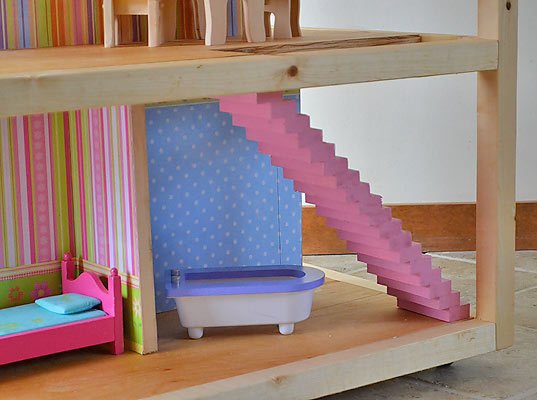
Stairs are built by stacking 1x2 boards staggered as shown above. Be very careful when nailing and use lots of glue.
Step 12
I then simply decoupaged the interior walls with contrasting scrapbooking paper. The roof is simply strips of 1/4" plywood - you could use 1/4" hobby stock as well - cut with a scalloped shape, lapped and nailed down.
Step 13
Attach 2" caster wheels to the 3/4" plywood base so wheels can swivel easily.
Finishing
Sand all surfaces, starting with a medium grit and finishing with fine. Wipe off the dust, fill any holes or gaps with wood filler, and sand smooth once dry. Apply primer if you're painting, then finish with your choice of paint or stain and seal with a durable clear topcoat. For outdoor projects, use exterior-rated primer, paint or stain, and sealer so the piece stands up to the weather.
Source (temporary): https://www.ana-white.com/woodworking-projects/open-frame-dollhouse-12-dolls