Open Frame Laundry Basket Organizer
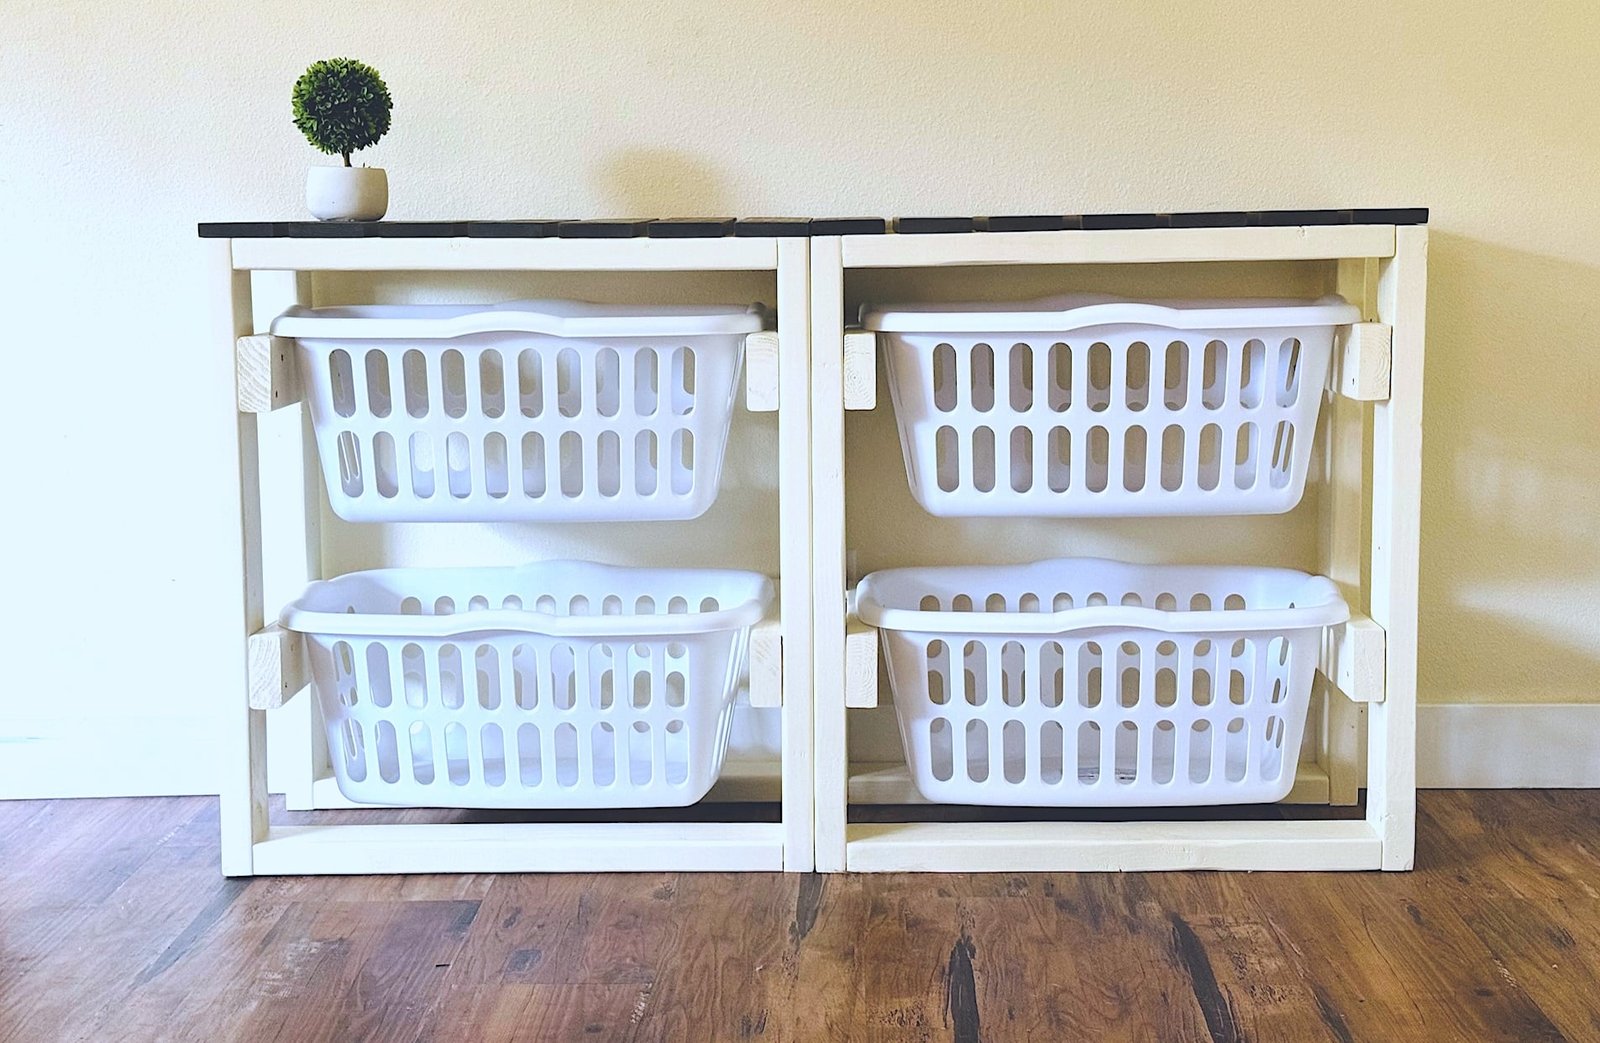
Get the laundry baskets up off the floor and create a drying space with this easy to build laundry basket dresser. This DIY Laundry basket organizer is made from 2x4 boards - Use most any laundry basket - this universal plan helps you design and build just the right size organizer for your laundry baskets. from
Specifications
| Project type | Crate Plans and Projects Made with Crates |
|---|---|
| Room | Storage Solutions |
| Difficulty | Beginner Projects |
| Estimated cost | $20 - $50 |
Dimensions
Use the size-specific shopping and cut lists below.
Shopping List
- 2x4 boards (about 3 - 2x4x8' as shown)
- 1x4 or 1x6 boards for top
- 2-1/2" self tapping wood screws
- 1-3/4" self tapping wood screws
- wood glue
- Laundry baskets (recommend the sterilize bushel series)
Cut List
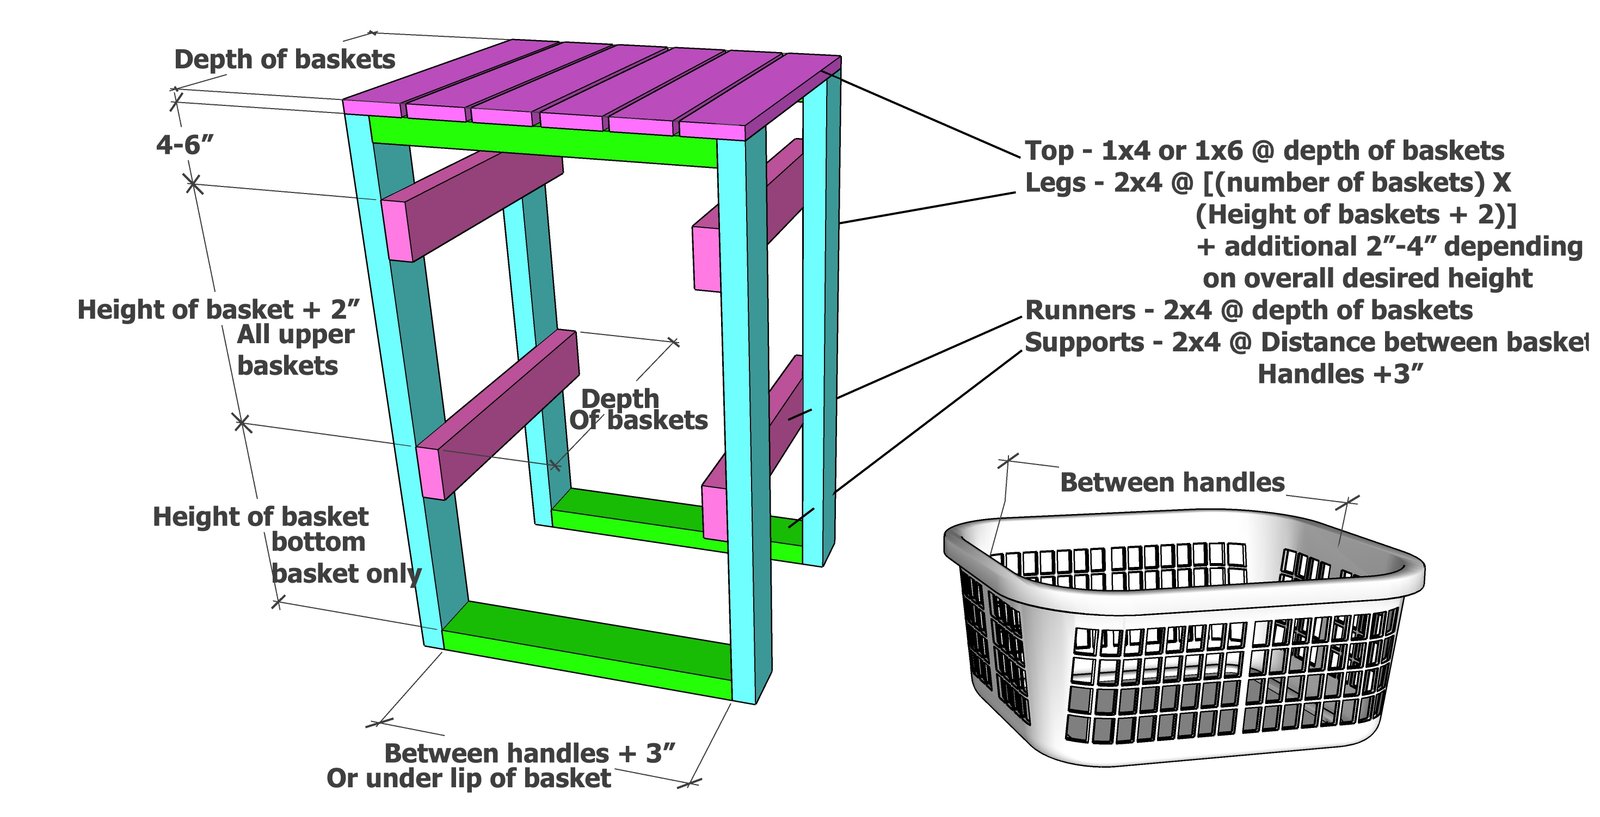
Measure your laundry basket as shown below:
Then use these three measurements to come up with your cut list:
LEGS: 4 - 2x4 - find the length of your legs by following directions below:
- Measure the height of one laundry basket and add 2" - this is the clearance needed per basket, should be about 13"
- Now multiply this number by the desired number of baskets in a column (as shown this is 2 baskets), number should be around 26" for two baskets, 39" for three baskets high
- Add 3" for the top and bottom supports - number should be about 29" now for two baskets, 42" for three baskets high
- This is the minimum cut length for the legs. You can always add more height to the legs, for example if you are trying to get a specific height for the finished tabletop.
RUNNERS: 2x4 @ Overall Depth Measurement, cut 2 per basket - this is the basket depth on the sliding side
HORIZONTAL FRAME: 4 - 2x4 @ Inside Lip Measurement + 3" - this is the width of the basket that will sit between the cleats
1x6 TOP = Cut 1x6 to match Depth of Baskets, quantity depending on top size
Tools
- measuring tape
- square
- pencil
- safety glasses
- drill
- circular saw
Step-by-step Instructions
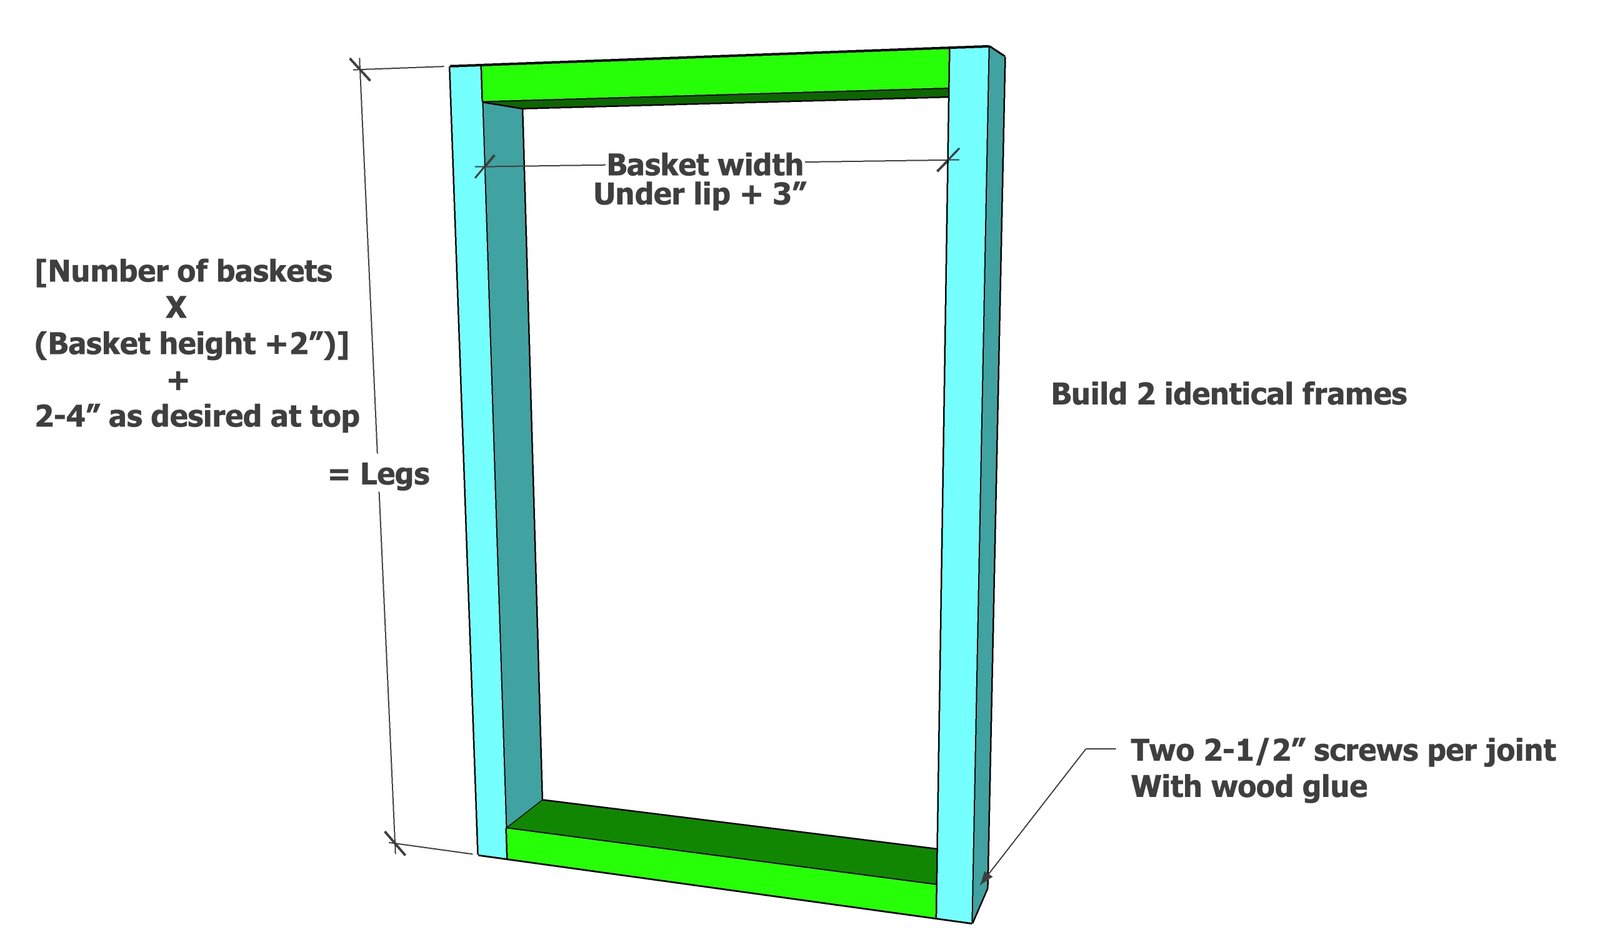
Figure the length of the legs and cut four legs from 2x4s.
Figure the length of the supports and cut four from 2x4s. Attach together with the supports inside the legs with 2-1/2" screws. Build two identical frames.
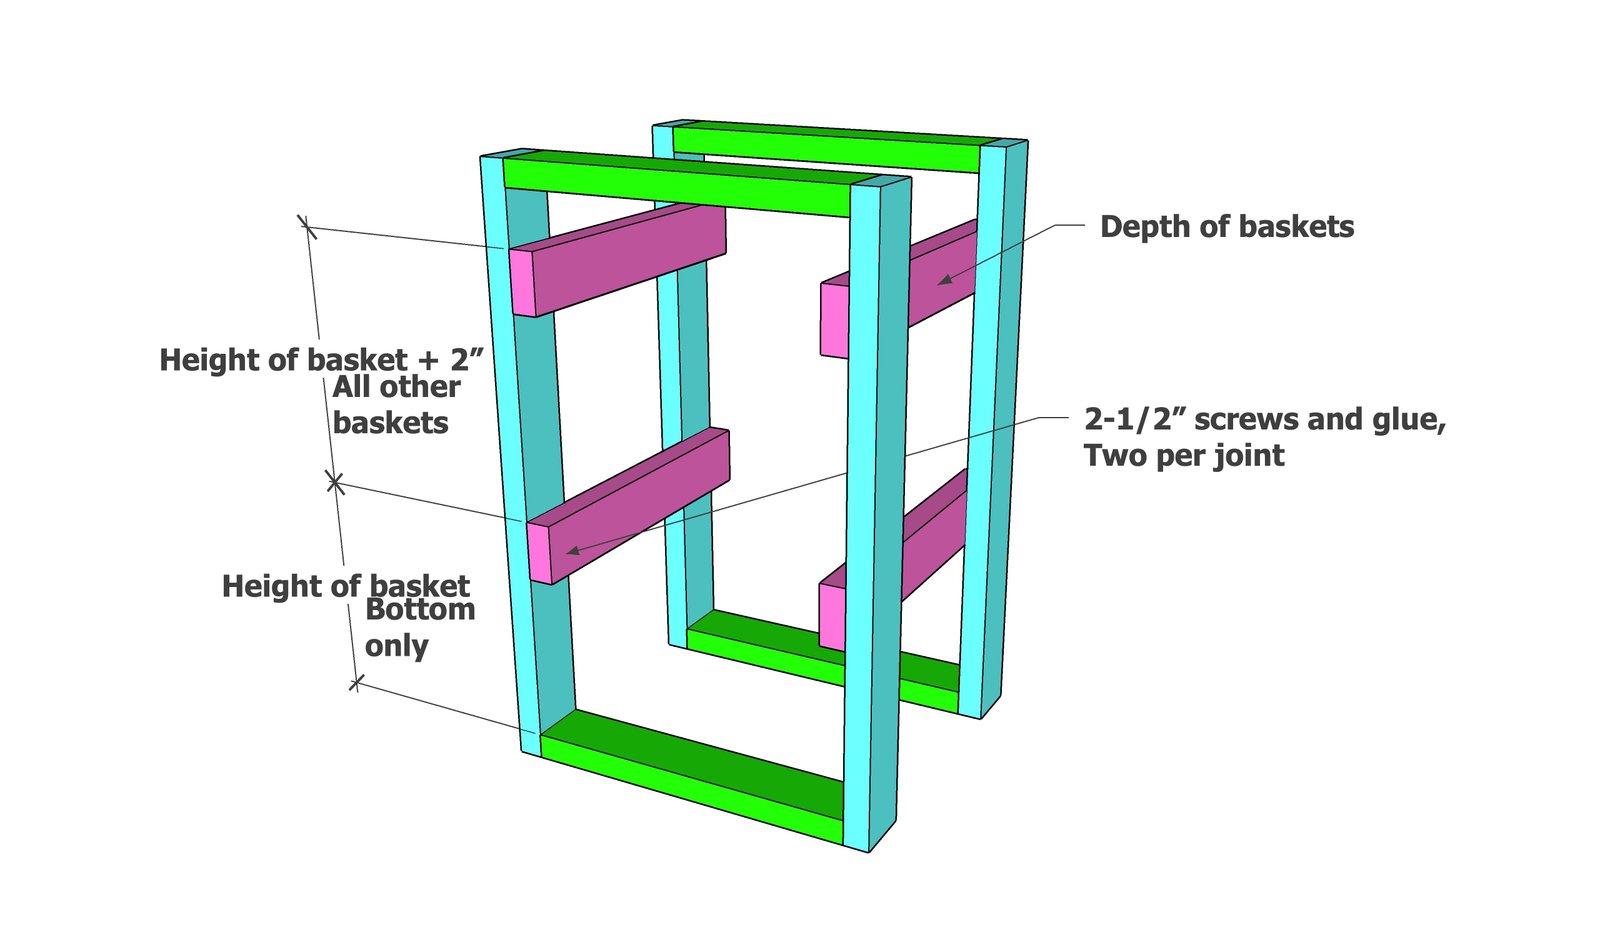
Measure and mark out the location of the runners.
The bottom runner will be spaced the overall height of the laundry basket (including the lip) to the top edge of the runner. ALL other runners will be spaced above the bottom runner by the overall height of the laundry basket plus 2". Attach with 2-1/2" screws and glue.
Step 3
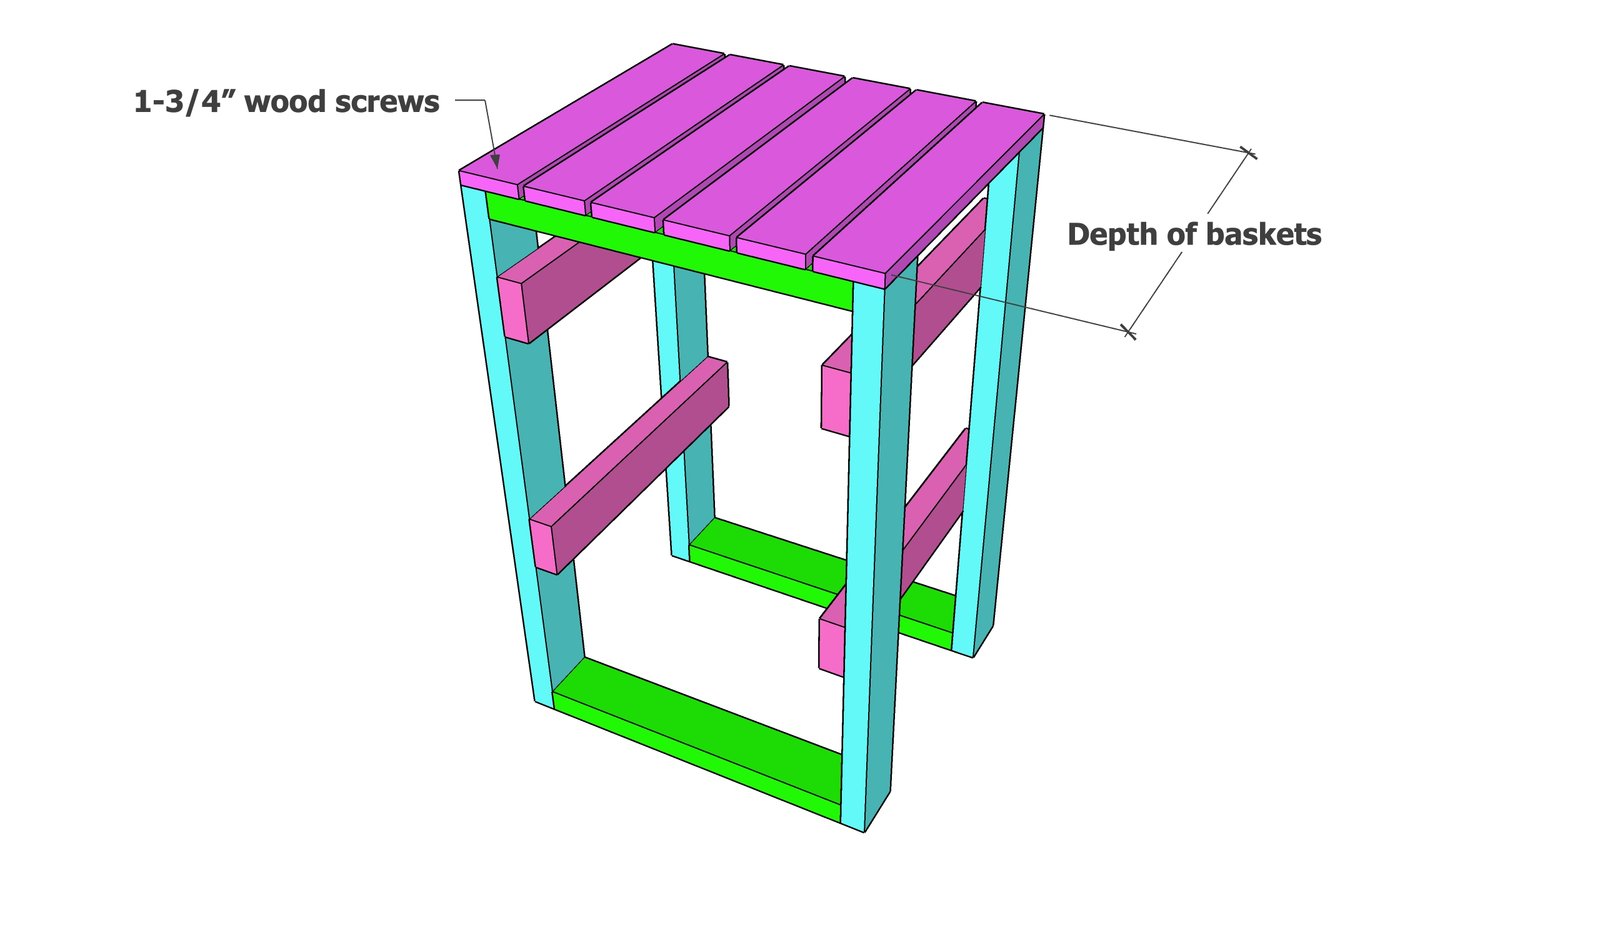
The top can be 1x4, 1x6, or other tabletop material. Leaving space in between will allow for air flow and could be used as a drying surface. Evenly space the boards and attach with 1-3/4" self tapping screws.
Finishing
Sand all surfaces, starting with a medium grit and finishing with fine. Wipe off the dust, fill any holes or gaps with wood filler, and sand smooth once dry. Apply primer if you're painting, then finish with your choice of paint or stain and seal with a durable clear topcoat. For outdoor projects, use exterior-rated primer, paint or stain, and sealer so the piece stands up to the weather.
Source (temporary): https://www.ana-white.com/woodworking-projects/open-frame-laundry-basket-organizer