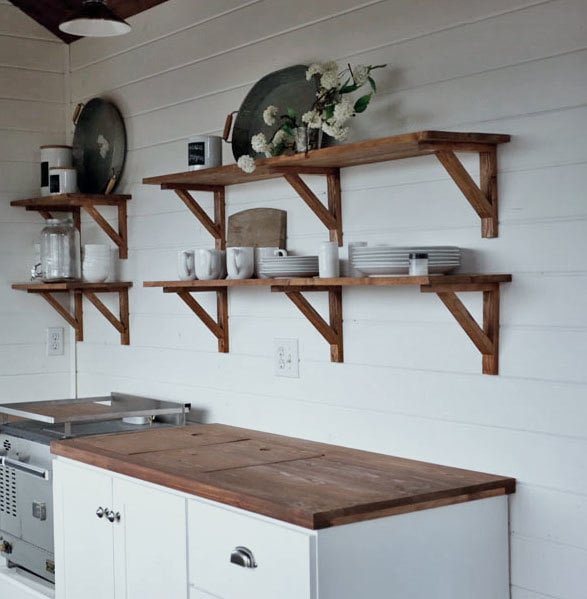
Open Kitchen Cabinet Shelving Rustic Cottage Farmhouse Style for our Tiny House
Easy Farmhouse Style DIY kitchen open shelving wood stained, free
Specifications
| Project type | shelves |
|---|---|
| Room | kitchen |
| Style | Cottage Style Furniture Plans |
| Difficulty | Intermediate |
Dimensions
Use the size-specific shopping and cut lists below.
Shopping List
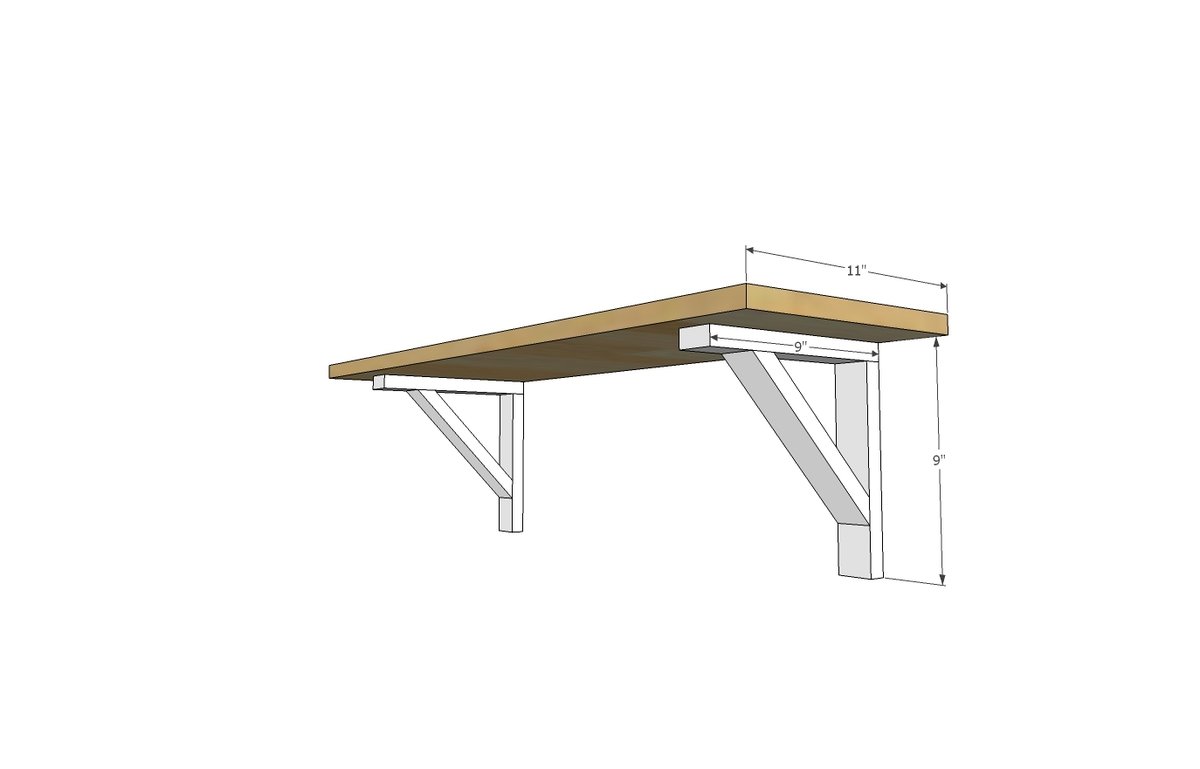
1x2s for the brackets
Double 1x6s for the shelving, or 1x10s or 1x12s
Cut List
PER BRACKET
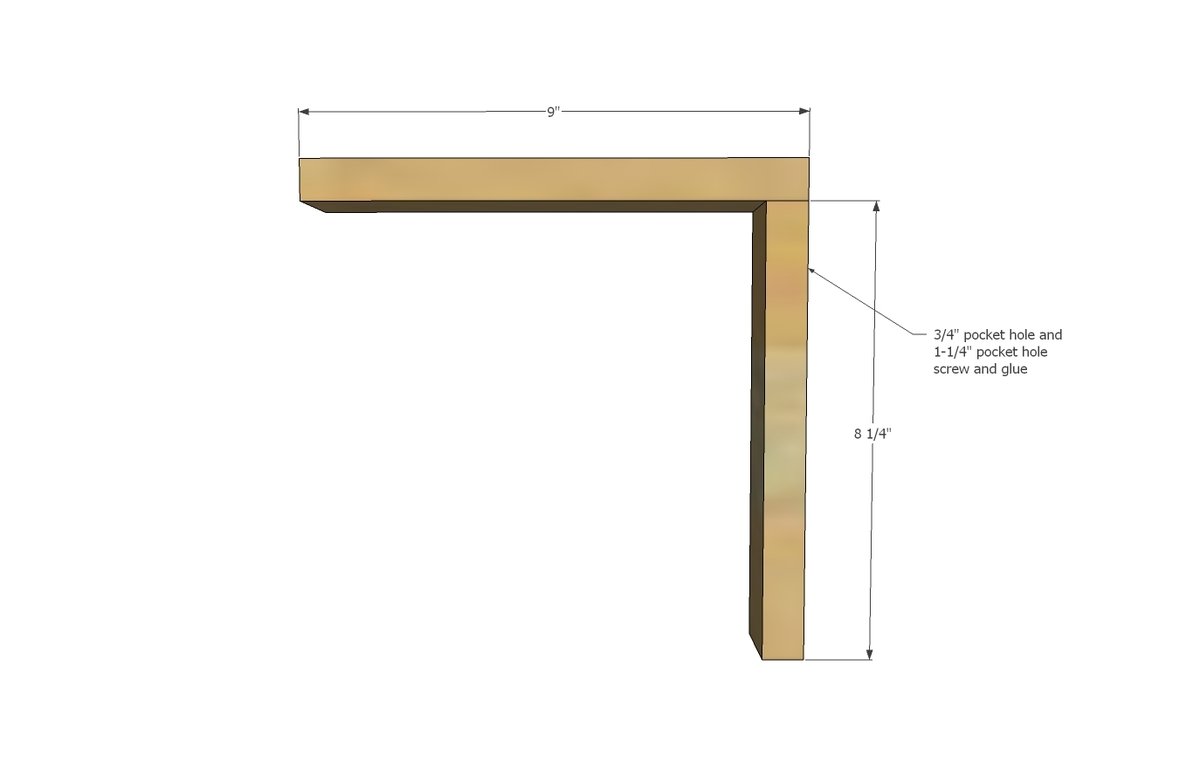
1 - 1x2 @ 9"
1 - 1x2 @ 8-1/4"
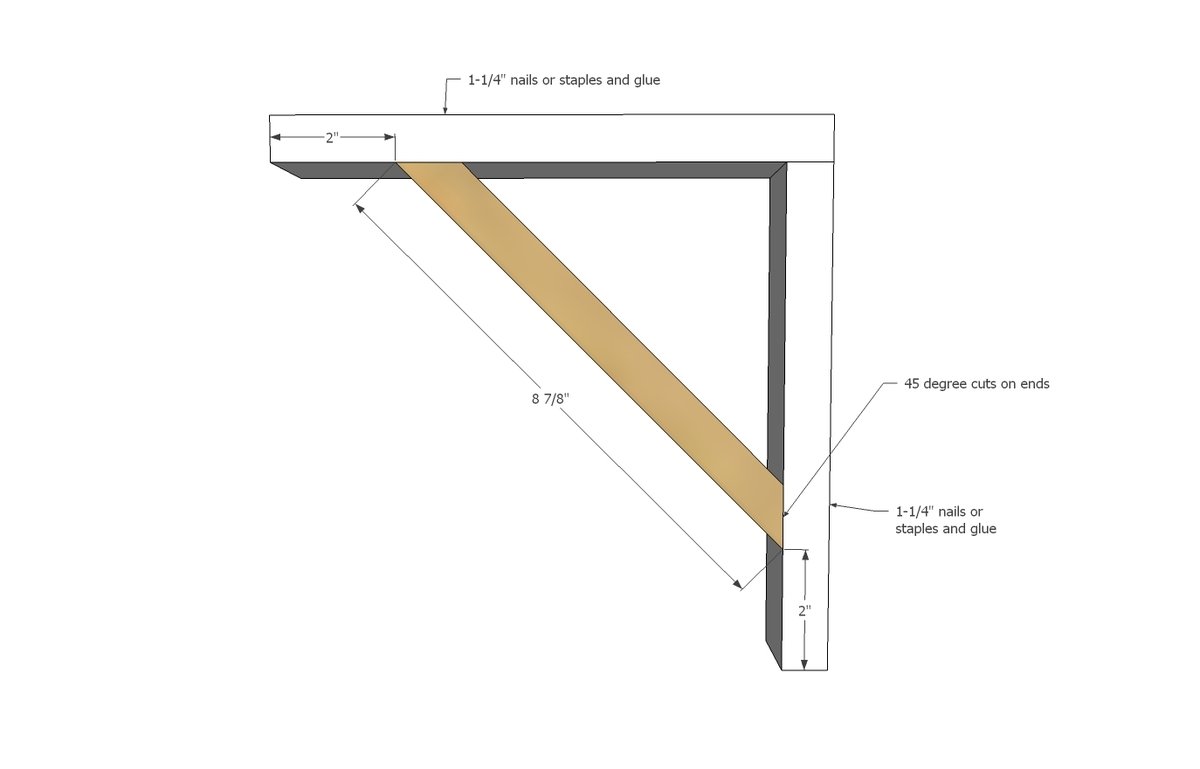
1 - 1x2 @ 8-7/8" Long point to long point, ends cut at 45 degrees perpendicular to each other
Shelving cut to size, can be 1x10s, 1x12s, or double 1x6s
Tools
- measuring tape
- square
- pencil
- safety glasses
- hearing protection
- kreg-jig
- drill
- compound miter saw
- nailer
- level
Step-by-step Instructions
Step 1
Attach bottom to top on back side, using glue and 1-1/4" pocket hole screw.
Step 2
Clamp bracket to workbench securely. Mark placement of cross support (important). I glued my cross supports and let dry, then when dry, nailed through back into cross support. Nail closer to the inside edge of the cross support to ensure your nail hits the thickest part of your cross support.
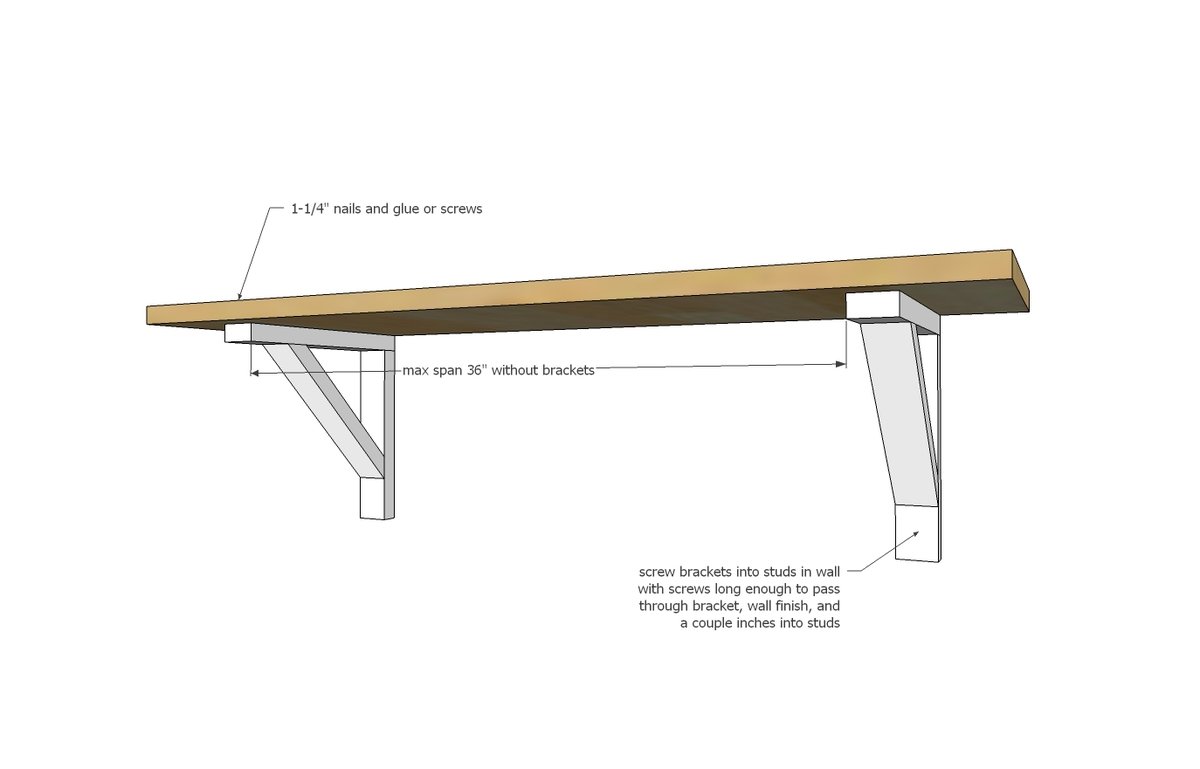
Attach shelving to brackets with glue and screws or nails/staples. Paint or stain your project now.
Brackets need to be secured to studs in the wall. Predrill holes in brackets to attach to wall. It was a little tricky attaching behind the cross support piece, but we ended up getting a screw in there.
Finishing
Sand all surfaces, starting with a medium grit and finishing with fine. Wipe off the dust, fill any holes or gaps with wood filler, and sand smooth once dry. Apply primer if you're painting, then finish with your choice of paint or stain and seal with a durable clear topcoat. For outdoor projects, use exterior-rated primer, paint or stain, and sealer so the piece stands up to the weather.
Source (temporary): https://www.ana-white.com/woodworking-projects/open-kitchen-cabinet-shelving-rustic-cottage-farmhouse-style-our-tiny-house