Open Shelf Media Console
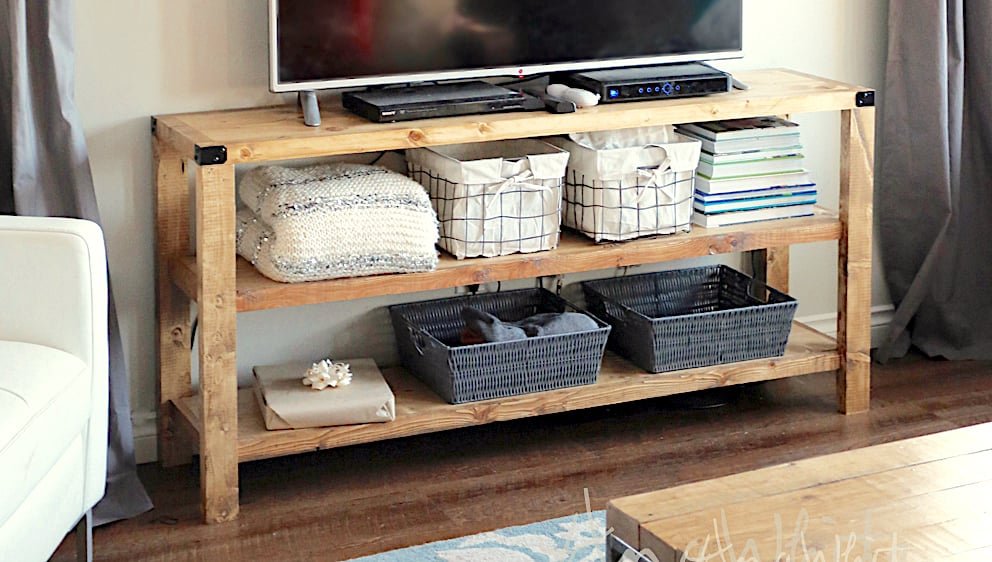
This gorgeous and sturdy media console is the perfect console for under your tv or wherever you need a console table! We love the extra storage and the solid wood design - you can stain or paint it any color. Step by step plans from
Specifications
| Project type | Media and Entertainment Centers |
|---|---|
| Room | living room |
| Style | Farmhouse Furniture |
| Difficulty | Intermediate |
| Estimated cost | $50 - $100 |
Dimensions
Use the size-specific shopping and cut lists below.
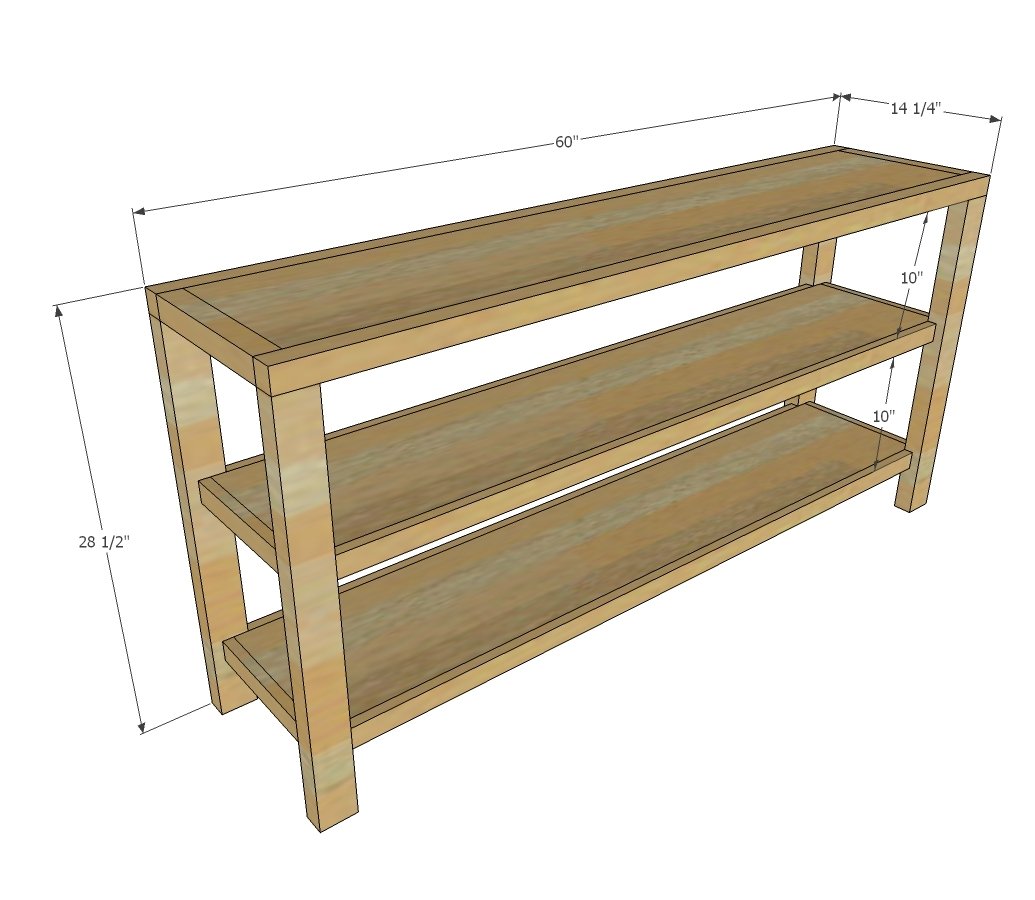
Shopping List
- 2 – 2x2 @ 8 feet long
- 15 feet of 1x12 boards, lengths 5 feet long (for example (1) 10’ and (1) 6’ board would work, but two 8 foot boards would not work)
- 2 – 2x3 @ stud length or 8 feet
- 4 – 1x2 @ 6 feet long
- 1-1/4” and 2-1/2” pocket hole screws
Cut List
- 2 – 2x2 @ 60” – top front/back trim
- 2 – 2x2 @ 11-1/4” – top side trim
- 3 – 1x12 @ 57” – shelves and top
- 4 – 2x3 @ 27” – legs
- 4 – 1x2 @ 11-1/4” – shelf side trim
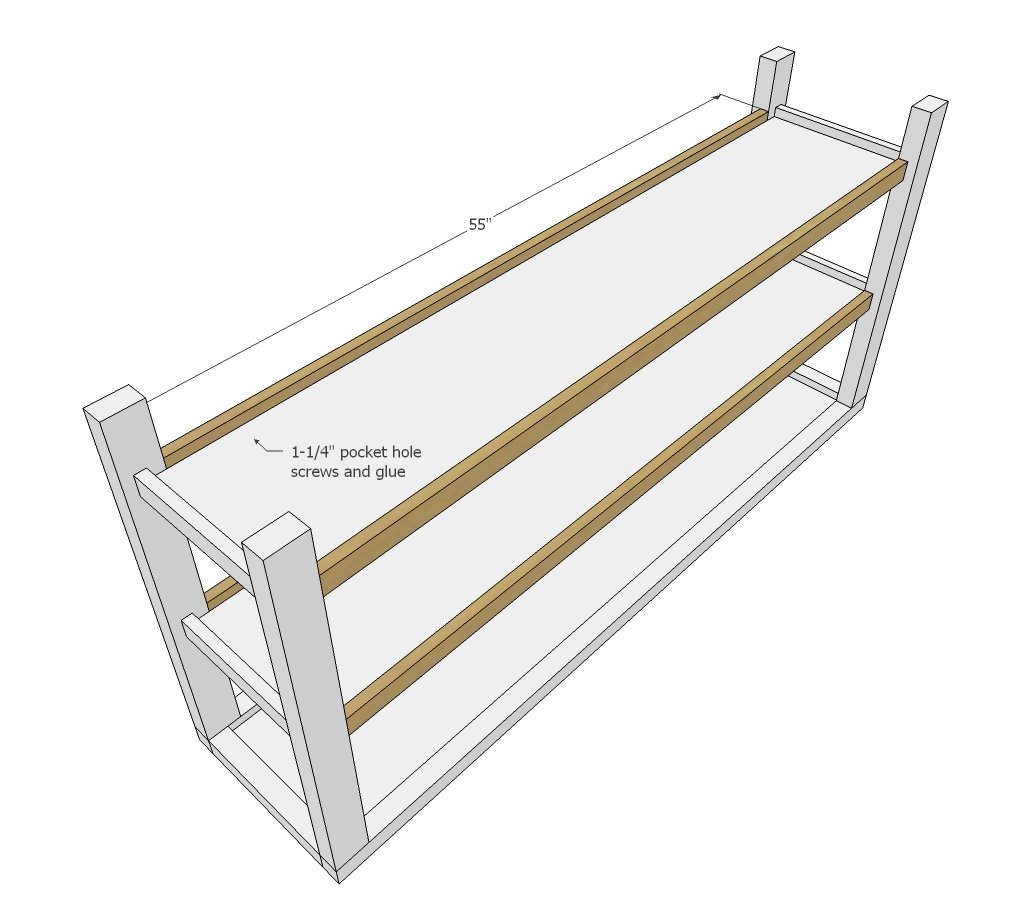
- 4 – 1x2 @ 55” – shelf front/back trim
Tools
- measuring tape
- safety glasses
- hearing protection
- kreg-jig
- drill
- compound miter saw
- sander
Step-by-step Instructions
Step 1
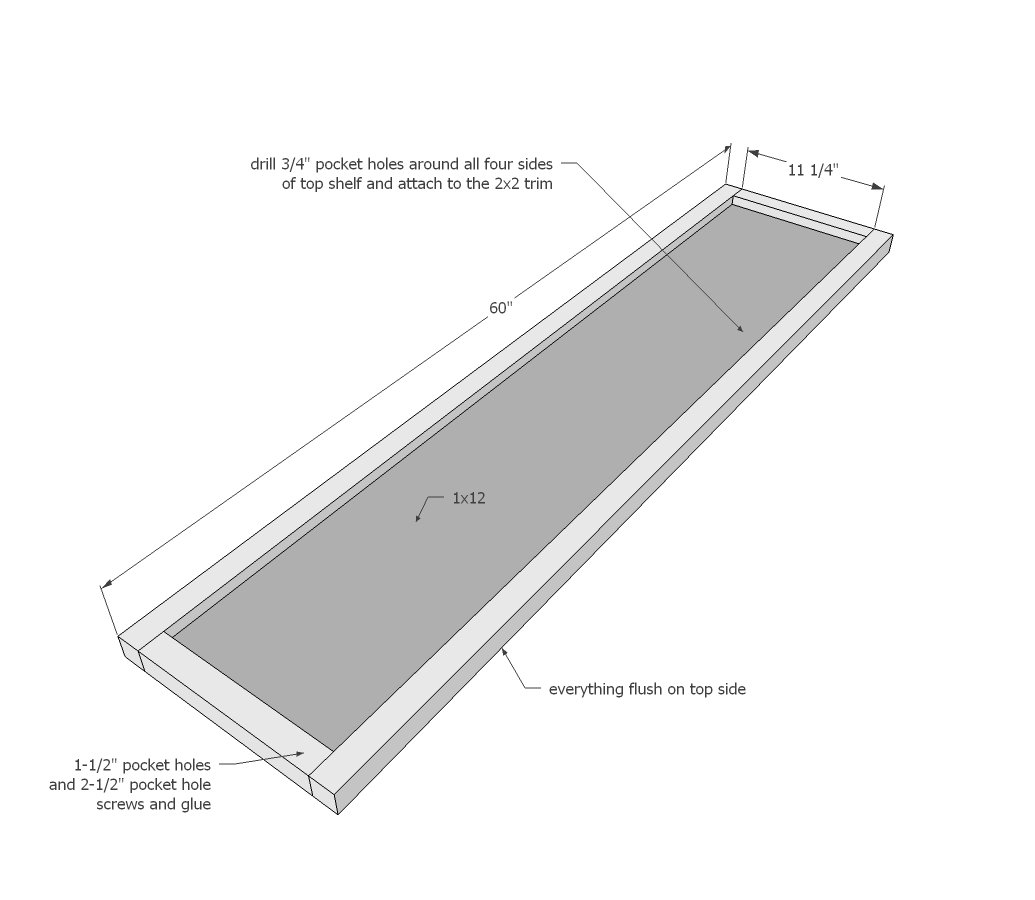
Drill 3/4” pocket holes around all four sides of the top shelf board. Drill a single 1-1/2” pocket hole on each end of 2x2s that are 11-1/4” long. Attach the end 2x2 trim with 1-1/4” pocket hole screws and Elmer’s Wood Glue. Now attach the 2x2 front and back trim using pocket hole screws – 1-1/4” when attaching the 1x12, and 2-1/2” when attaching the 2x2s together at corners.
Step 2
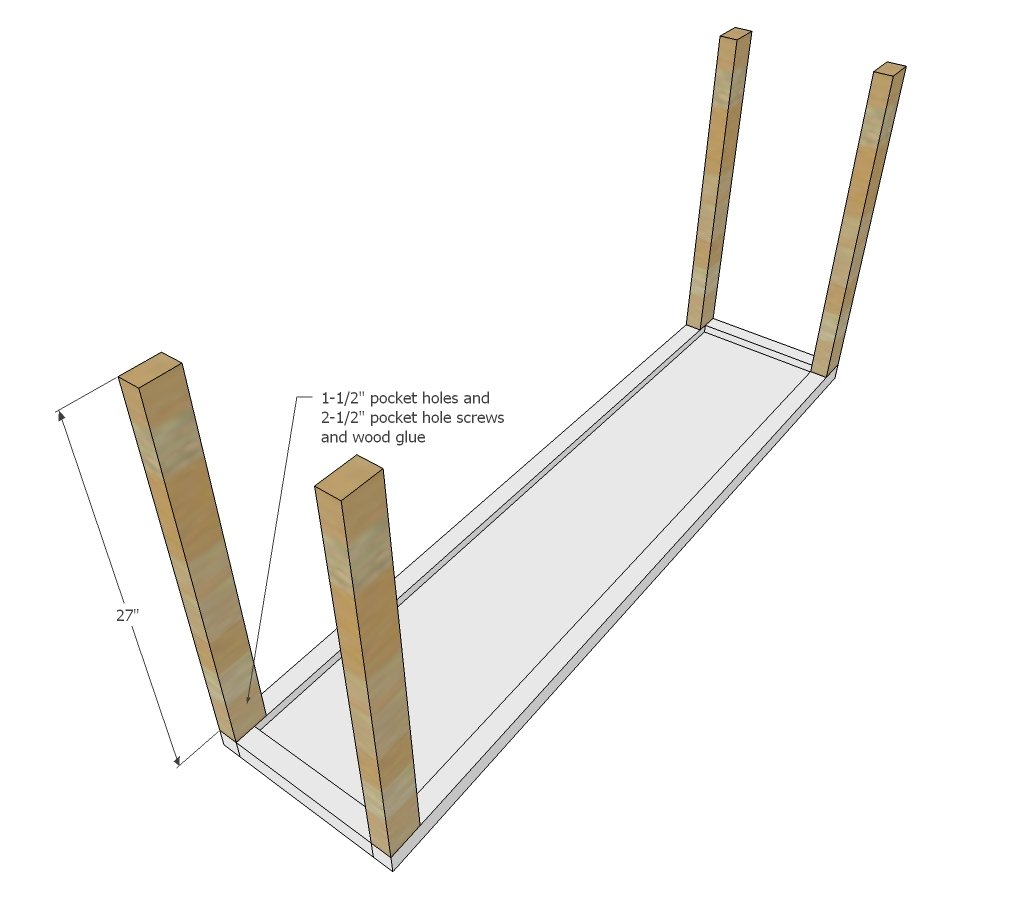
Drill two 1-1/2” pocket holes on one end of each leg. Attach to underside of top with glue and 2-1/2” pocket hole screws.
Step 3
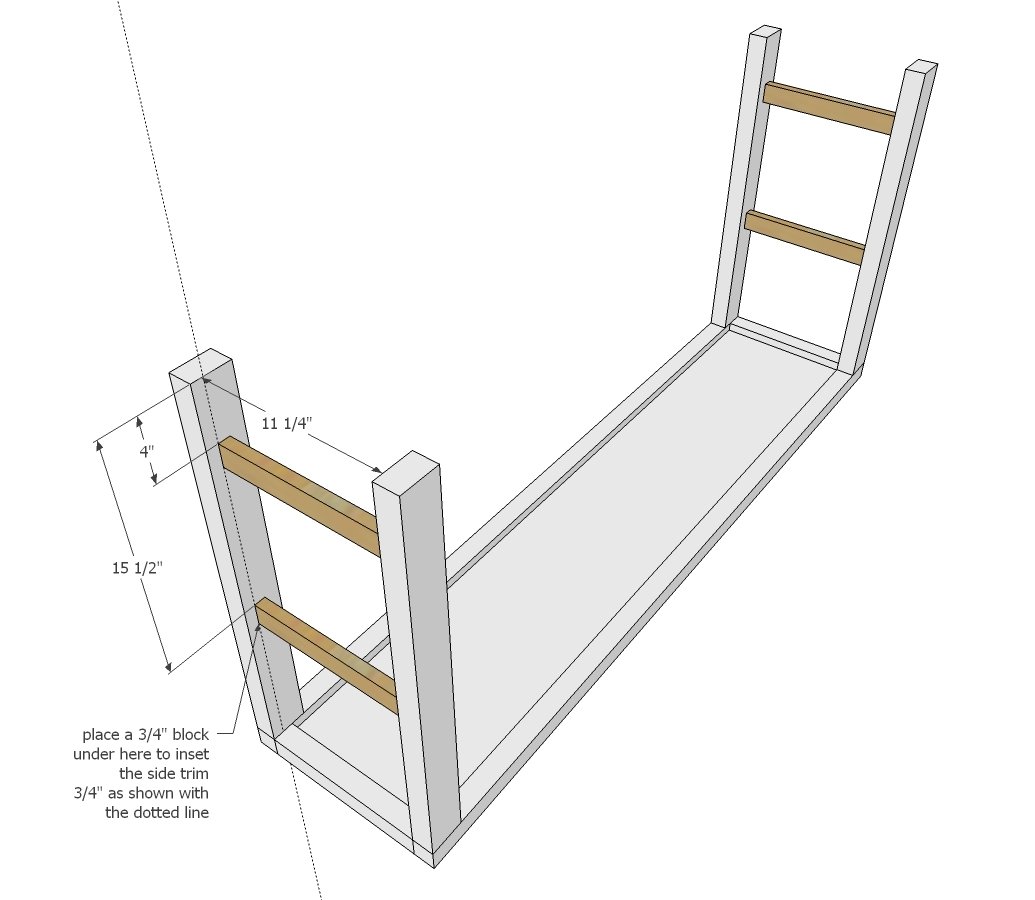
The side trim will be inset on the legs 3/4” from outside. You can mark or use a scrap piece of 1x wood as a spacer to help guide placement. Drill 3/4” pocket hole on each end of 1x2. Attach to legs with 1-1/4” pocket hole screws and glue.
Step 4
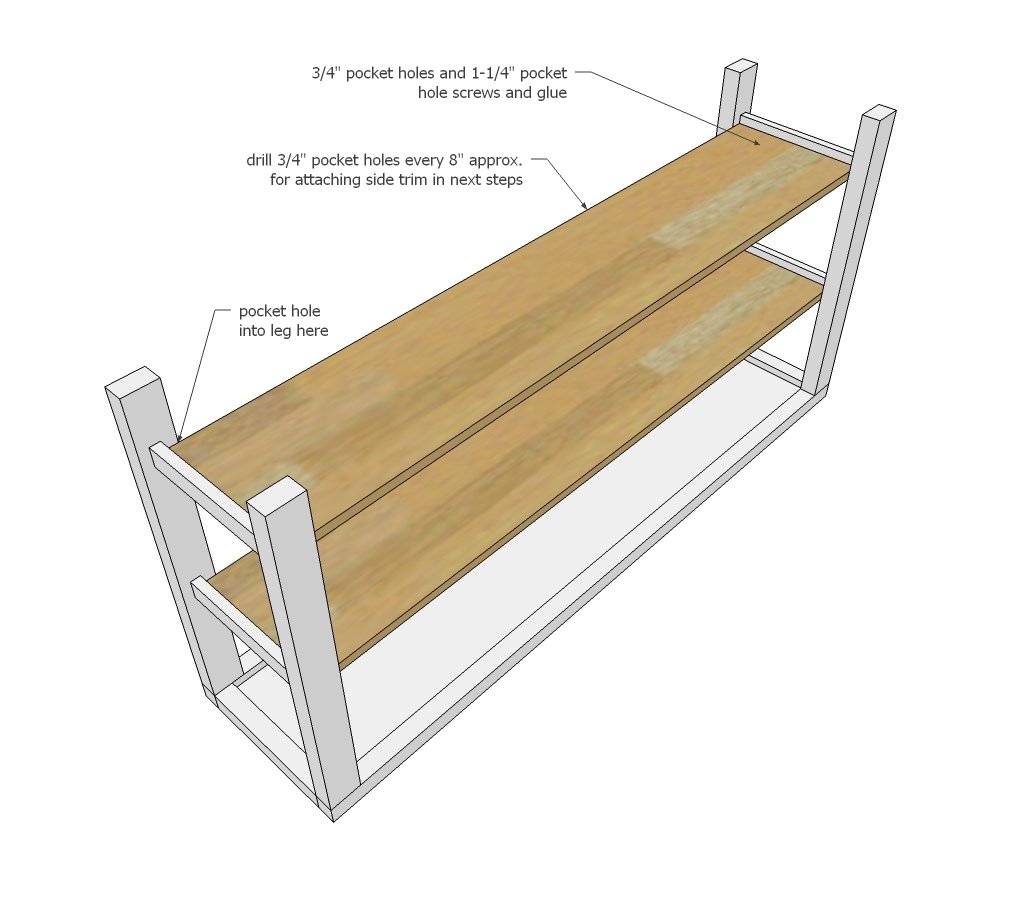
Drill 3/4” pocket holes around all four edges of the shelves, including a pocket hole into the legs. Attach to side trim and legs with 1-1/4” pocket hole screws and Elmer’s Wood Glue.
Step 5
Finishing
Sand all surfaces, starting with a medium grit and finishing with fine. Wipe off the dust, fill any holes or gaps with wood filler, and sand smooth once dry. Apply primer if you're painting, then finish with your choice of paint or stain and seal with a durable clear topcoat. For outdoor projects, use exterior-rated primer, paint or stain, and sealer so the piece stands up to the weather.
Source (temporary): https://www.ana-white.com/woodworking-projects/open-shelf-media-console