Open Storage Bed Frame (Twin)
Build your own storage bed frame. This unique design maximizes storage - so you can store all the things! Use any headboard, or build your own as shown with our free rustic farmhouse headboard plans.
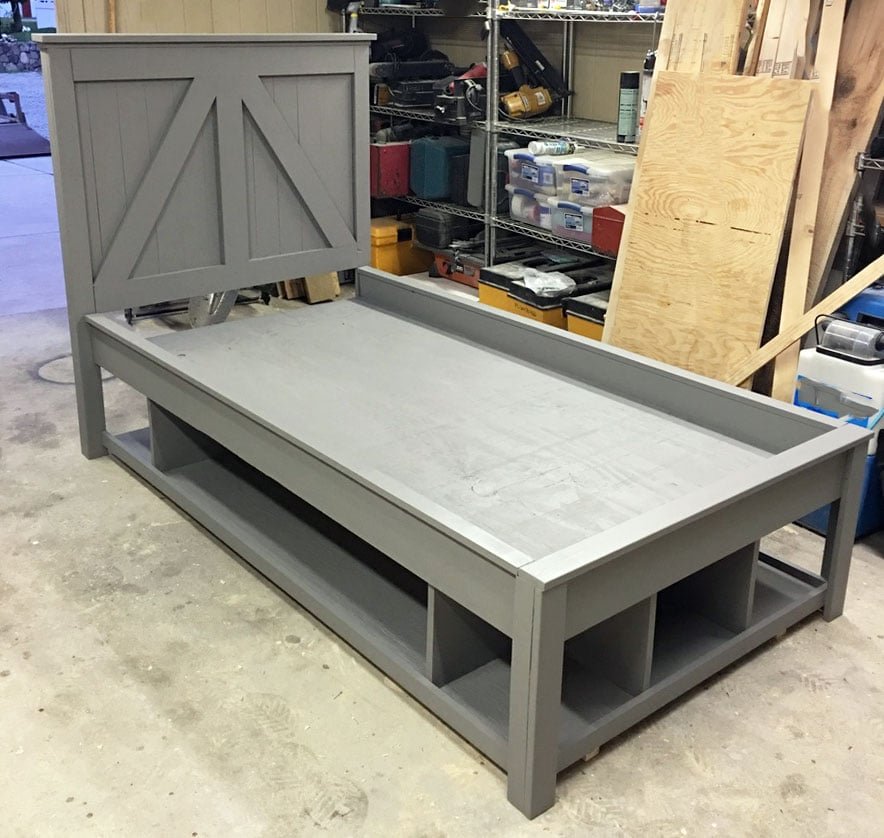
Specifications
| Project type | Beds and Bed Frames |
|---|---|
| Room | Bedroom |
| Style | Children's and Kid's Room Furniture and Toy Plans |
| Difficulty | Advanced |
| Estimated cost | $100-$150 |
Dimensions
Use the size-specific shopping and cut lists below.
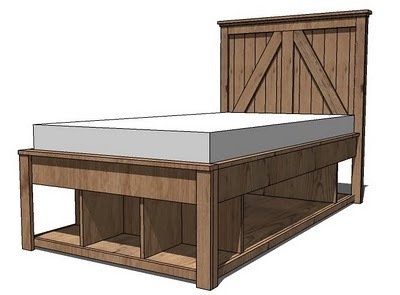
Shopping List
2 - sheets 3/4" Plywood (AC is fine)
2 - 2x2 @ 8 Feet Long
1 - 1x12 @ 10 Feet Long
1 - 1x6 @ 16 Feet Long
1 - 1x3 @ 8 Feet Long
5 - 1x2 @ 8 Feet Long
Cut List
Quantity
Board
Length
Description
A
2
2x2
70”
Under Bed Supports
B
2
¾” Plywood
75 3/4 “ x 39
Side Legs
C
2
1x12
39”
Dividers
D
2
1x12
11 1/4”
Small Dividers
E
2
1x6
75 3/4”
Side Rail Trim
F
1
1x6
40 1/2”
Foot Rail Trim
G
2
1x2
75 3/4”
Bottom Shelf Side Trim
H
1
1x2
40 1/2”
Bottom Shelf Foot Trim
I
2
1x2
18 1/4”
Legs
J
2
1x3
18 ¼”
Legs
K
1
1x3
42”
Footer Trim
L
2
1x2
75”
Side Top Trim
Tools
- measuring tape
- square
- pencil
- safety glasses
- hearing protection
- drill
- table saw
- nailer
- sander
- level
- countersink drill bit
Step-by-step Instructions
Step 1
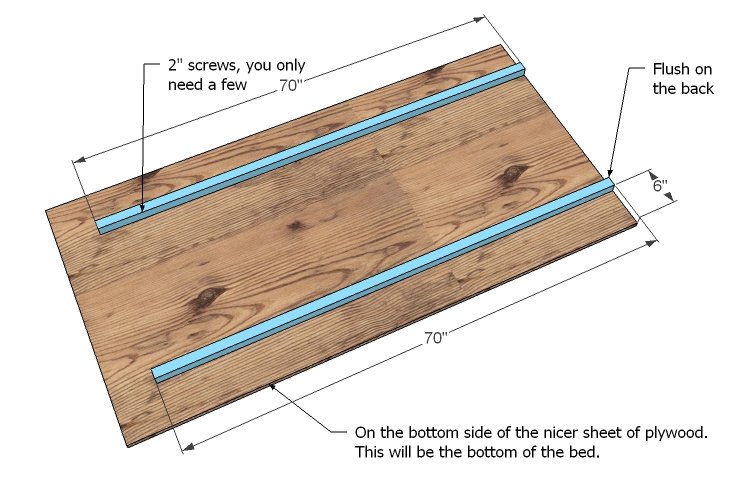
On the bottom side of the bottom piece of plywood, attach the two 2x2 supports with 2” screws. You only need a few screws, the bed rests on top of these supports, and the screws just hold the cleats in place.
Step 2
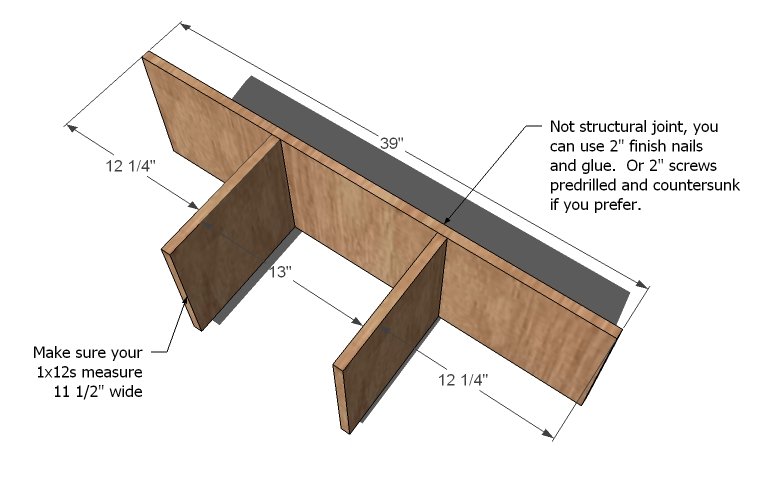
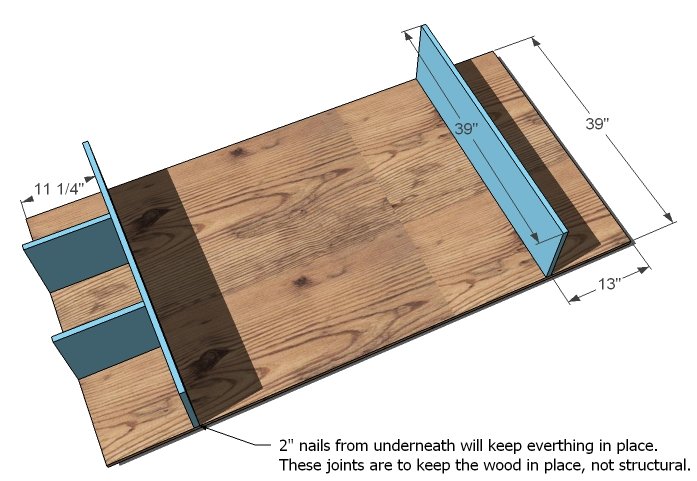
Build the bottom divider unit as shown to the left with the 1x12s and 2” finish nail and glue. Small dividers are 11 ¼” long.
Step 3
Attach dividers to the plywood as shown with nails and glue.
Step 4
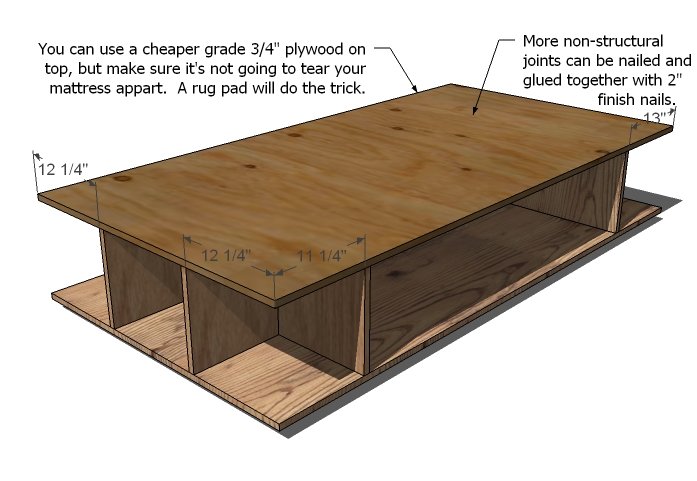
Attach the top plywood as you did the bottom. Measurements shown are to the sides of the dividers, not the centers. Nail into the centers.
Step 5
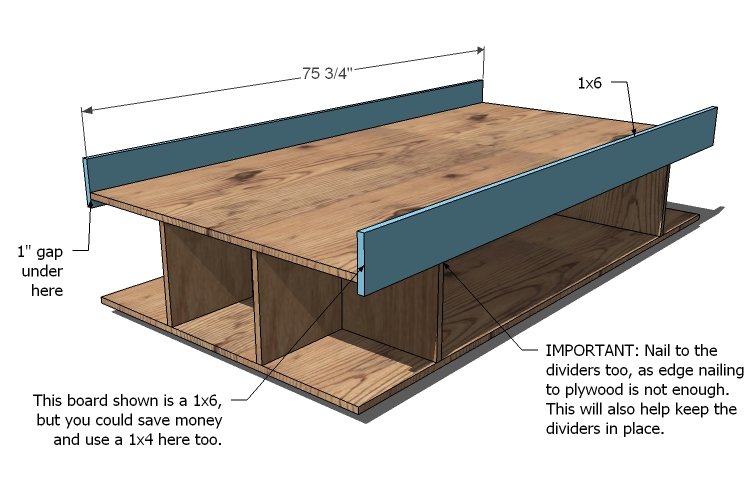
As shown in the diagram above, attach the siderail trim to the bed frame. Make sure you also attach to the dividers to reinforce all joints.
Step 6
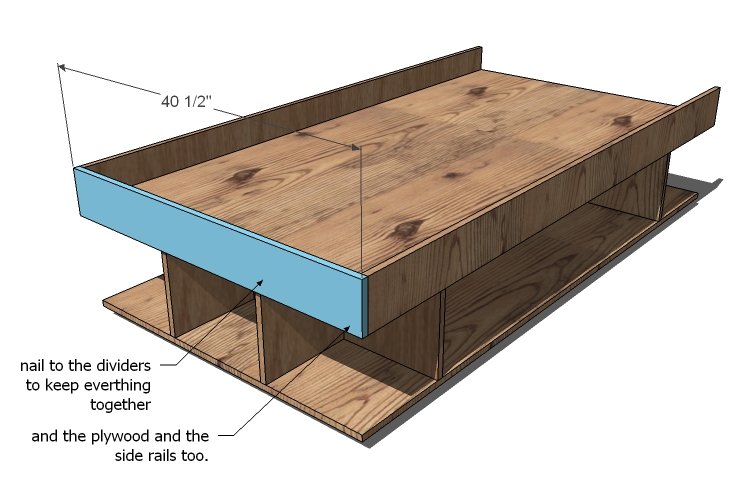
Nail the end trim in place with 2” finish nails and glue.
Step 7
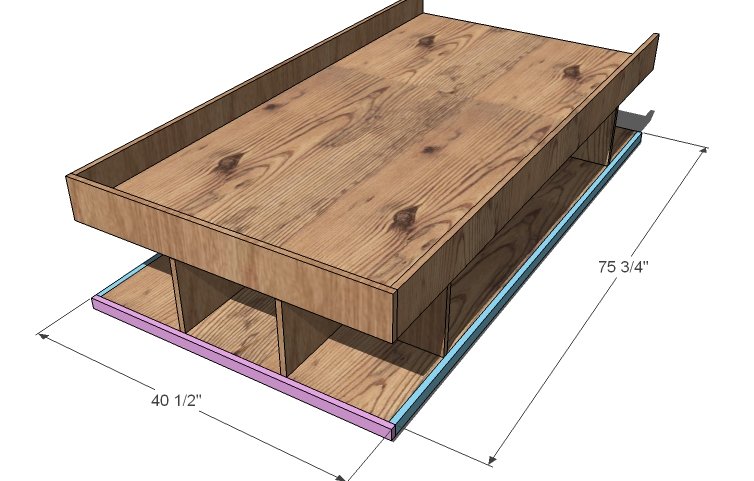
Keeping edges flush with the top of the bottom plywood, attach the bottom trim with 2” finish nails and glue.
Step 8
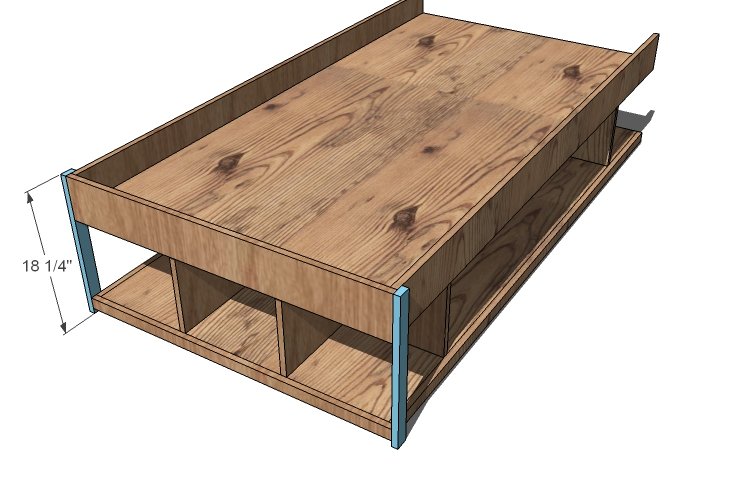
Attach the 1x2 legs to the sides, as shown in the diagram, keep outside edges flush and reinforcing all trim joints. Use 1 ¼” nails and glue where needed to avoid overshooting nails.
Step 9
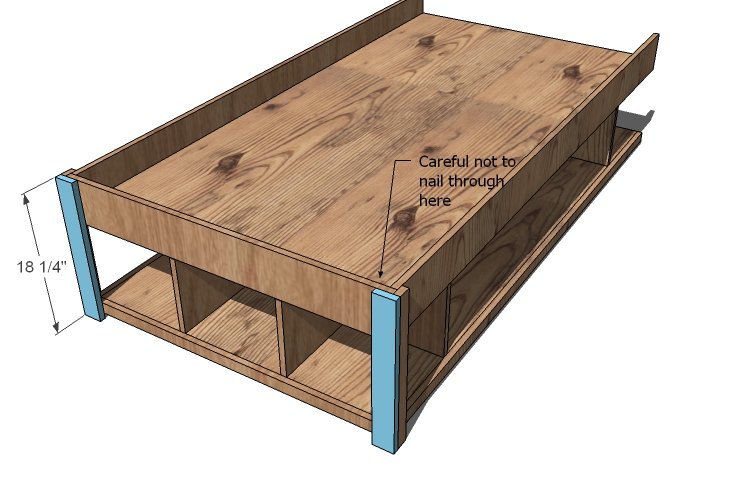
The 1x3 legs will be nailed to both the 1x2 leg and the 1x6 and 1x2 trim boards to reinforce all joints. Minimize any gaps between the two leg boards to make the leg appear as a solid board.
Step 10
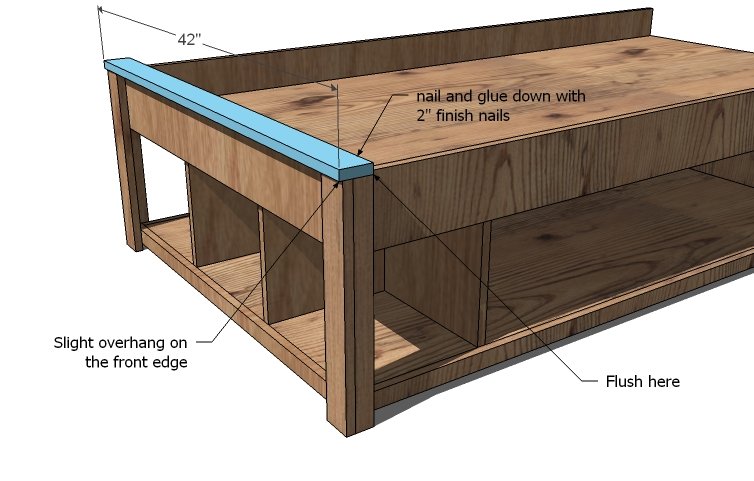
The bottom trim is a 1x3. Use 2” finish nails and glue to attach, reinforcing all joints by nailing into both leg pieces
Step 11
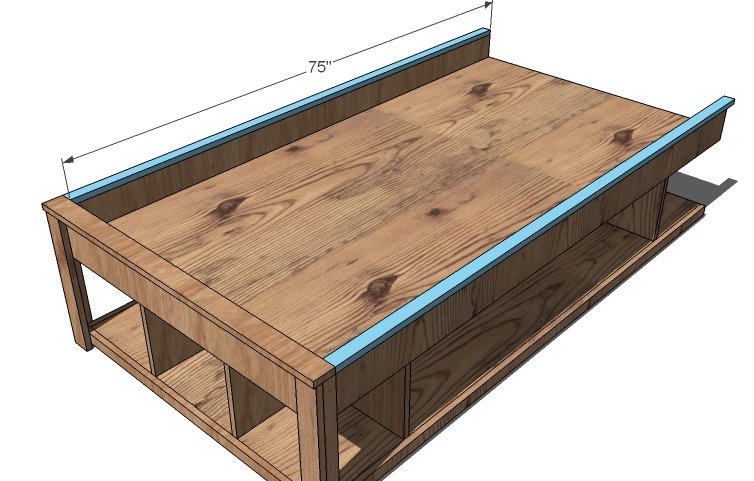
Attach the side trim as shown here, flush to the inside of the bed. Use glue and 2” finish nails.
Step 12
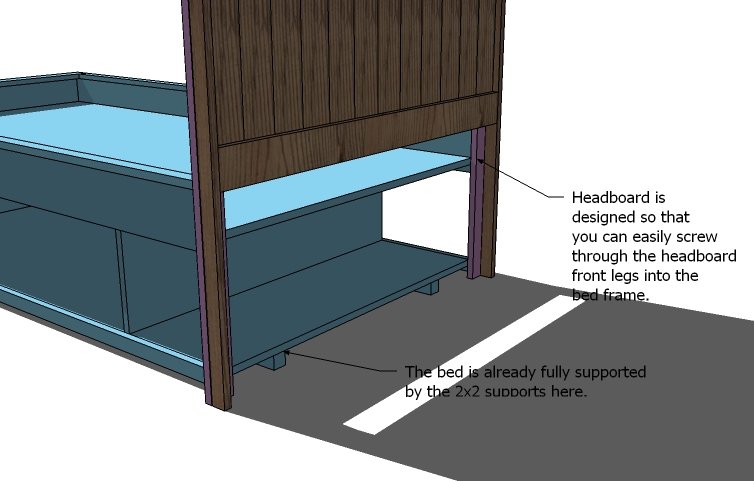
It will be very easy to attach this bed to the headboard. Simply drill pilot holes and attach with screws directly through the headboard legs, as shown in the diagram above.
Finishing
Sand all surfaces, starting with a medium grit and finishing with fine. Wipe off the dust, fill any holes or gaps with wood filler, and sand smooth once dry. Apply primer if you're painting, then finish with your choice of paint or stain and seal with a durable clear topcoat. For outdoor projects, use exterior-rated primer, paint or stain, and sealer so the piece stands up to the weather.
Source (temporary): https://www.ana-white.com/woodworking-projects/open-storage-bed-frame-twin