Outdoor Chaise Lounge
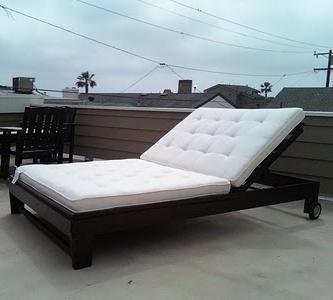
Plans are for a single lounger, but can be easily modified, as one of our readers did, to a double. Featuring no special hardware, slatted wood design, adjustable back angles, and optional wheels.
Specifications
| Project type | Beds and Bed Frames |
|---|---|
| Room | Outdoor |
| Style | Farmhouse Furniture |
| Difficulty | Advanced |
| Estimated cost | $50 - $100 |
Dimensions
Use the size-specific shopping and cut lists below.
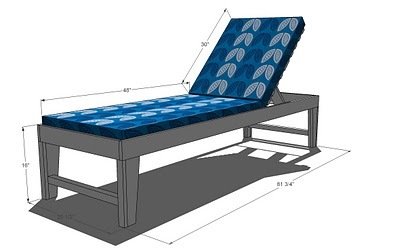
Shopping List
Shopping List
1 – 2×2 8′ Long
10 – 1×2 8′ Long
5 – 1×4, 8′ Long
2″ Screws
1 1/4″ Screws
5 Hinges
1 – 24″ 3/4″ Dowel
4 – 3/4″ Pipe Straps
Wood Glue
Wood Filler
Finishing Supplies
24″ Wide Foam, 48″ and 30″ long for Cushions
Fabric for Cushions, 2 1/2″ yards (approximately)
Cut List
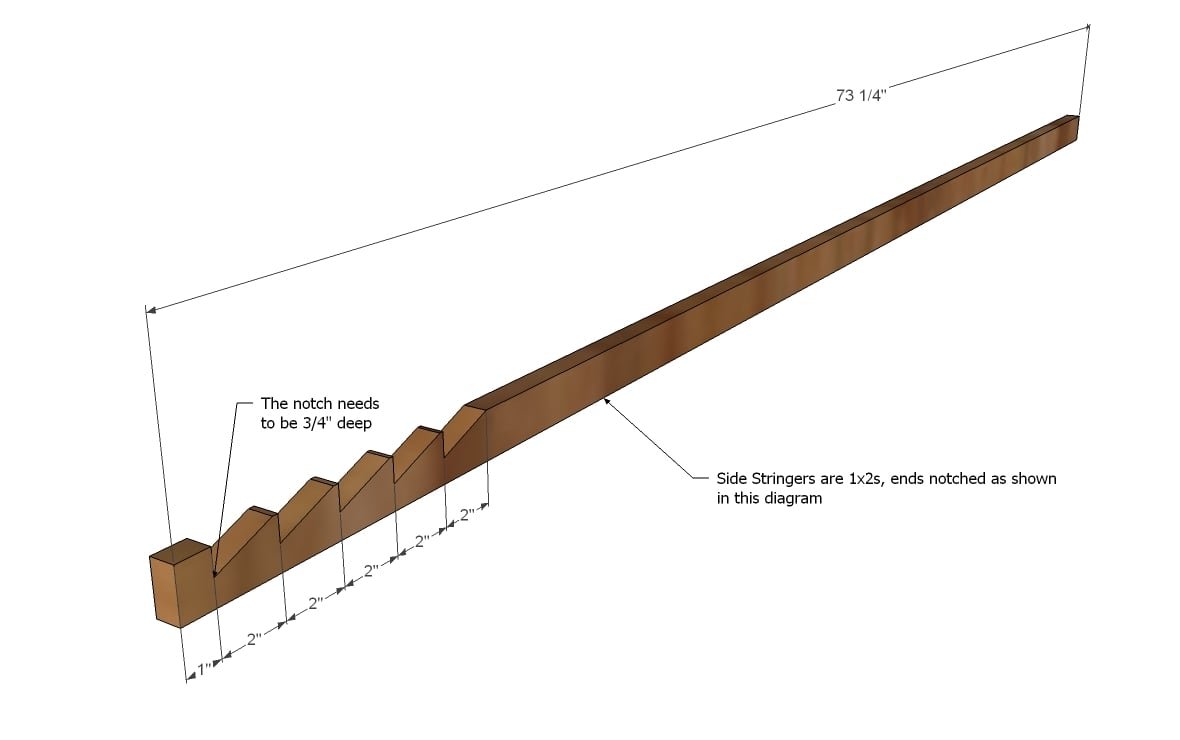
2 – 1×2 @ 73 1/4″ (Side Stringers)
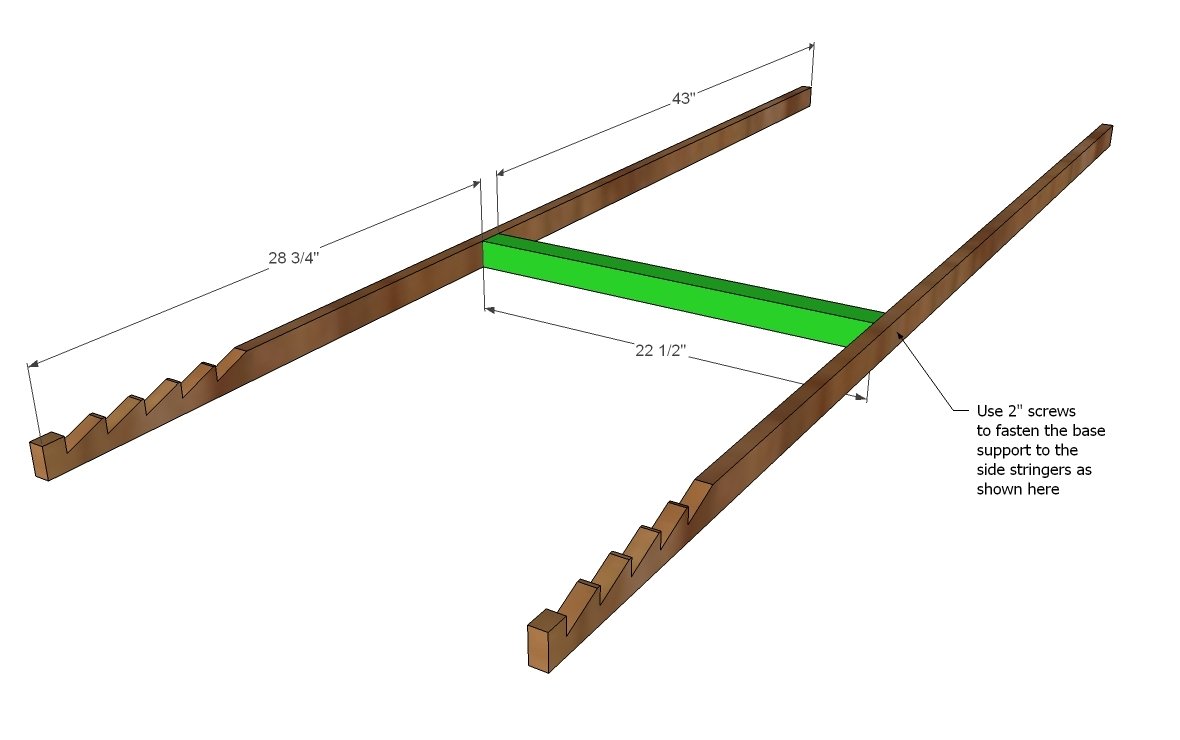
1 – 2×2 @ 22 1/2″ (Base Support)
2 – 1×4 @ 81 3/4″ (Sides)
4 – 1×4 @ 14″ (Inside Leg Piece)
2 – 1×4 @ 24″ (Front and Back)
2 – 2×2 @ 22 1/2″ (Stretchers)
4 – 1×4 @ 12 1/2″ (Outer Leg)
4 – 1×2 @ 12 1/2″ (Fronts and Backs of Legs)
24 – 1×2 @ 24″ (Main Slats)
2 – 1×4 @ 24″ (Support Slats)
3 – 1×2 @ 30 1/2″ (Back Stringers)
2 – 1×4 @ 16 1/2″ (Back Incline Support)
1 – 3/4″ Hardwood Dowel or Pipe @ 24″ (Back Incline Catch)
Tools
- measuring tape
- square
- pencil
- hammer
- safety glasses
- hearing protection
- drill
- circular saw
Step-by-step Instructions
Step 1
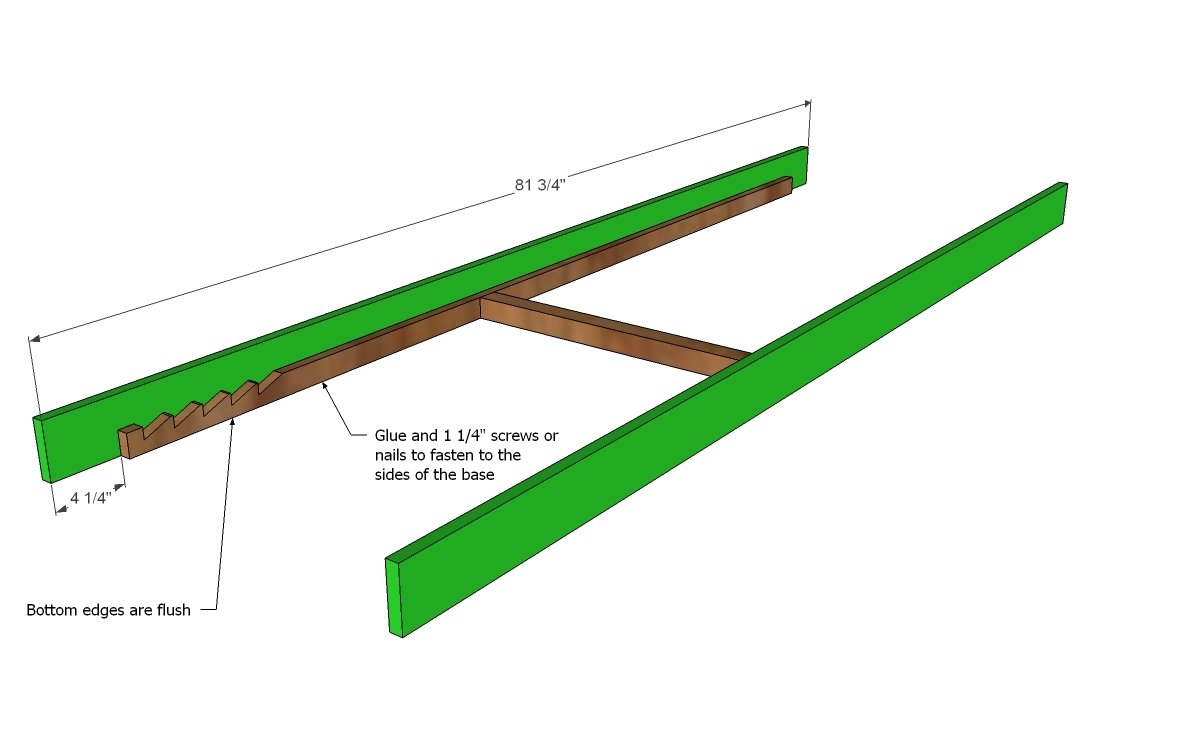
Side Stringers. Notch out your side stringers as shown here. You could actually add more notches for more customization if you would like.
Step 2
Base Support. Use 2″ screws and glue to fasten the base support as shown here.
Step 3
Sides. Fasten the sides to the side stringers, keeping bottom edges flush. Use glue and 1 1/4″ screws or nails. There will be a 4 1/4″ difference on the front and back ends of the stringer and the sides, as shown above.
Step 4
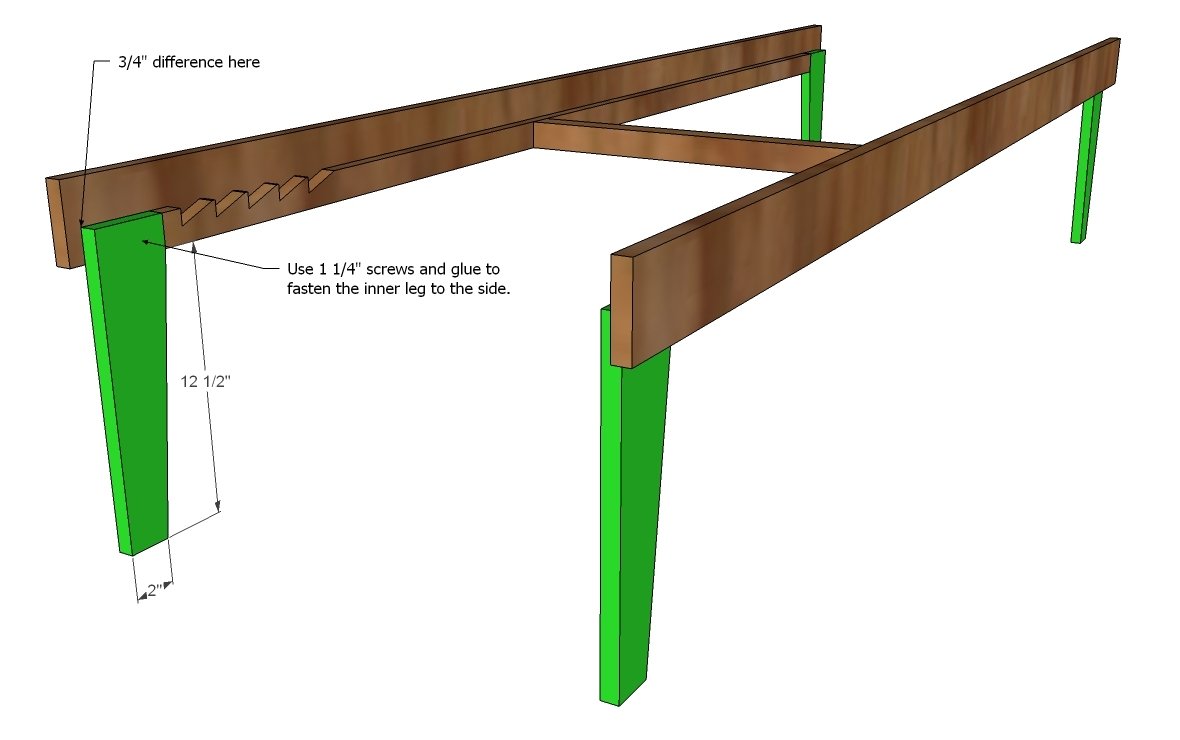
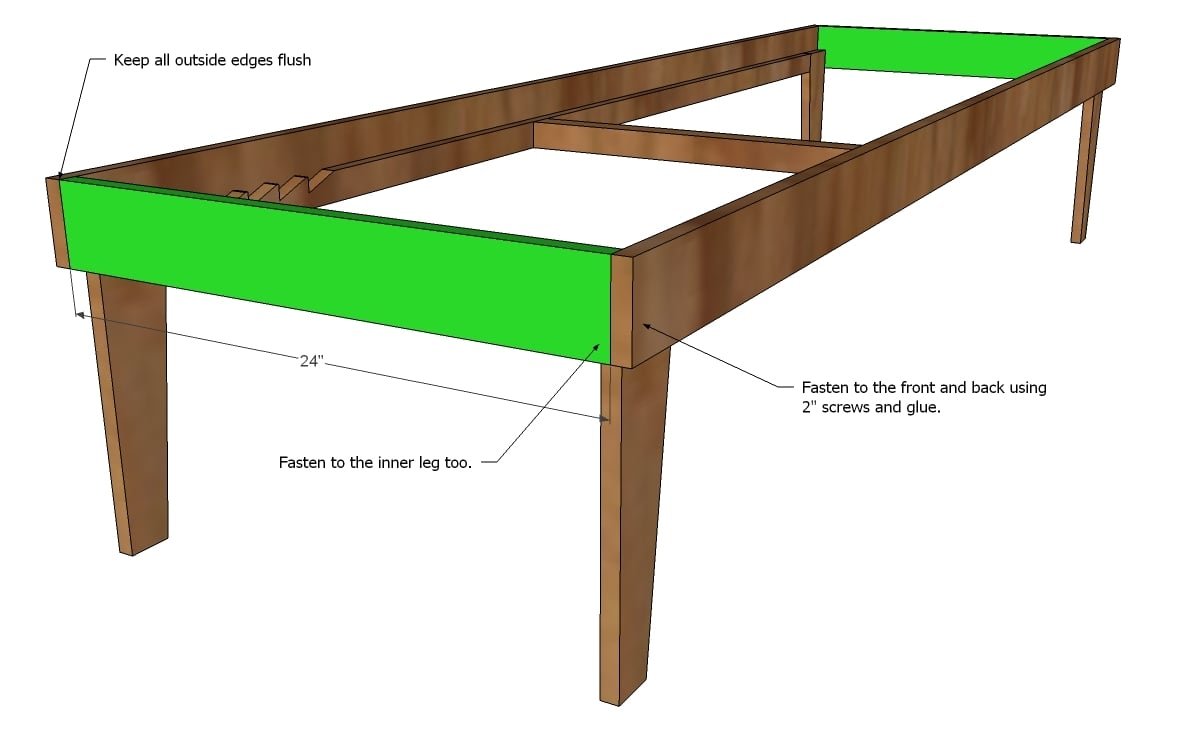
Inside Legs. First cut your inside leg to a taper, as shown above. Then fasten the inside leg to the sides, using glue and 1 1/4″ screws.
Step 5
Step 6
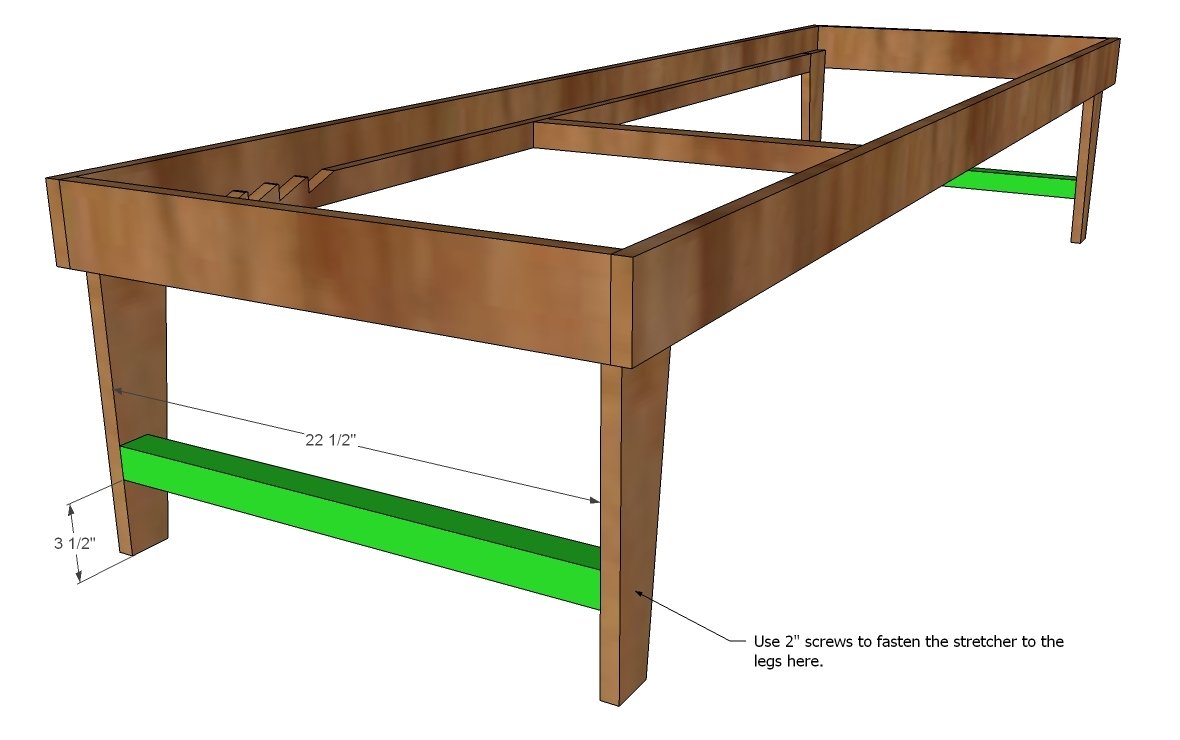
Stretchers. Fasten the stretcher to the inner legs as shown here. Use 2″ screws and glue.
Step 7
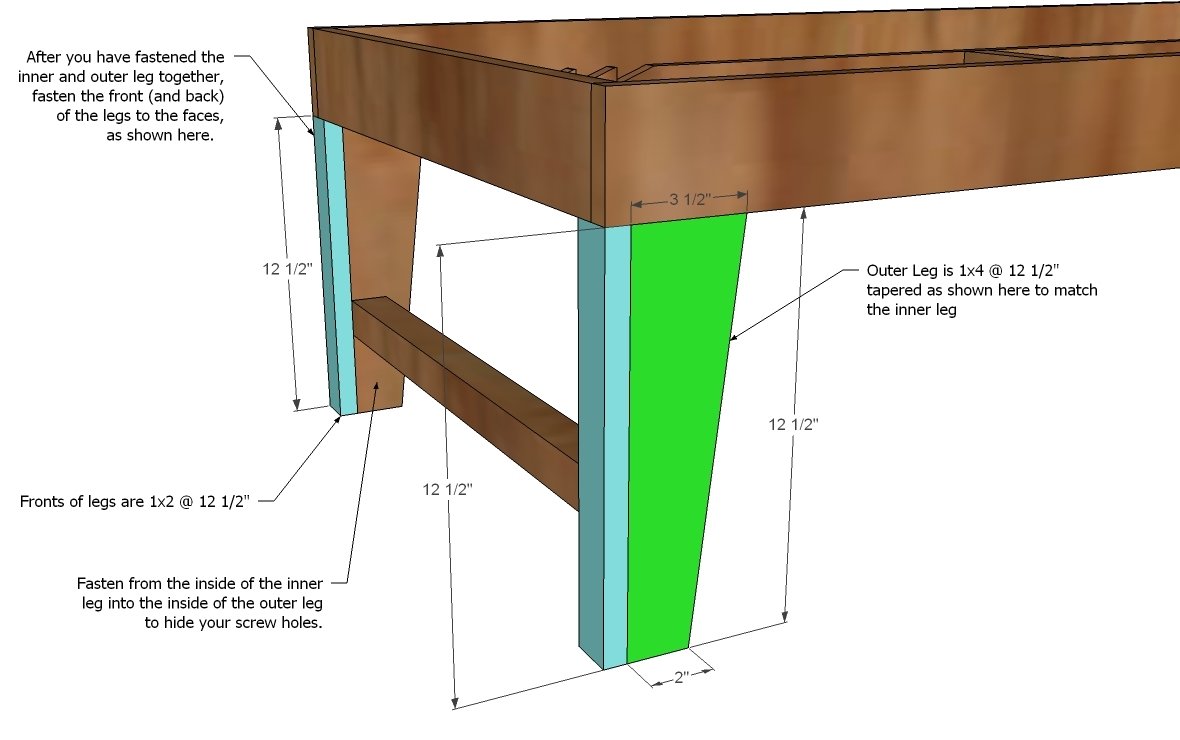
Finishing the legs. First, cut the taper of the outer leg as shown here so it matches the inner leg. Fasten the outer leg to the inner leg using 1 1/4″ nails. Fasten through the insides. Then fasten the fronts of the legs (or the backs for the back legs) to the inner and outer leg pieces.
Step 8
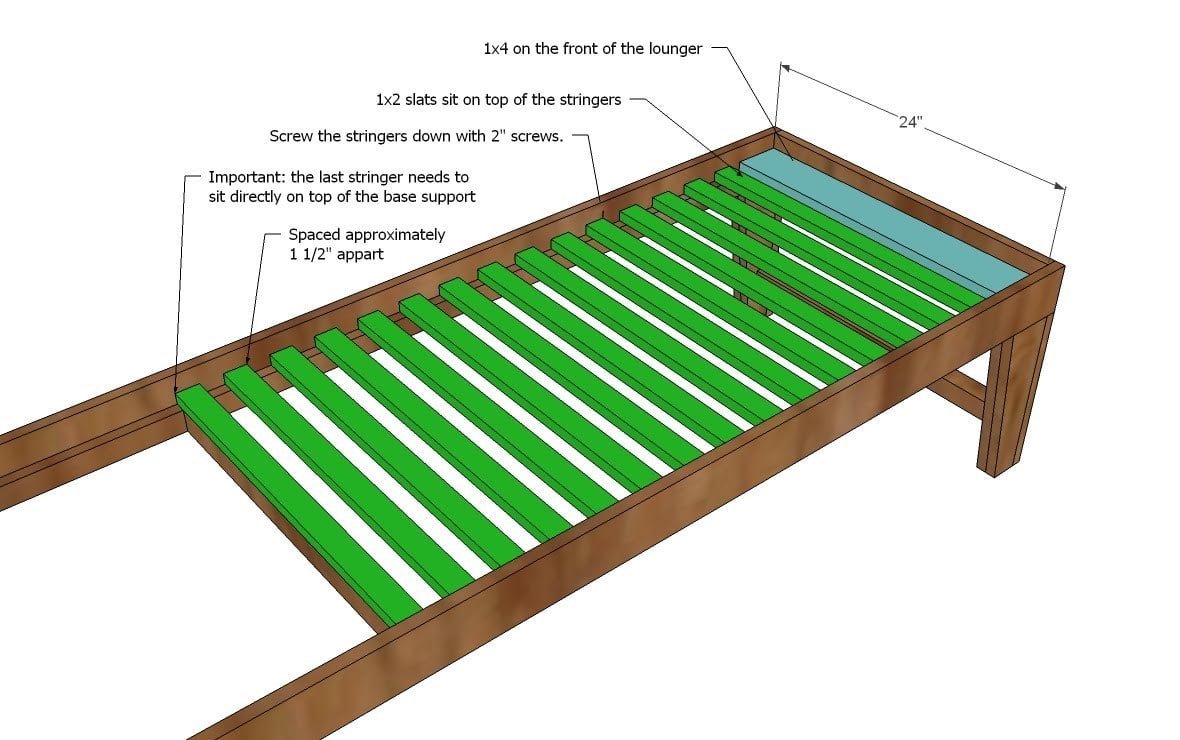
Main Slats. As shown above, fasten the main slats to the stringers. Start with the 1×4 front piece and the last slat that sits on top of the base support. Then fill in with slats, approximately 1 1/2″ apart. Screw down with 2″ screws and glue.
Step 9
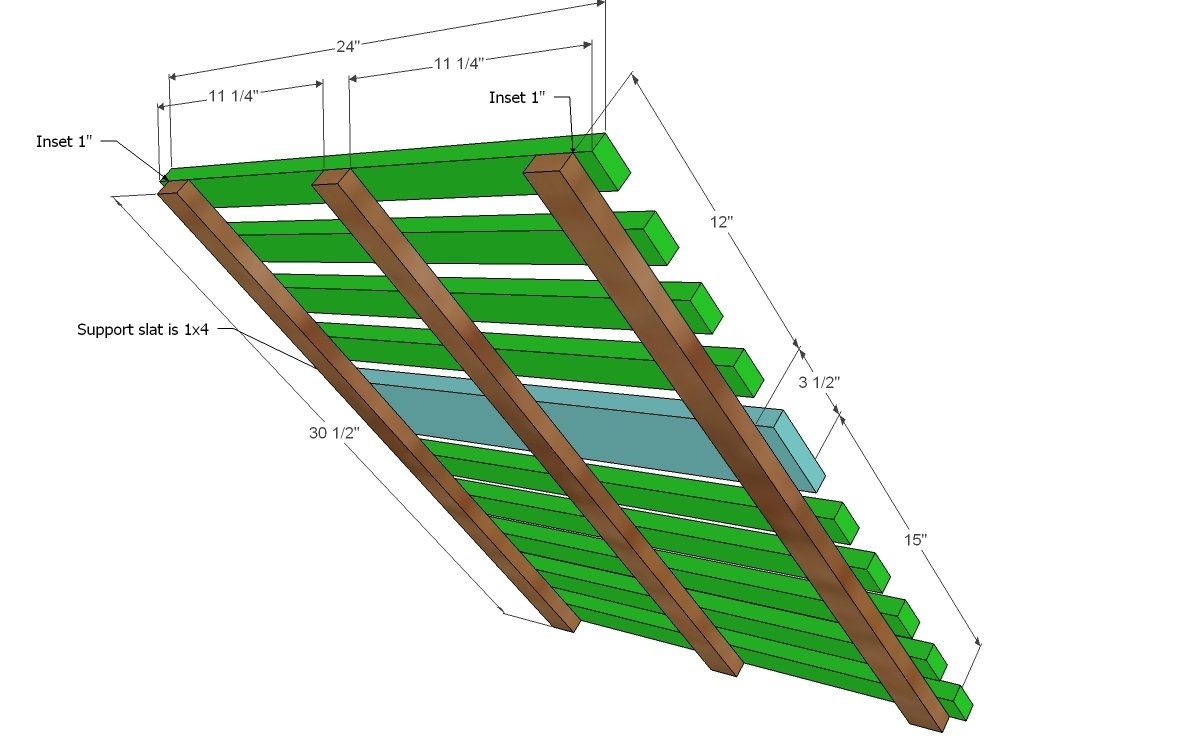
Back. Build the back as shown above. Keep the top and bottom edges flush with the back stringers, but there will be a 1″ difference on the slats and the stringers, as shown above. Use 1 1/4″ screws to fasten through the back stringers into the backs of the slats to hide your screws.
Step 10
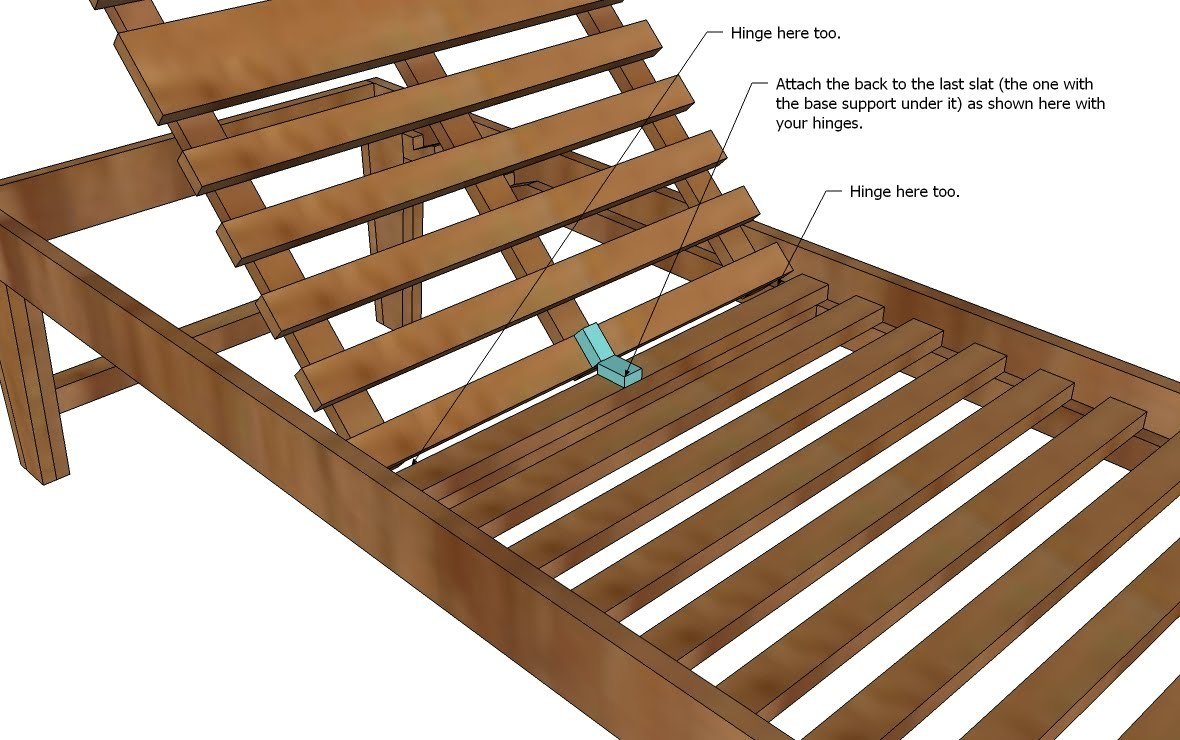
Attaching the Back. Lay the back in the lounger, and attach the last slat of the back to the last slat on the lounger. Simply lay the hinges flat on top of the slats and screw in place. Position the hinges so that the pin rests in a gap between the back slat and the seat slat. Use three hinges, all positioned over the back stringers.
Step 11
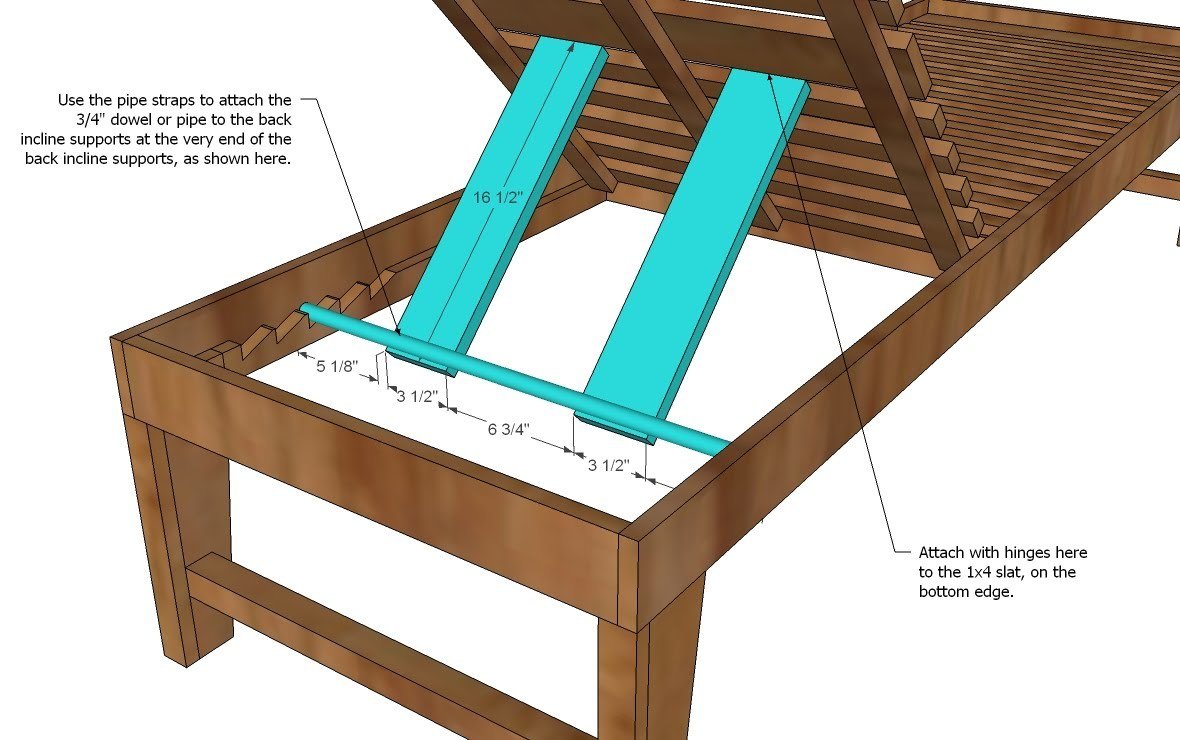
Incline Support. Attach the dowel with the pipe straps to the incline supports and use the hinges to attach the incline supports to the 1×4 back slat. The dowel needs to be on the very end of the incline supports so that the dowel can fold to the top when the recliner is layed flat.
Step 12
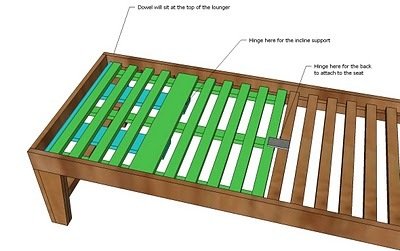
Mechanics. I added this diagram to help illustrate how the lounger will appear when in the flat position. Notice how the dowel sits above the last slat on the back?
Finishing
Sand all surfaces, starting with a medium grit and finishing with fine. Wipe off the dust, fill any holes or gaps with wood filler, and sand smooth once dry. Apply primer if you're painting, then finish with your choice of paint or stain and seal with a durable clear topcoat. For outdoor projects, use exterior-rated primer, paint or stain, and sealer so the piece stands up to the weather.
Source (temporary): https://www.ana-white.com/woodworking-projects/outdoor-chaise-lounge