Outdoor Sofa
Build your own outdoor sofa. Modern style, reclined seat and back for increased comfort. Fits standard 25" x 25" deep seat cusions. from Matching loveseat plans available here and matching chair plans available here.
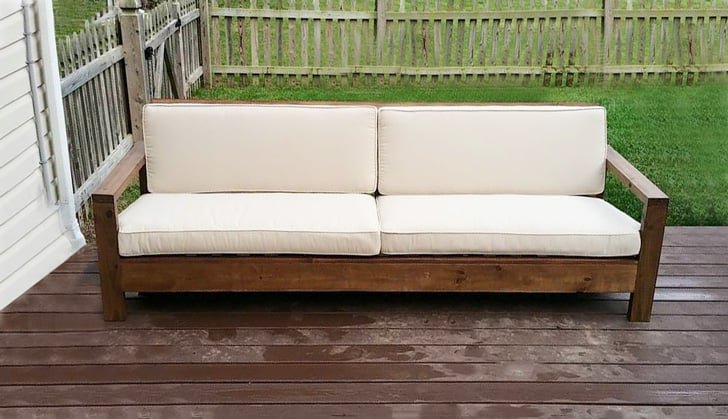
Specifications
| Project type | Sofa |
|---|---|
| Room | Outdoor |
| Style | Cottage Style Furniture Plans |
| Difficulty | Intermediate |
| Estimated cost | $20 - $50 |
Dimensions
Use the size-specific shopping and cut lists below.
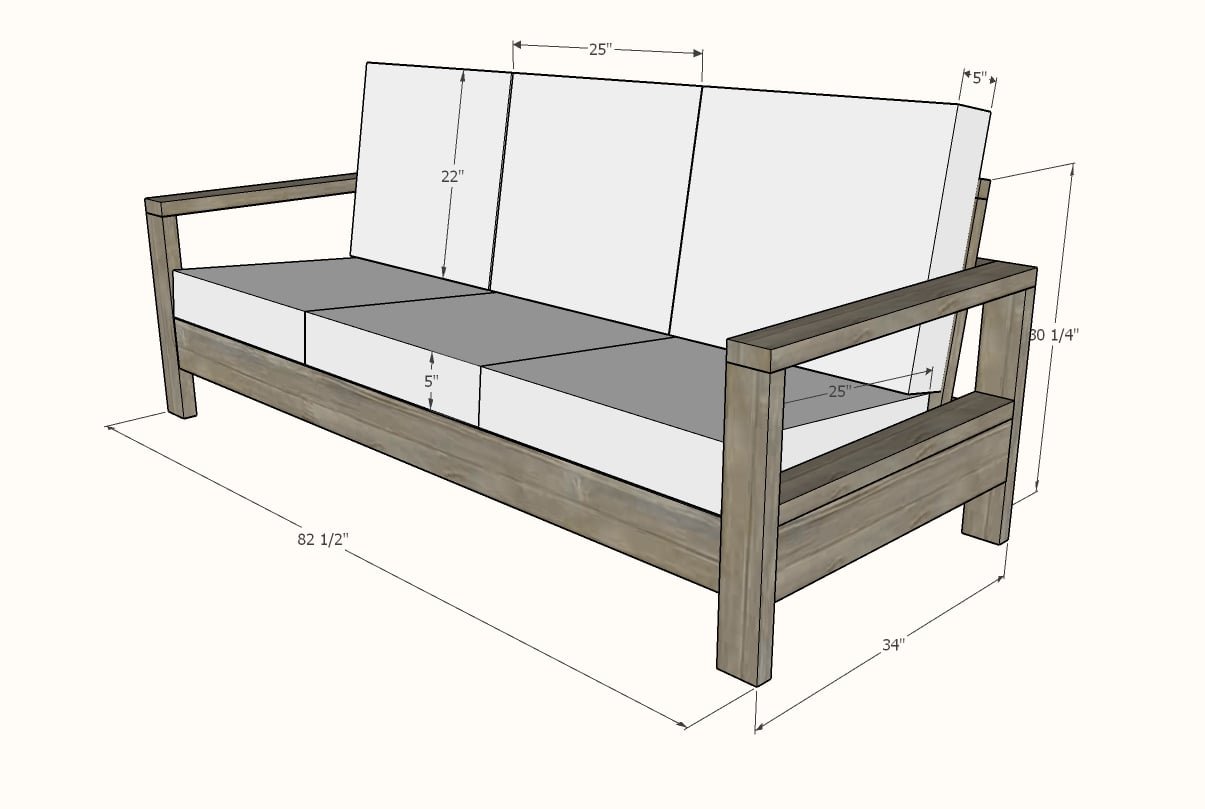
Shopping List
3 - 2x2 @ 8 feet long
4 - 2x6 @ 8 feet long
6 - 2x4 @ 8 feet long
2 - 1x4 @ 10 feet long
(50) 2-1/2" self tapping exterior wood screws
(50) 2-1/2" pocket hole screws
(20) 1-1/2" self tapping exterior wood screws
Cut List
4 - 2x4 @ 22" - legs
2 - 2x4 @ 34" - arm rests
2 - 2x4 @ 31" - arm supports
2 - 2x6 @ 31" - arm supports
2 - 2x6 @ 75-1/2" - bases
1 - 2x4 @ 75-1/2" - back
1 - 2x2 @ 75-1/2" - back rest top
9 - 2x4 @ 23-3/4" - back slats
1 - 2x6 @ 79-1/2" - back base
2 - 2x2 @ 79-1/2" - seat slat cleats
10 - 1x4 @ 23-1/2" - seat slats
Tools
- measuring tape
- pencil
- safety glasses
- hearing protection
- kreg-jig
- drill
- circular saw
Step-by-step Instructions
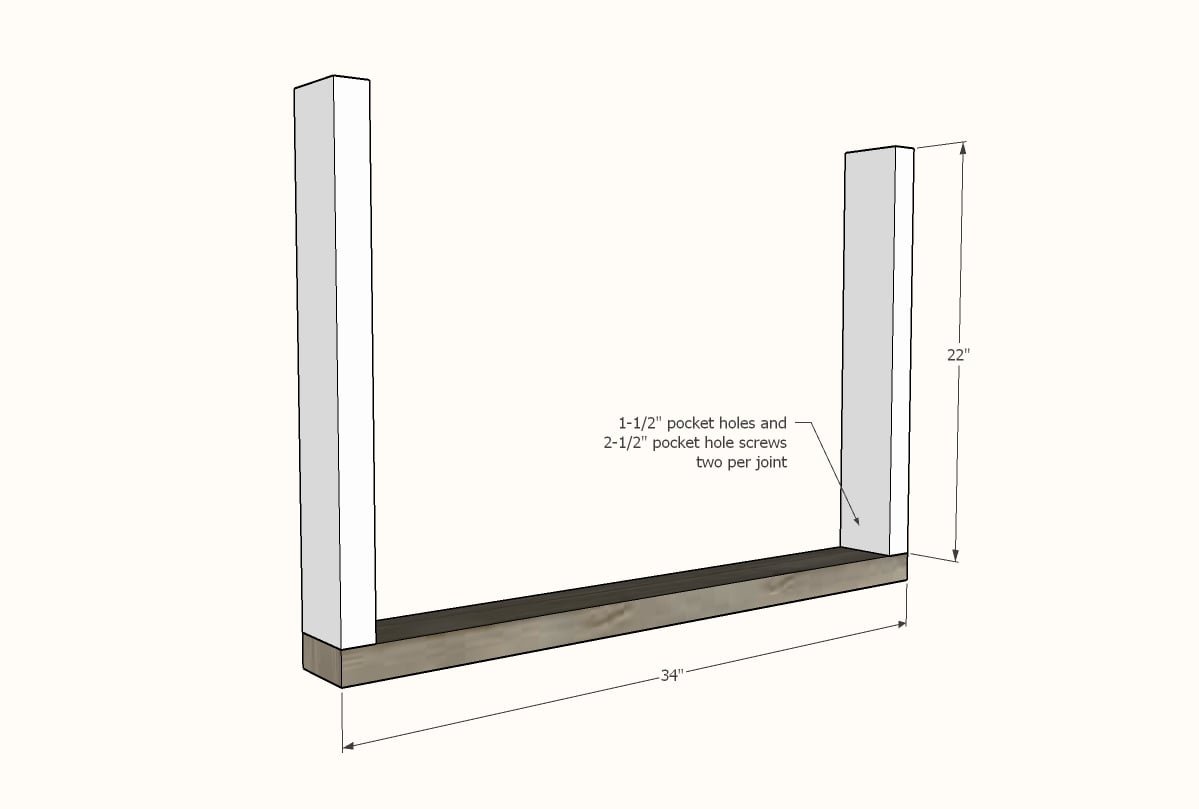
Drill two 1-1/2" pocket holes on top of each of the legs.
Attach to the arm rest from underneath with 2-1/2" pocket hole screws. Leg is shown upside down.
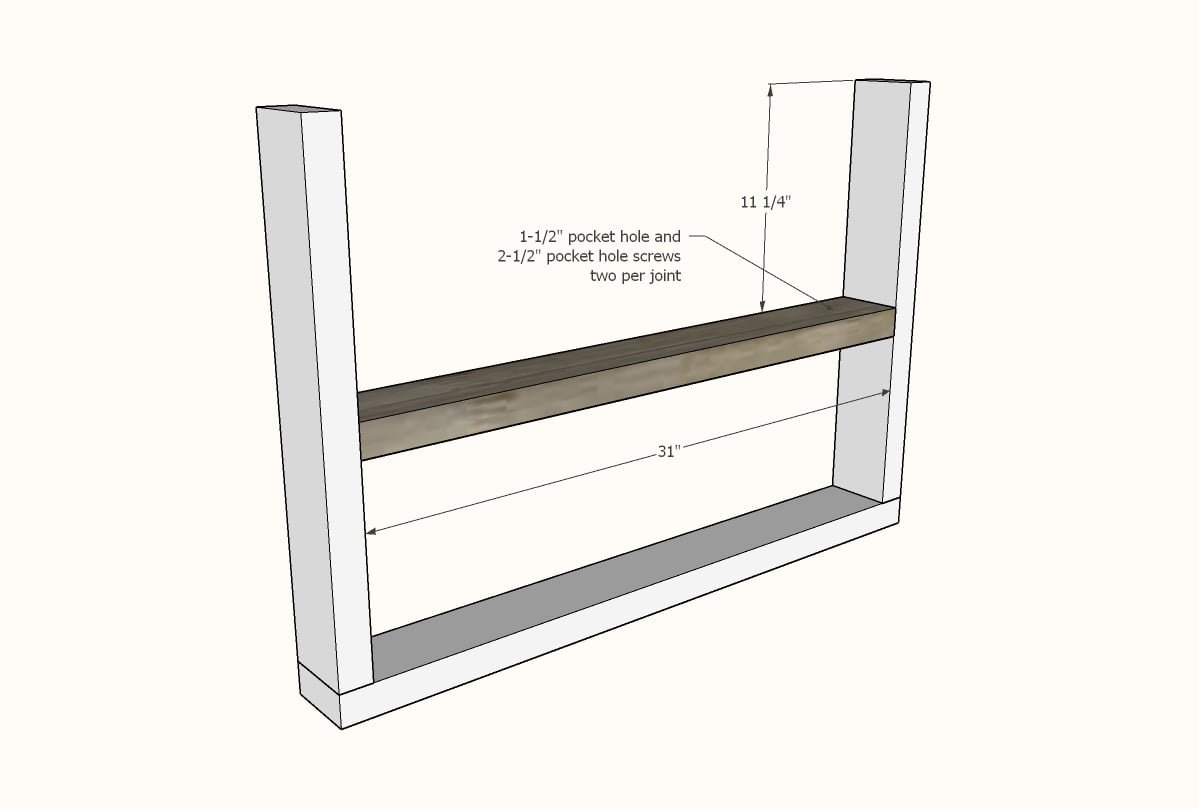
Drill two 1-1/2" pocket holes on each end of the 2x4 side supports.
Attach to the insides of the legs with 2-1/2" pocket hole screws. Leg is shown upside down.
Step 3
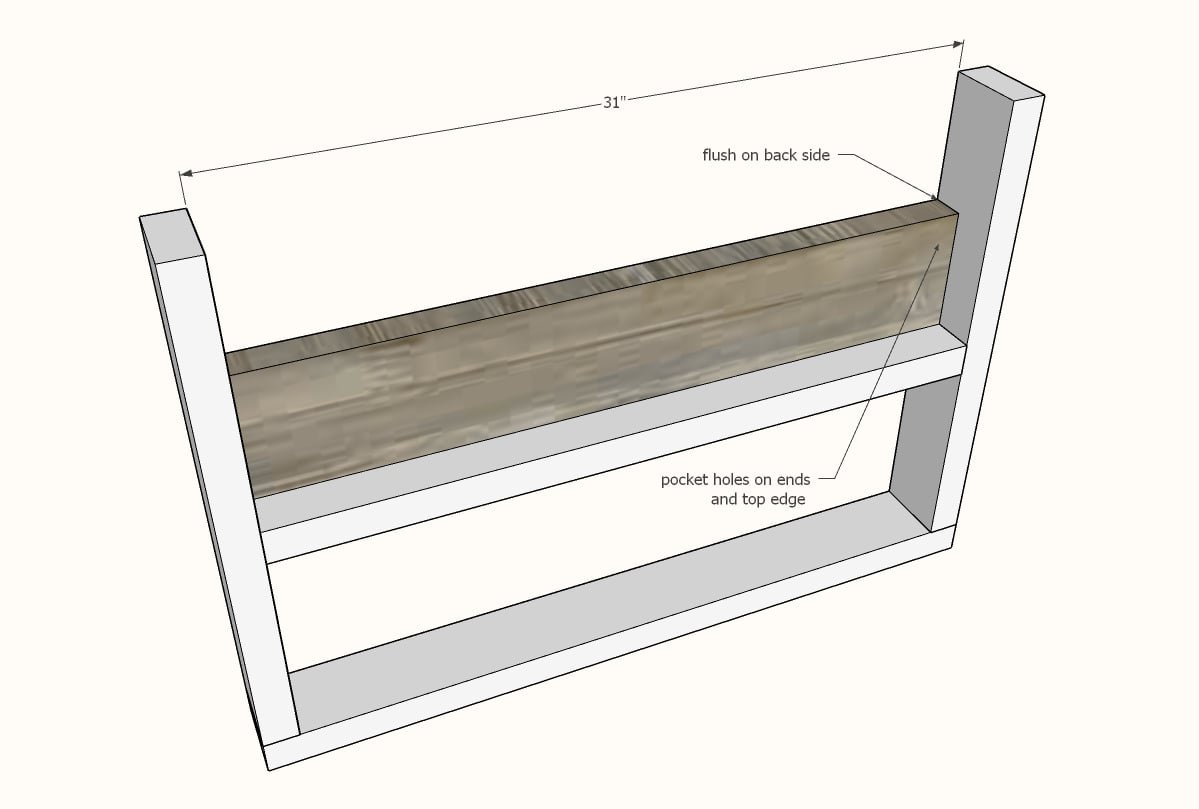
Drill two 1-1/2" pocket holes on each end of the 2x6 end aprons. Also drill three 1-1/2" pocket holes along one edge. Attach inside the leg, flush to the outside, pocket holes hidden on insides, with 2-1/2" pocket hole screws. Leg is shown upside down.
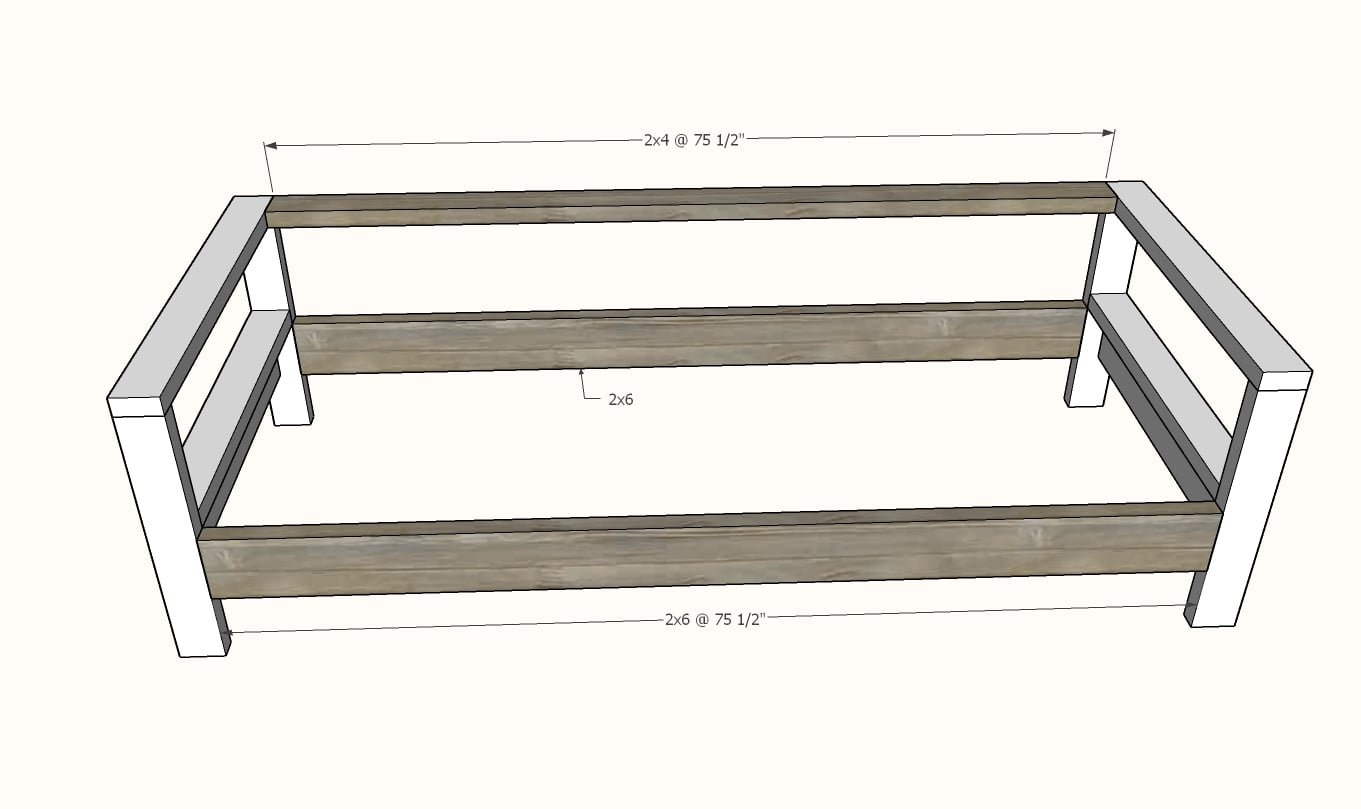
Drill two 1-1/2" pocket holes on each end of the 2x6 and 2x4s shown.
Attach with 2-1/2" pocket hole screws to the legs, all pocket holes are on the insides, or facing downward.
Step 5
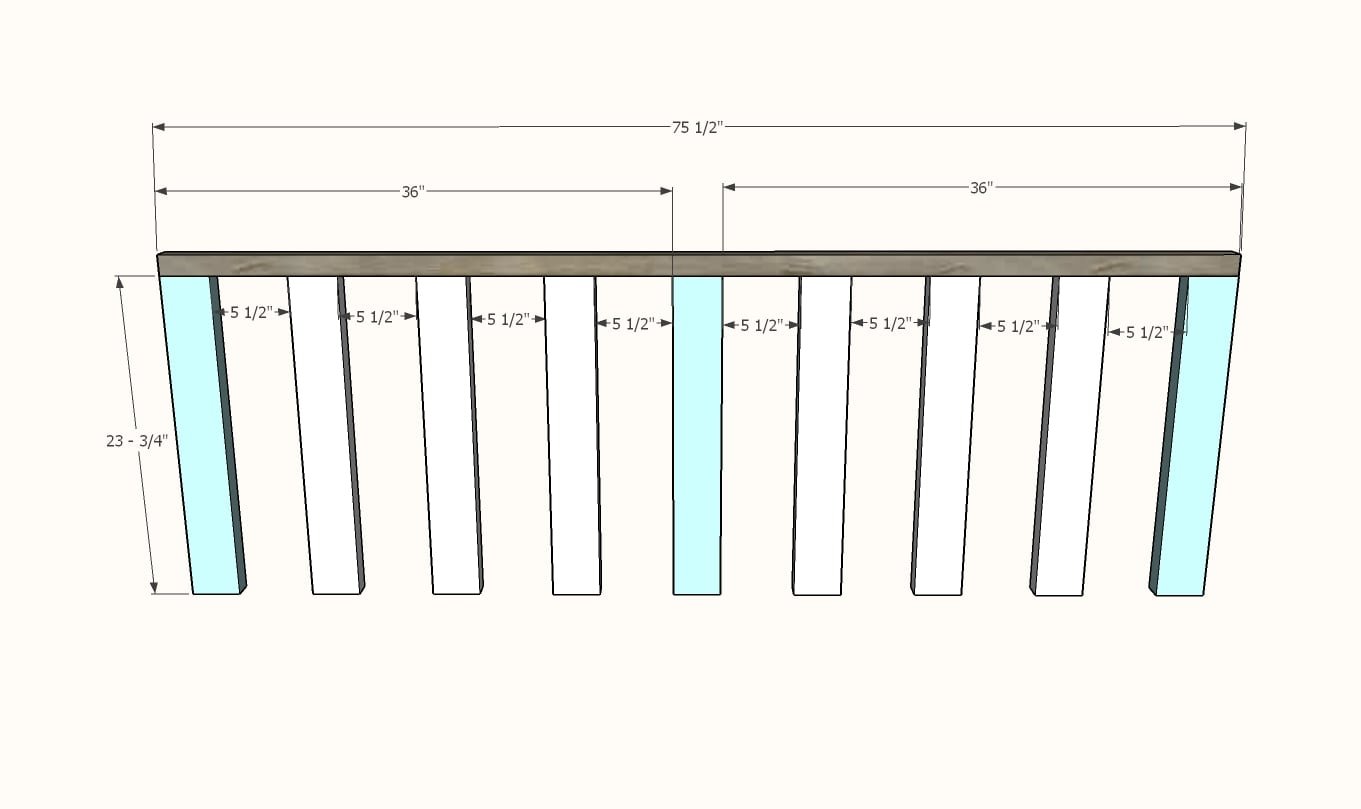
Attach 2x2 to the back slat pieces with 2-1/2" exterior self tapping screws. Two screws per joint recommended. TIP: Attach ends and middle first, then evenly space remaining, to avoid uneven gaps between the back slats.
Step 6
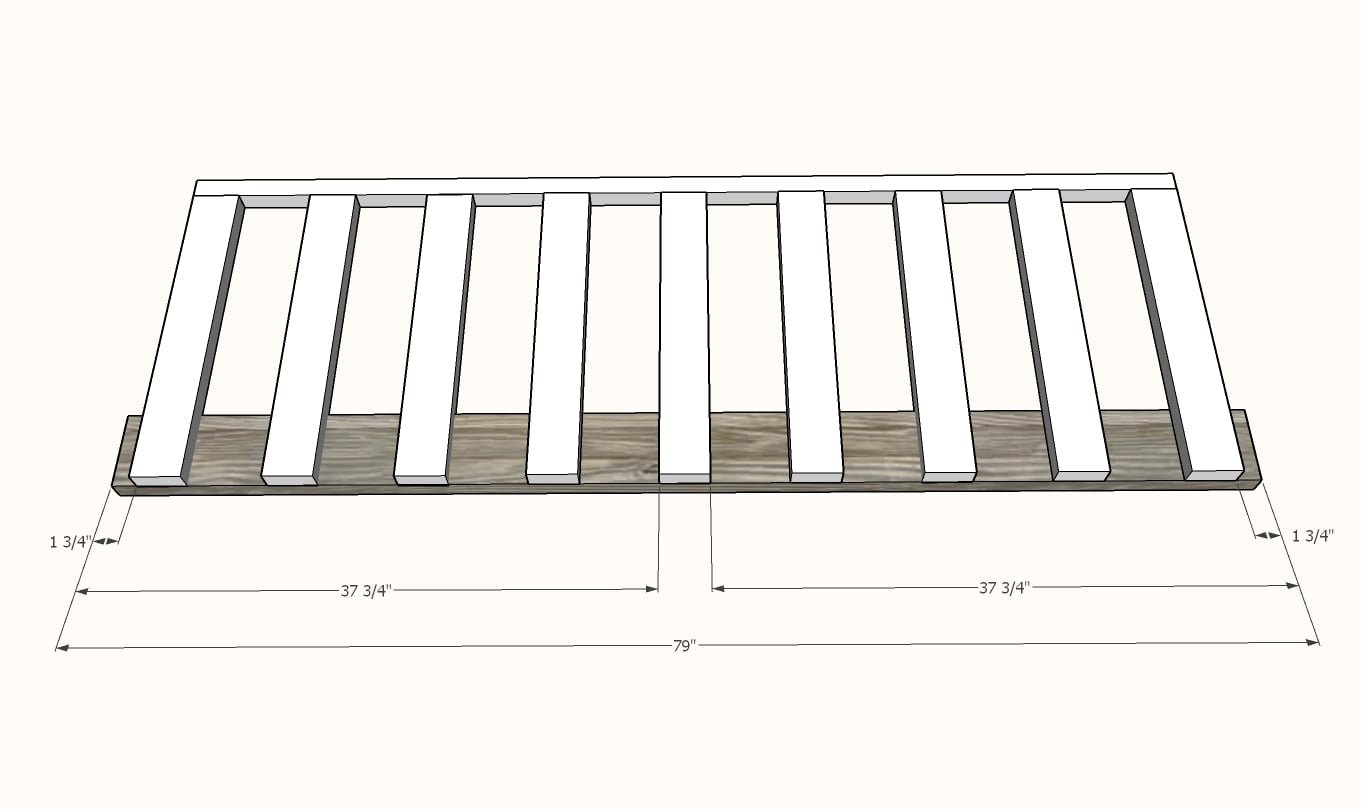
Attach back to the base with 2-1/2" self tapping wood screws, with a 2" gap on each end, keeping the same spacing as the top. Two screws per joint recommended. NOTE: There is an error in this diagram, the base should be 79-1/2" long and the overhangs on the ends should be 2" long.
Step 7
Place the back inside the sofa frame and attach at the base 8" inward with 2-1/2" self tapping screws. The top leans on the back (see next step).
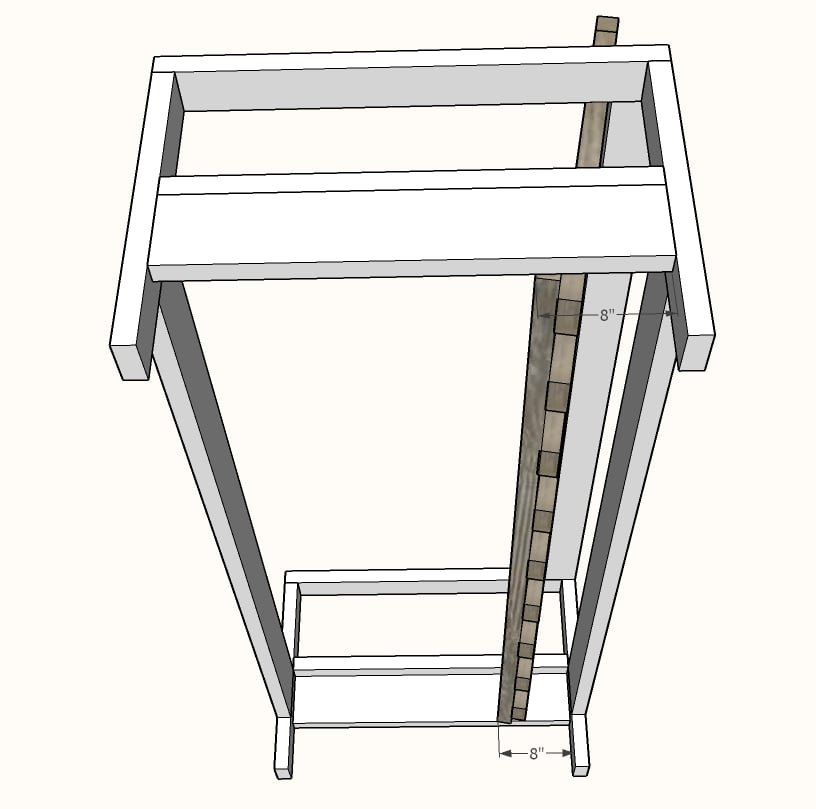
Step 8
Attach a few of the back slats to the back with 2-1/2" self tapping screws.
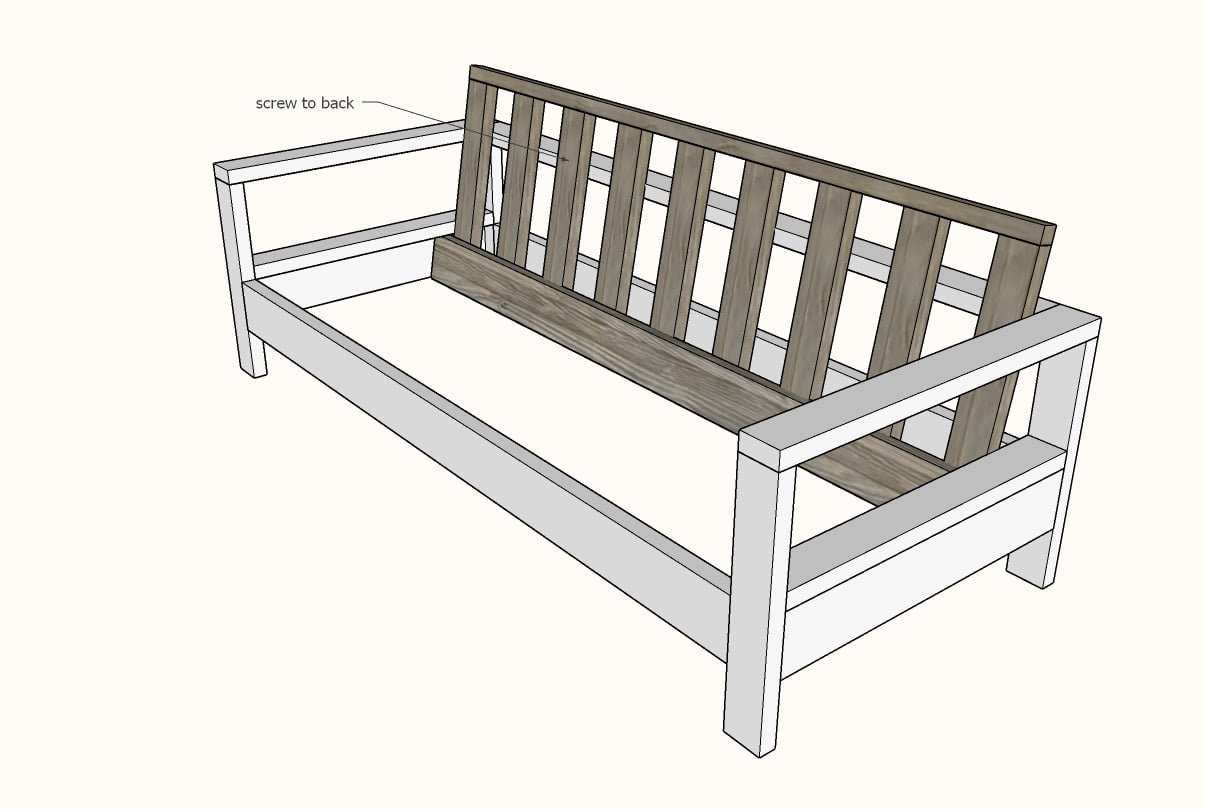
Step 9
Attach 2x2 to 2x6 with 2-1/2" self tapping screws, screws about every 12".
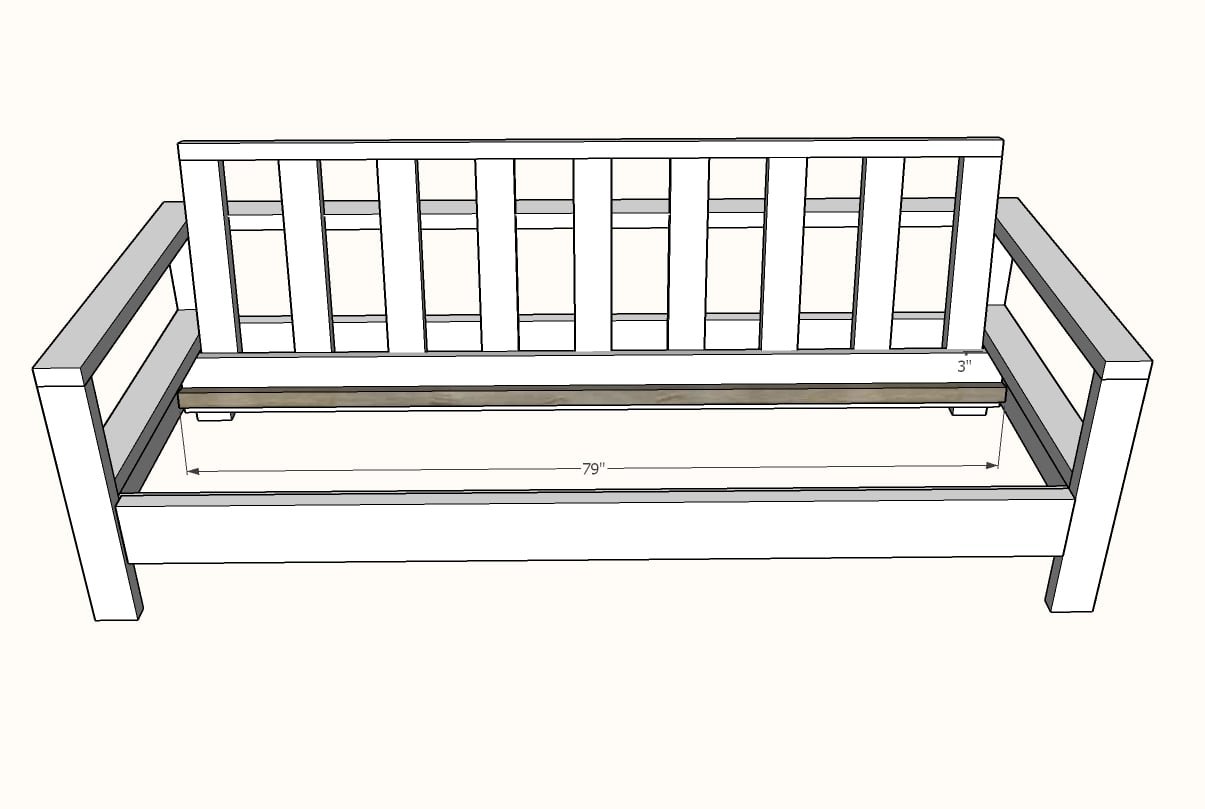
Step 10
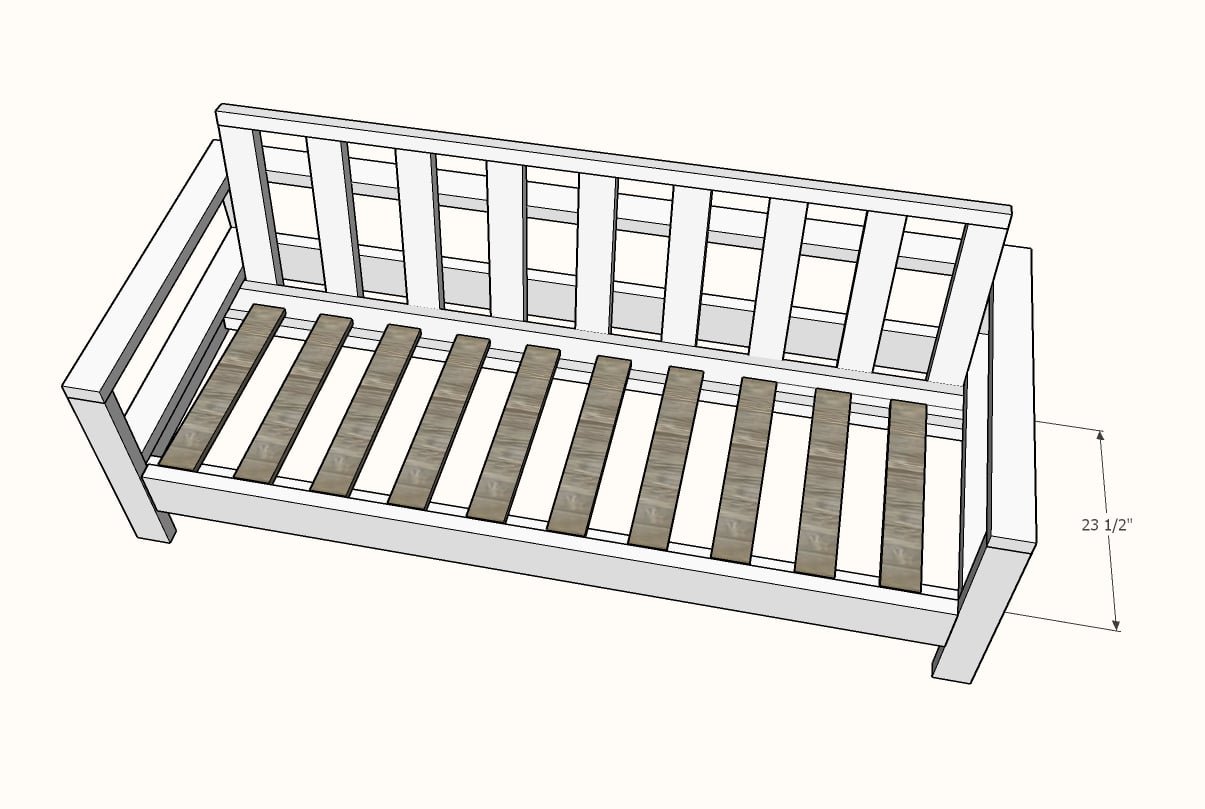
Add the front cleat with 2-1/2" screws to the front, about 1" down from the front top edge.
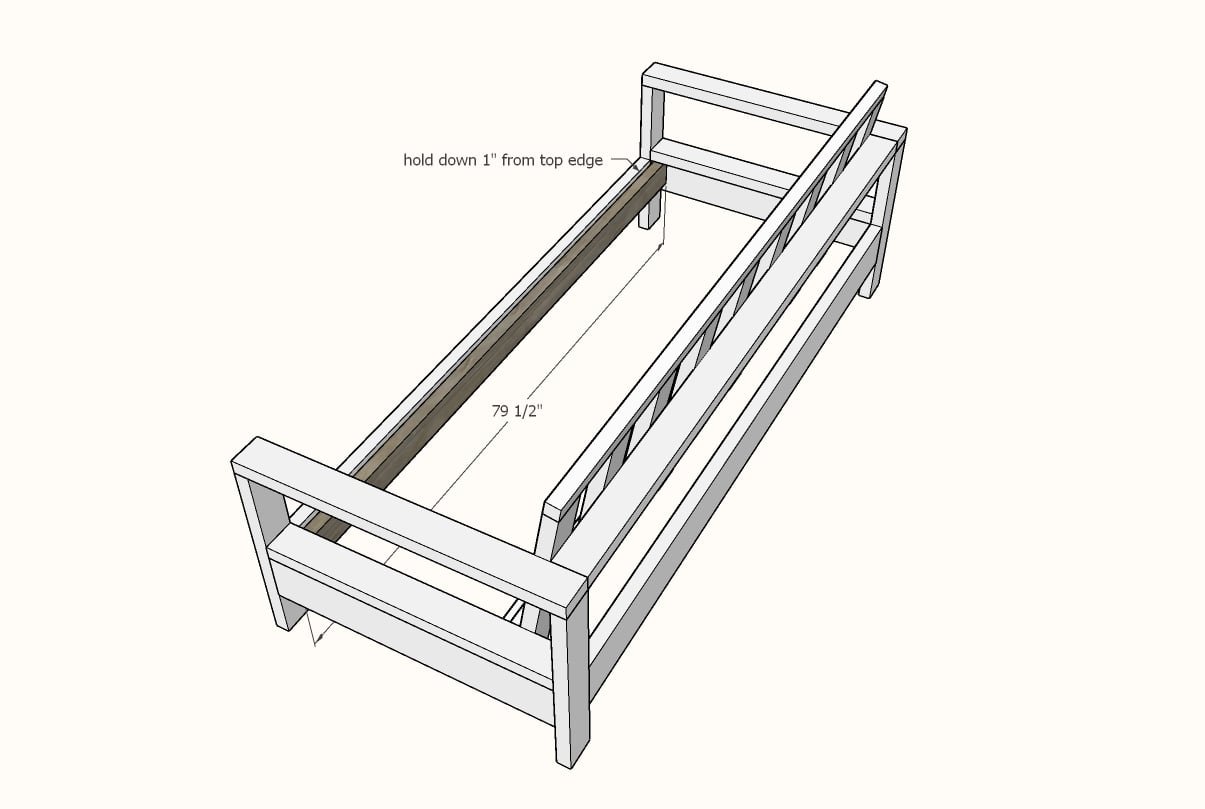
Step 11
Place seat slats on top of the 2x2s and screw down with 1-1/2" screws (only one per joint is needed).
Finishing
Sand all surfaces, starting with a medium grit and finishing with fine. Wipe off the dust, fill any holes or gaps with wood filler, and sand smooth once dry. Apply primer if you're painting, then finish with your choice of paint or stain and seal with a durable clear topcoat. For outdoor projects, use exterior-rated primer, paint or stain, and sealer so the piece stands up to the weather.
Source (temporary): https://www.ana-white.com/woodworking-projects/outdoor-sofa-modern-comfort-collection