Outdoor X Base Table
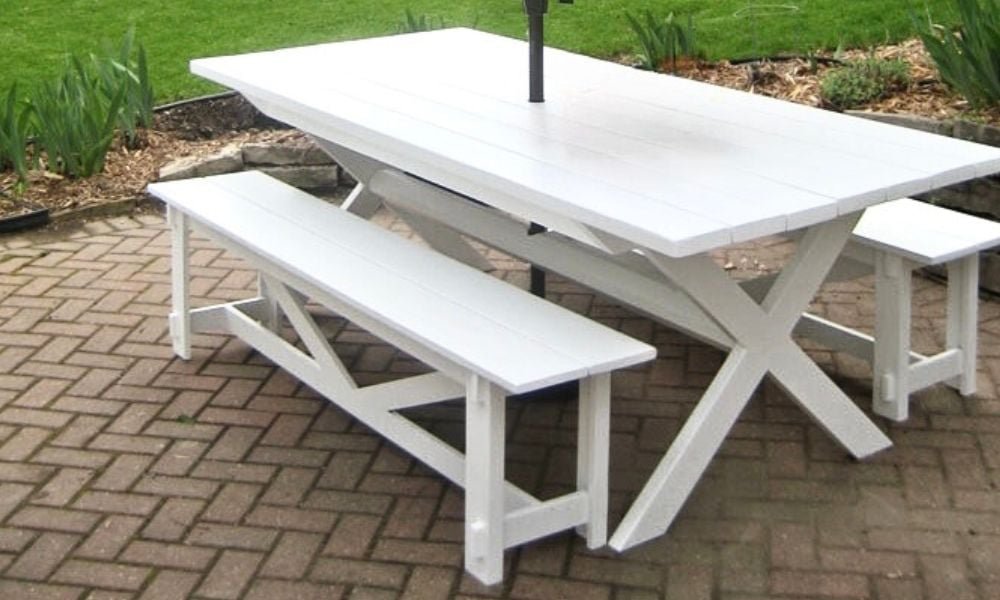
Here's a beautiful, stylish and easy to build outdoor table that you can build with basic materials! This outdoor dining table features and X base and planked wood top. Add outdoor chairs or build your own benches to match. This is a free, step by step woodworking plan with detailed diagrams, shopping and cut list - everything you need to build your own outdoor table! RELATED PLANS: Outdoor X Base Benches
Specifications
| Project type | Dining Table Plans |
|---|---|
| Room | dining room |
| Style | Farmhouse Furniture |
| Difficulty | Beginner Projects |
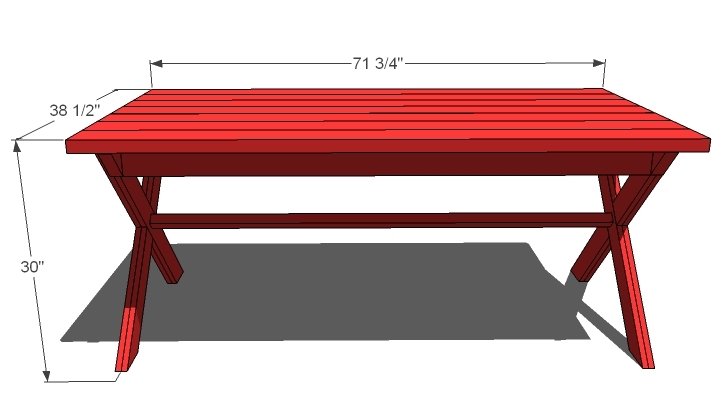
Dimensions
Use the size-specific shopping and cut lists below.
Shopping List
- 3 – 2×6, 12′ Length
- 1 – 2×6, 8′ or Stud Length
- 1 – 2×4, 8′ or stud length
- 1 – 2×2, 8′ Length
- 7 – 1×4, 8′ Length
- Wood Glue
- 1 1/4″ Wood Screws
- 2″ Wood Screws
- 2 1/2″ Wood Screws
- Finishing Supplies (Wood Filler, Paint, Stain, Sandpaper, Sealer)
Tools
- measuring tape
- square
- pencil
- safety glasses
- hearing protection
- drill
- compound miter saw
- sander
Step-by-step Instructions
Apron Ends
Cut your apron ends as shown above. The angles on the ends are 45 degrees. You will need to cut 2 of these.
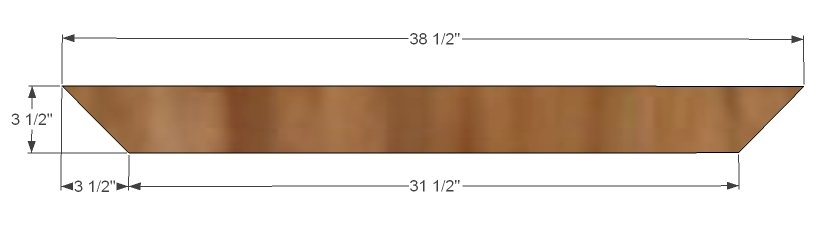
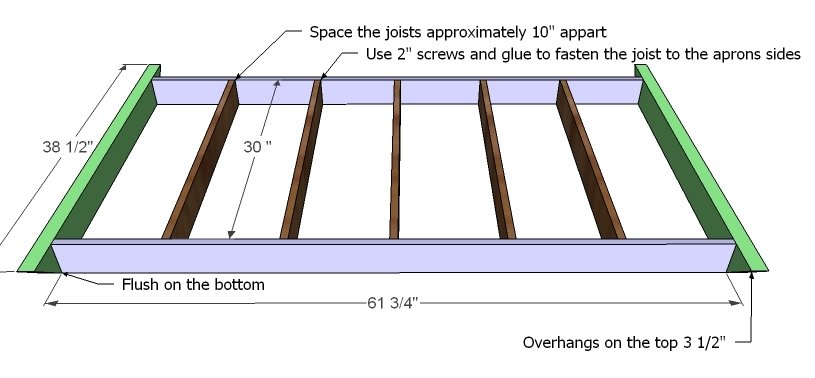
Table Frame
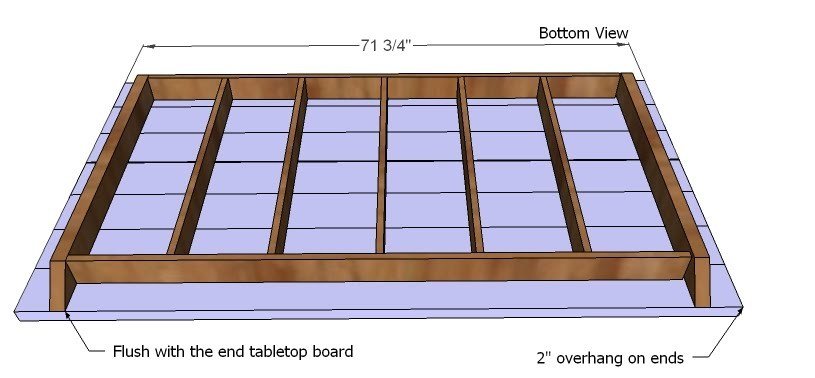
Start by marking your table side aprons (the 1x4s 61 3/4″ long) every 10″ (this does not have to come out exact). Use these marks to guide you as you attach the supports, as shown above. Use 2″ screws and glue. Then screw the side aprons to the end aprons from step 1. Make sure you square your project at this step.
Tabletop Boards
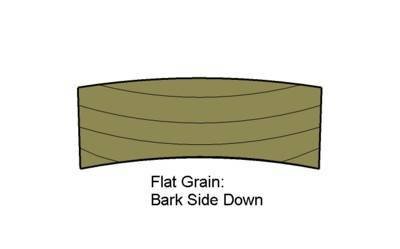
Use 2 1/2″ screws and glue to fasten your tabletop boards as shown above. Remember, if you want to use your table for outdoor purposes, you should leave a 1/4″ gap between the boards. You can use a flat carpenters pencil as a guide. This will increase your overhang on the ends by approximately 3/4″, if you choose to ad spacing between your boards. One tip a reader suggested is examining the ends of your boards. Each board will have a “bark” side or a side that the grain bends away from. Alternate the bark side up and the bark side down as you lay your tabletop boards. That way if your boards do “move” as wood can do, the boards will expand in a complimentary fashion, minimizing any tabletop warping.
Tabletop board orientation
If you are using the table outdoors, bark side down will avoid cupping, and create better water drainage. The above photo is an exaggeration, but even the slightest amount of crowning will keep water (the enemy) from pooling on top of your outdoor table.
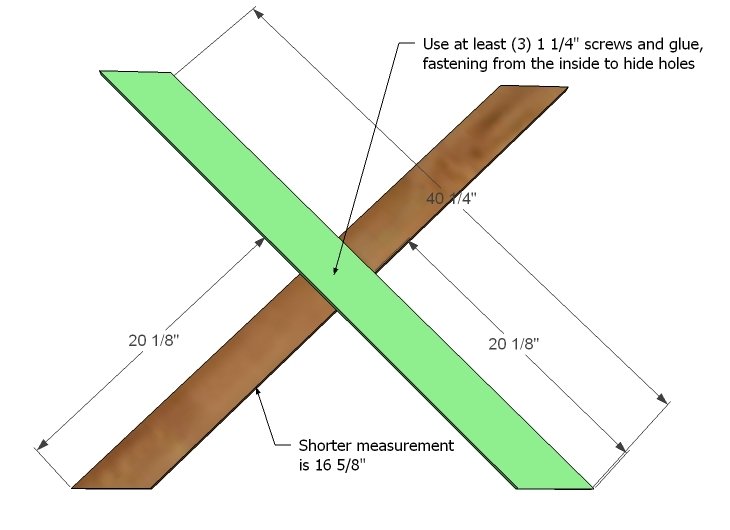
Building the X Base Frames
Attach at the center with 2-1/2" self tapping screws.
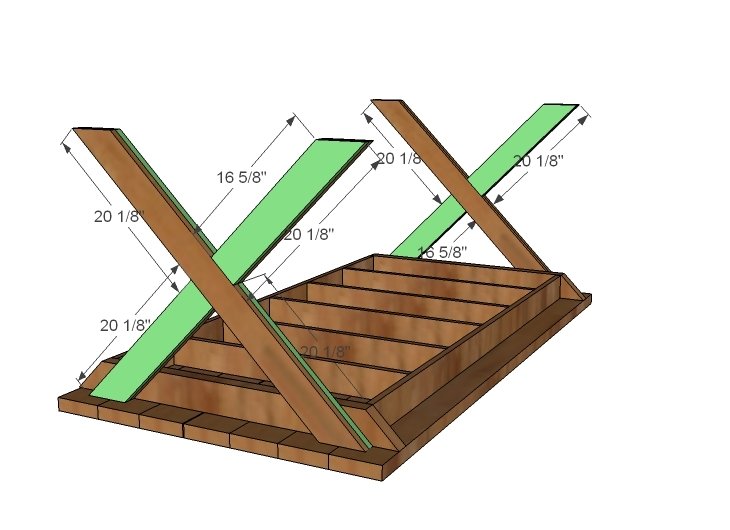
Attaching Legs to Table Base
Finish the legs by attaching the remaining leg trim pieces using 1 1/4″ screws and glue. Hide your screw holes by attaching from the insides. Then using the 2 1/2″ screws, fasten the legs to the side aprons, centering the legs on the side apron.
Stretcher
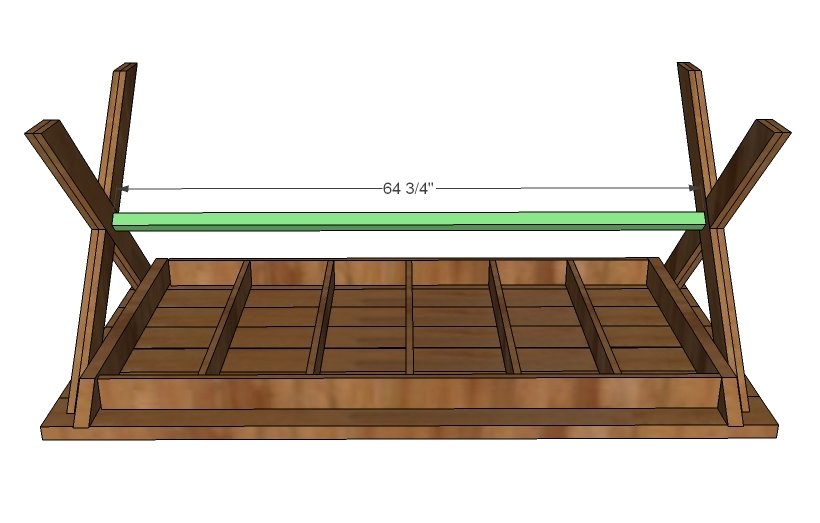
Your table is going to need something to keep the legs from spreading appart – think dragging the table from the end. The amount of leverage on those top screws would be quite strong. So to keep your table together you can do a cross braces from the center of the Xs to the underside of the table. But I choose to keep this super simple and do a 2×2 as a stretcher so that most any beginner could tackle this project. Simply use the 2 1/2″ screws to screw the stretcher to the legs, in the centers of the X. TIP – once one side is fastened, use a level to determine where the other side should be fastened.
Finishing
Sand all surfaces, starting with a medium grit and finishing with fine. Wipe off the dust, fill any holes or gaps with wood filler, and sand smooth once dry. Apply primer if you're painting, then finish with your choice of paint or stain and seal with a durable clear topcoat. For outdoor projects, use exterior-rated primer, paint or stain, and sealer so the piece stands up to the weather.
Source (temporary): https://www.ana-white.com/woodworking-projects/outdoor-x-base-table