Outhouse Plan for Cabin
We've been so busy working on the tiny house, running Grace to sports and school and all the other stuff that keep mom's (and dad's so busy), it's been hard to keep up. Spring time is always a busy time, isn't it?
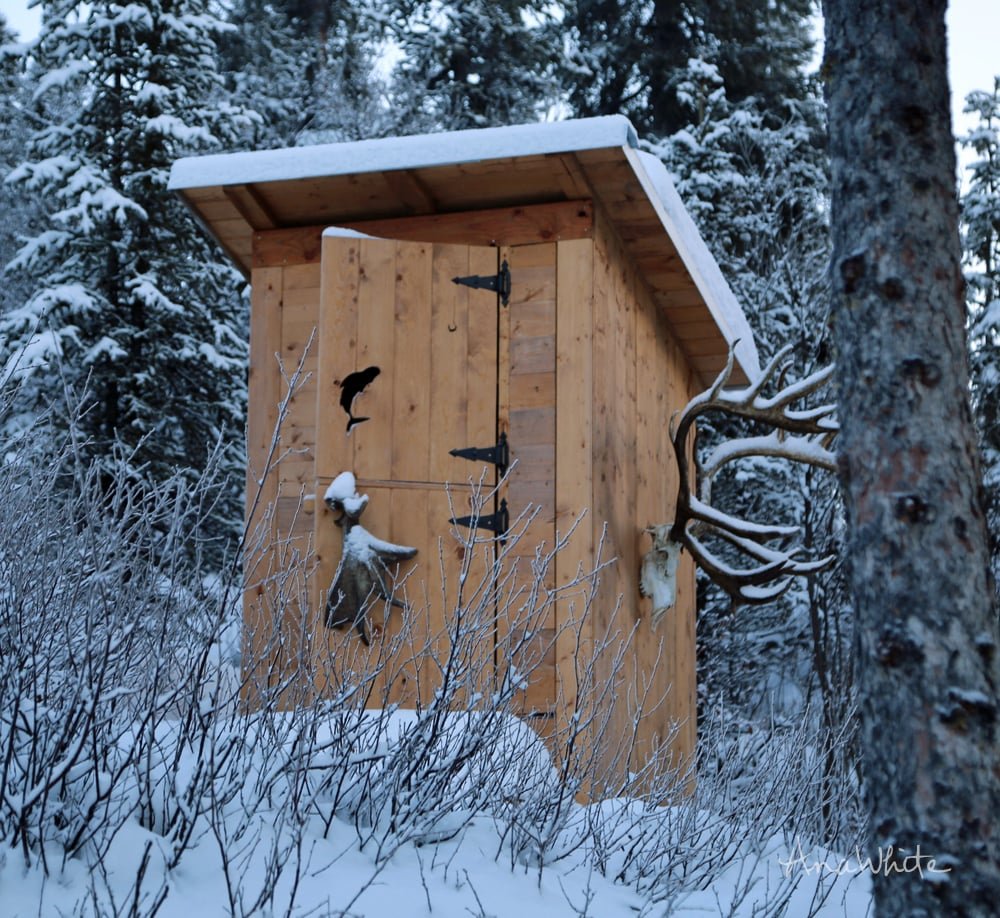
Specifications
| Project type | Other Projects |
|---|---|
| Room | Outdoor |
| Style | Rustic Furniture Plans |
| Difficulty | Advanced |
Dimensions
Use the size-specific shopping and cut lists below.
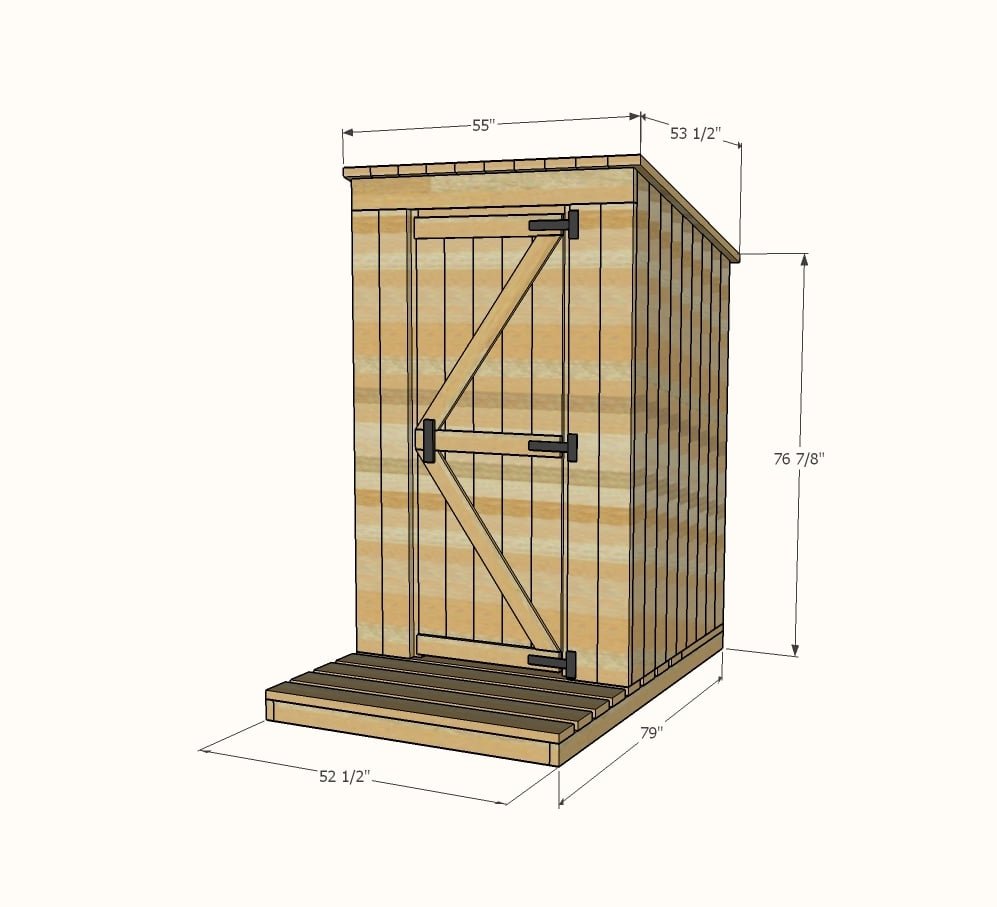
Tools
- measuring tape
- square
- pencil
- hammer
- safety glasses
- hearing protection
- kreg-jig
- drill
- circular saw
- jigsaw
- compound miter saw
- level
Step-by-step Instructions
Step 1
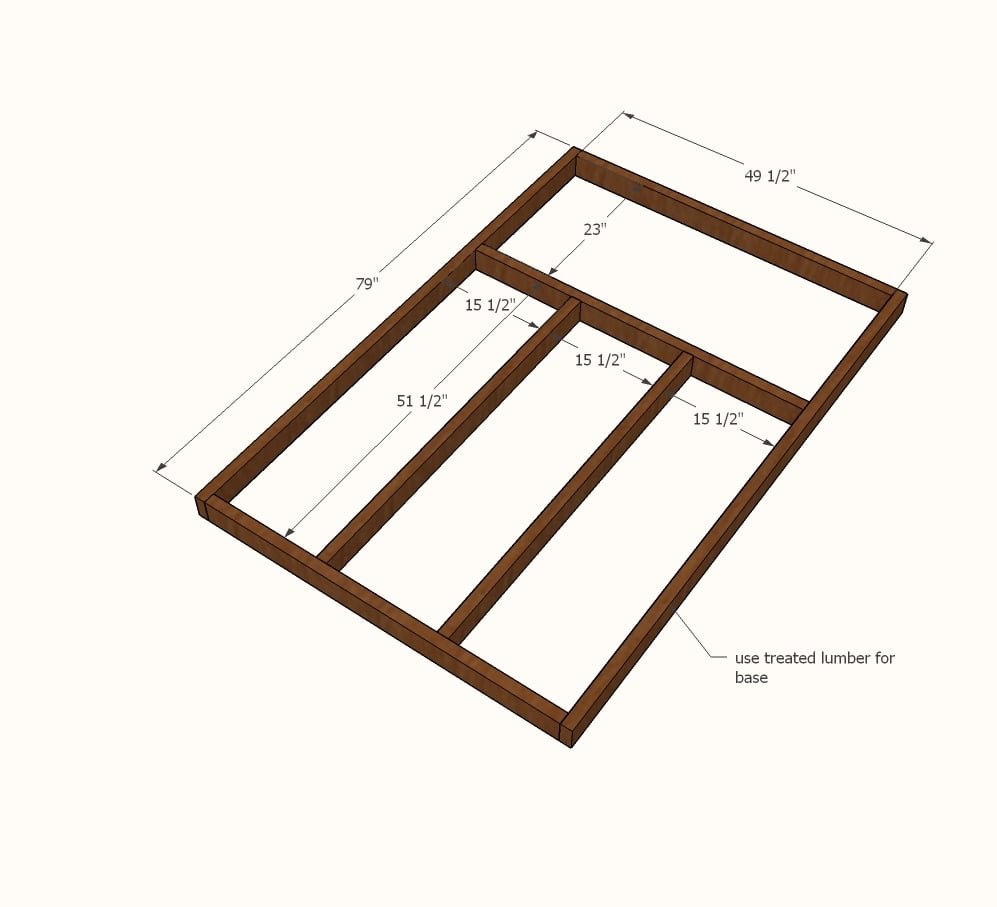
Frame the floor using either 3" exterior self tapping wood screws, or use a Kreg Jig set for 1-1/2" thick wood, with 2-1/2" long pocket hole screws. Adjust the frame for square. You may need to further support the floor with beams, depending on how the outhouse hole is excavated and the soil.
Step 2
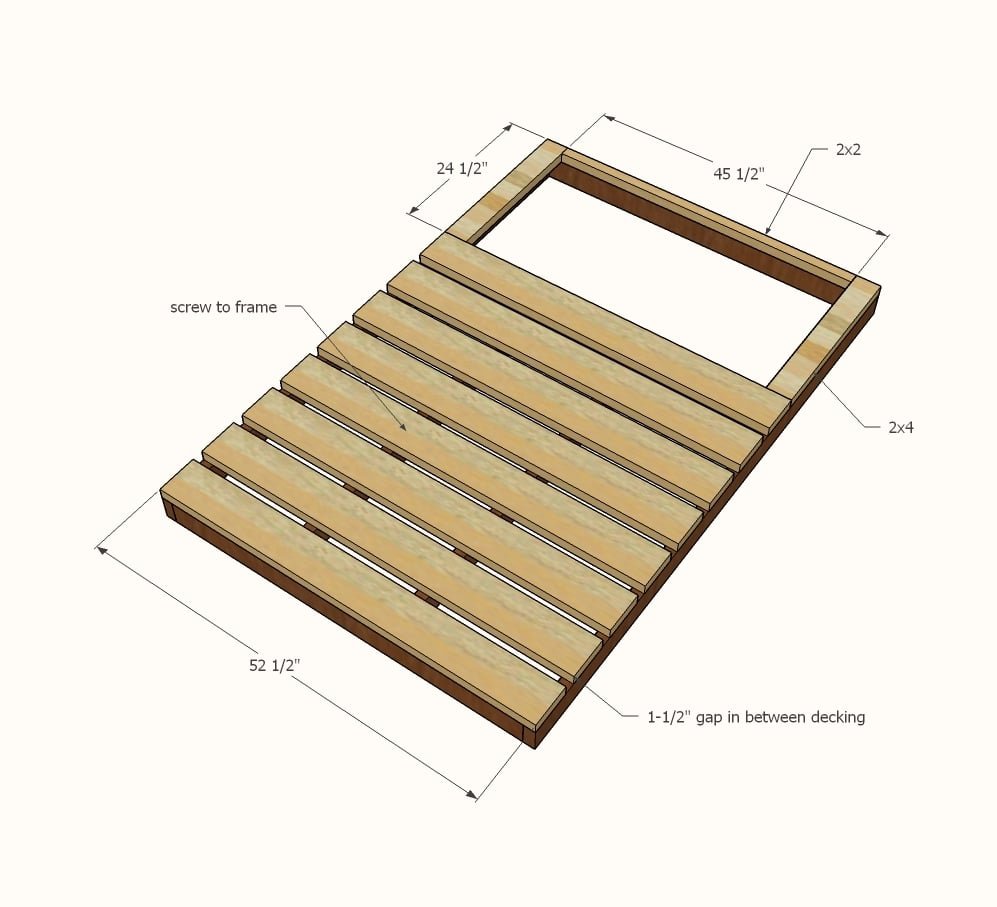
Add decking on top with 2-1/2" screws and glue. Once the deck is done, move to final position and level.
Step 3
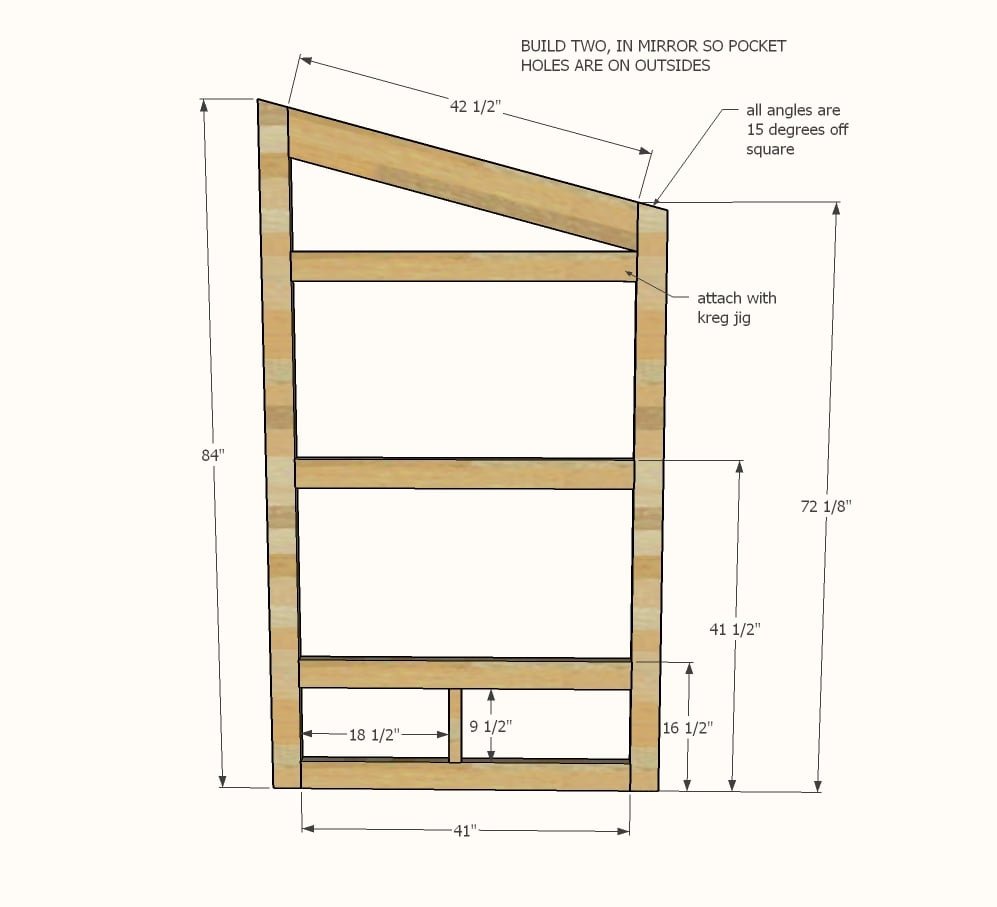
Build the two side walls with Kreg Jig, 1-1/2" setting and 2-1/2" pocket hole screws. Remember to build so the pocket holes are placed on the outsides to be hidden in later steps with siding. TIP: Drill 1-1/2" pocket holes facing downward on bottom boards for attaching to deck in next step.
Step 4
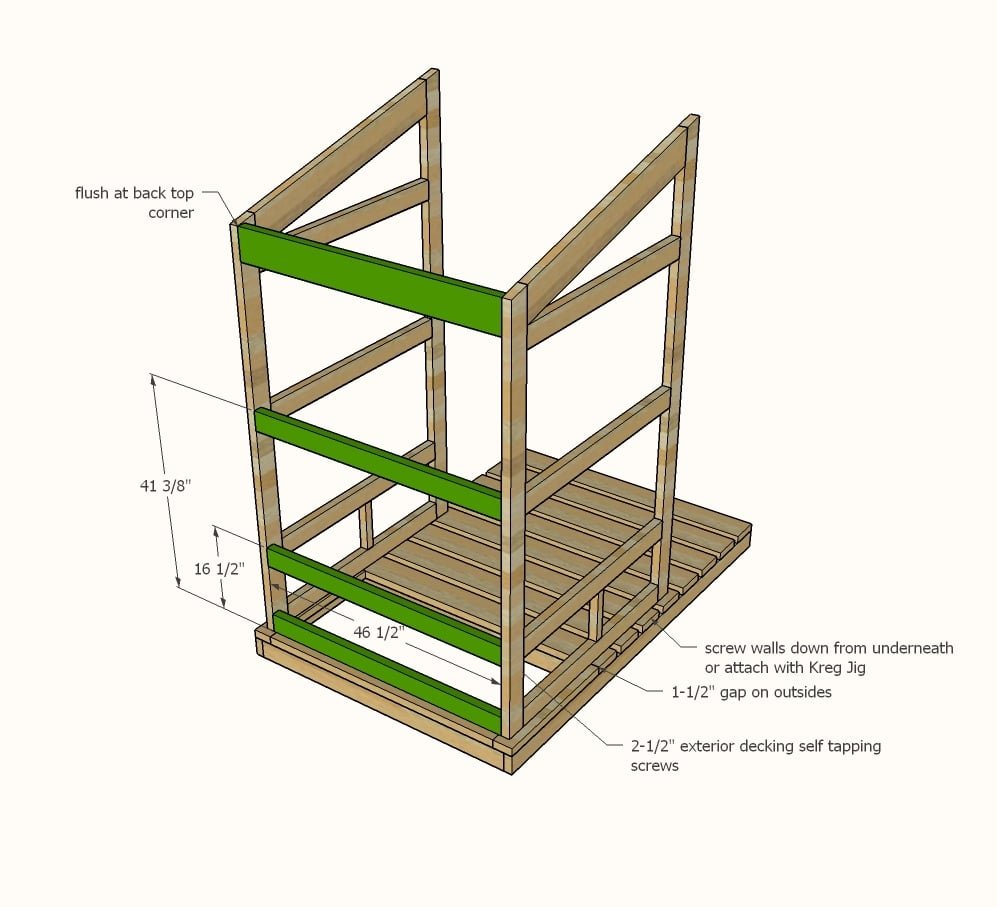
TIP: Drill 1-1/2" pocket holes along back edge of bottom board for attaching to deck. With all pocket holes on outside, attach the two side walls together with 3" wood screws. Adjust for square and attach to floor.
Step 5
Step 6
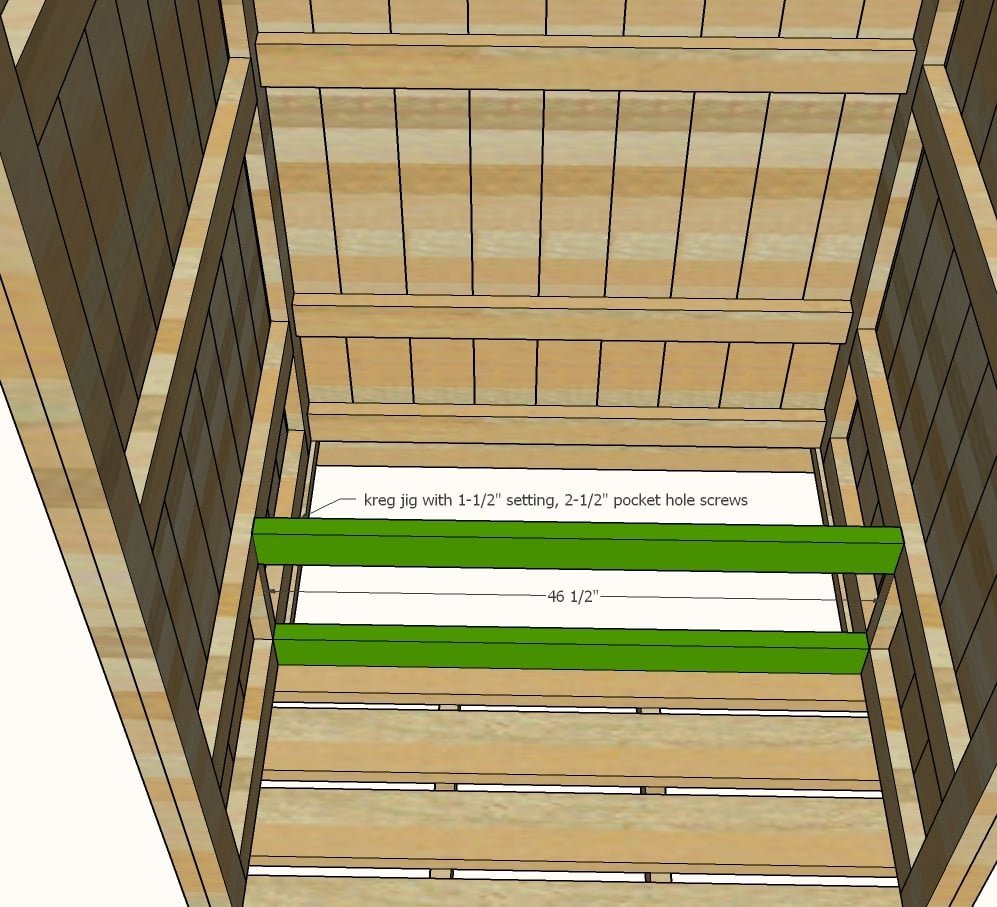
Drill 1-1/2" pocket holes on each end of the interior seat support boards. Attach to sides with 2-1/2" pocket hole screws and glue.
Step 7
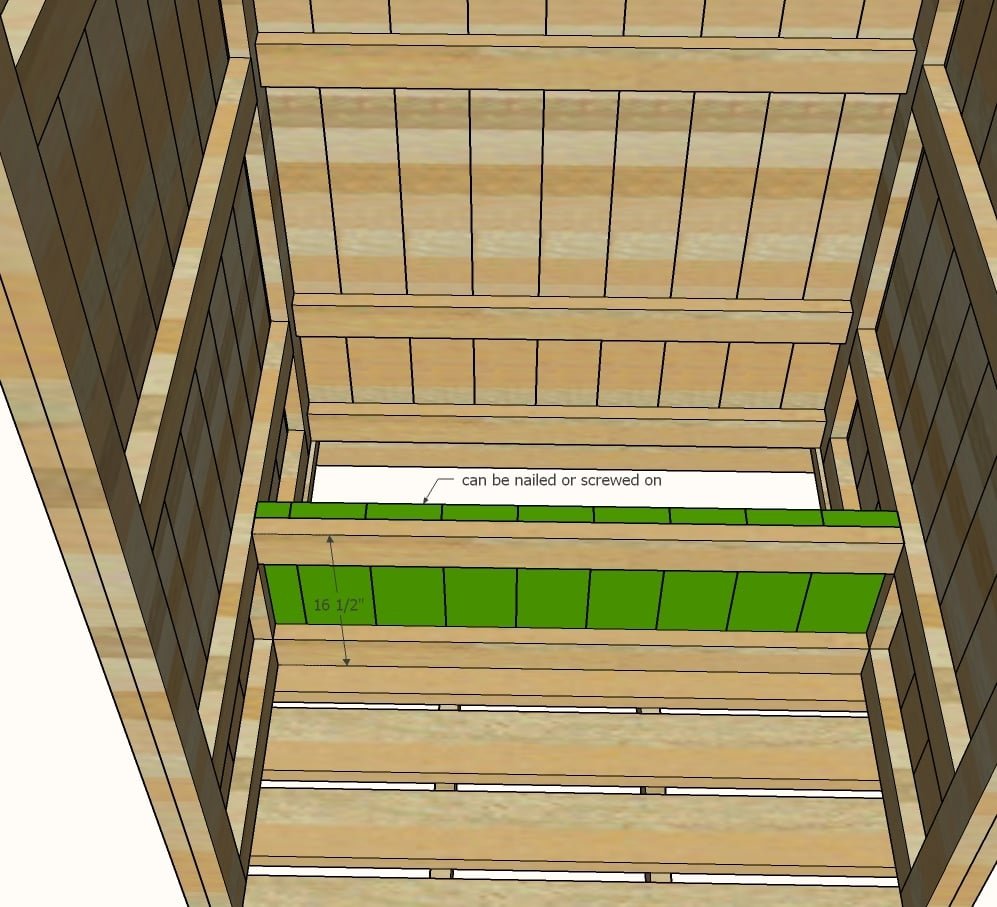
Use scrap 2x material to fill in area in front of seat. Screw or nail on.
Step 8
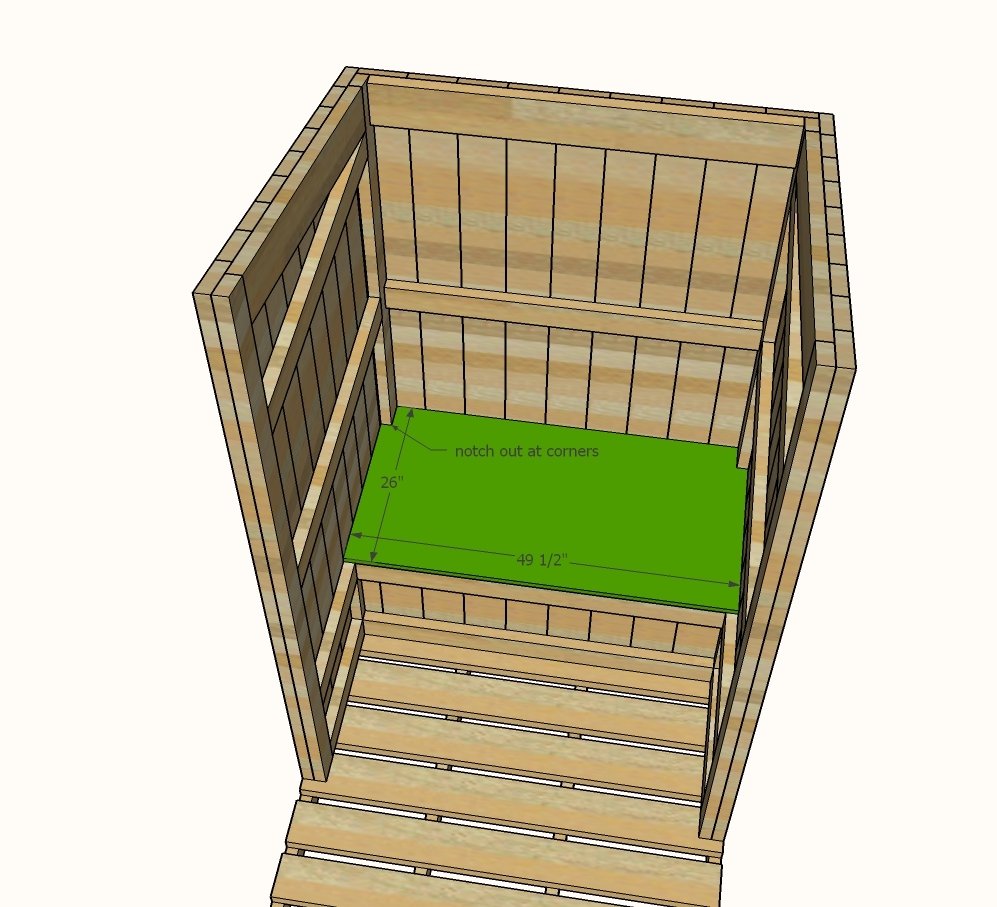
Cut 3/4" plywood to fit. Screw to seat framing. Do not use glue so is removable if necessary.
Step 9
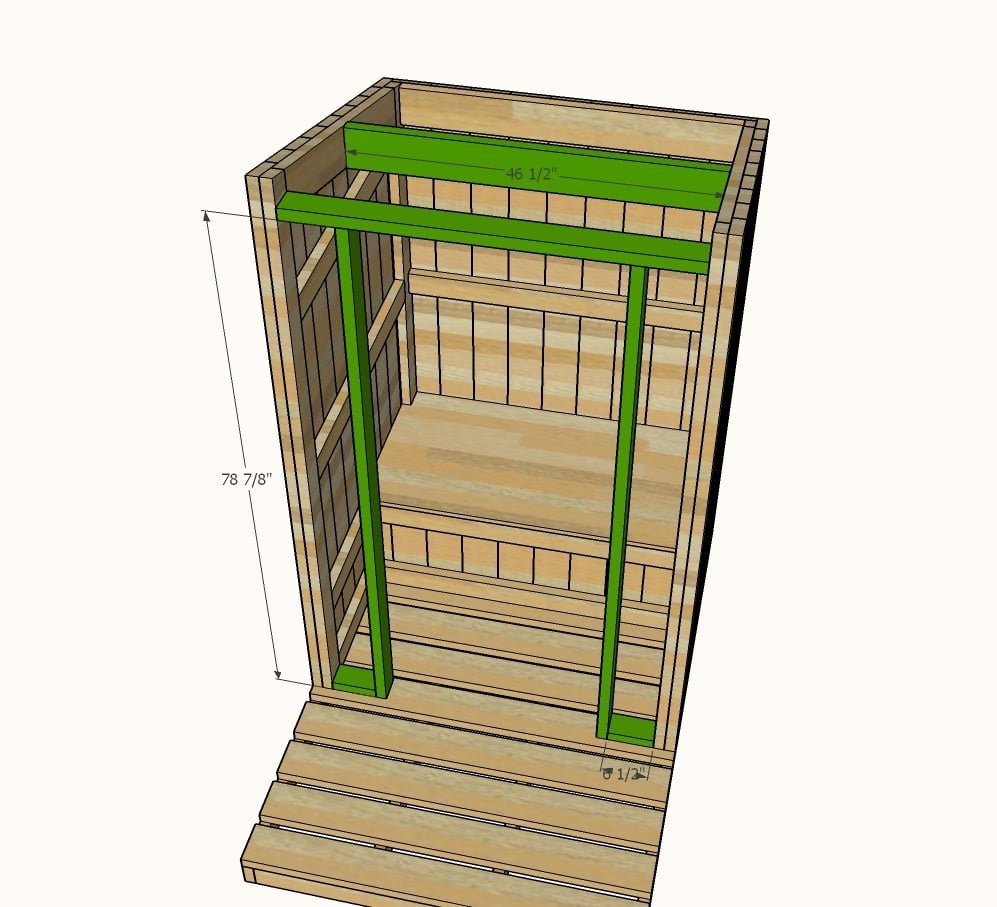
Attach remaining framing for supporting the front siding.
Step 10
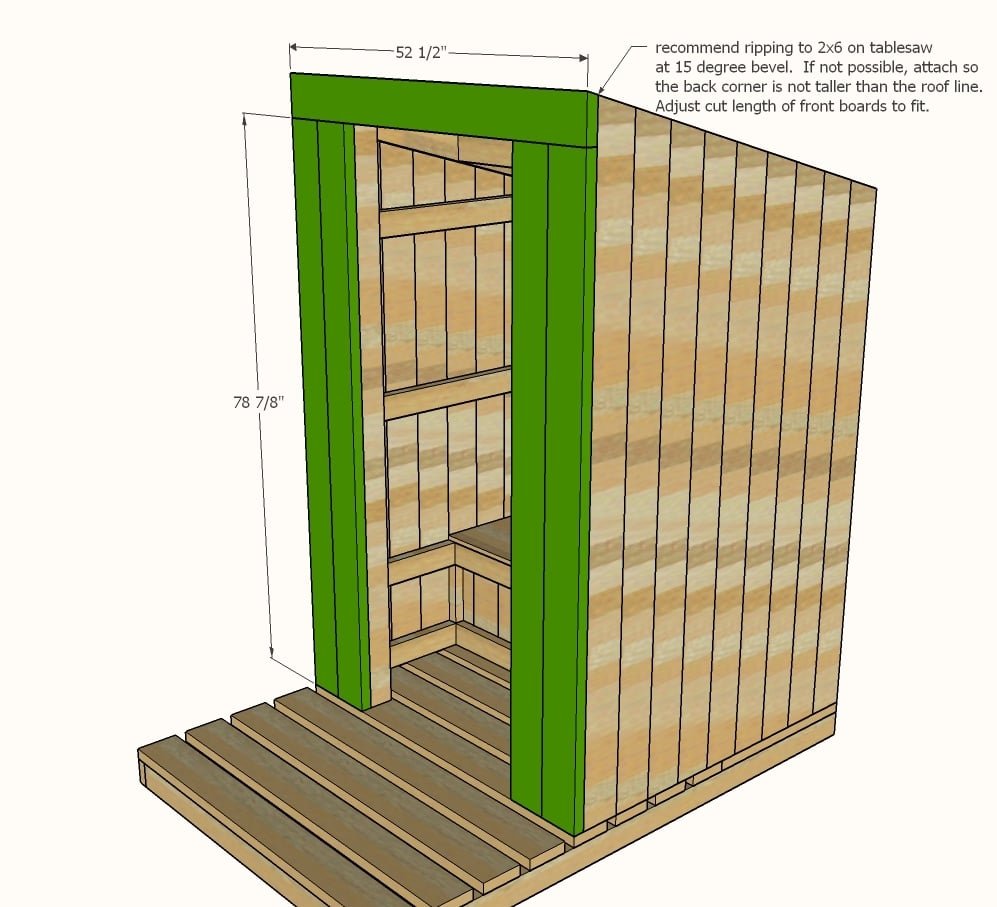
Add the front siding pieces or 2x6s (as shown in cut list).
Step 11
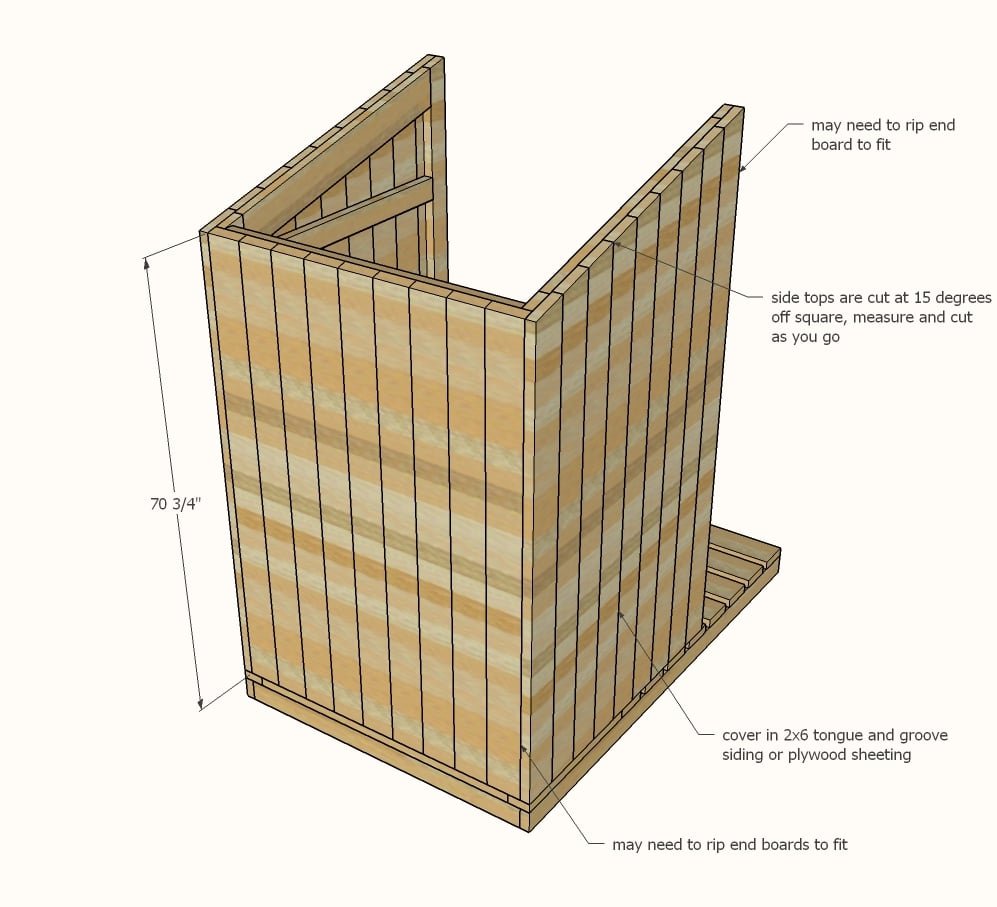
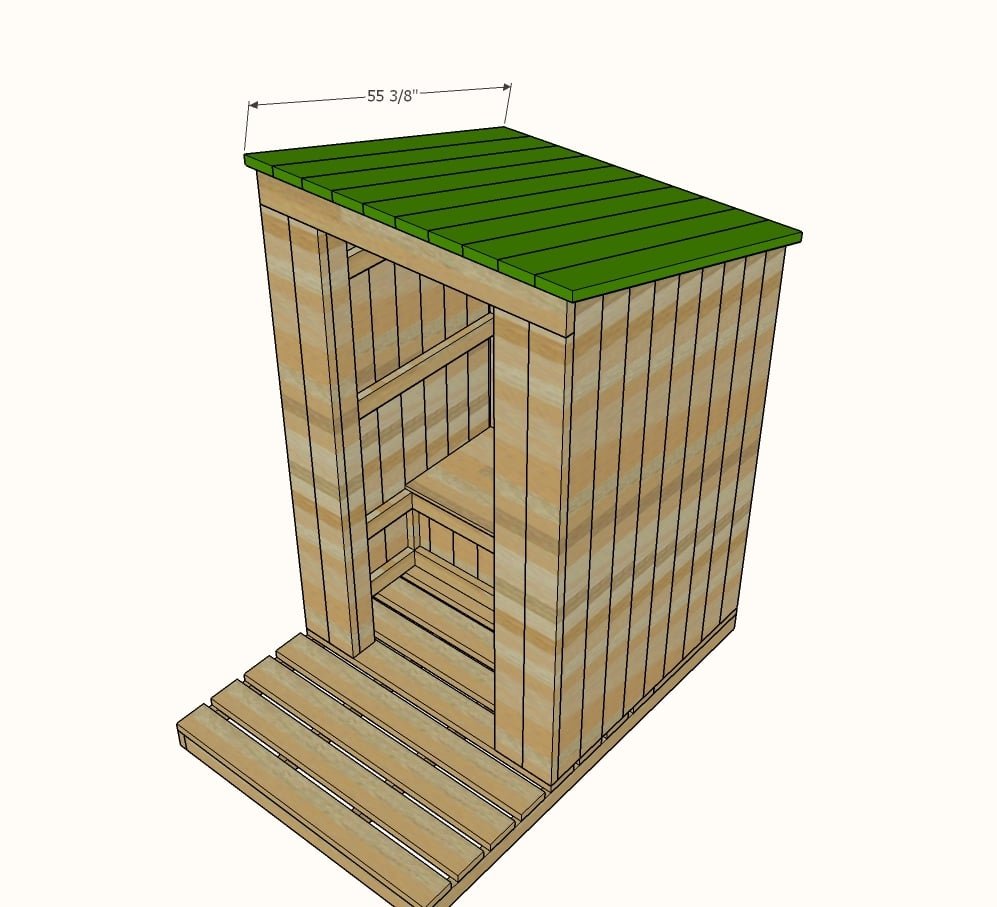
Plywood or 2x6 tongue and groove boards can be used for the roofing. Attach to rafters and side walls and all support boards.
Step 12
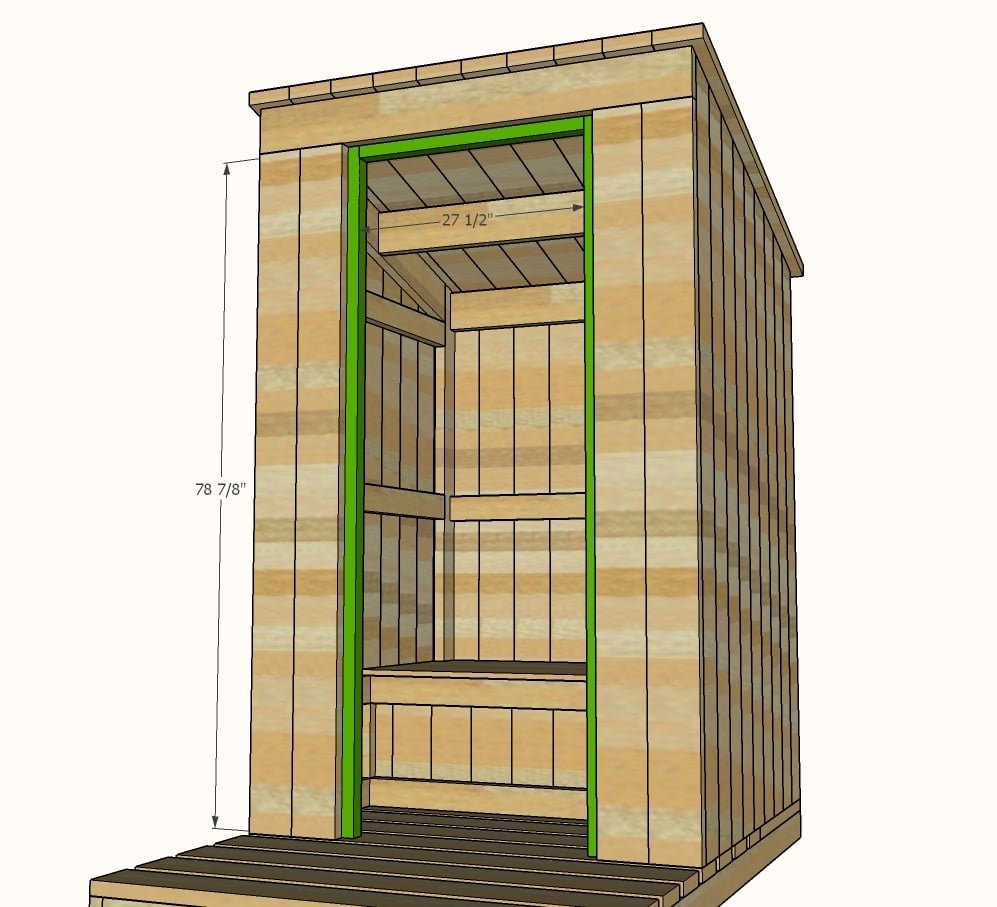
Add the 2x2 door stop to give the door something to stop on.
Step 13
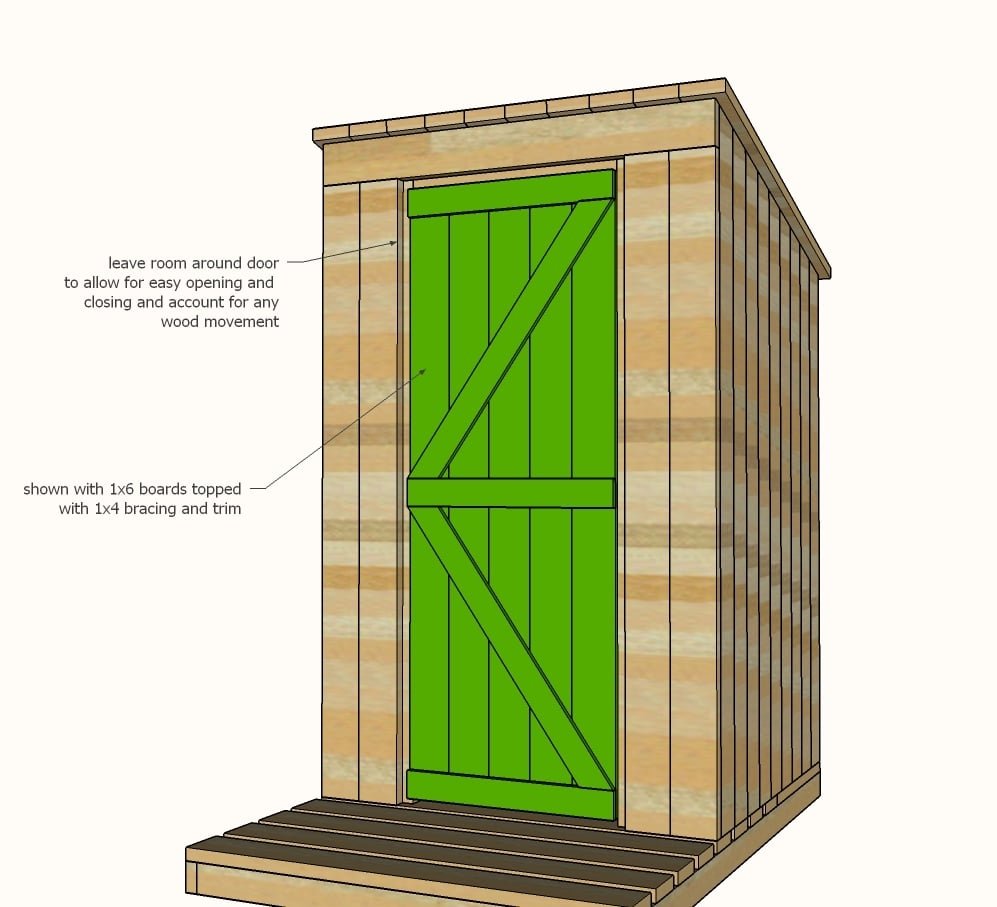
Build the door and hang inside the opening. Make sure there is a gap at the bottom for easy opening and closing.
Finishing
Sand all surfaces, starting with a medium grit and finishing with fine. Wipe off the dust, fill any holes or gaps with wood filler, and sand smooth once dry. Apply primer if you're painting, then finish with your choice of paint or stain and seal with a durable clear topcoat. For outdoor projects, use exterior-rated primer, paint or stain, and sealer so the piece stands up to the weather.
Source (temporary): https://www.ana-white.com/woodworking-projects/outhouse-plan-cabin