Owens Nightstand
Make bedside tables inspired by Pottery Barn Kids Owen nightstand.
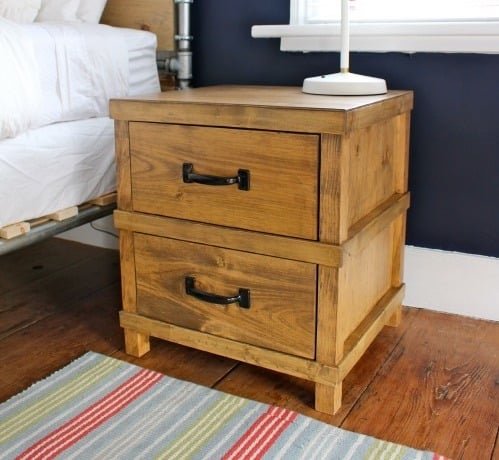
Specifications
| Project type | Nightstands |
|---|---|
| Room | Bedroom |
| Style | Farmhouse Furniture |
| Difficulty | Intermediate |
| Estimated cost | $20 - $50 |
Dimensions
Use the size-specific shopping and cut lists below.
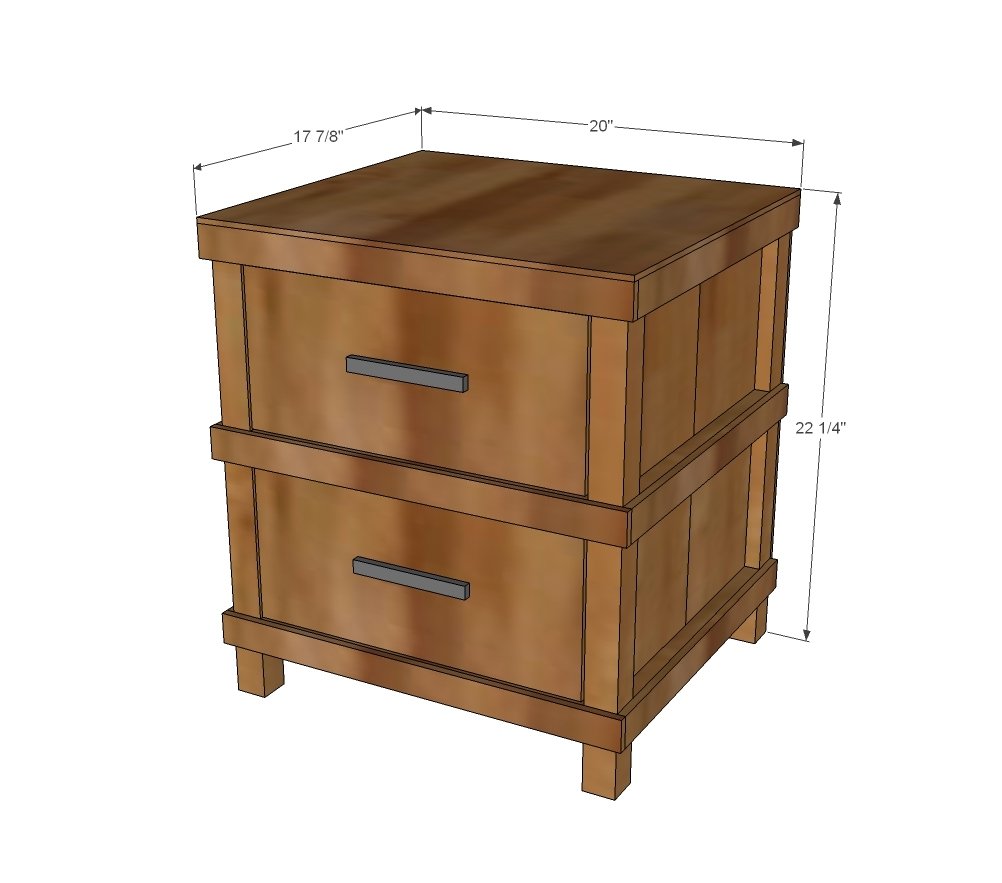
Shopping List
- 2 - 2x2 @ 8 feet long (cut 2@2”2 and 3@16-1/4” out of each)
- 1 - 1x8 @ 10 feet long
- 1 - 1x2 @ 8 feet long
- 5 - 48” wood lath pieces (1-1/2” x 3/8”)*
- 1 - 1x6 or 1x4 @ 10 feet long (for drawer boxes)
- 1/2 sheet of 1/4” pine plywood
- 2 - 16” drawer slides (euro style bottom corner undermount)
- 2 knobs or handles
- 1-1/4” and 2-1/2” pocket hole screws
- 1-1/4” brad nails or staples
*Jaime used these wood lath pieces
Cut List
- 4 - 1x8 @ 19-1/2” (side panels)
- 6 - 1x2 @ 14-1/2” (cut to fit - side panel trim)
- 4 - 2x2 @ 22” (legs)
- 6 - 2x2 @ 16-1/4” (front/back supports)
- 6 - 1-1/2” x 3/8” wood lath pieces - cut to fit for side panels
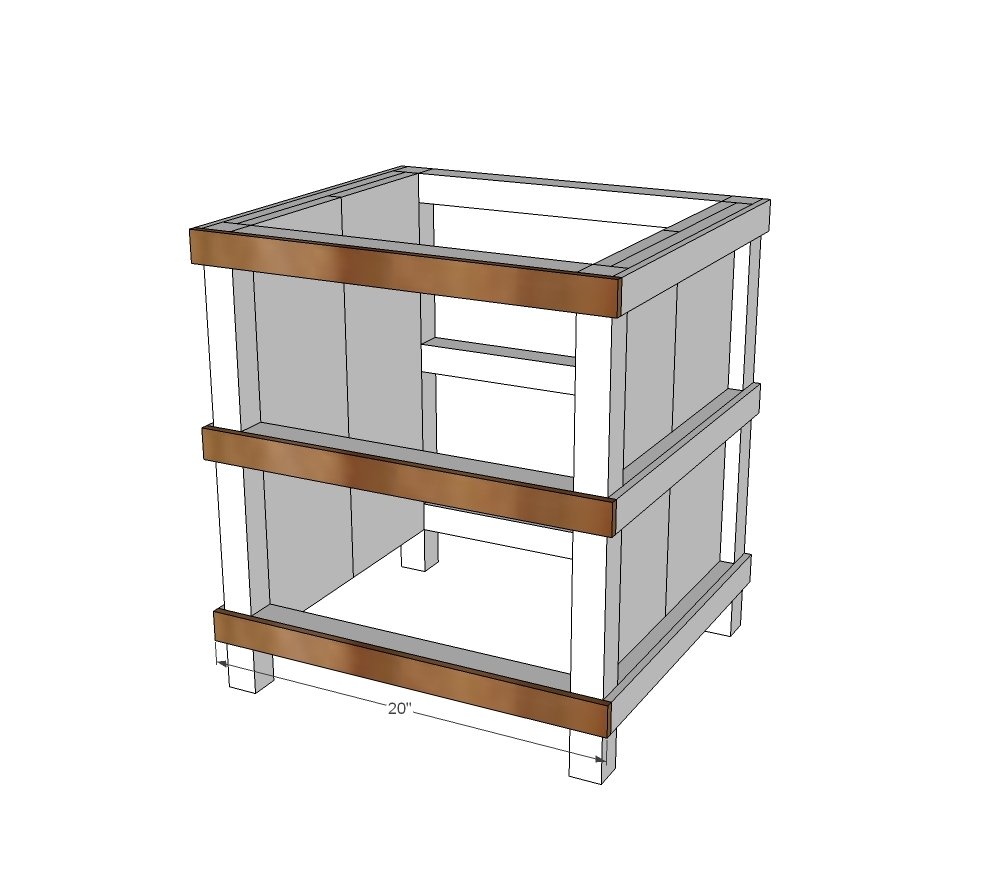
- 3 - 1-1/2” x 3/8” wood lath pieces - cut to fit for front trim
- 1 - 1/4” plywood 18” x 20” (top)
- 1 - 1/4” plywood 19-1/2” x 19-1/4” (back)
DRAWERS (for 1/2” clearance on sides)
- 4 - 1x6 @ 16”
- 4 - 1x6 @ 13-3/4”
- 2 - 1x8 @ 16”
- 2 - 1/4” plywood @ 15-1/4” x 16”
Tools
- measuring tape
- square
- pencil
- safety glasses
- hearing protection
- kreg-jig
- drill
- circular saw
- compound miter saw
- nailer
- sander
Step-by-step Instructions
Step 1
Attach the 1x8 boards to the 1x2 trim with 1-1/4" finish nails and glue. Make sure everything is square. NOTE: With the Kreg jig, you may wish to do step 2 (attach 1x2s to the 2x2 legs) first, then add the 1x8s second.
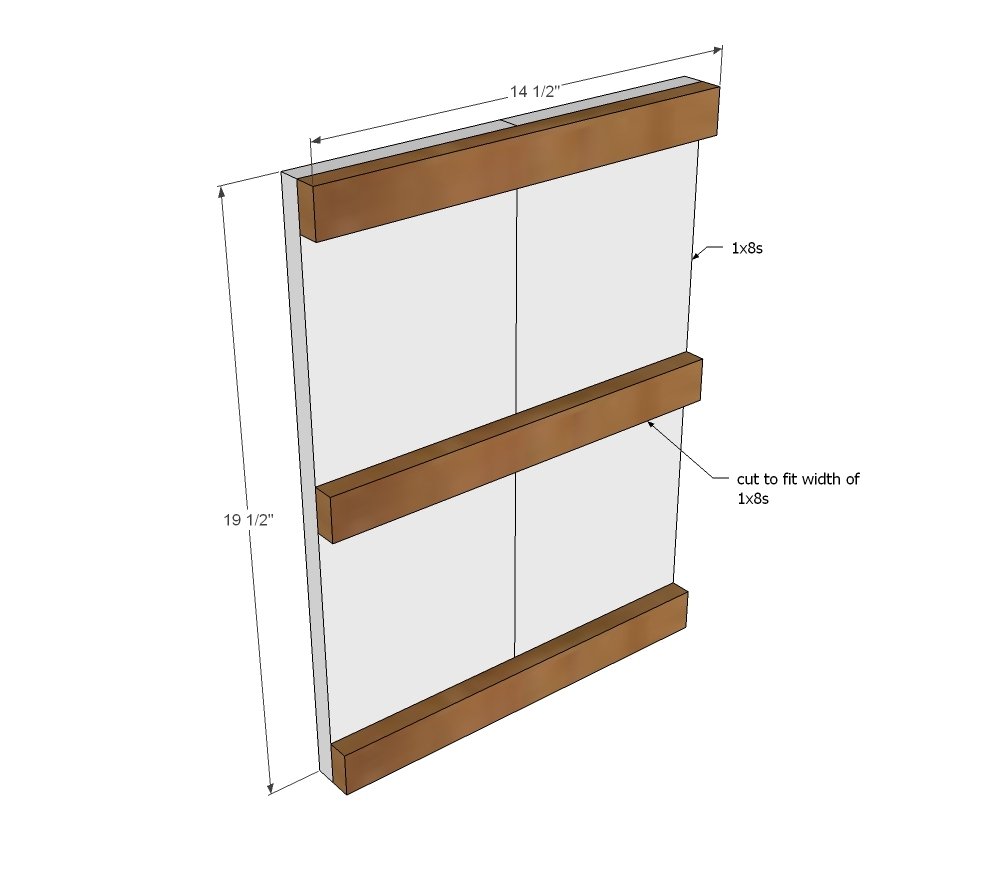
Step 2
Attach legs to the 1x8 boards - 3/4" pocket holes and 1-1/4" pocket hole screws are preferred.
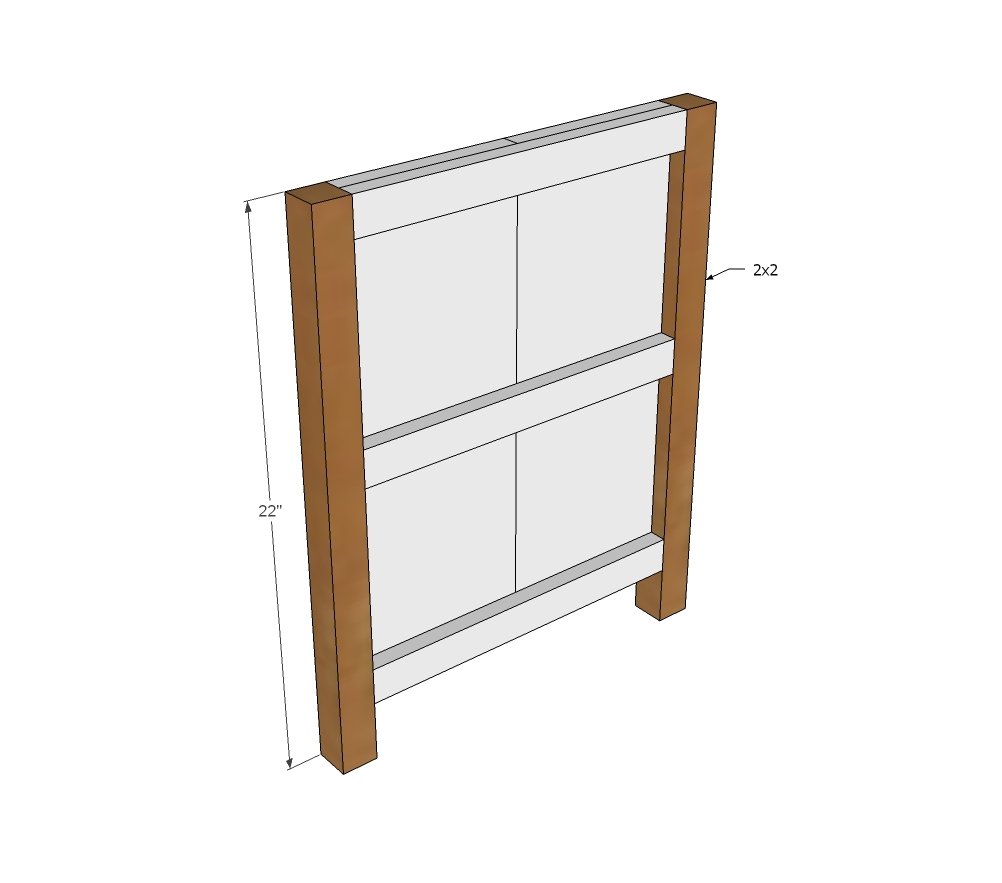
Step 3
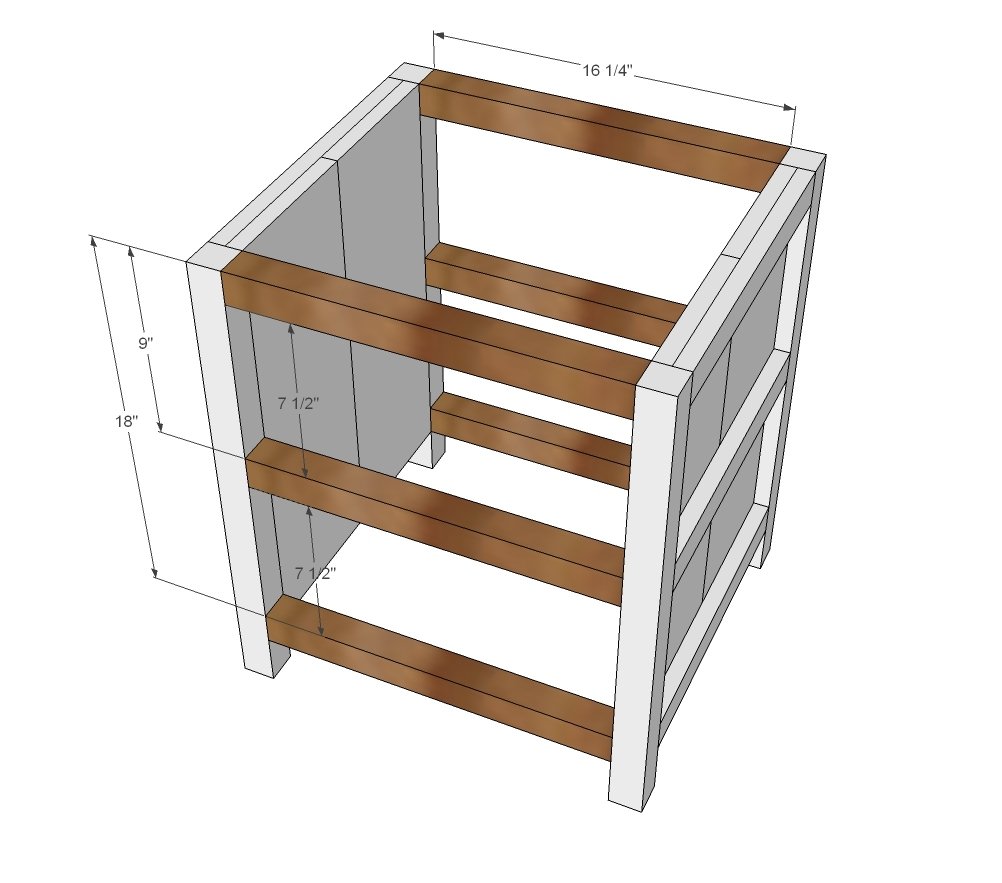
Then use 1-1/2" pocket holes and 2-1/2" pocket hole screws to attach the two sides together with the 2x2s.
Step 4
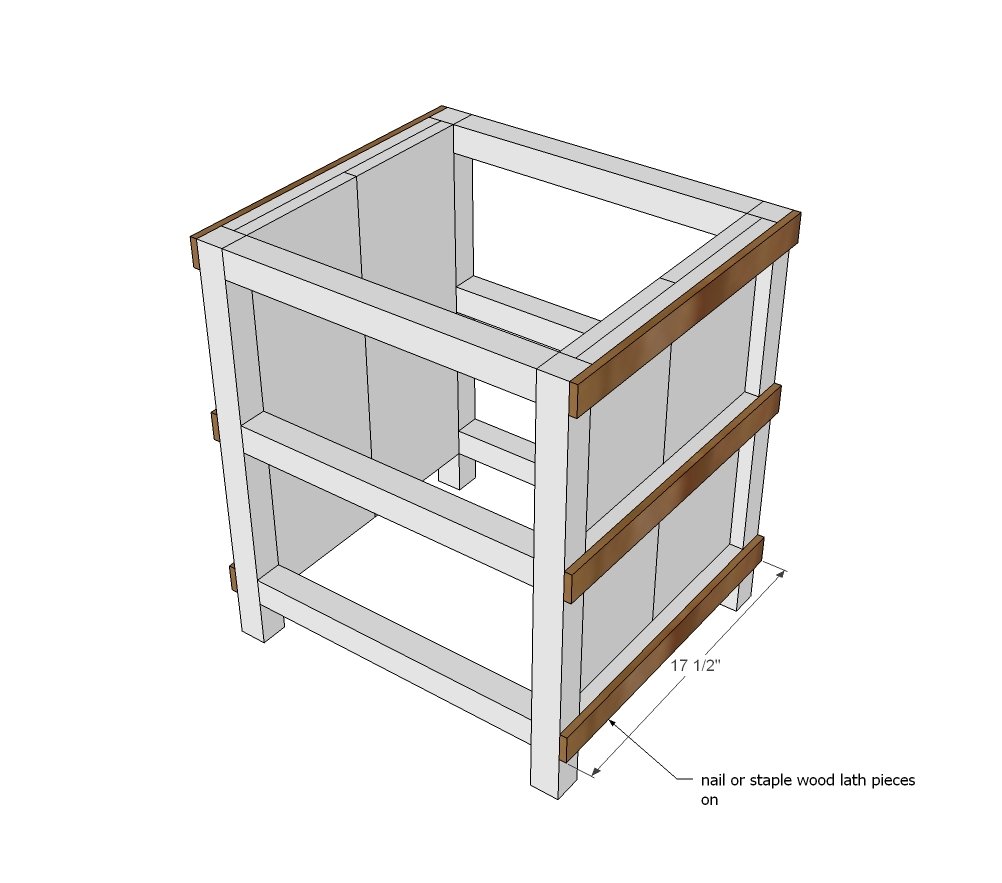
Attach wood lath pieces to the sides, over the 1x2s, with finish nails and glue. Jaime used a stapler to attach the wood lath.
Step 5
Step 6
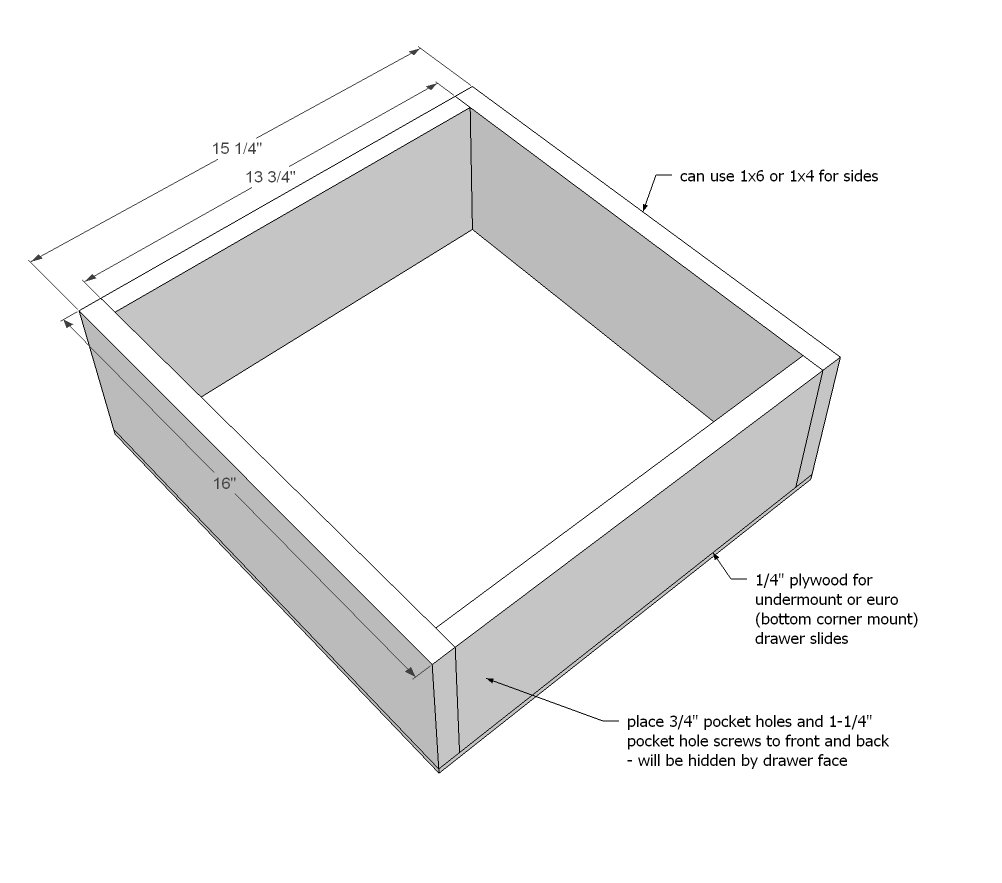
Drawers should be cut to fit - drawer shown is for 1/2" clearance (per side) euro style drawer slides. Here's a video tutorial on installing drawer slides
Step 7
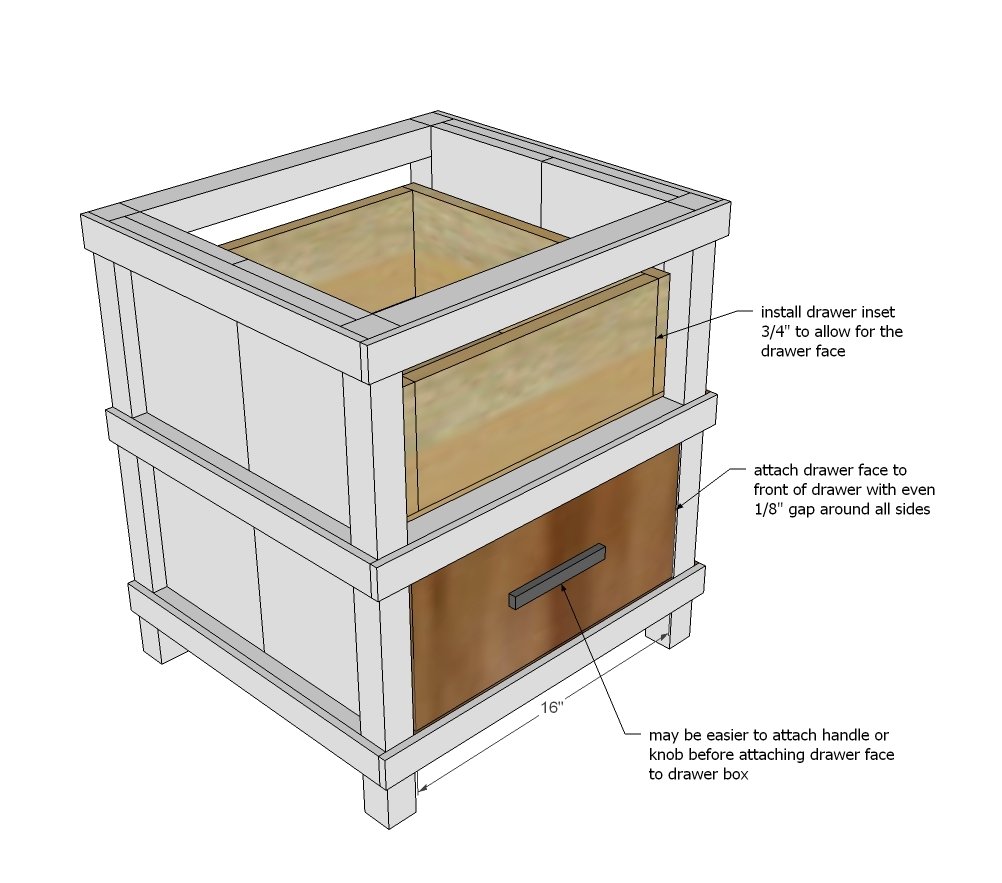
Install drawers and add drawer face.
Step 8
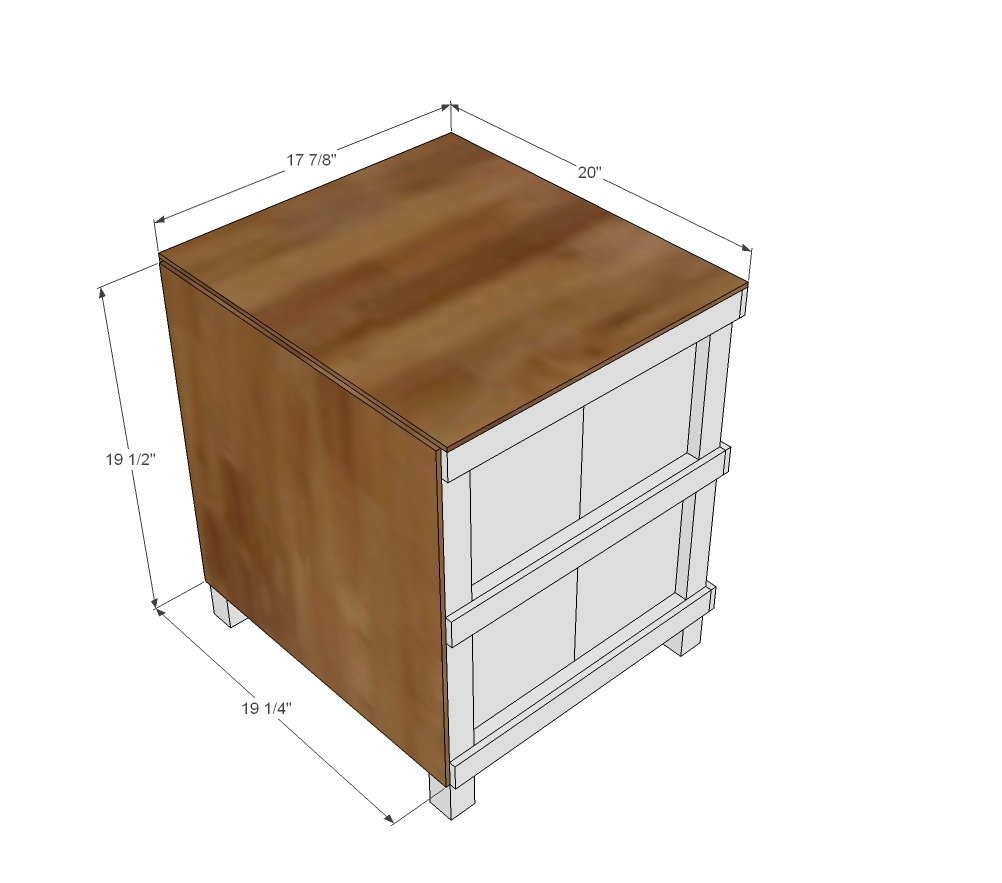
Cover back and top with 1/4" plywood.
Step 9
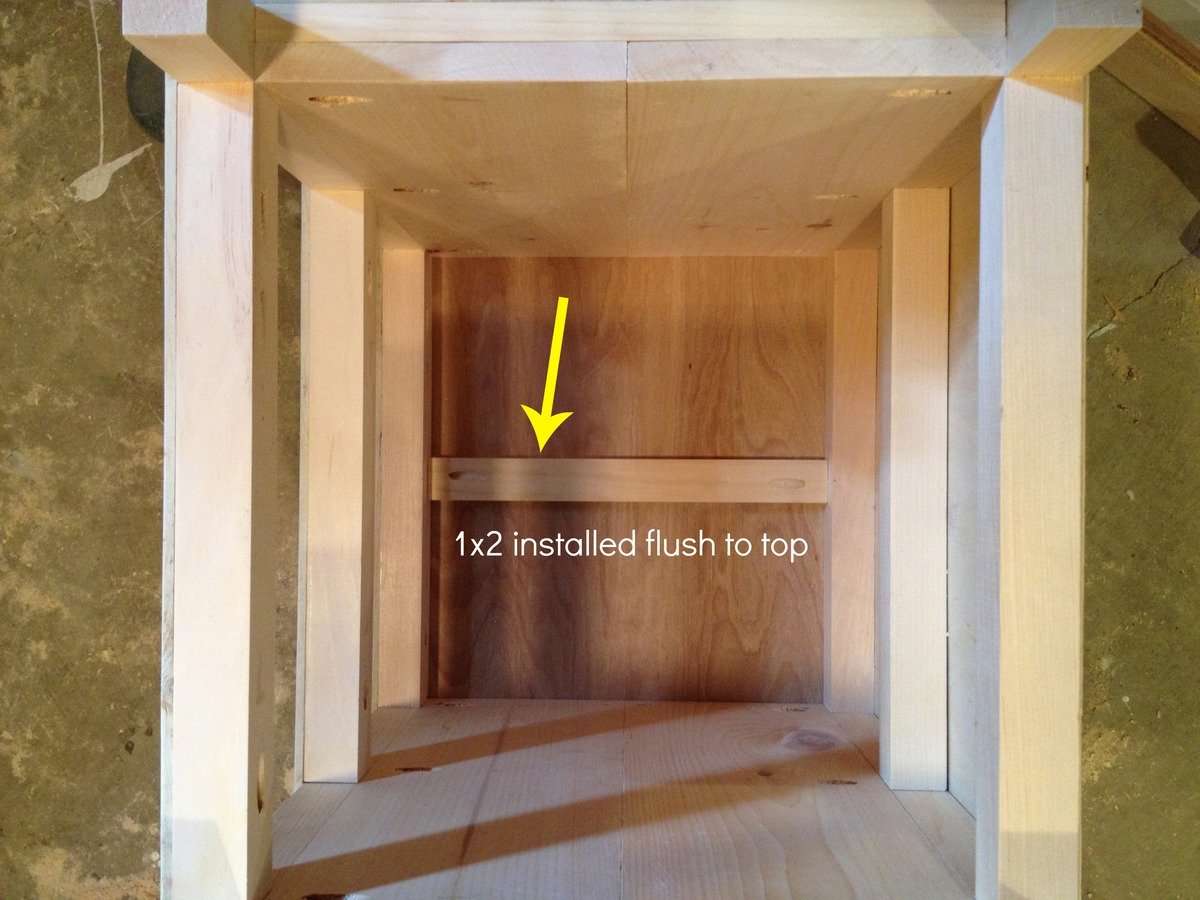
As added insurance, Jaime added a 1x2 support across the top.
Step 10
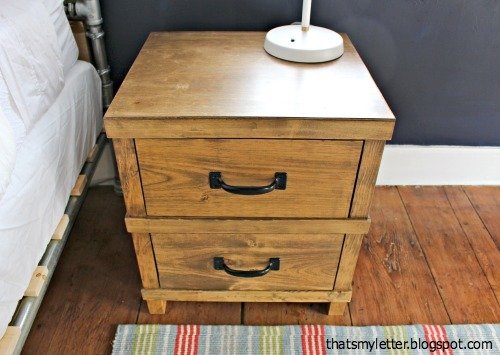
For more details on the finish and building tips, please visit Jaime here.
Finishing
Sand all surfaces, starting with a medium grit and finishing with fine. Wipe off the dust, fill any holes or gaps with wood filler, and sand smooth once dry. Apply primer if you're painting, then finish with your choice of paint or stain and seal with a durable clear topcoat. For outdoor projects, use exterior-rated primer, paint or stain, and sealer so the piece stands up to the weather.
Source (temporary): https://www.ana-white.com/woodworking-projects/owens-nightstand