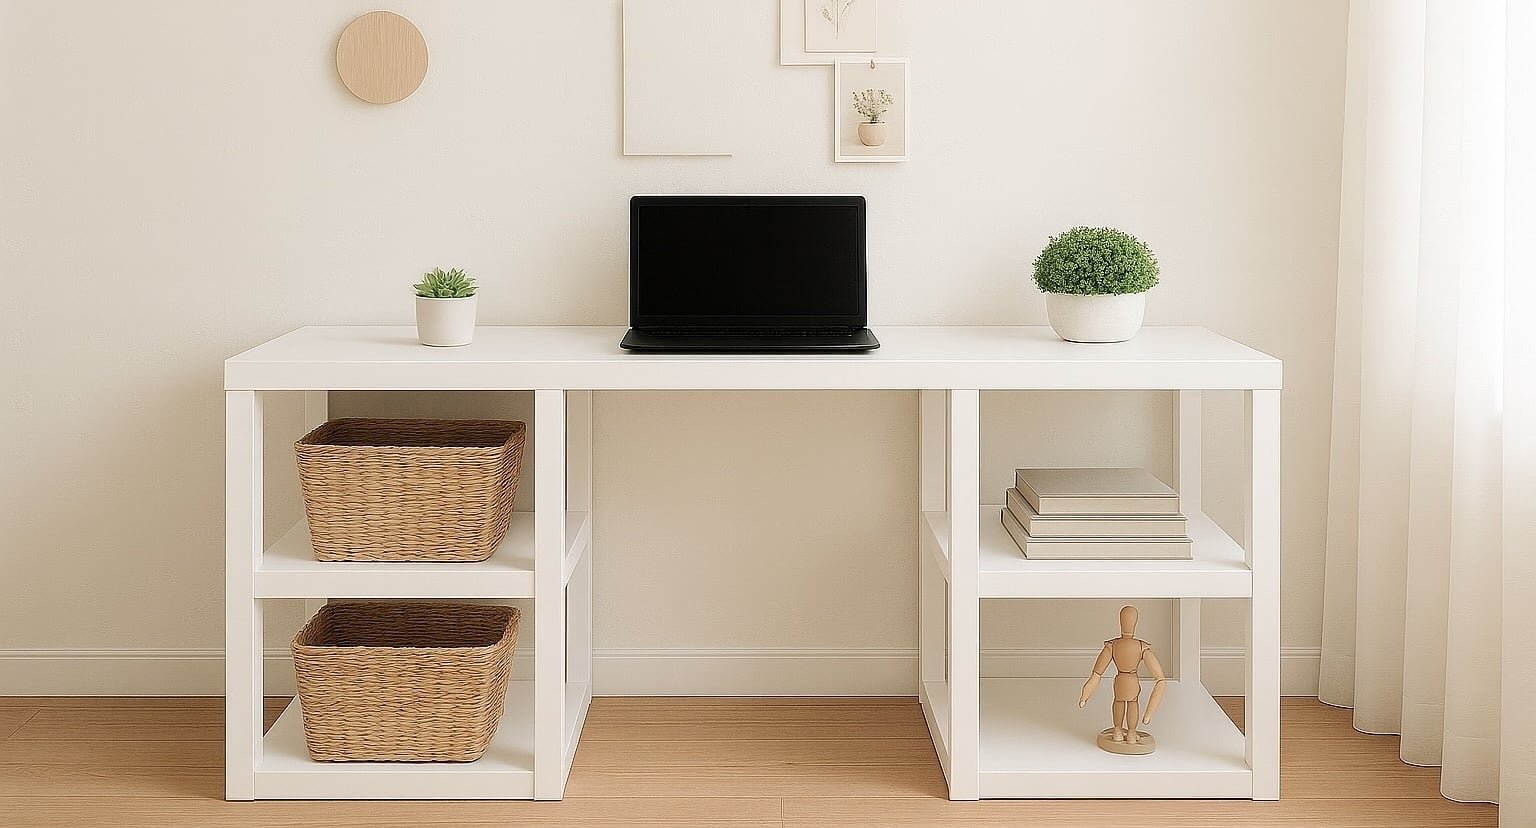
Parson Tower Desk
Build your own modern parsons style desk with free. Step by step plans include detailed diagrams, shopping and cut list, and lots of reader submitted photos.
Specifications
| Project type | Desk, Desk Systems and Project Table Plans |
|---|---|
| Room | Storage Solutions |
| Style | Modern Style Furniture Plans |
| Difficulty | Beginner Projects |
| Estimated cost | $20 - $50 |
Dimensions
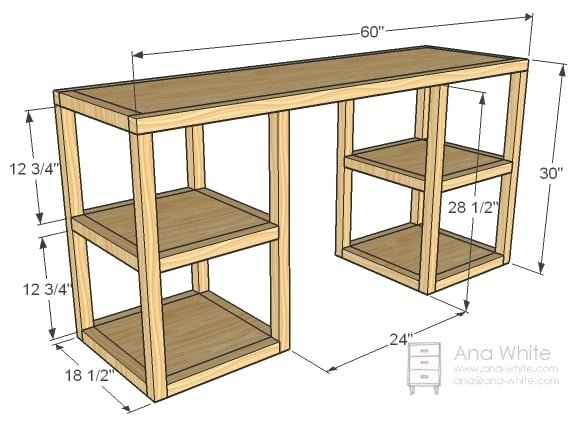
Use the size-specific shopping and cut lists below.
Shopping List
- 1 - 4x8 Sheet of 3/4″ thick MDF or Plywood, ripped into three 15 1/2″ widths x 8 feet long
- 7 - 2×2 boards, 8′ long
- 1-1/4″ and 2-1/2" pocket hole screws
- paint and finishing supplies
Cut List
- 1 – 1×16 @ 57″ (desk top)
- 4 – 1×16 @ 15″ (Shelves)
- 10 – 2×2 @ 15 1/2″ (Trim perpendicular to desktop)
- 8 – 2×2 @ 15″ (Trim parallel to desktop)
- 8 – 2×2 @ 28 1/2″ (Legs)
- 2 – 2×2 @ 60″ (Desktop Side Trim)
Tools
- measuring tape
- square
- pencil
- safety glasses
- kreg-jig
- drill
- circular saw
- sander
Step-by-step Instructions
Shelf Trim
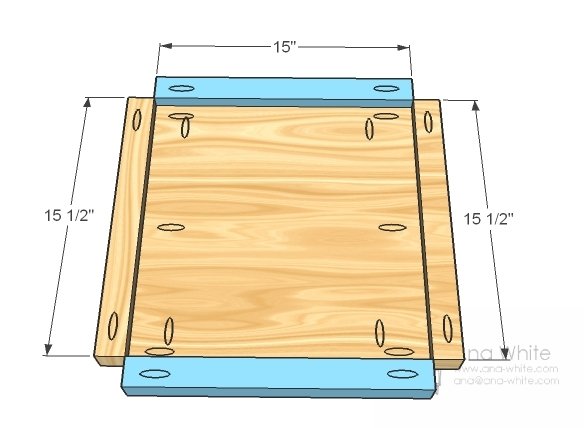
With the tops flush, glue and screw the shelves to the trim as shown above. Use 1 1/4″ pocket hole screws. Drill pocket holes set for 3/4″ stock. Make sure you have already drilled one pocket hole in each end of all of the 2×2 trim pieces. The pocket holes in the 2x2s need to be for 1 1/2″ thick stock. Build four of these.
Legs
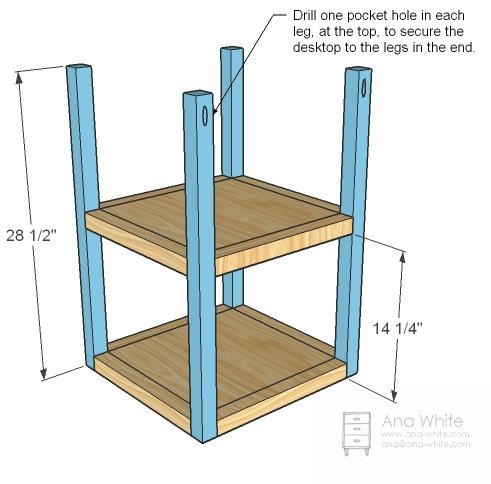
Mark legs for the center shelf. Then glue and screw through the pocket holes into the legs. Remember – the tops of the legs should each have a single pocket hole to attach the top. If you don’t have a right angle drill, resist the urge to place the pocket hole on the inside where it won’t be seen – you also won’t be able to get your drill in there. Build two of these.
Tabletop
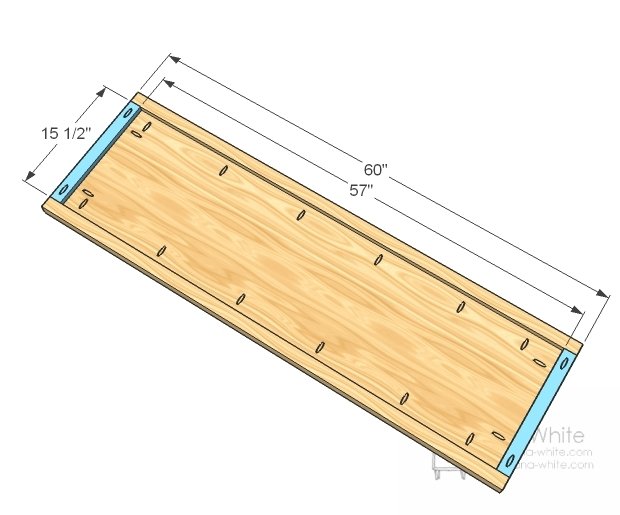
The tabletop is super simple. Begin by attaching the end trim to the top. Then attach the front and back trim (the long ones) to the top and the side trim. Done. Keep the bottom edges flush.
Assembly
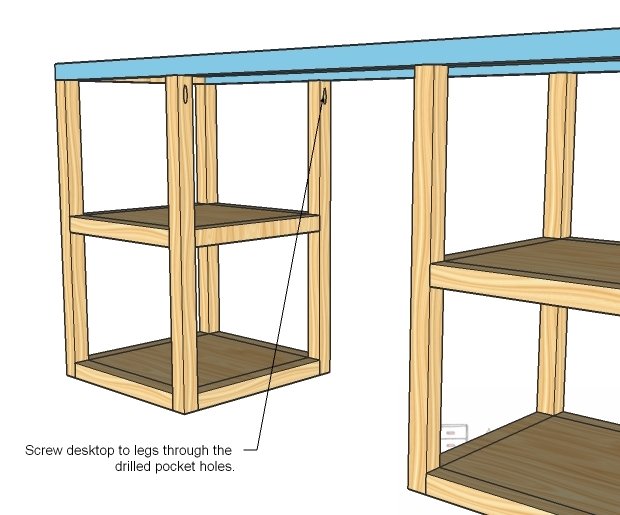
I choose to leave the glue off to make for moving the desk easy. Simply lay the desktop on top of the tower and screw through the pocket holes into the underside of the desktop. Remember, the towers are not perfect squares, so you may need to rotate the towers to get the perfect fit.
Finishing
Sand all surfaces, starting with a medium grit and finishing with fine. Wipe off the dust, fill any holes or gaps with wood filler, and sand smooth once dry. Apply primer if you're painting, then finish with your choice of paint or stain and seal with a durable clear topcoat. For outdoor projects, use exterior-rated primer, paint or stain, and sealer so the piece stands up to the weather.
Source (temporary): https://www.ana-white.com/woodworking-projects/parson-tower-desk