Patrick's Router Table
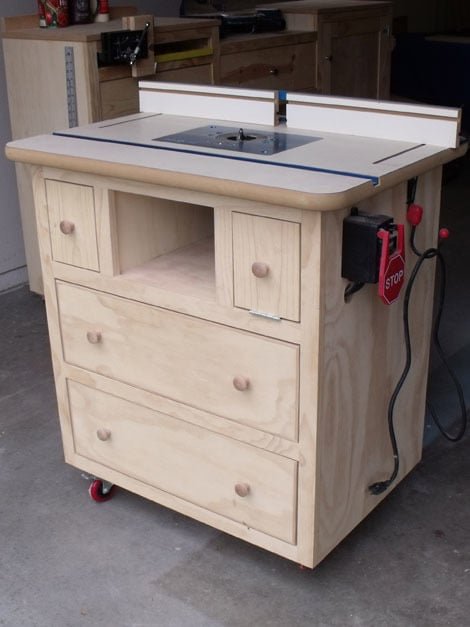
Build your own router table! Free router table plans from
Specifications
| Project type | Workshop and Garage Plans |
|---|---|
| Room | Garage and Workshop |
| Style | Cottage Style Furniture Plans |
| Difficulty | Intermediate |
Dimensions
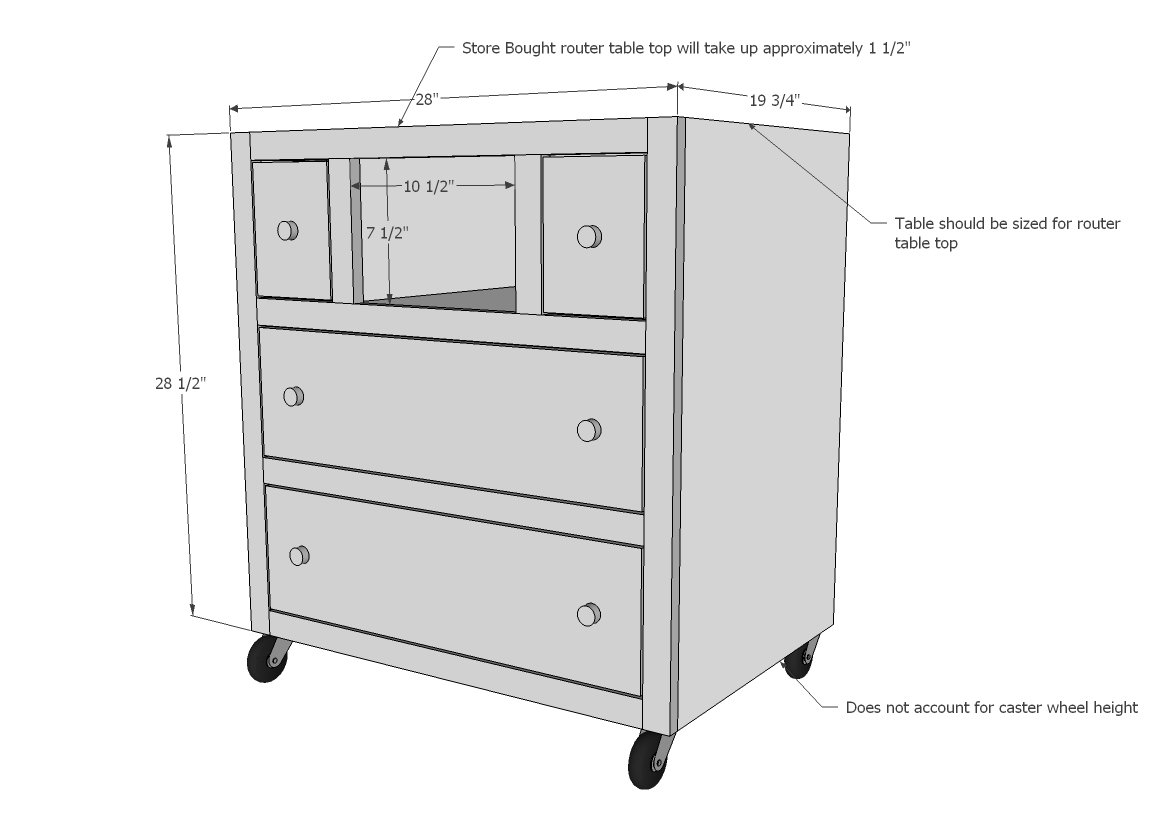
Use the size-specific shopping and cut lists below.
Shopping List
- 1 Sheet 3/4" plywood ripped into two 19" x 8 foot long strips (remaining scrap can be ripped into 5 1/2" wide strip and used to replace some of the 1x6 boards - if you do this, may I suggest altering to 18" widths so you can get two 5 1/2" strips out of scrap plywood? You'll still need to buy a 1x6) OR 3 - 1x6 @ 8 feet long (plan assumes your 1x6 are 5 1/2" wide)
- 1 - 1x3 @ 8 feet long
- 2 - 1x2 @ 8 feet long
- 1 - 1x8 @ 6 feet long (plan assumes your 1x8s are 7 1/4" wide)
- Recommended joinery is 1 1/4" PH screws and 1 1/4" finish nails
Cut List
MAIN BOX
- 3 - 3/4" plywood 19" x 26 1/2"
- 2 - 3/4" plywood 19" x 8 1/4"
- 2 - 3/4" plywood 19" x 28 1/2"
- 5 - 1x3 @ 19" (or width of your plywood)
FACE FRAME
- 2 - 1x2 @ 28 1/2"
- 4 - 1x2 @ 25"
- 2 - 1x2 @ 7 1/2"
SMALL DRAWER
- 2 - 1x6 @ 16"
- 2 - 1x6 @ 5"
- 1 - 1x6 @ 14 1/2"
- 2 - 1x8 @ 5 1/2" (drawer faces for both top drawers)
LARGE DRAWER (for 2)
- 4 - 1x6 @ 22 1/2"
- 4 - 1x6 @ 16"
- 2 - 1/4" plywood @ 24" x 16"
- 2 - 1x8 @ 24 3/4"
Tools
- measuring tape
- square
- pencil
- safety glasses
- hearing protection
- kreg-jig
- drill
- circular saw
- table saw
- nailer
- sander
- countersink drill bit
Step-by-step Instructions
Step 1
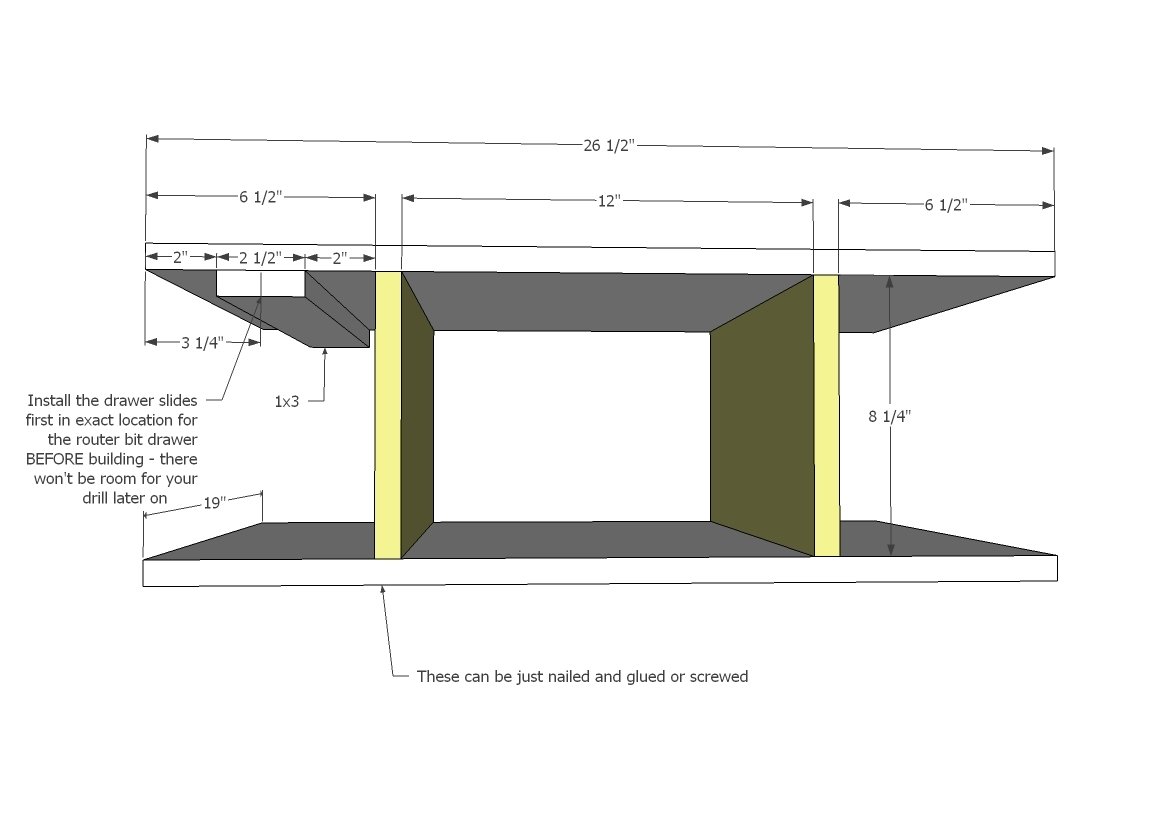
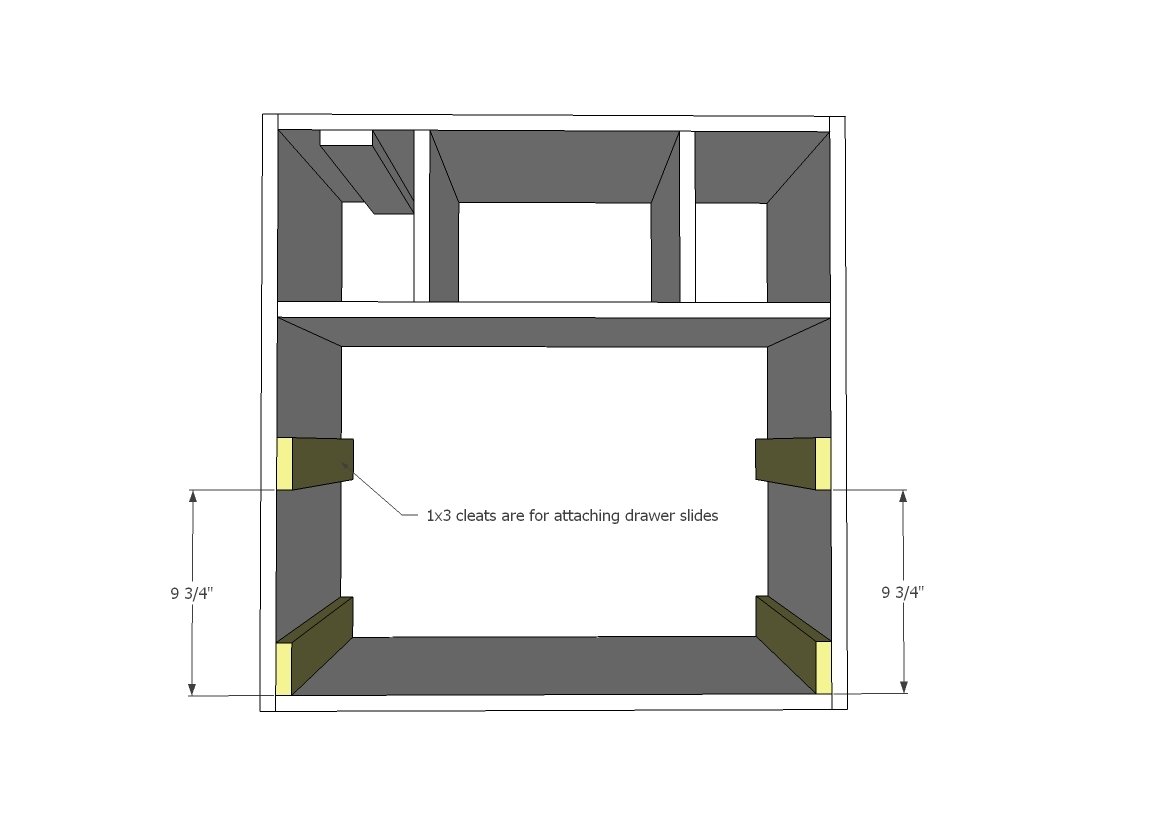
So the tricky part here is the little drawers. You'll need to do some prepwork to get the drawers in before building - because once built, there's no way you are going to get a drill in the tiny space to attach drawer slides. So do a test layout of the top center piece as shown here. You'll want to attach the 1x3...
Step 2
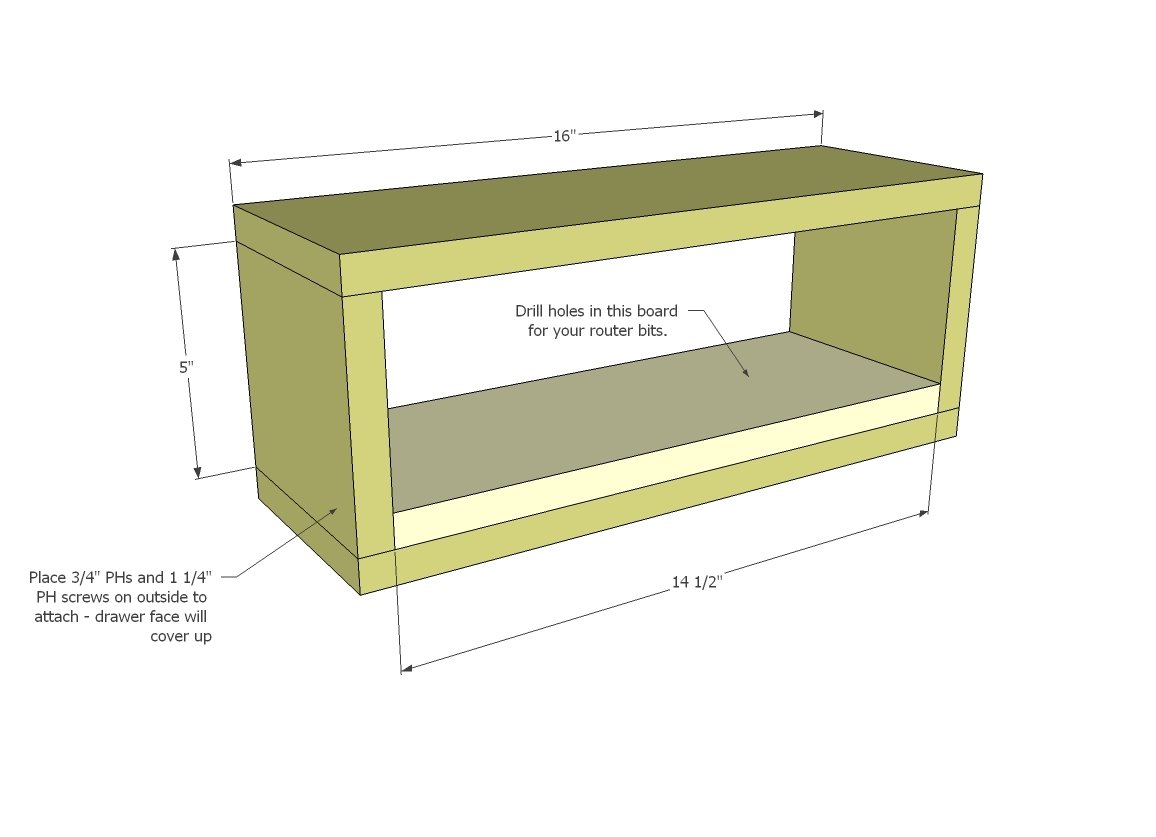
Build your router bit box as shown above. The 14 1/2" piece is for drilling out holes for your router bit collection....
Step 3
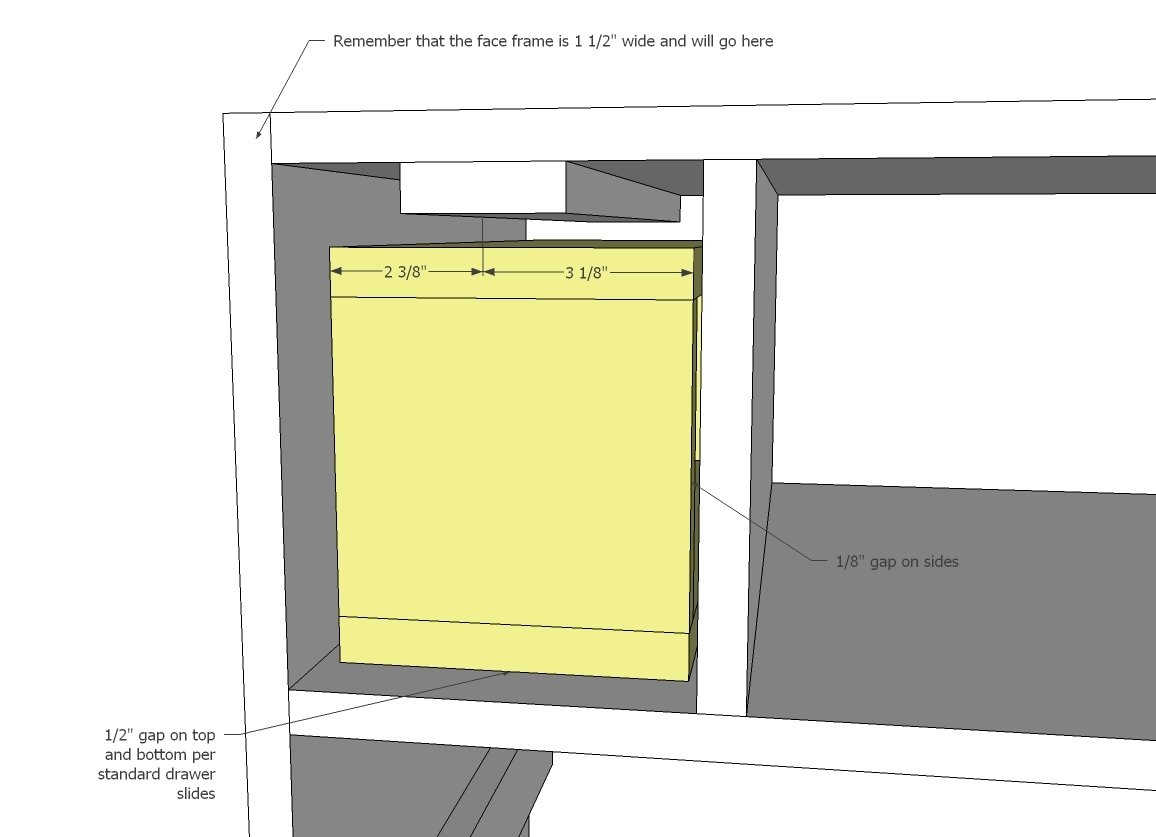
Remembering that the project gets a face frame, install the drawer slides cabinet member on the project BEFORE construction. Test the drawer for fit before you glue anything.
Step 4
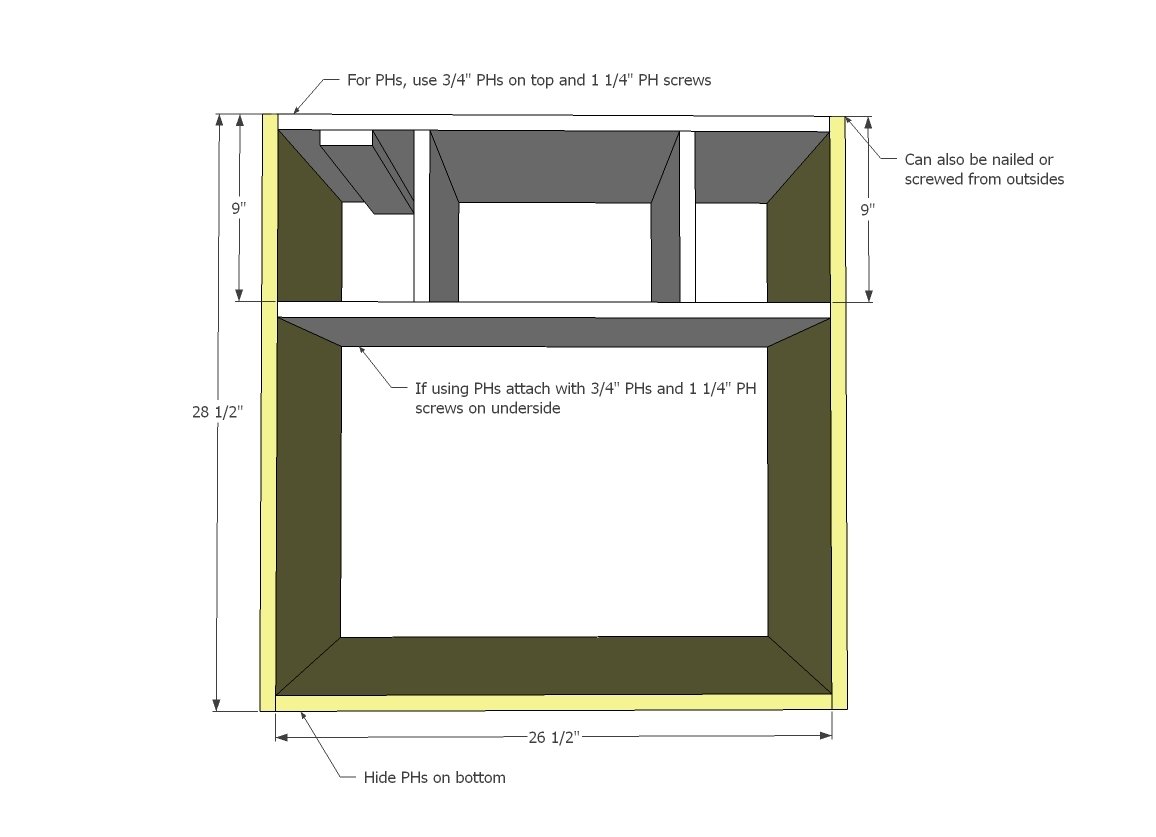
Once you are happy with the drawer fit, you can add the sides and bottom.
Step 5
Step 6
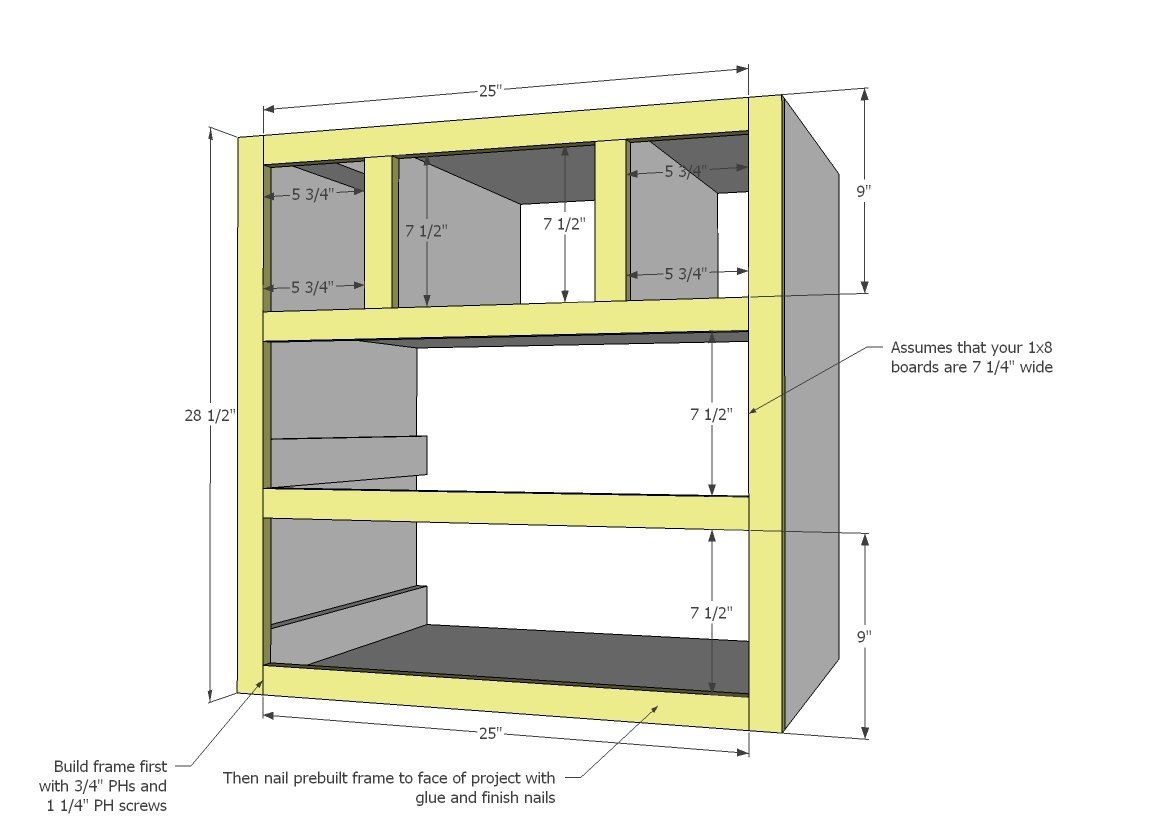
Now build the face frame and attach to front of cabinet.
Step 7
And then finish off small drawers with faces.
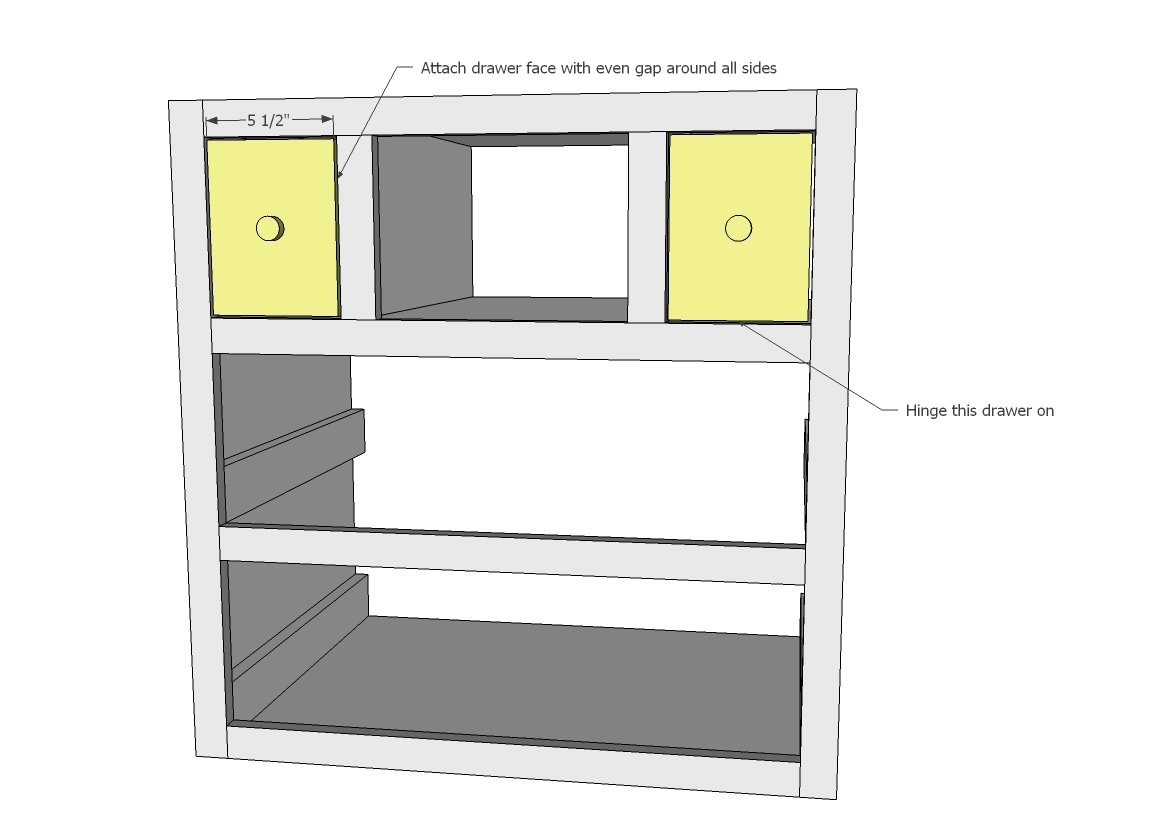
Step 8
Build two large drawers. Check your overall widths - drawers should be made overall 1" less than the opening to allow for standard 1/2" clearance drawer slides. Check for square.
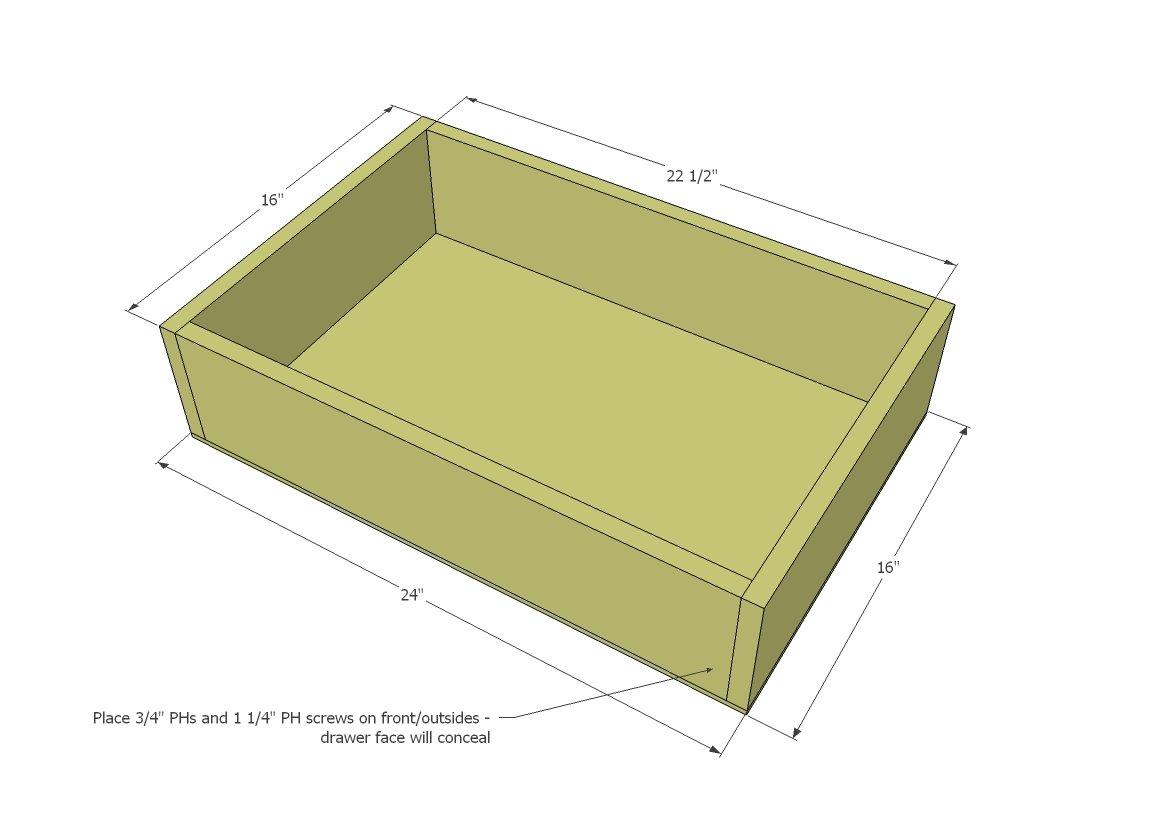
Step 9
Install drawers 3/4" inset in cabinet to allow for drawer face.
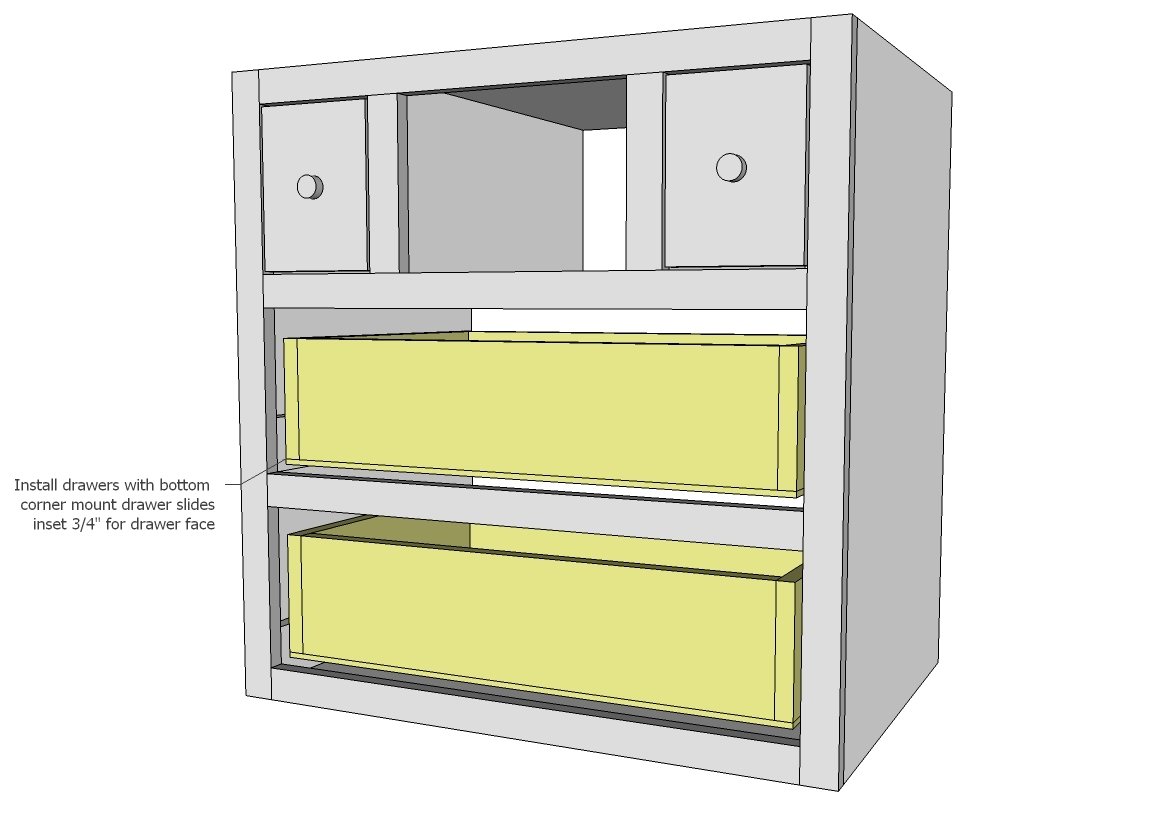
Step 10
Attach drawer face to drawers with even 1/8" gap on all sides.
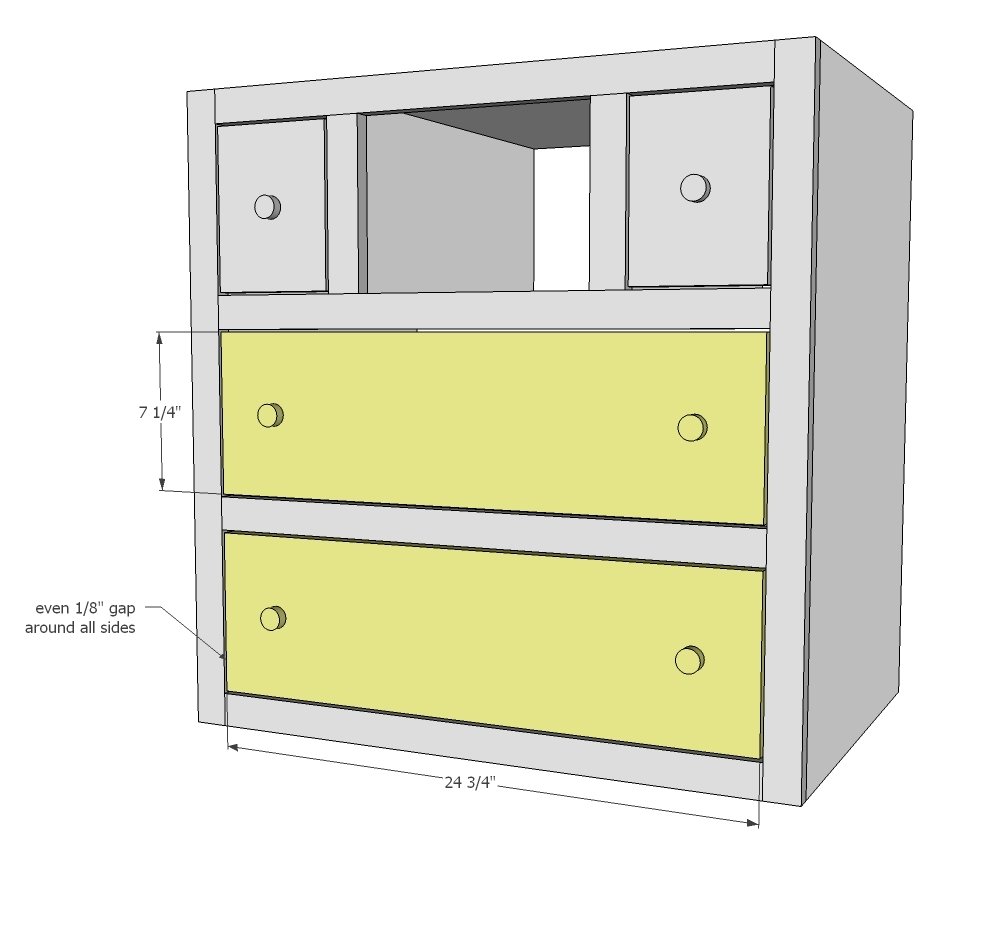
Step 11
And then add the caster wheels.
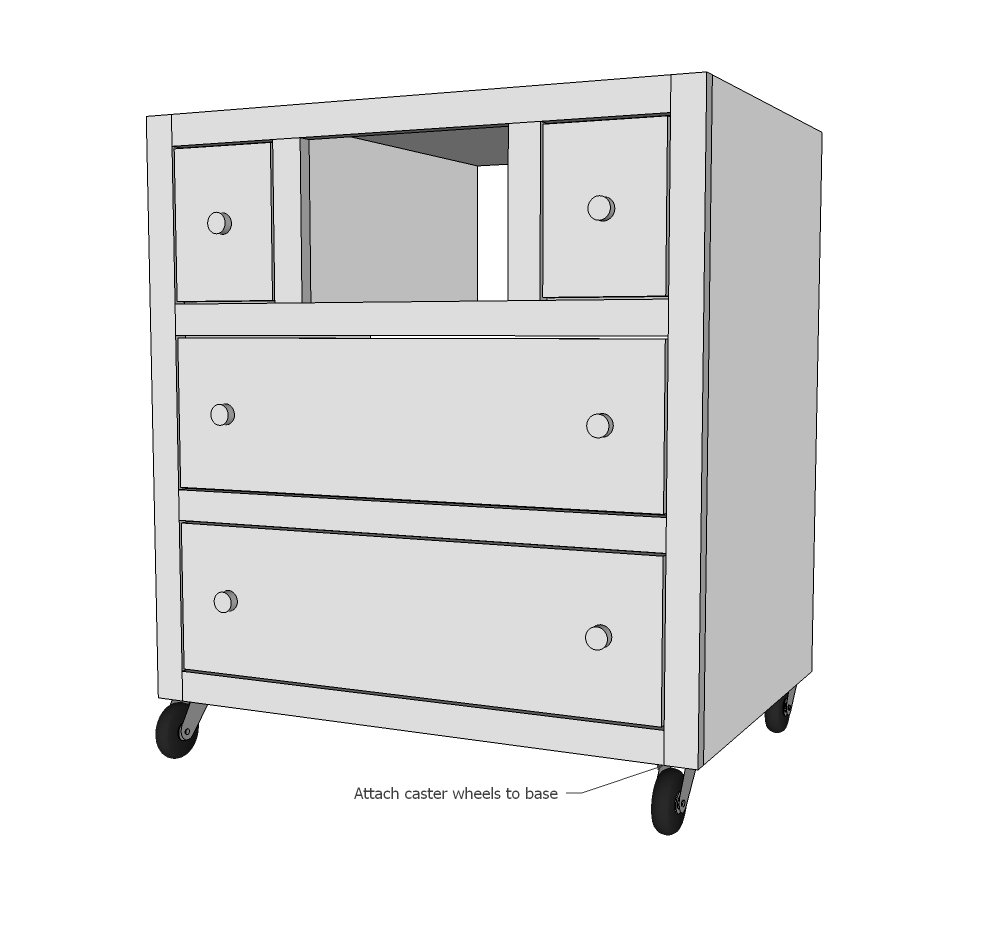
Step 12
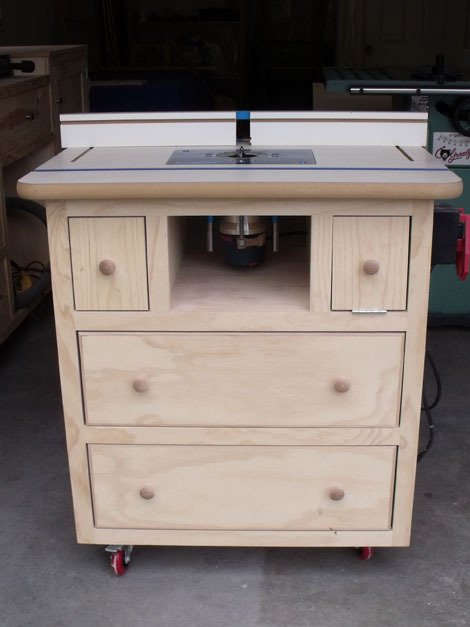
Cut out holes for router and attach router table top.
Step 13
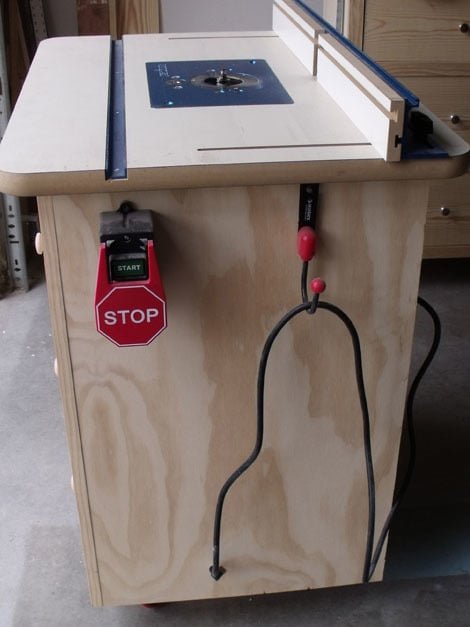
And I love how Patrick did this!
Finishing
Sand all surfaces, starting with a medium grit and finishing with fine. Wipe off the dust, fill any holes or gaps with wood filler, and sand smooth once dry. Apply primer if you're painting, then finish with your choice of paint or stain and seal with a durable clear topcoat. For outdoor projects, use exterior-rated primer, paint or stain, and sealer so the piece stands up to the weather.
Source (temporary): https://www.ana-white.com/woodworking-projects/patricks-router-table-plans