Perfect Console Bookshelf
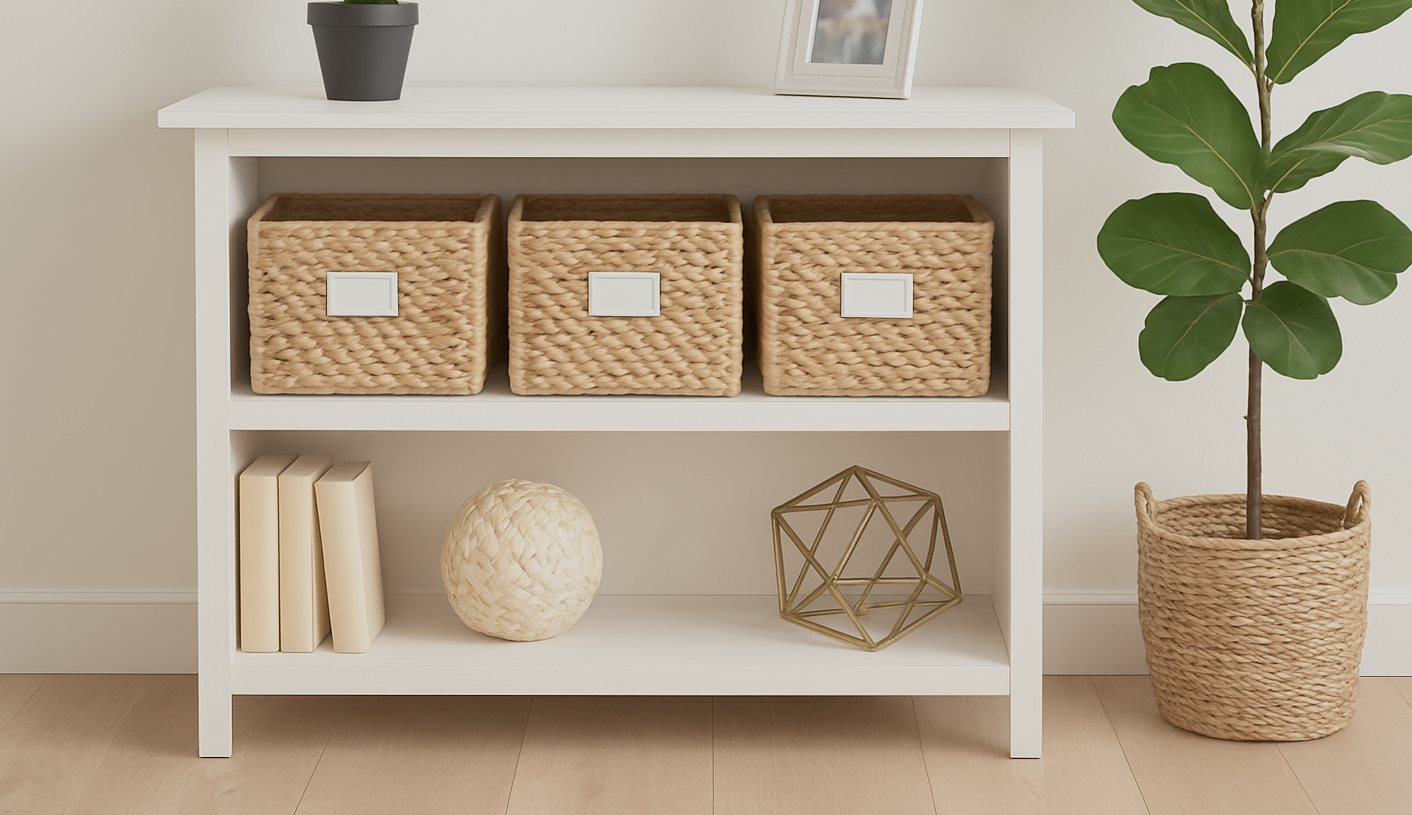
Perfect Console Bookshelf – Bring timeless functionality to your home with the Perfect Console Bookshelf, designed to blend seamlessly into modern, farmhouse, or transitional spaces. At console height, this versatile piece works beautifully as an entryway catchall, behind a sofa, or as a stylish toy organizer in a child’s room. Featuring clean lines, a slim profile, and generous open shelving, it offers just the right balance of storage and display. Woven baskets, books, or decor nestle easily on the sturdy shelves, while the top surface provides the perfect stage for plants, photos, or seasonal accents. Download the and create your own custom console bookshelf—simple to build, endlessly practical, and perfectly styled.
Specifications
| Project type | Bookshelf and Bookcase Plans |
|---|---|
| Room | Storage Solutions |
| Style | Children's and Kid's Room Furniture and Toy Plans |
| Difficulty | Beginner Projects |
| Estimated cost | scraps |
Dimensions
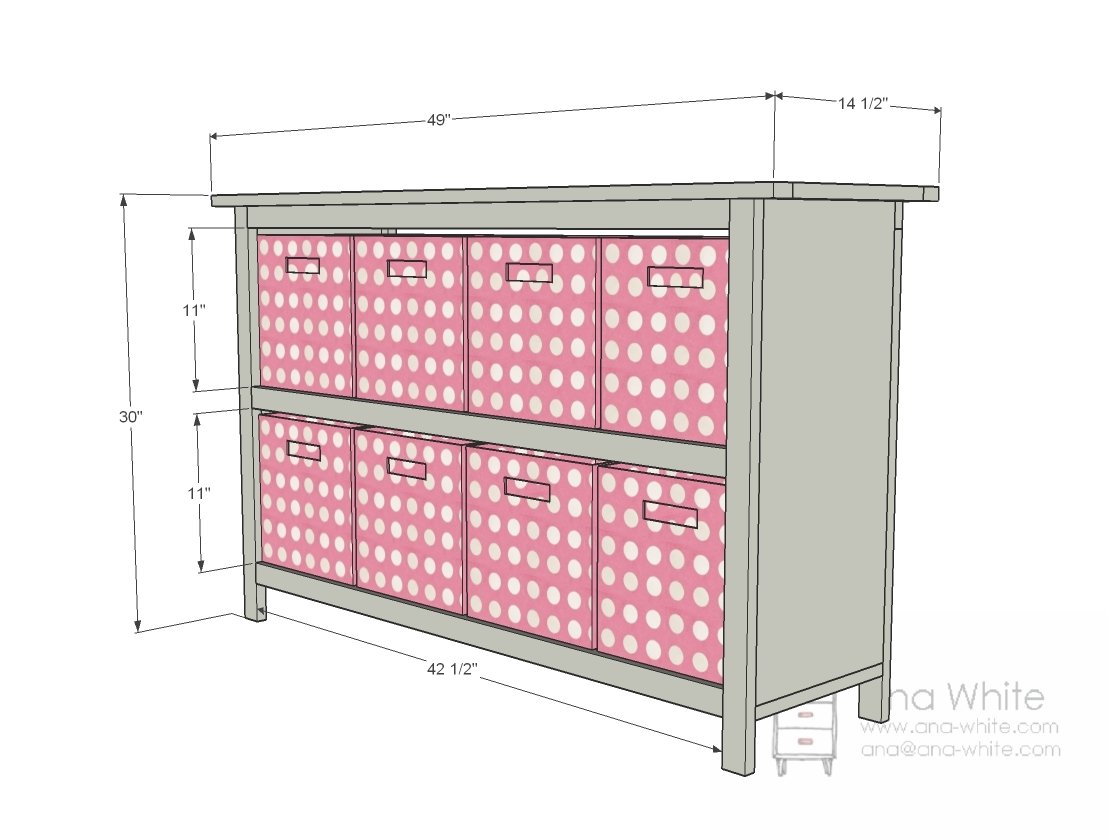
Use the size-specific shopping and cut lists below.
Shopping List
- 2 - 1×12 pine boards, 8 feet long
- 5 - 1×2 pine boards, 8 feet long
- recommend 1-1/4" pocket hole screws for 1x12 joints
- 1-1/4" brad nails
- 3/4" brad nails if adding a back
- 1/4" plywood panel (wainscoting panel would work great) if adding a back
Cut List
A) 2 – 1x12 @ 44″ (Shelves)
B) 2 – 1x12 @ 25 3/4″ (Sides)
C) 2 – 1×2 @ 44″ (Top Supports)
D) 4 – 1×2 @ 29 3/4” (Legs)
E) 4 – 1×2 @ 42 1/2″ (Shelf Trim)
F) 2 – 1×2 @ 11 1/2″ (Bottom Side Trim)
G) 1 – 1x12 @ 49″ (Top)
H) 2 – 1×2 @ 49″ (Top Trim)
Tools
- measuring tape
- square
- pencil
- safety glasses
- hearing protection
- drill
- nailer
- sander
Step-by-step Instructions
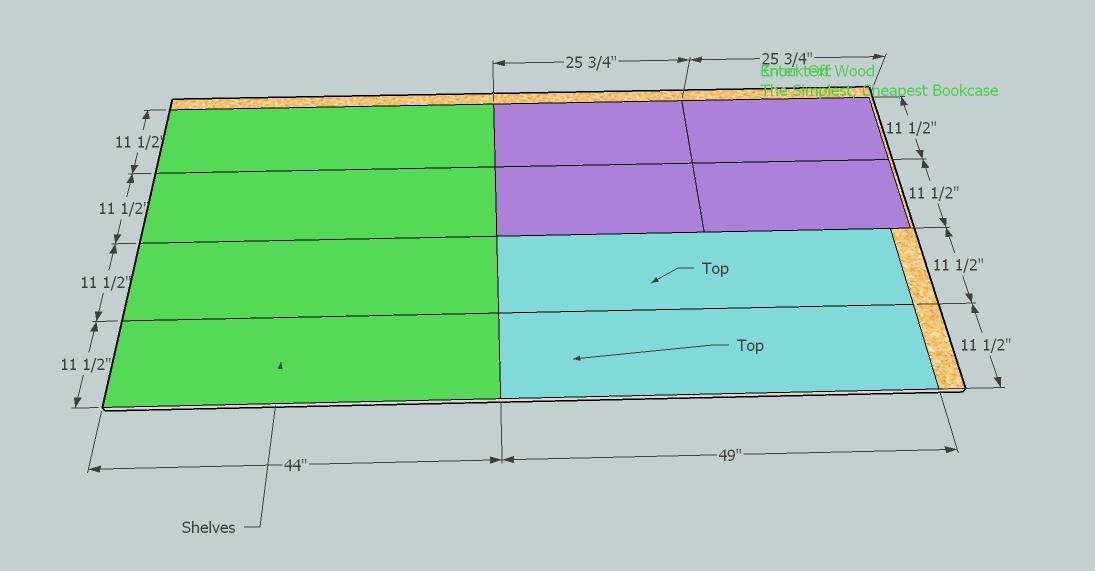
Optional Plywood Ripping Diagram
You can also use plywood or MDF to build this bookshelf. One sheet of plywood will build two bookshelves. Here's how to cut the plywood for two bookshelves Have your plywood or MDF cut into 11 1/2" wide strips to create 1x12 boards. Carefully follow the cutting layout here to conserve boards and get exactly two bookshelves out of 1 sheet of plywood.
Step 2
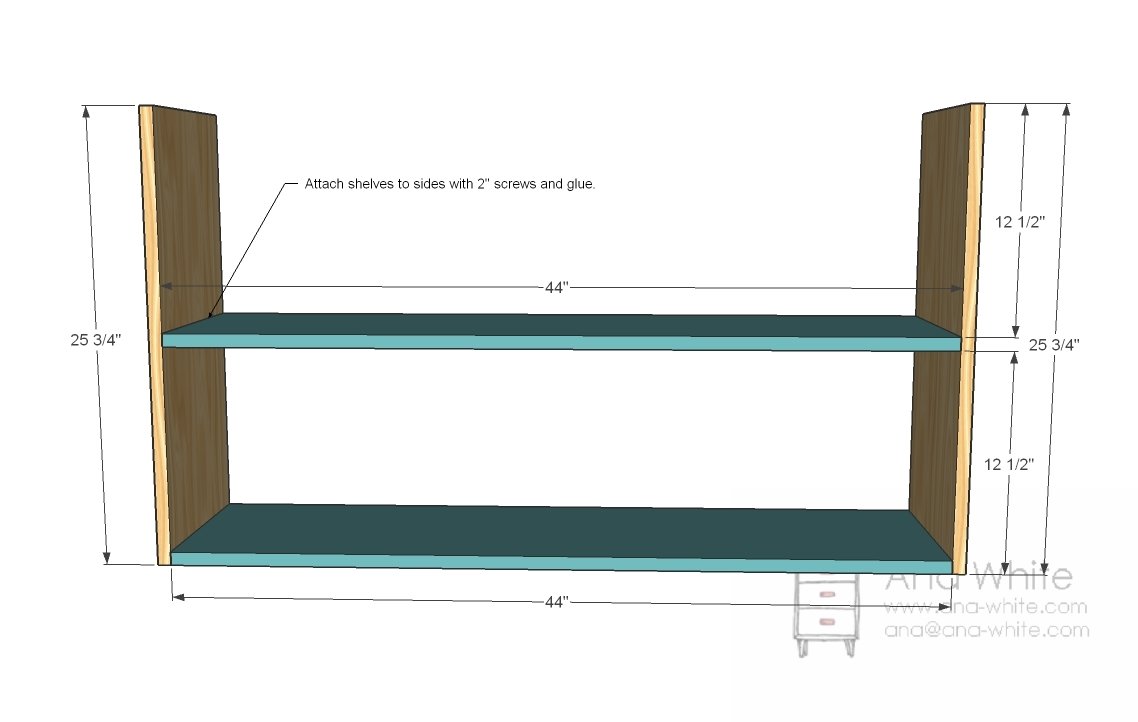
Attach the sides to the shelves with either 2" nails and glue or 2" screws and glue. This shelf is fully framed, so nails will suffice, but screws - though harder to hide - are stronger.
Step 3
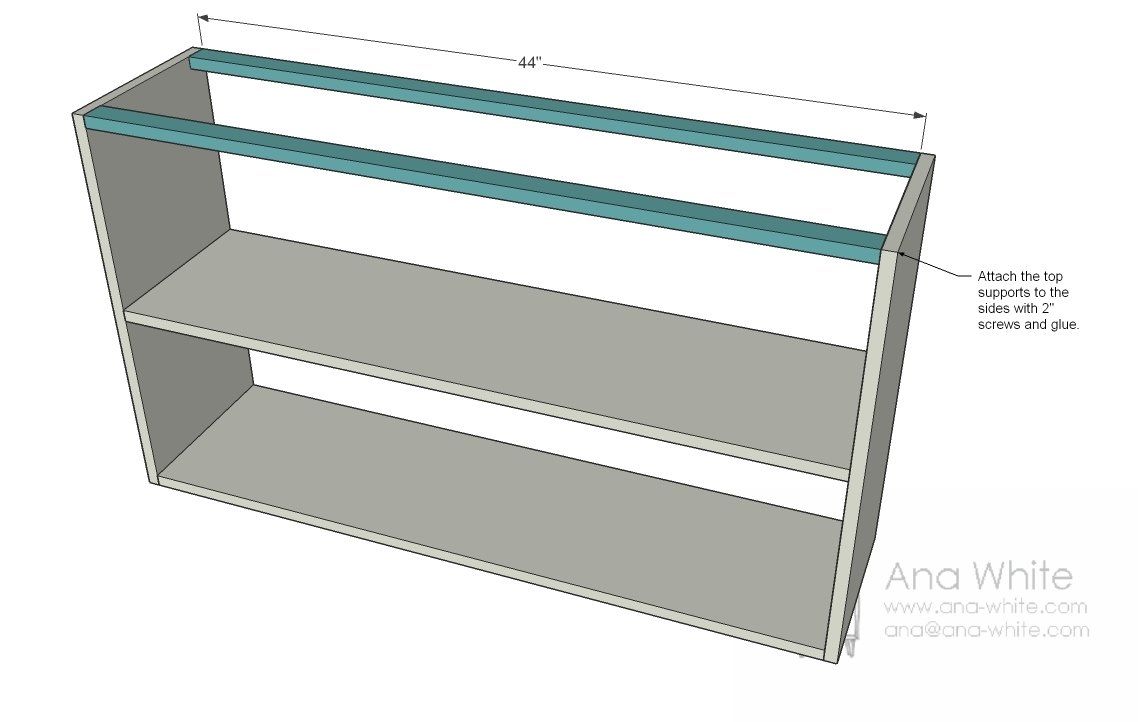
Top Supports. Add the top supports (C, Green) as shown above.
Step 4
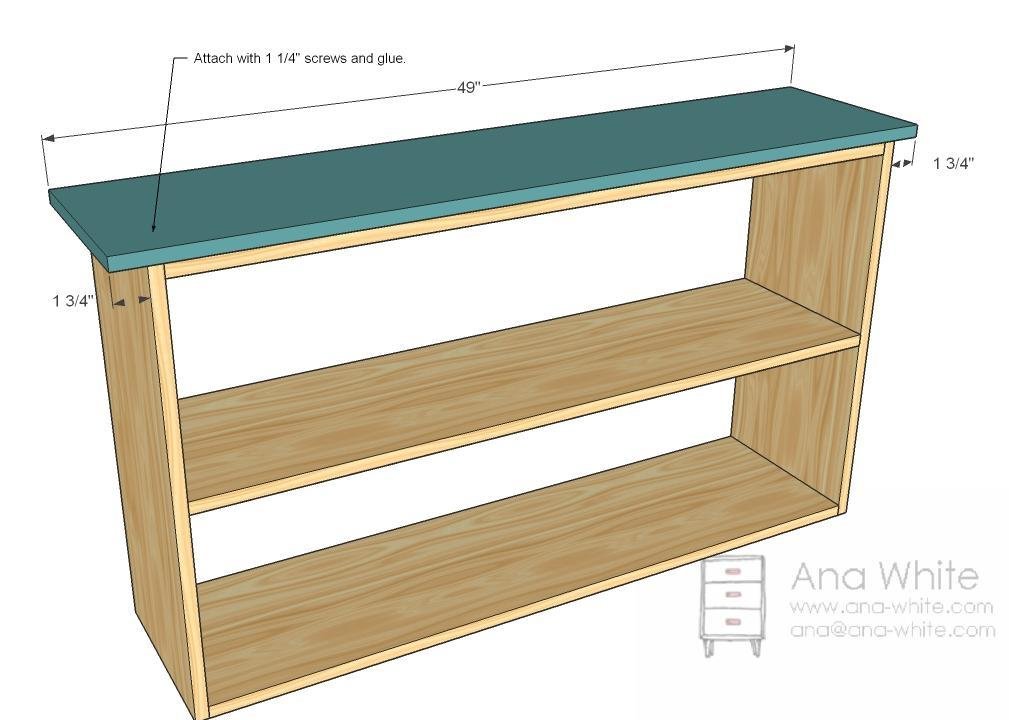
Attach the top to the bookcase as shown above. You can fasten through the supports to hide screw/nail holes.
Step 5
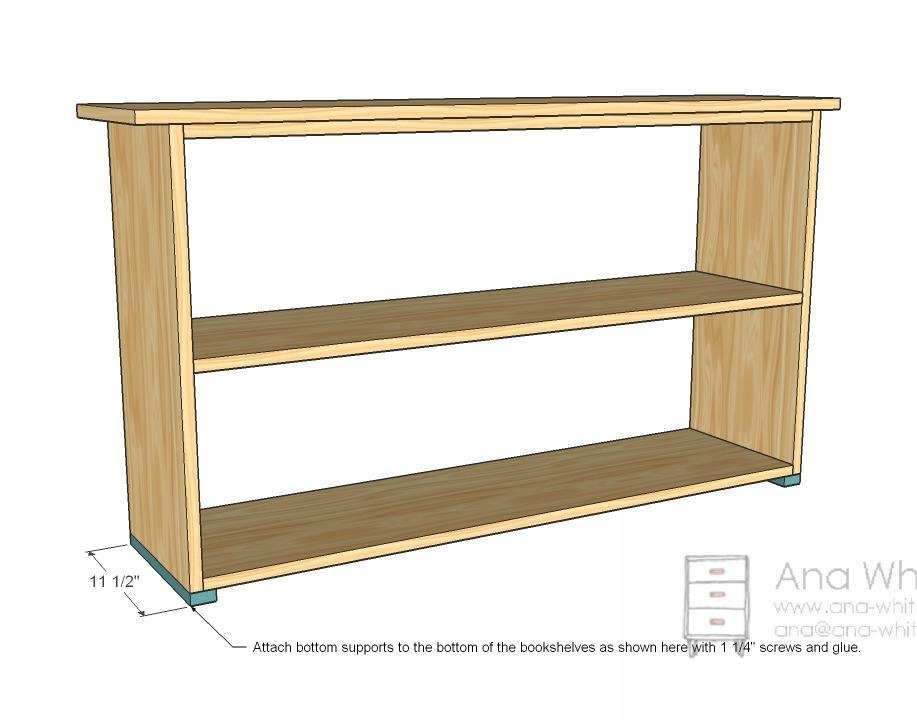
Attach the bottom trim pieces with 1-1/4" brad nails and wood glue.
Step 6
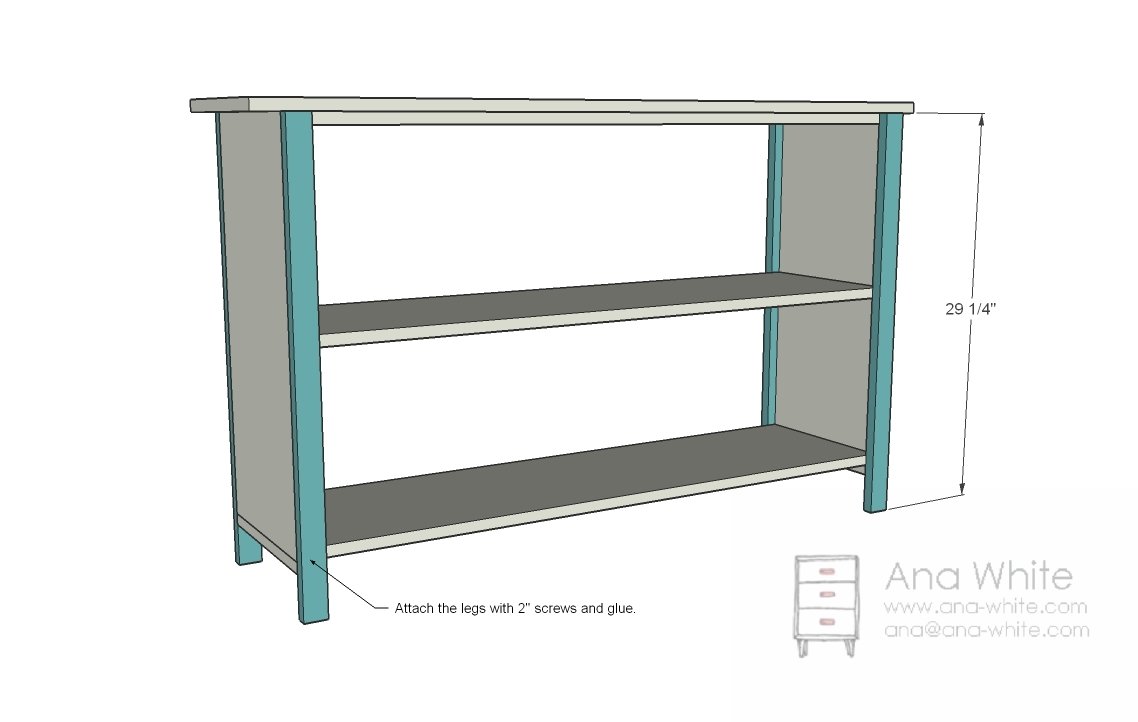
Now it's time for the legs. Flush to the top and outsides. Use 2" finish nails and glue or screws and glue.
Step 7
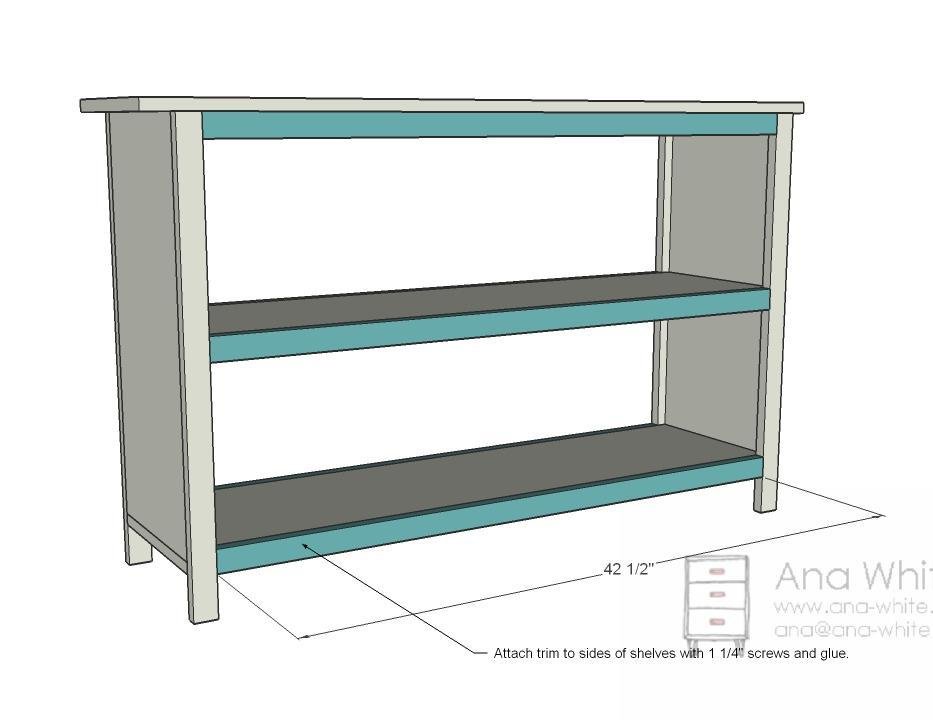
Shelf trim. Attach the shelf trim just like you did the legs. You should also fasten 2" finish nails through the sides of the legs into the shelf trim.
Step 8
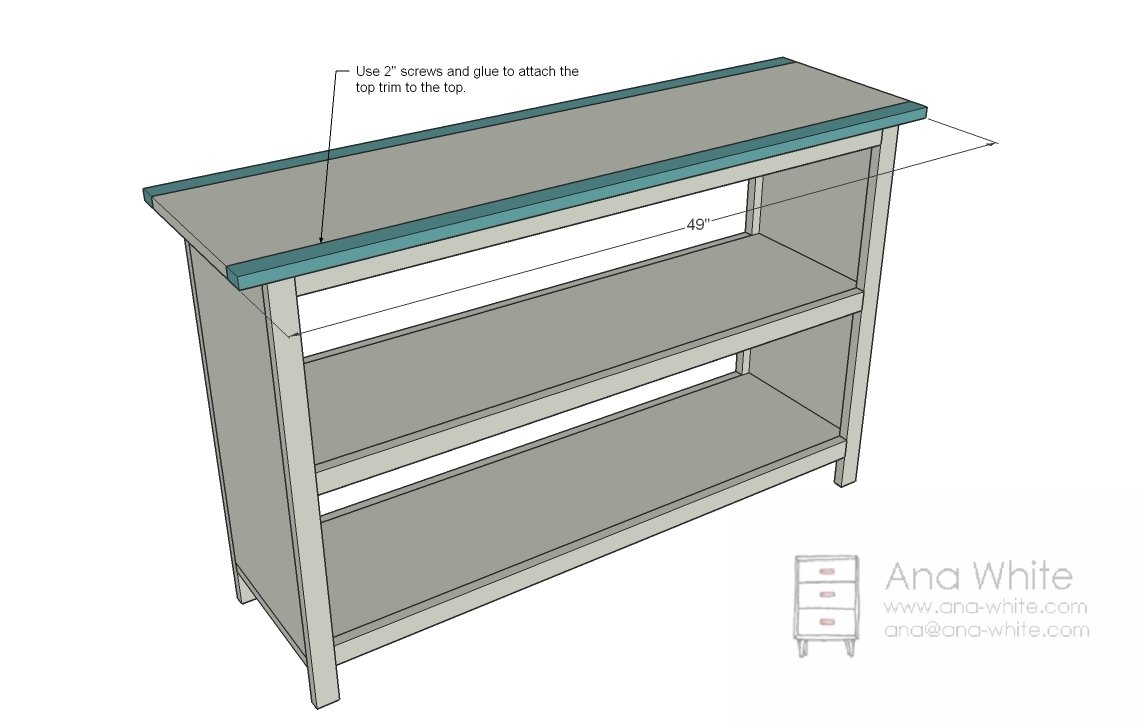
Finally, attach the top trim as shown above. I would use finish nails here to hide holes. Don't forget your glue.
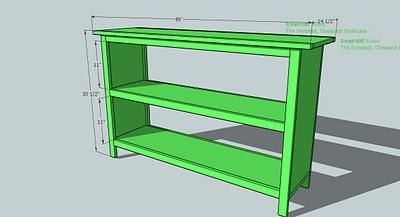
Fill nail holes with putty and sand and finish as desired.
A 1/4" panel can be added to the back with 3/4" brad nails or staples and glue.
Finishing
Sand all surfaces, starting with a medium grit and finishing with fine. Wipe off the dust, fill any holes or gaps with wood filler, and sand smooth once dry. Apply primer if you're painting, then finish with your choice of paint or stain and seal with a durable clear topcoat. For outdoor projects, use exterior-rated primer, paint or stain, and sealer so the piece stands up to the weather.
Source (temporary): https://www.ana-white.com/woodworking-projects/perfect-console-bookshelf-free-diy-plans