Picnic Table that Converts to Benches
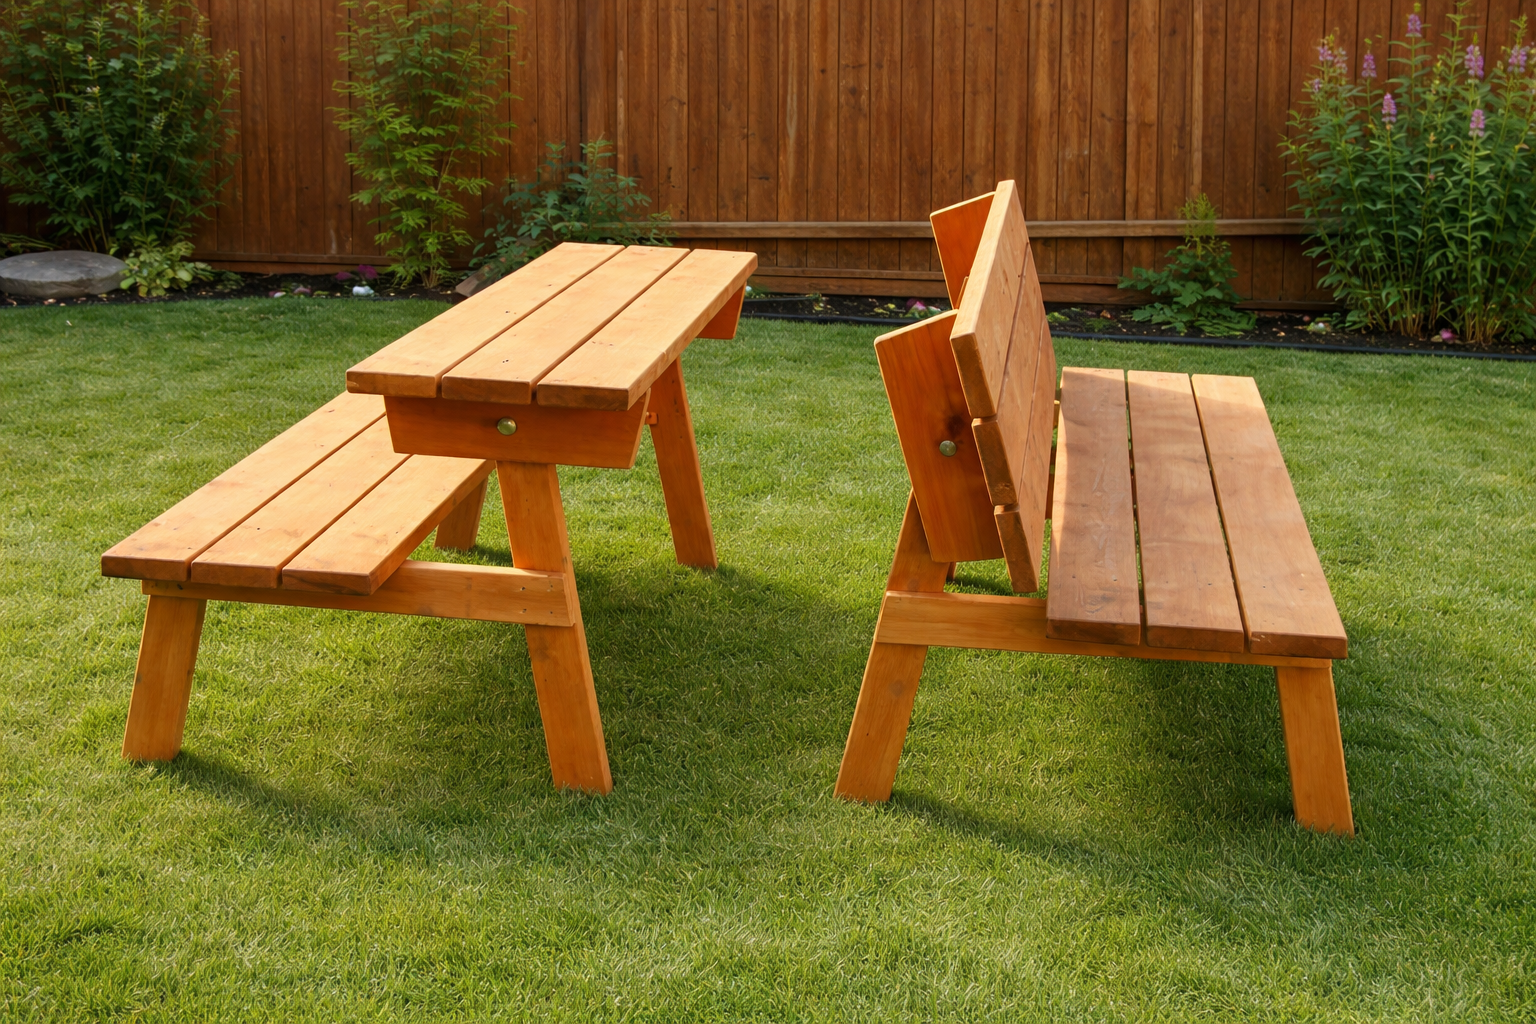
to build a picnic table that converts easily to two separate benches. The tabletops rotate to form bench backs. Detailed plans give you step by step instruction to build this multi-use outdoor staple for your deck or patio.
Specifications
| Project type | Dining Table Plans |
|---|---|
| Room | Outdoor |
| Style | Modern Style Furniture Plans |
| Difficulty | Beginner Projects |
| Estimated cost | $50 - $100 |
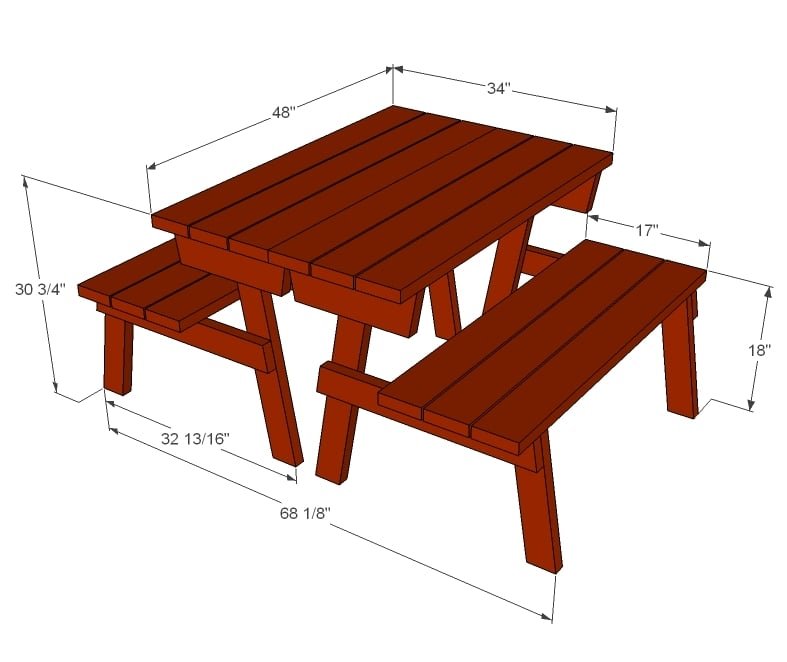
Dimensions
Use the size-specific shopping and cut lists below.
Shopping List
- 7 - 2x6 @ 8 feet long
- 5 - 2x4 @ 8 feet long
- 2 1/2" self tapping exterior deck screws (star bit recommended)
- 8 - 4" long, 1/2 diameter bolts with washers and nuts
Cut List
CUT LIST IS FOR 2 BENCHES CONVERTING TO ONE PICNIC TABLE
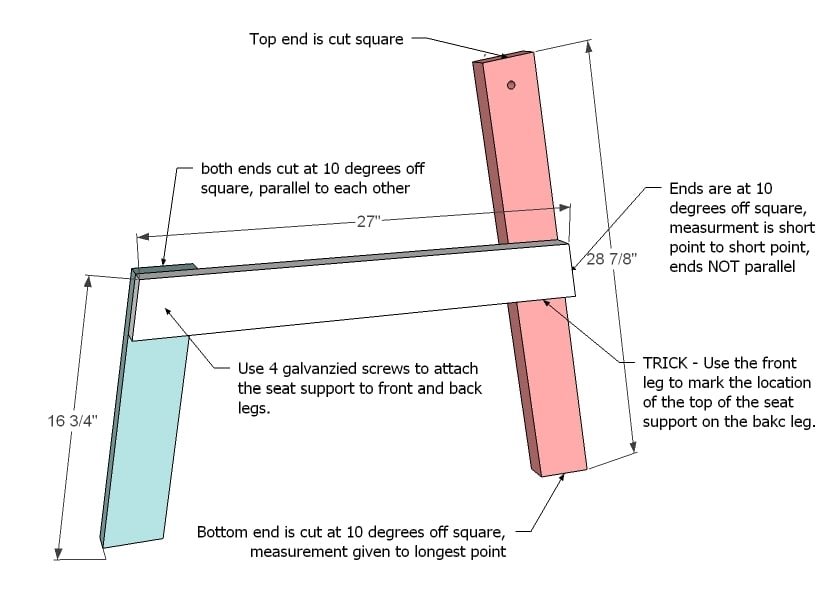
- 4 - 2x4 @ 28 7/8" (Back Legs - Both ends cut at 10 degrees off square, parallel to each other, long point to short point measurement)
- 4 - 2x4 @ 27" (Seat Support - Short point to short point measurement - both ends cut at 10 degrees off square, NOT parallel to each other)
- 4 - 2x4 @ 16 3/4" (Front Legs - Both ends cut at 10 degrees off square, parallel to each other, long point to short point measurement)
- 12 - 2x6 @ 47 7/8" (Seat and Tabletop boards)
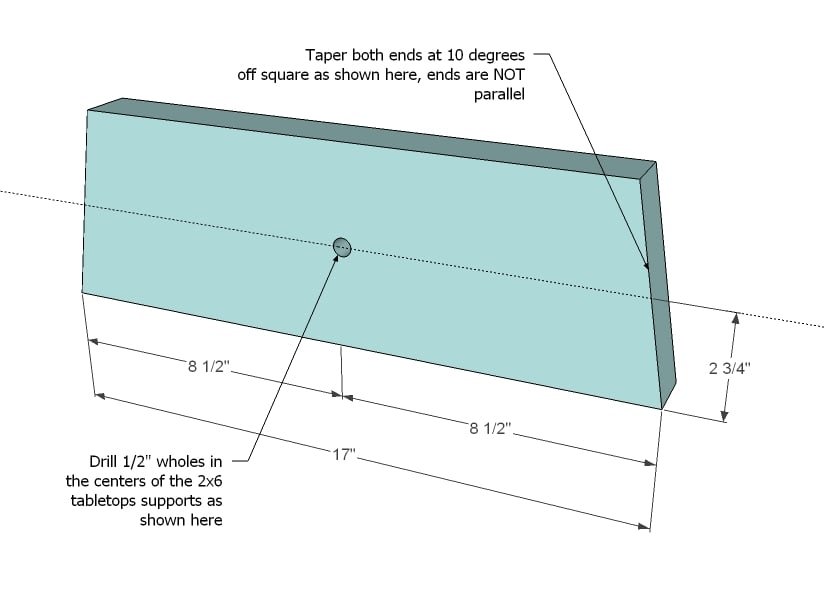
- 4 - 2x6 @ 17" long (Tabletop Supports)
- 2 - 2x4 @ 41" (bottom back support)
Tools
- measuring tape
- square
- pencil
- hammer
- safety glasses
- hearing protection
- drill
- compound miter saw
- sander
- level
- countersink drill bit
Step-by-step Instructions
Step 1
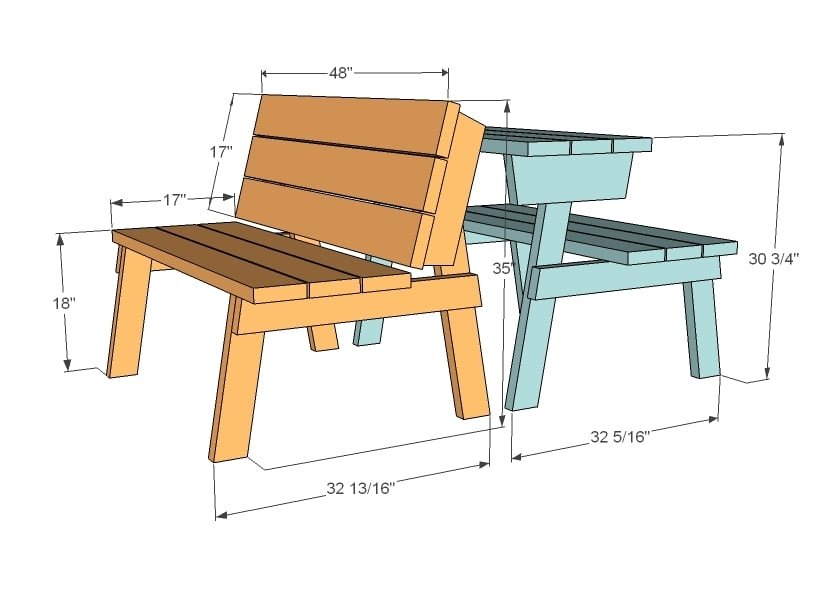
Additional dimensions shown above. We found that this table/bench was most comfortable as a bench. If you are expecting to use the convertible picnic table bench mostly as a picnic table, I suggest you first review our free as always picnic table plans. The wide seat when converted to a picnic table makes for climbing into the seat a tad more difficult than traditional picnic tables - but let me tell you, the wide seat as a bench is quite nice.
Step 2
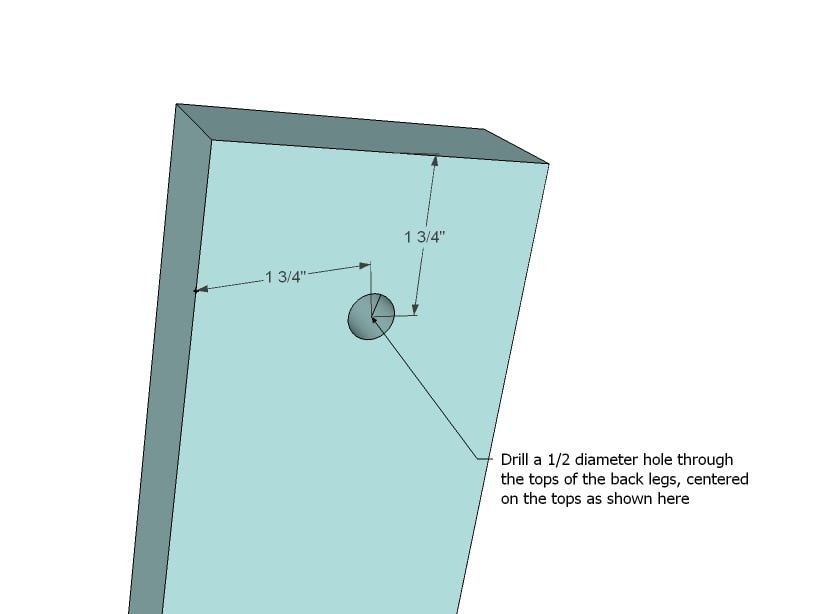
First things first. From your back legs, drill 1/2" diameter holes as shown above, centered on the top. Drill on all four legs.
Step 3
Lay the front leg over the bottom of the back leg, with bottom and outside edges flush. Trace the top edge - this will be the line that you will line your seat support top up with. Lay the seat support on top of the legs as shown above and predrill holes and attach the seat support to the legs with 2 1/2" galvanized screws and wood glue. You will need to make four of these. Make two with the seat support on the right and two with the seat support on the left - it does matter.
Step 4
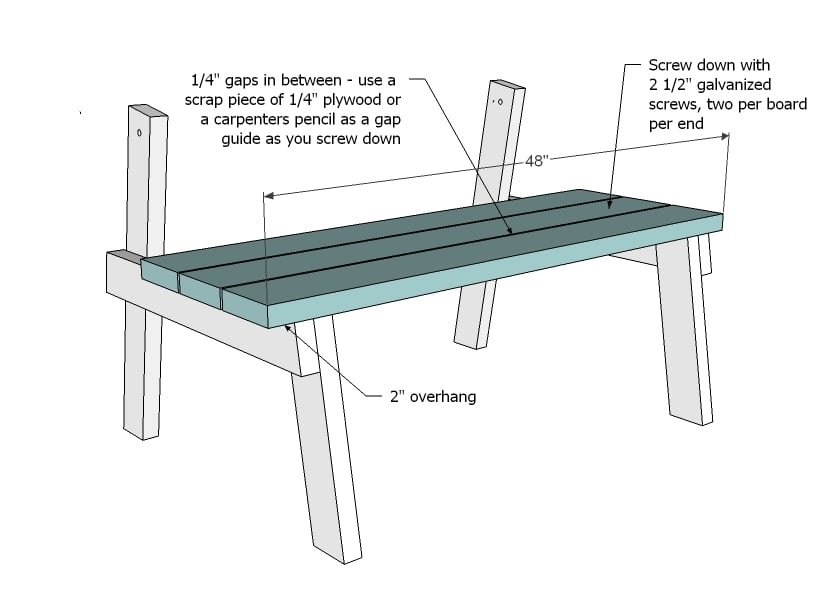
Mark all of the seat boards 2" from the ends. The seat boards overhang the legs by 2" on the outsides. Attach the seat boards to the legs, using 2 1/2" galvanized screws and wood glue. Adjust for square. Leave 1/4" gaps between the seat boards. Use one left and one right leg for each bench as shown above in the diagram.
Step 5
Step 6
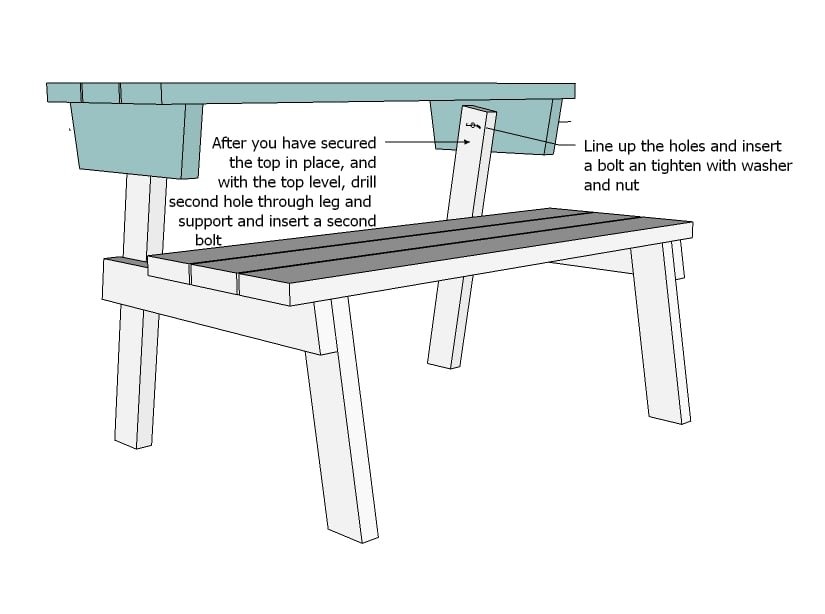
Now that you have constructed the top, line the holes in the back legs up with the holes in the tabletop supports. Thread your 4" bolts through, add washer and nuts, and tighten. Lay a level on top of the table, perpendicular to the tabletop boards. With the tabletop level (use a clamp to hold in place) drill holes through the back legs and the tabletop supports and insert a pin (you can just use another 1/2" bolt). Do this on both sides.
Step 7
Remove the pins and rotate the tabletop so it becomes a backrest. Sit in the bench, and determine a comfy backrest position. When satisfied, clamp the tabletop supports to the back legs and drill another 1/2" diameter whole. Insert the pin. Do the same on both sides. To convert the benches to picnic tables, simply remove the pins and rotate the backrest to a tabletop, and reinsert the pins in the correct holes.
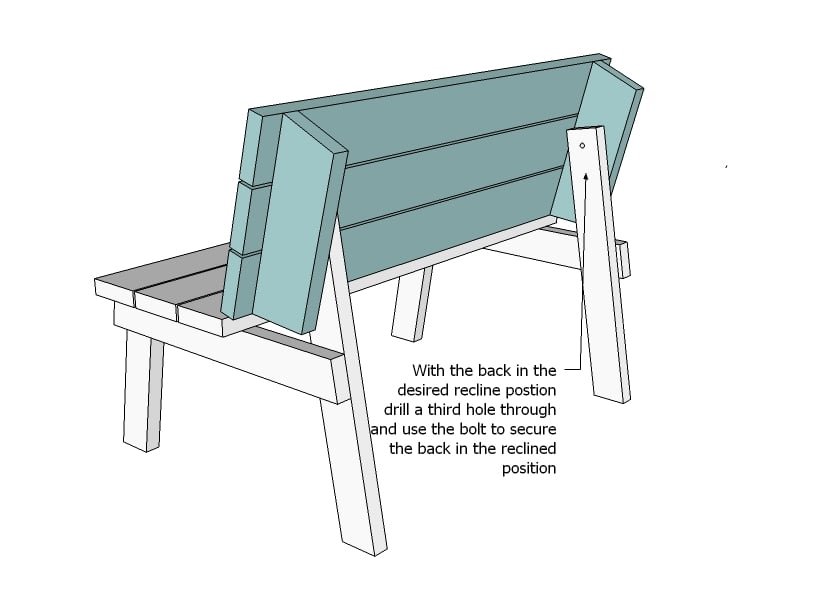
Add the back support piece to the back legs, with two screws per end, 6" from base of legs.
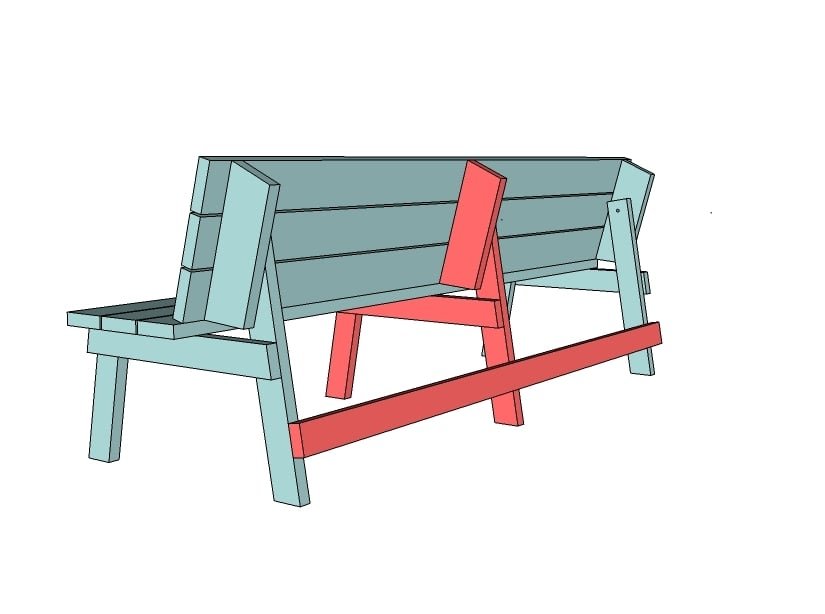
Longer Picnic table: for a longer convertible picnic table bench, above shows how you would use standard eight feet long boards for the tabletops, and simply add an extra leg in the center. You will also need to add a back brace as shown above.
Finishing
Sand all surfaces, starting with a medium grit and finishing with fine. Wipe off the dust, fill any holes or gaps with wood filler, and sand smooth once dry. Apply primer if you're painting, then finish with your choice of paint or stain and seal with a durable clear topcoat. For outdoor projects, use exterior-rated primer, paint or stain, and sealer so the piece stands up to the weather.
Source (temporary): https://www.ana-white.com/woodworking-projects/picnic-table-converts-benches