Pine and Plain Collection
Pine and Plain Collection Coffee Table –, Easy Build This coffee table is designed to be simple, sturdy, and beginner-friendly, making it an ideal weekend project for any DIYer. The walk you through each step with clear instructions, straightforward cuts, and common materials—no complicated joinery or specialty tools required. With clean lines, open storage, and a solid, practical design, this table fits easily into modern, farmhouse, or minimalist spaces. Whether you’re building your first piece of furniture or adding a reliable classic to your home, these plans make it easy to build something you’ll be proud to use every day. What you’ll love: • Free, easy-to-follow plans • Simple construction with standard lumber • Beginner-friendly design • Functional storage and timeless style Perfect for anyone who wants a great-looking coffee table without an overcomplicated build.
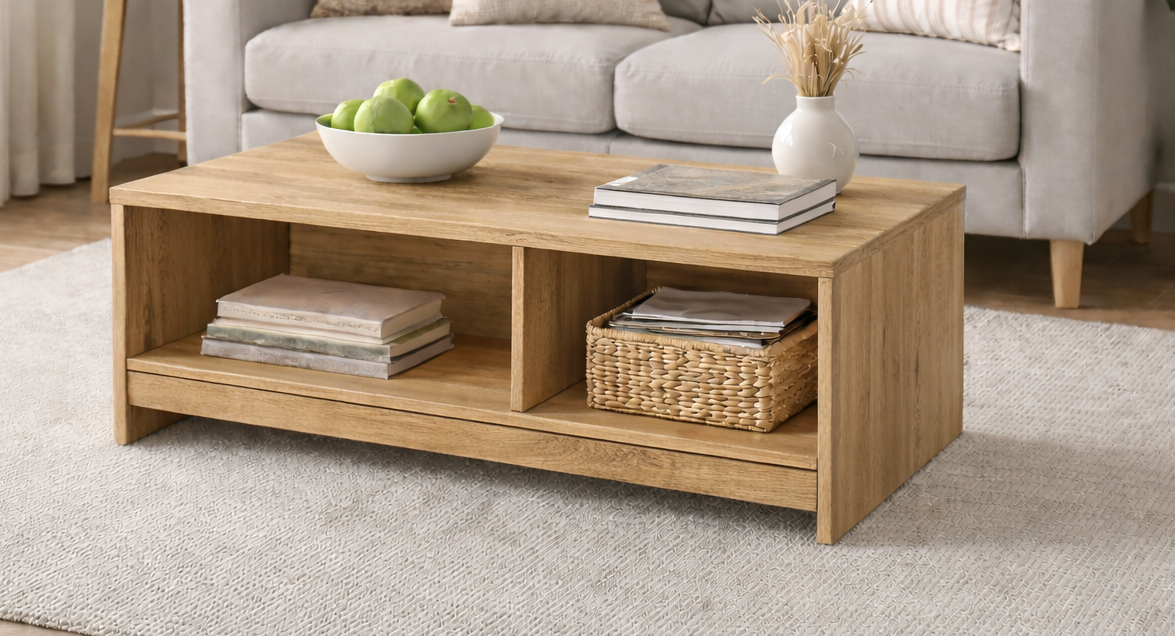
Specifications
| Project type | Coffee Tables |
|---|---|
| Room | living room |
| Difficulty | Intermediate |
Dimensions
Use the size-specific shopping and cut lists below.
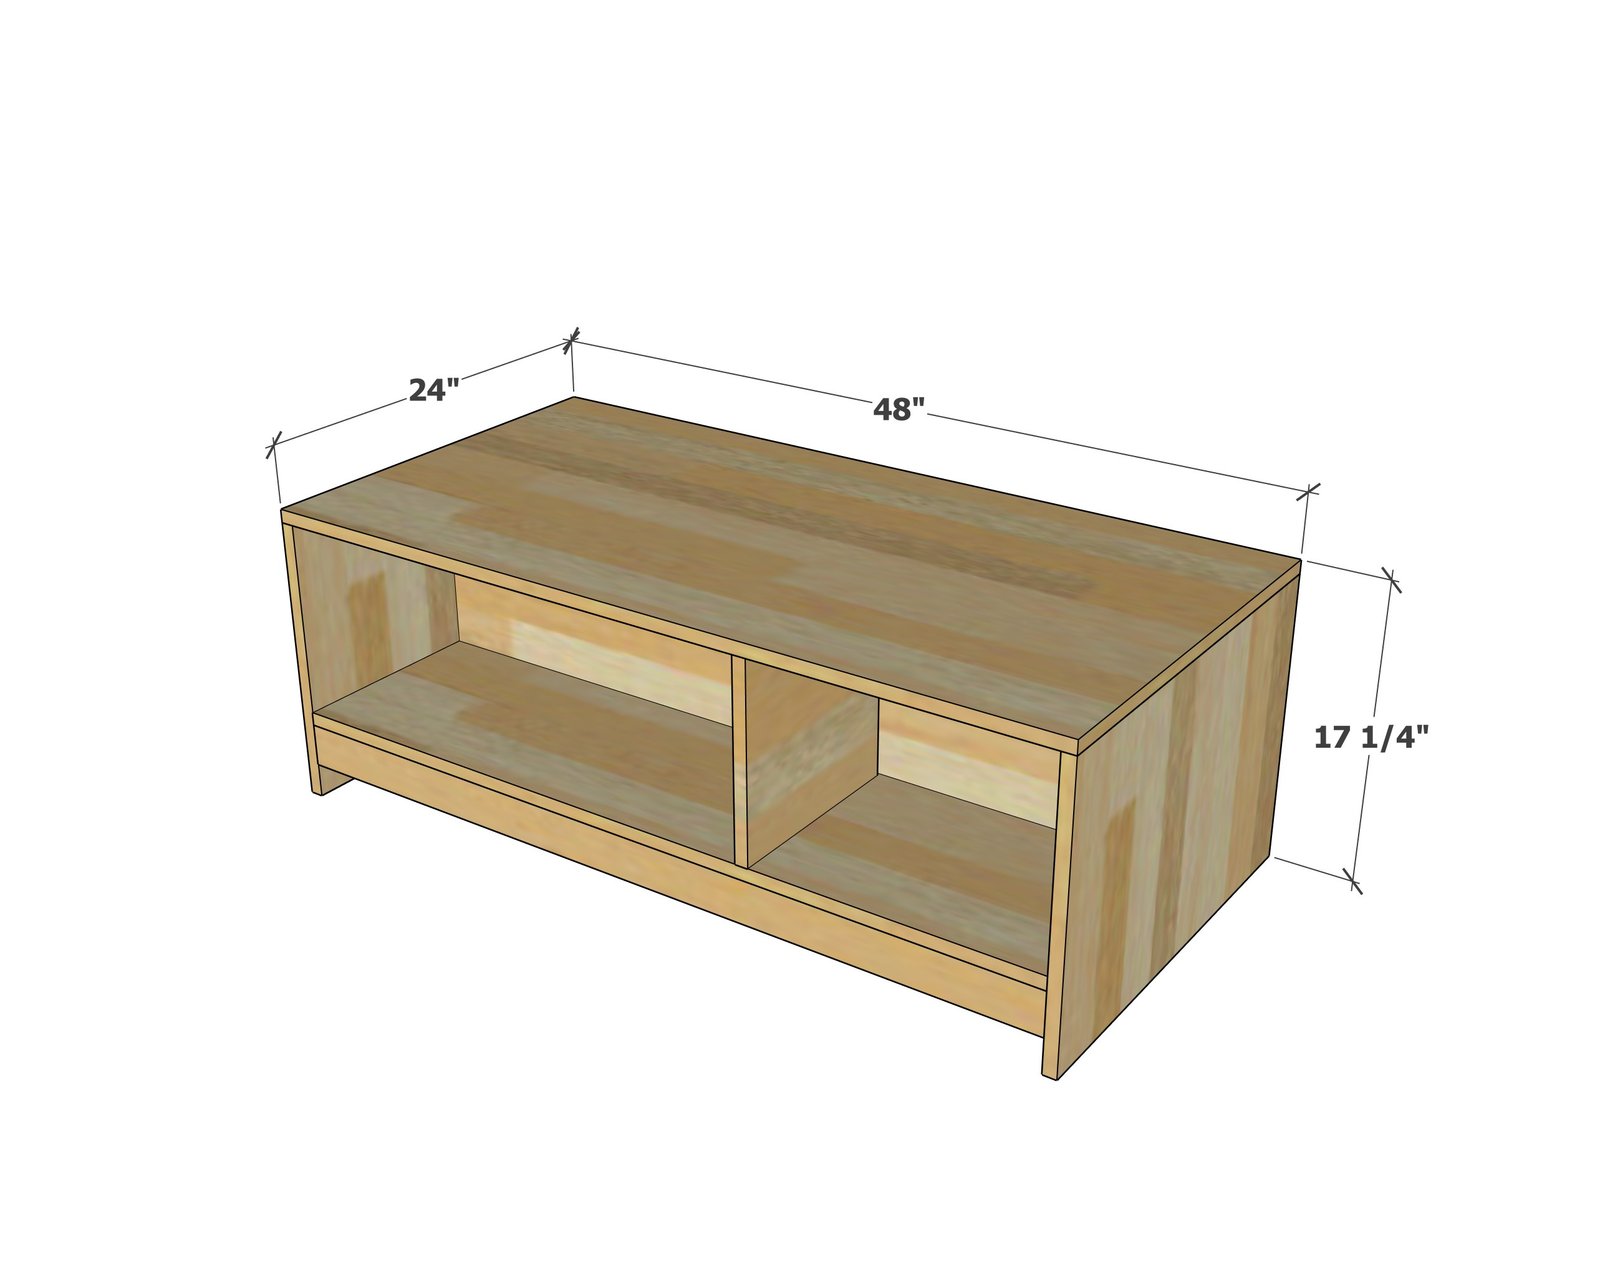
Shopping List
- 2 - 3/4" x 24" pine project panels, 4 feet long
- 1 - 3/4" x 24" pine project panel, 3 feet long
- 1 - 1x12 @ 6 feet long
- 1 - 1x3 @ 8 feet long
- Recommend 1-1/4" pocket holes screws, but can also use 2" self tapping general screws or 1-1/4" brad nails and glue
Cut List
- 1 - 3/4" project panel 48" x 24" - top
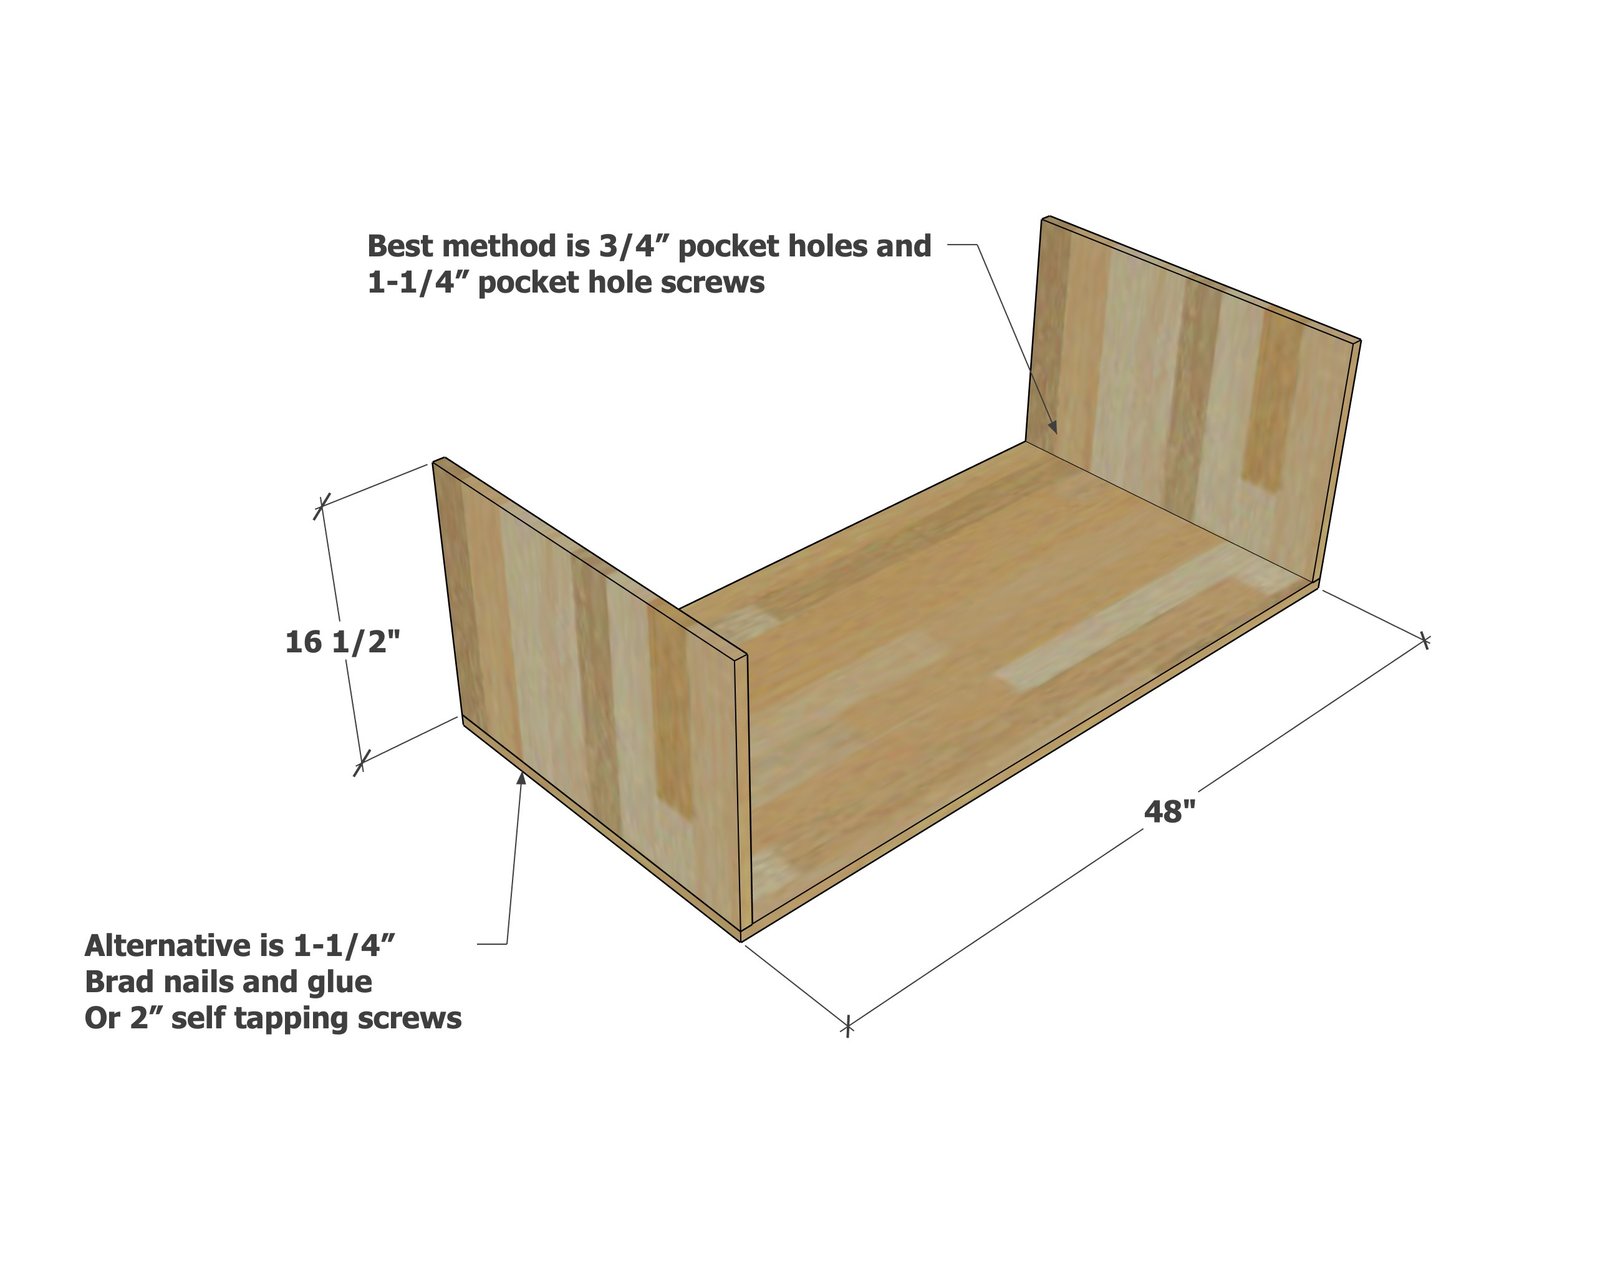
- 2 - 3/4" project panel, 16-1/2" x 24" - legs (cut from the 36" pine project panel)
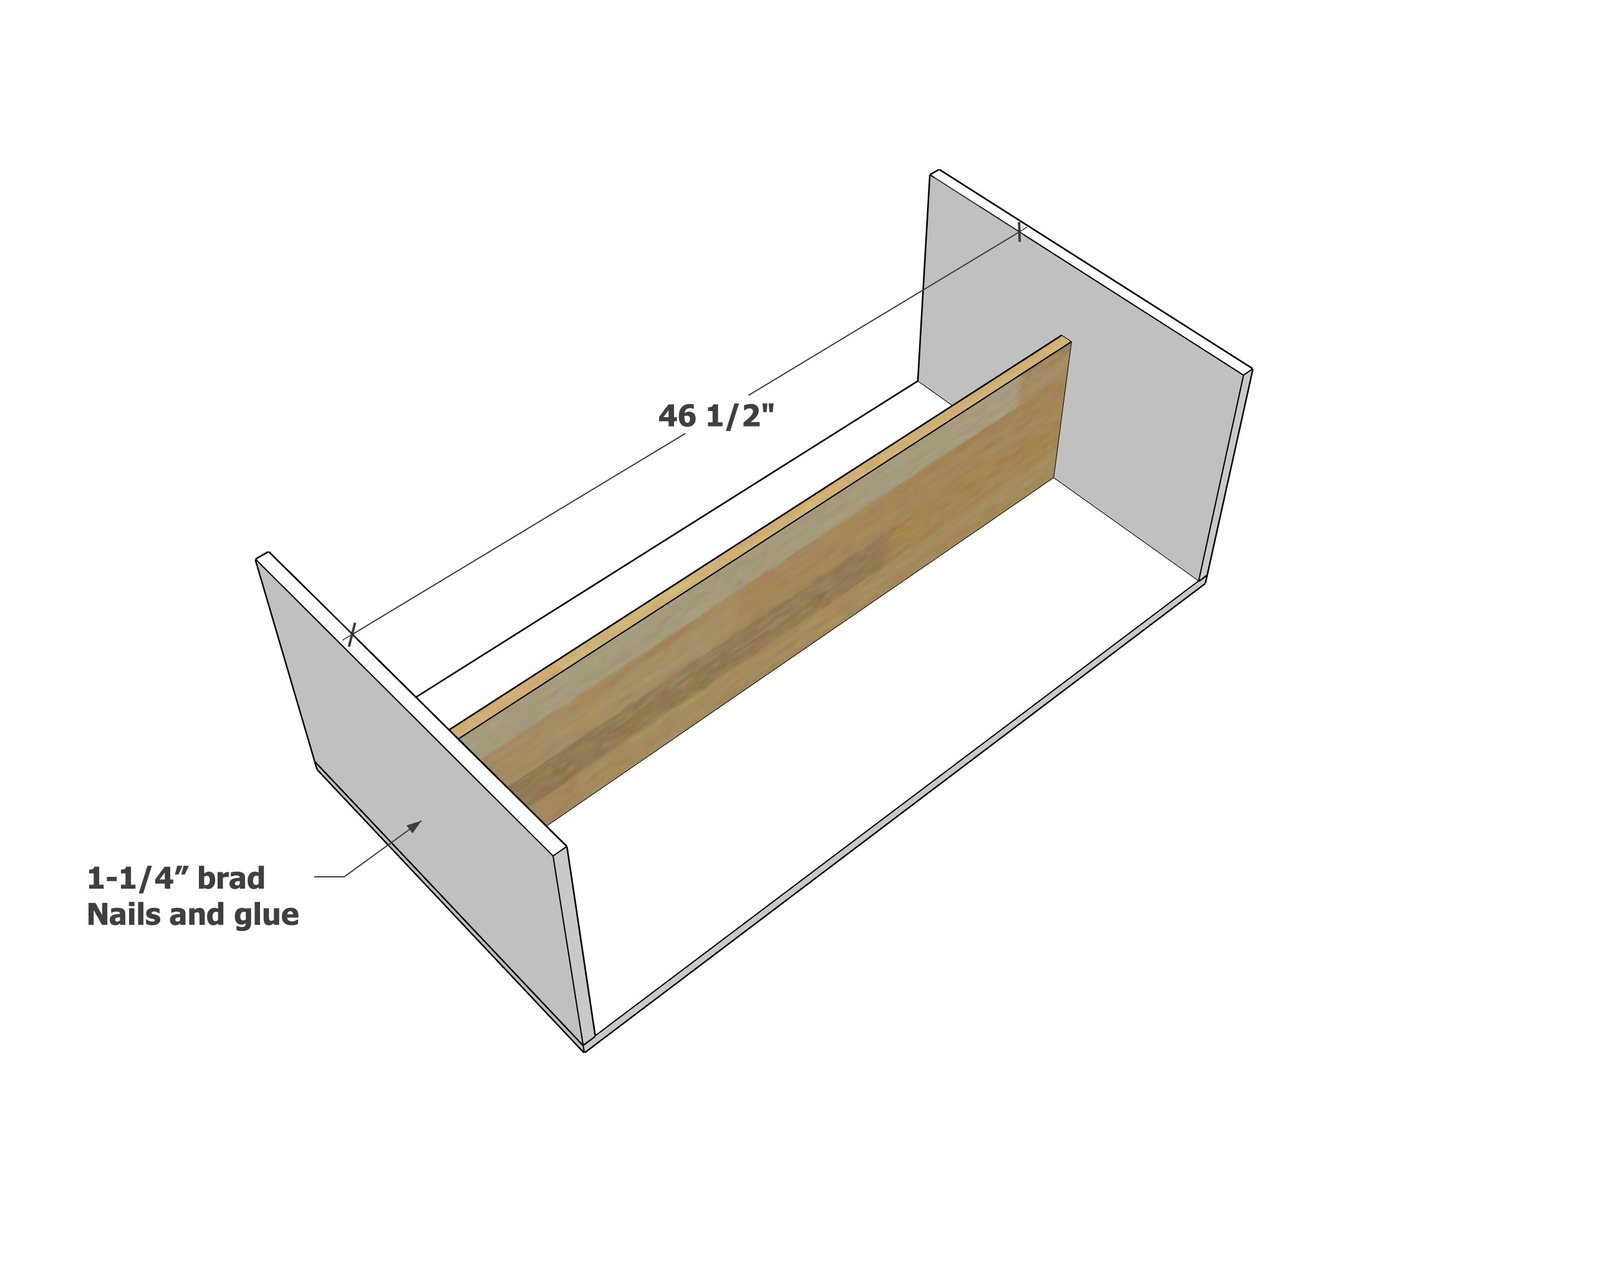
- 1 - 1x12 @ 46-1/2" - center support
- 2 - 1x12 @ about 11-1/2" - measure and cut to fit - dividers
- 1 - 3/4" project panel 46-1/2" x 24" - shelf
- 2 - 1x3@ 46-1/2" - bottom supports
Tools
- measuring tape
- square
- pencil
- kreg-jig
- drill
- circular saw
- nailer
Step-by-step Instructions
Step 1
Attach the legs to the top. The best way to attach is with 3/4" pocket holes and 1-1/4" pocket hole screws. But you can attach with 1-1/4" brad nails and glue or 2" screws - just will have to hide the fastener holes.
Measure and cut the center divider.
Attach the center divider, pocket holes are best, but glue and 1-1/4" brad nails will work.
Step 3
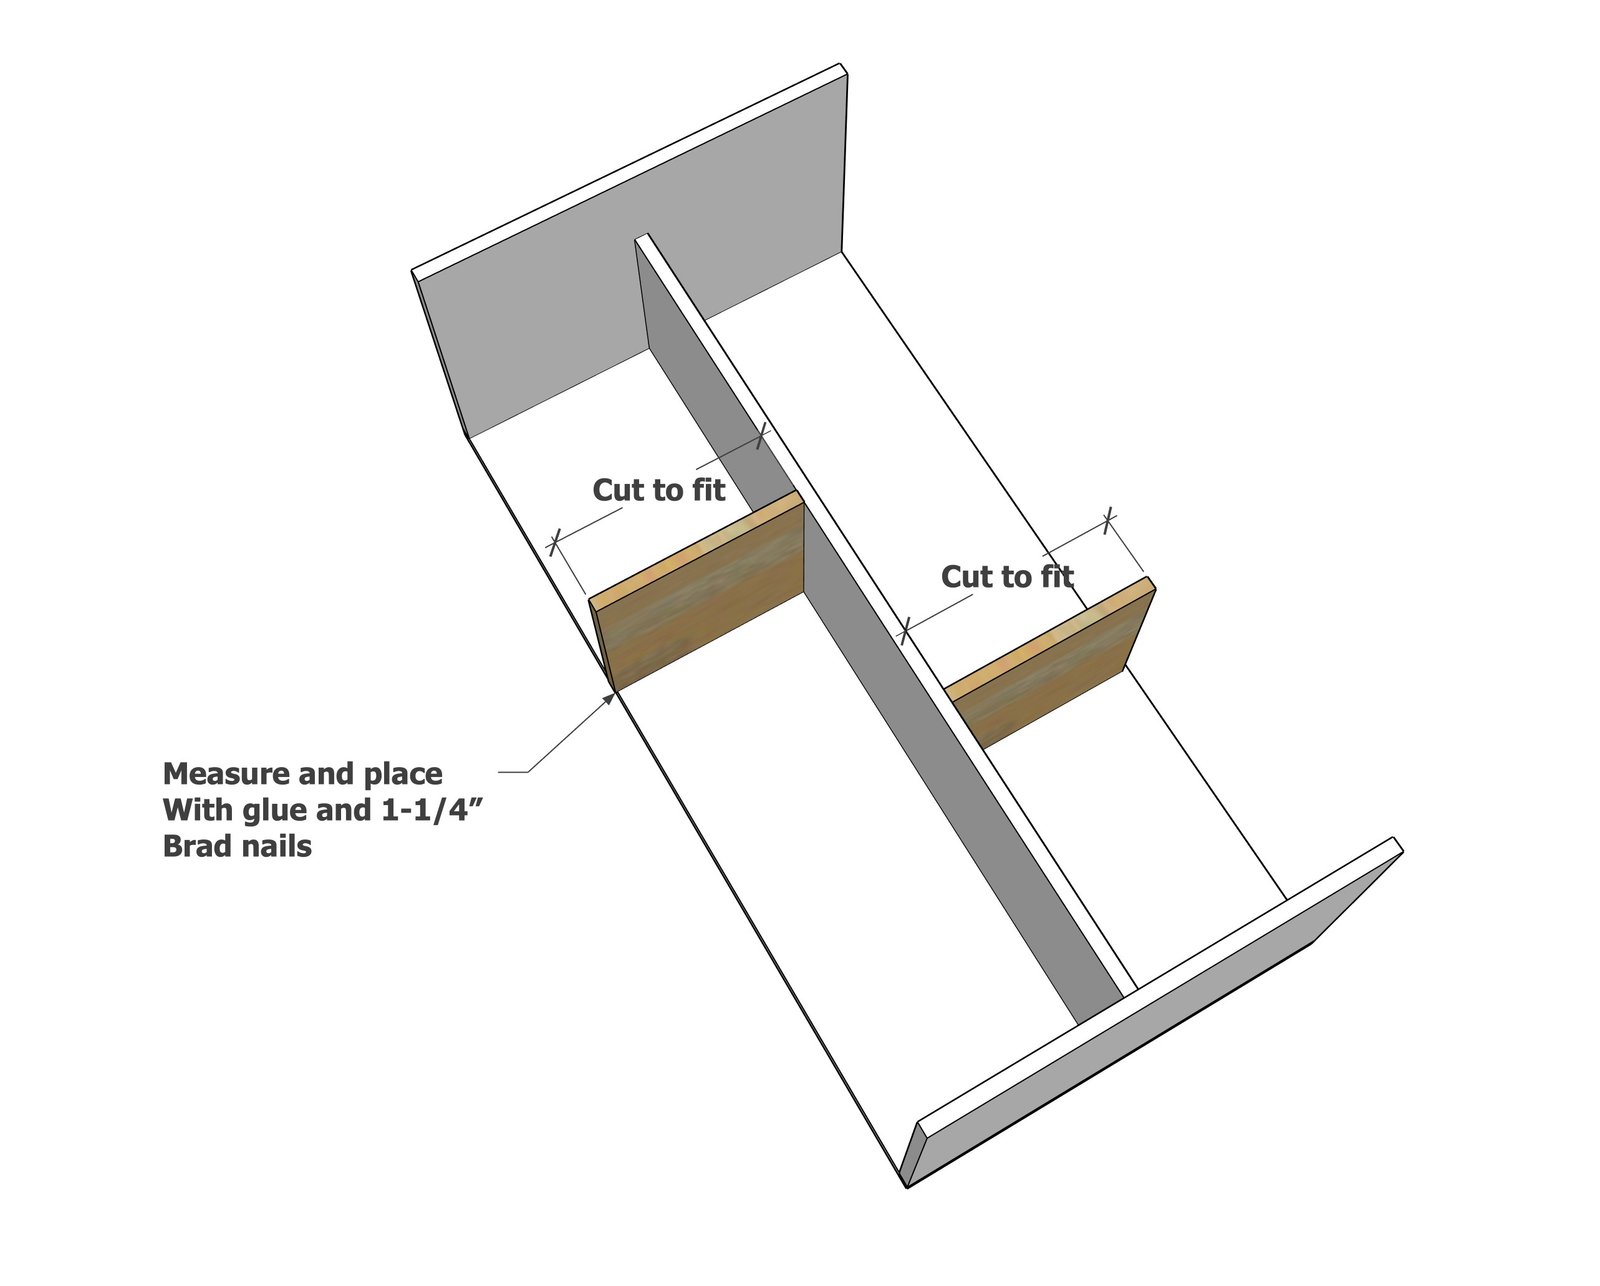
Place the smaller dividers as desired, we recommend a 2/3:1/3 split as shown (about 15" wide for the smaller opening)
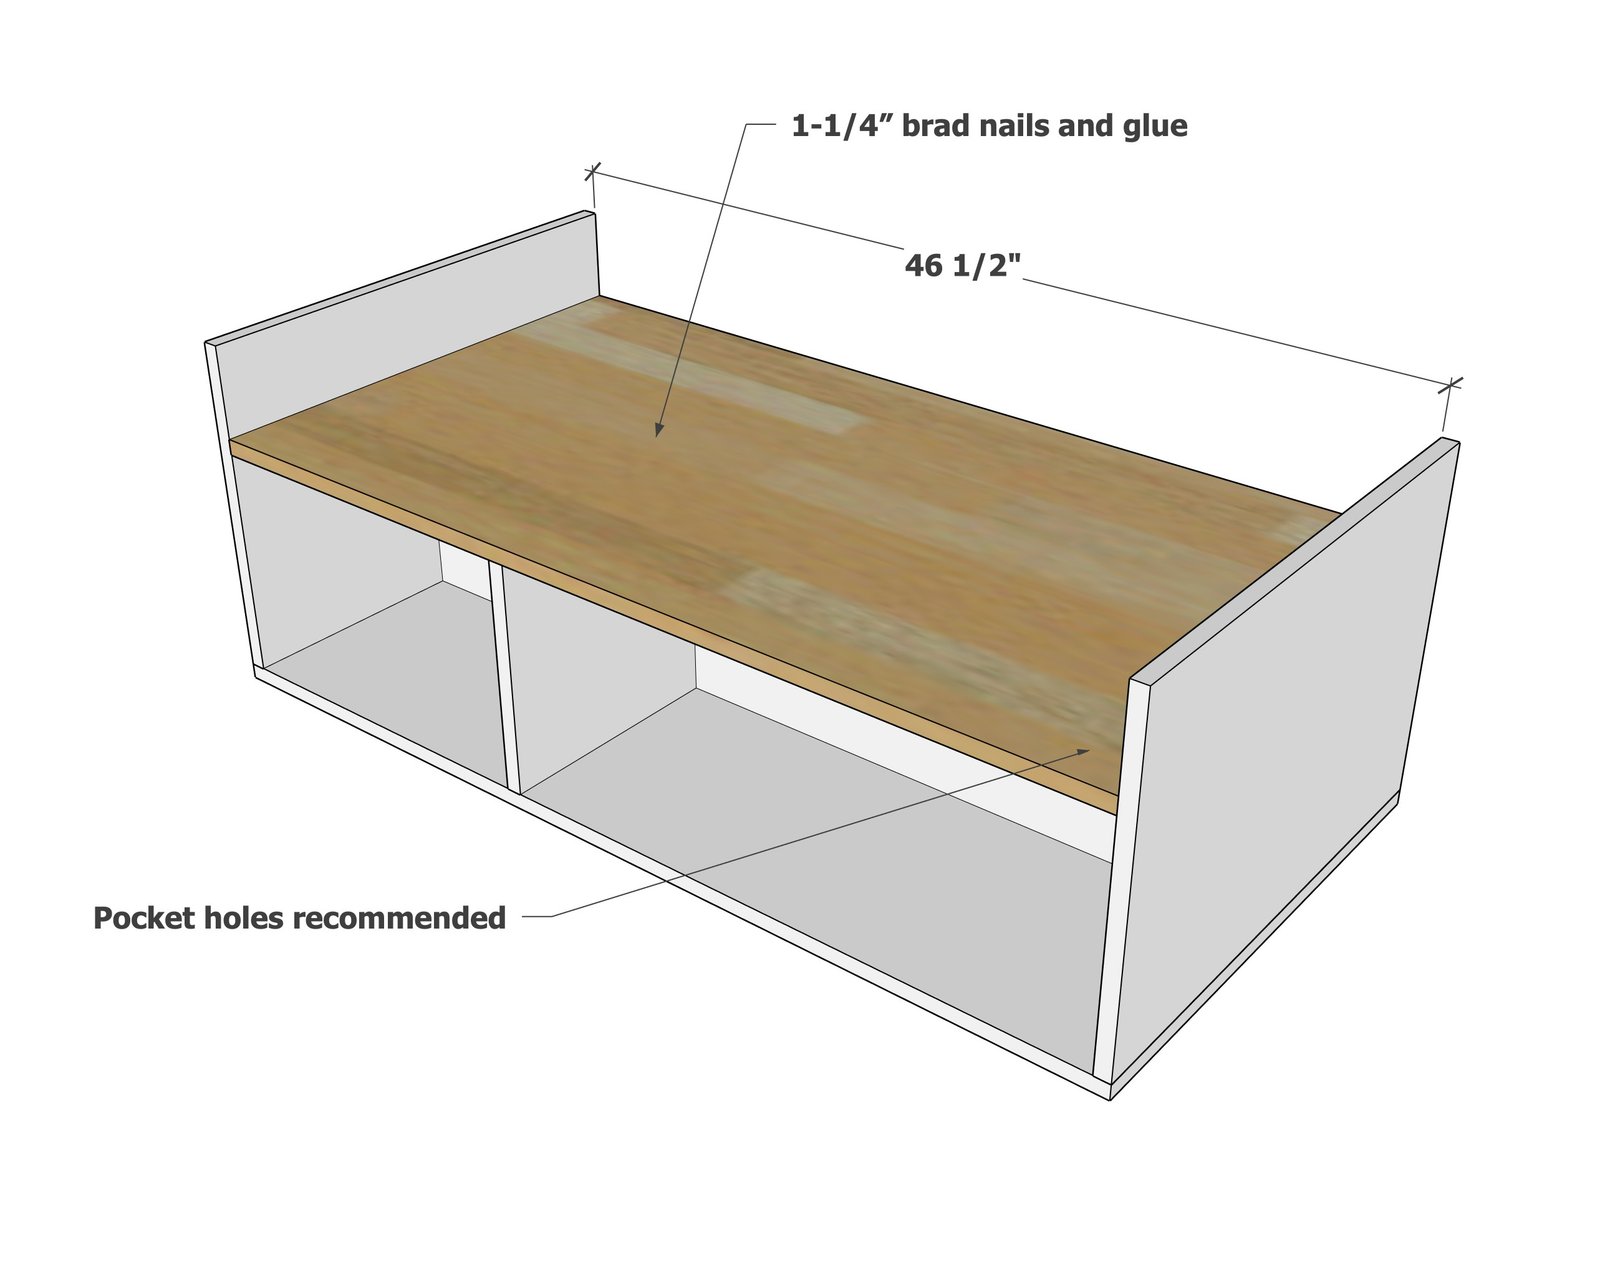
Drill pocket holes first in the bottom of the bottom shelf if using bottom shelf.
Apply glue to the top edges of the 1x12s. Apply glue to the end edges of the large bottom shelf panel. Place the bottom shelf on the dividers. Attach the bottom shelf with nails or pocket holes.
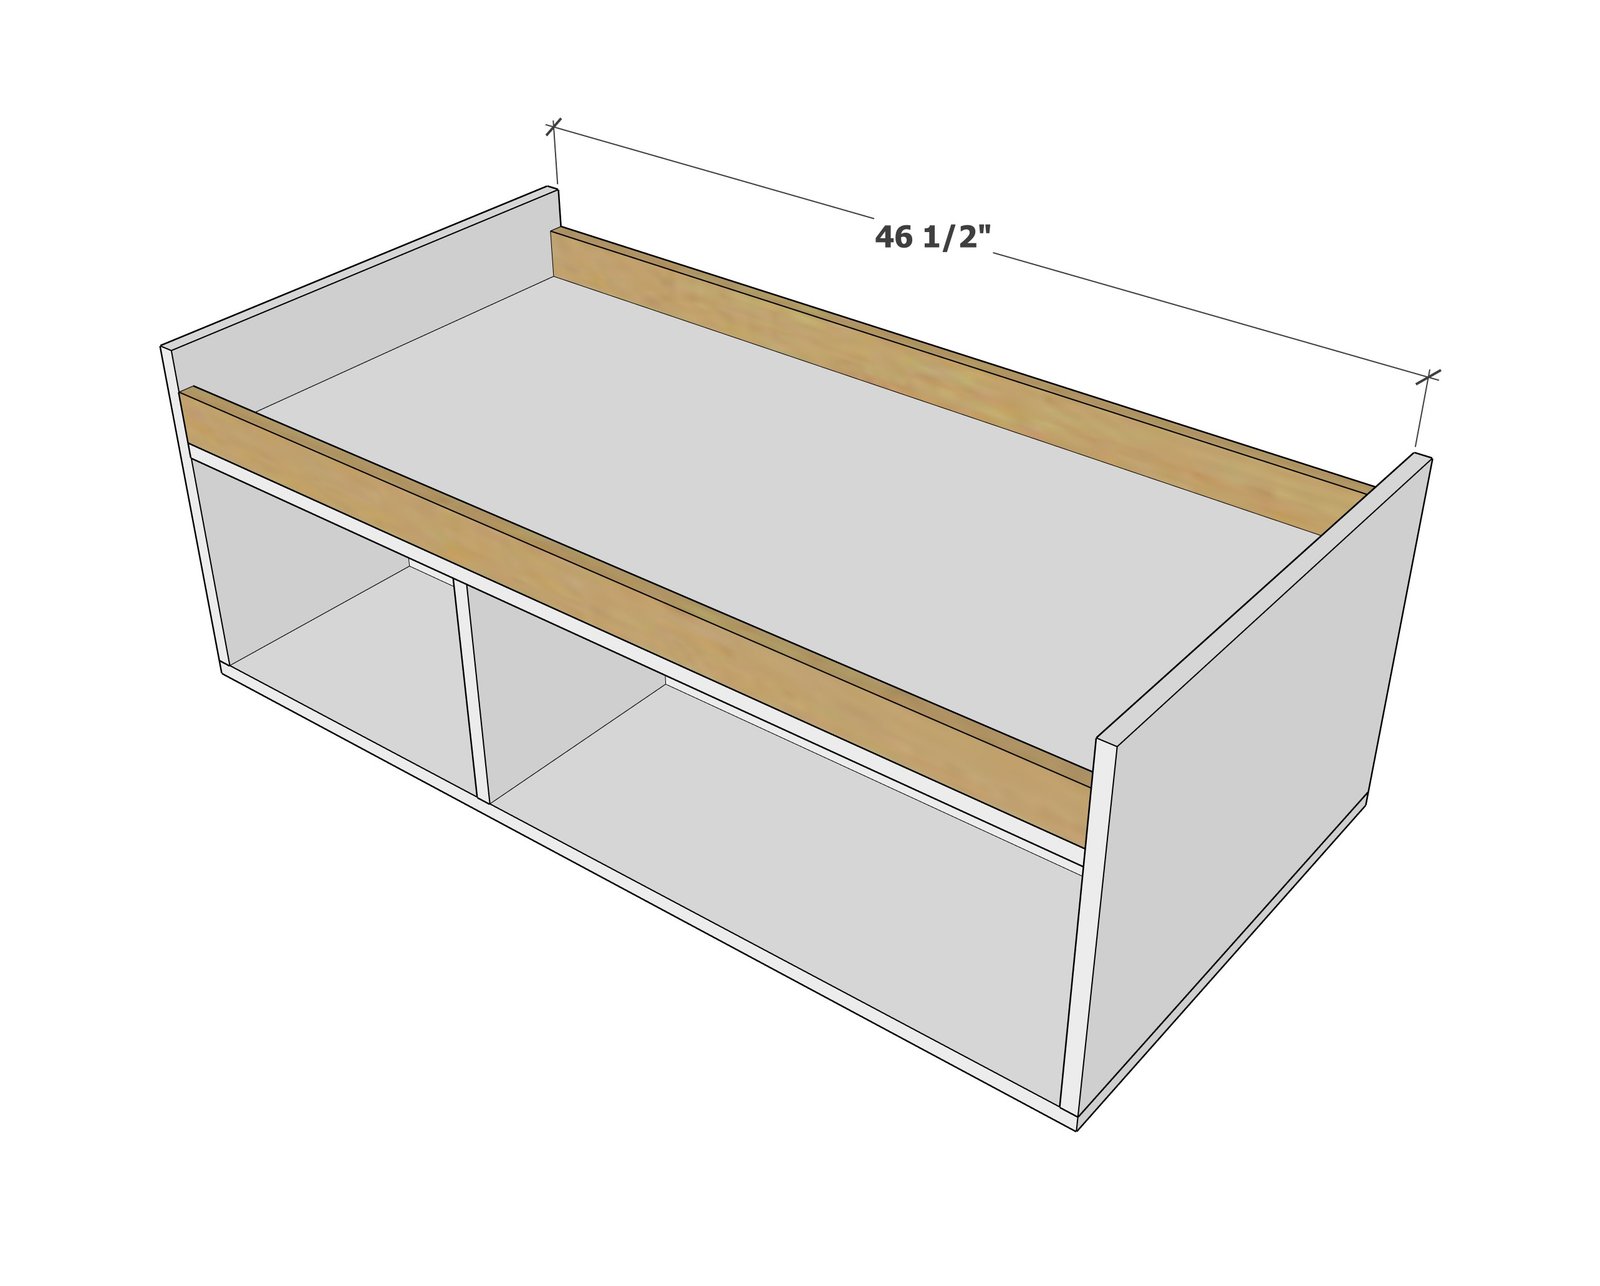
Attach the bottom 1x3s to the bottom.
Best choice - use 3/4" pocket holes and 1-1/4" pocket hole screws that are hidden on the inside. The second option is to use brad nails or 2" self tapping wood screws.
Finishing
Sand all surfaces, starting with a medium grit and finishing with fine. Wipe off the dust, fill any holes or gaps with wood filler, and sand smooth once dry. Apply primer if you're painting, then finish with your choice of paint or stain and seal with a durable clear topcoat. For outdoor projects, use exterior-rated primer, paint or stain, and sealer so the piece stands up to the weather.
Source (temporary): https://www.ana-white.com/woodworking-projects/pine-and-plain-collection-rectangle-coffee-table-free-plans