Pine Board Flip Top Storage Bench
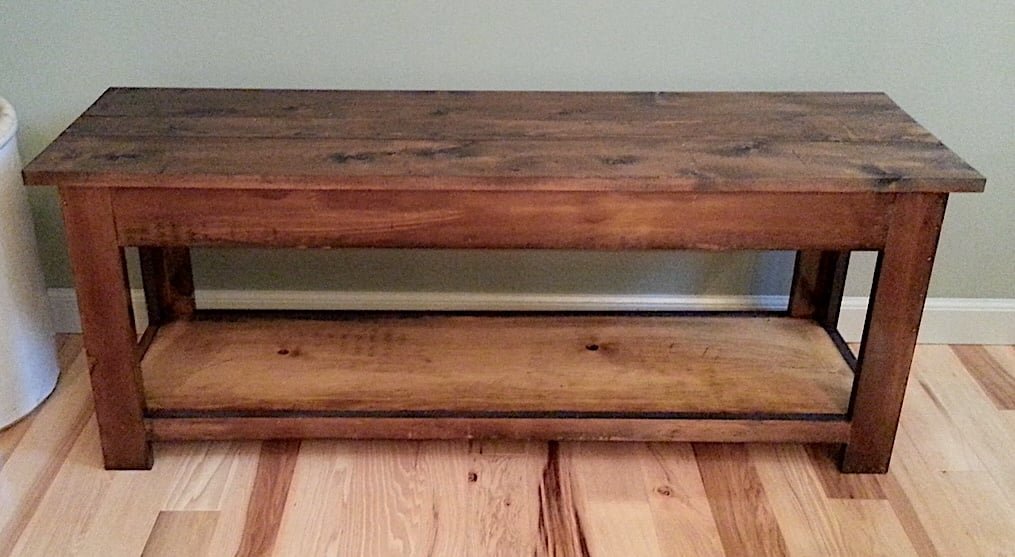
How to build a storage bench with flip top and shelf. Perfect for the entryway with lots of room for shoes, and a hidden storage area for accessories. I built my bench almost 20 years ago, and we are still using it today! This bench is built using 1x boards, to keep costs down, construction easy, and the pine wood is beautiful and full of character. from
Specifications
| Project type | Bench |
|---|---|
| Room | Entryway and Mudroom |
| Style | Farmhouse Furniture |
| Difficulty | Intermediate |
Dimensions
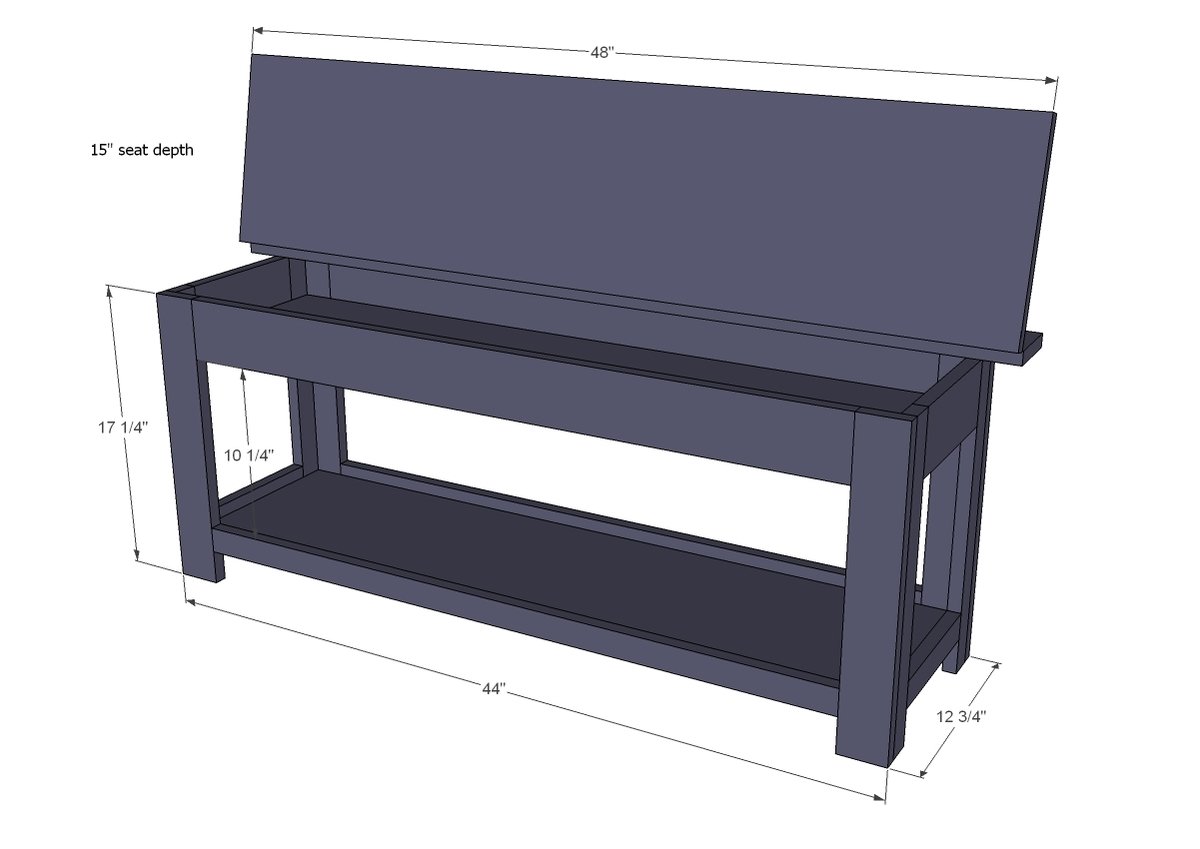
Use the size-specific shopping and cut lists below.
Shopping List
- 1 - 1x12 @ 12 feet long
- 1 - 1x4 @ 12 feet long
- 2 - 1x2 @ 8 feet long
- 1 - 1x3 @ 8 feet long
Cut List
- 4 - 1x3 @ 17 1/4"
- 2 - 1x4@ 38 3/4"
- 2 - 1X2 @ 38 3/4"
- 2 - 1X2 @ 17 1/4"
- 2 - 1X4 @ 8 1/4"
- 2 - 1X2 @ 8 1/4"
- 2 - 1X12 @ 42 1/2"
- 1 - 1x4 @ 48"
- 1 - 1x12 @ 48"
Tools
- measuring tape
- pencil
- safety glasses
- circular saw
- nailer
- sander
Step-by-step Instructions
Step 1
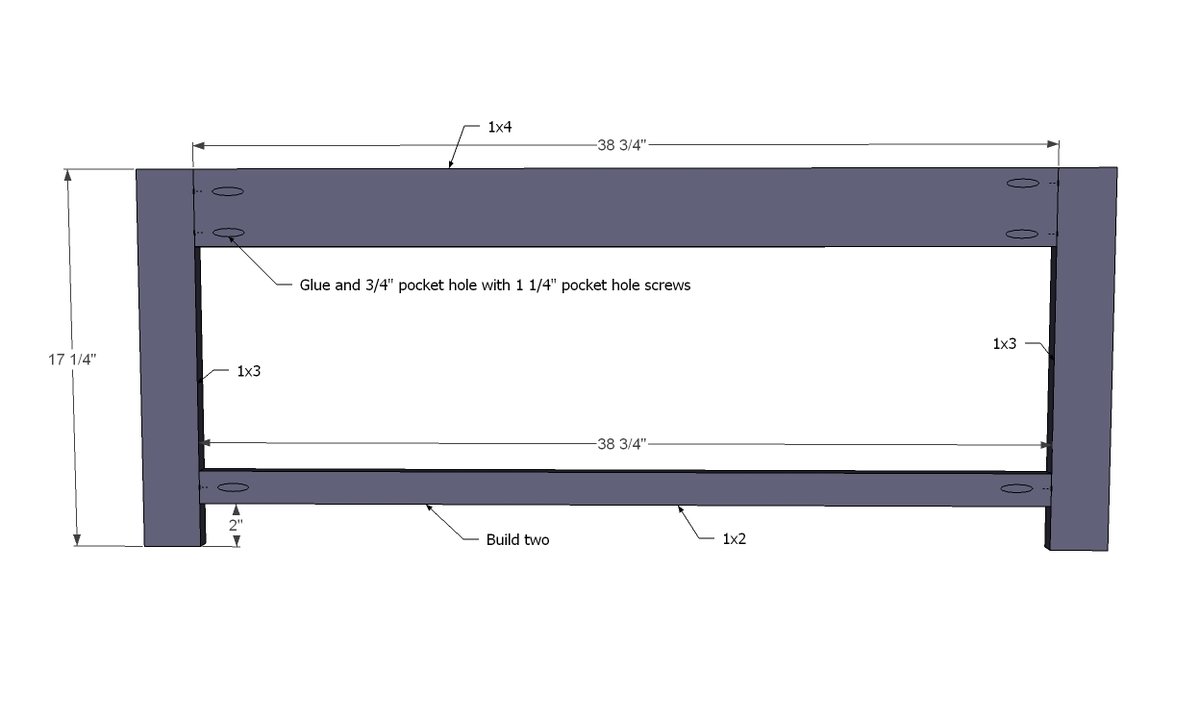
When I built my bench way back when, I did not even know about pocket holes. But you’ll find building this bench much easier with pocket hole construction. All you will need to do is make two frames for the front and back as shown in diagram.
Step 2
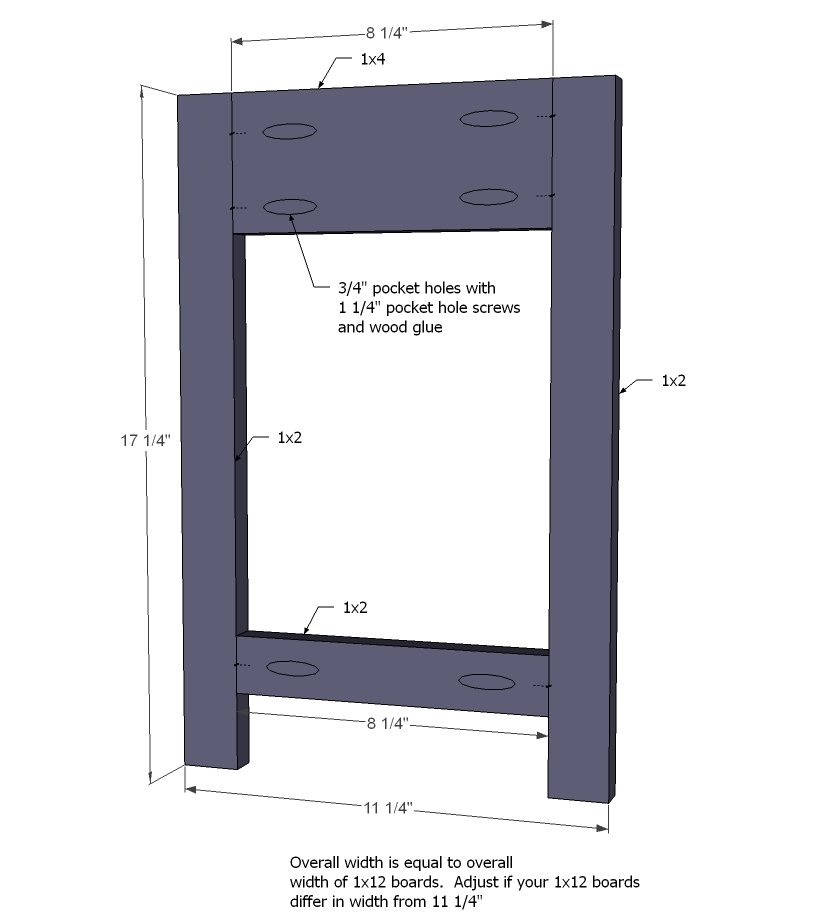
And then make two frames for sides with the 1x2 legs instead.
Step 3
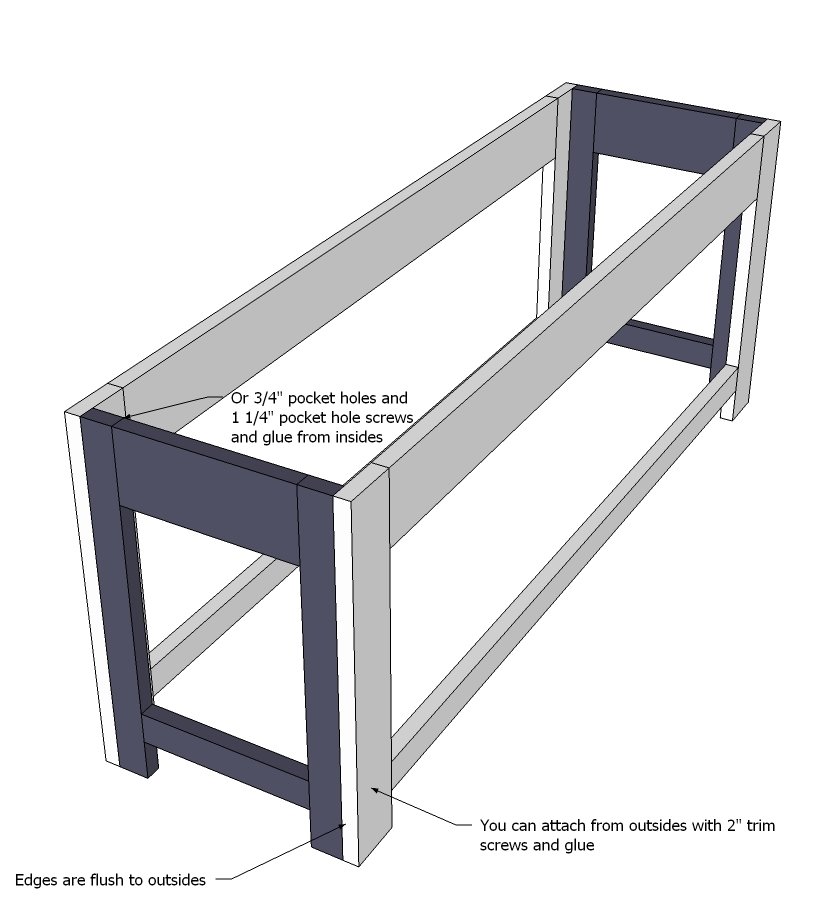
Then just attach the four frames together, hiding pocket holes to insides.
Step 4
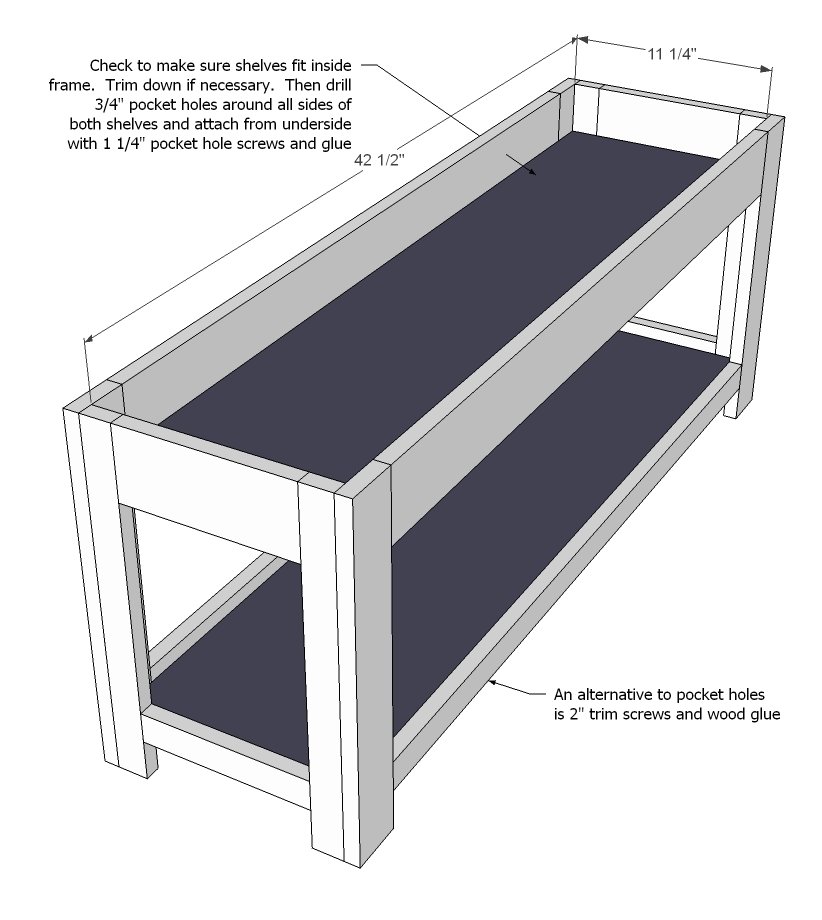
Test fit the shelves inside the frame. You want snug, not tight. If you need to, you can trim down shelves. Once the shelves fit right, drill 3/4” pocket holes around all sides and fit into place. Attach with 1 1/4” pocket hole screws and glue.
Step 5
Step 6
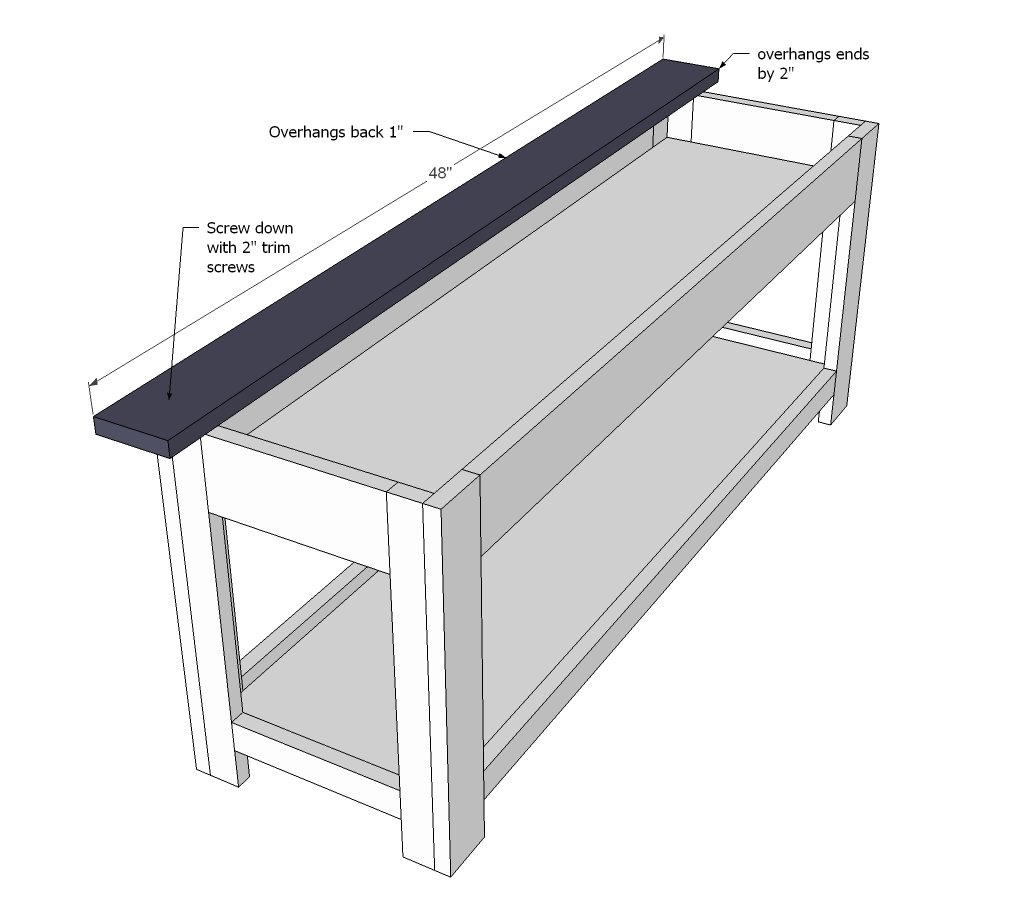
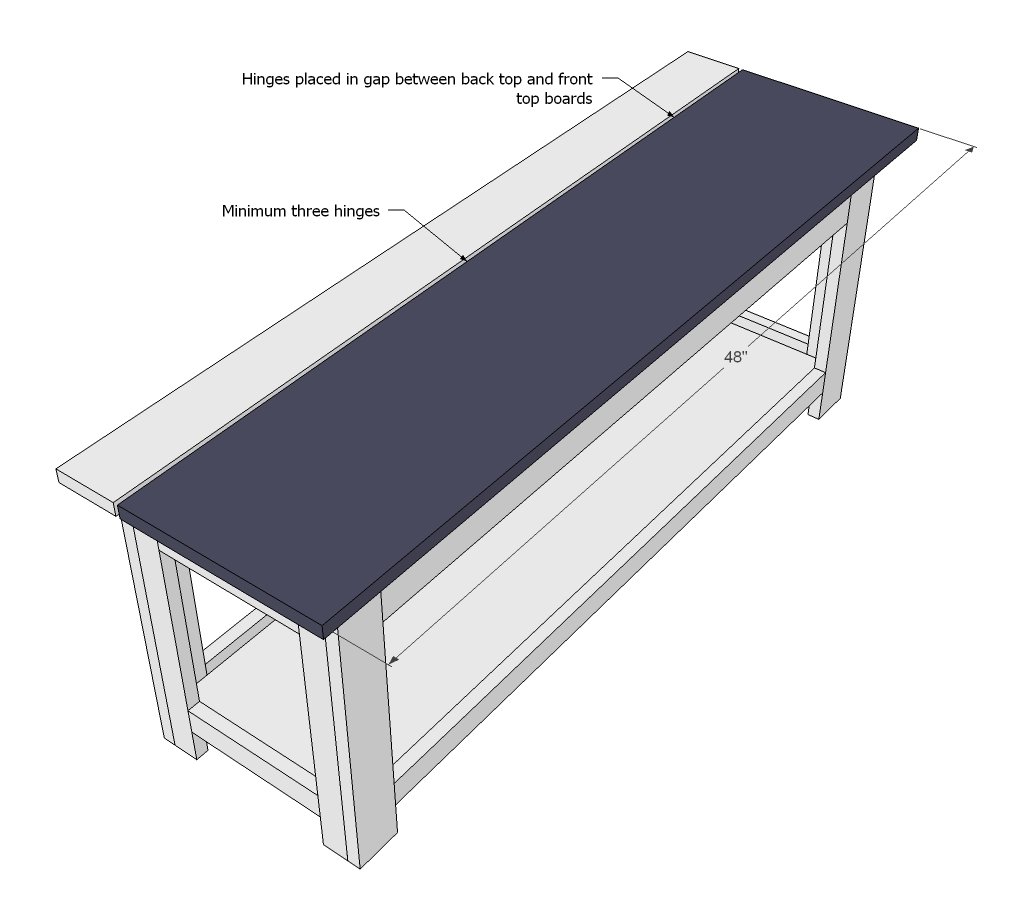
The top front is just hinged to the top back with narrow profile hinges, installed inside the gap in between the top boards. The easiest way to do this is to position the bench top pieces as if the bench was fully open, and on the exposed inside edges, screw on hinges. Test to make sure bench closes well and adjust if necessary.
Finishing
Sand all surfaces, starting with a medium grit and finishing with fine. Wipe off the dust, fill any holes or gaps with wood filler, and sand smooth once dry. Apply primer if you're painting, then finish with your choice of paint or stain and seal with a durable clear topcoat. For outdoor projects, use exterior-rated primer, paint or stain, and sealer so the piece stands up to the weather.
Source (temporary): https://www.ana-white.com/woodworking-projects/pine-board-flip-top-storage-bench