Pine Wood Lego Table
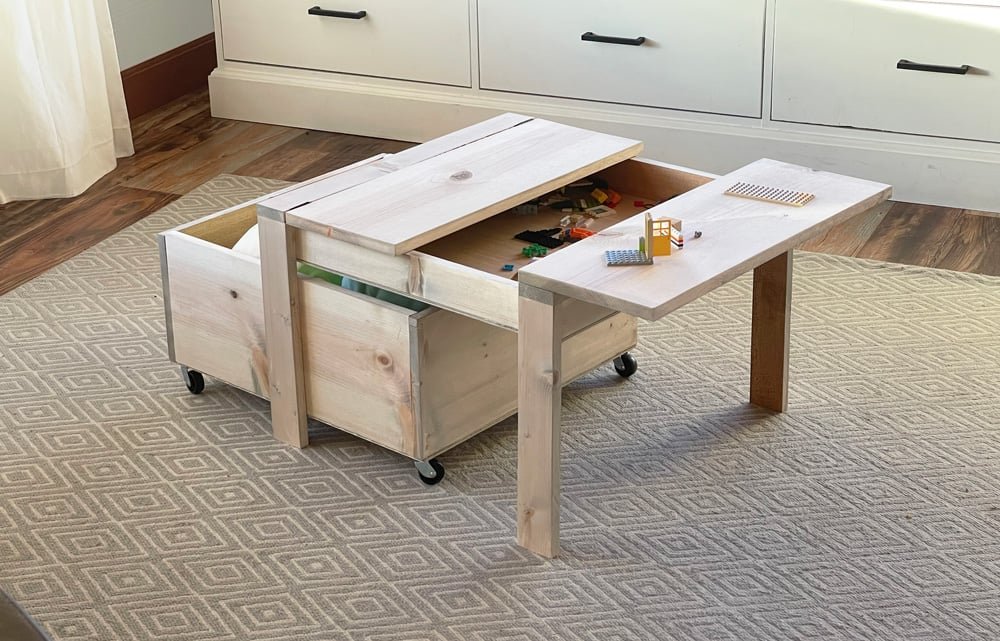
Build a lego table out of pine wood boards! This lego table features fold open top, to create surfaces and expose a large lego storage compartment in the middle. Add a trundle for extra storage, or slide benches underneath. Free DIY Lego Table plans from - easy build with basic tools includes step by step diagrams, shopping and cut lists, and a build video.
Specifications
| Project type | Kids Tables and Chairs |
|---|---|
| Room | Kids and Toys |
| Difficulty | Intermediate |
Dimensions
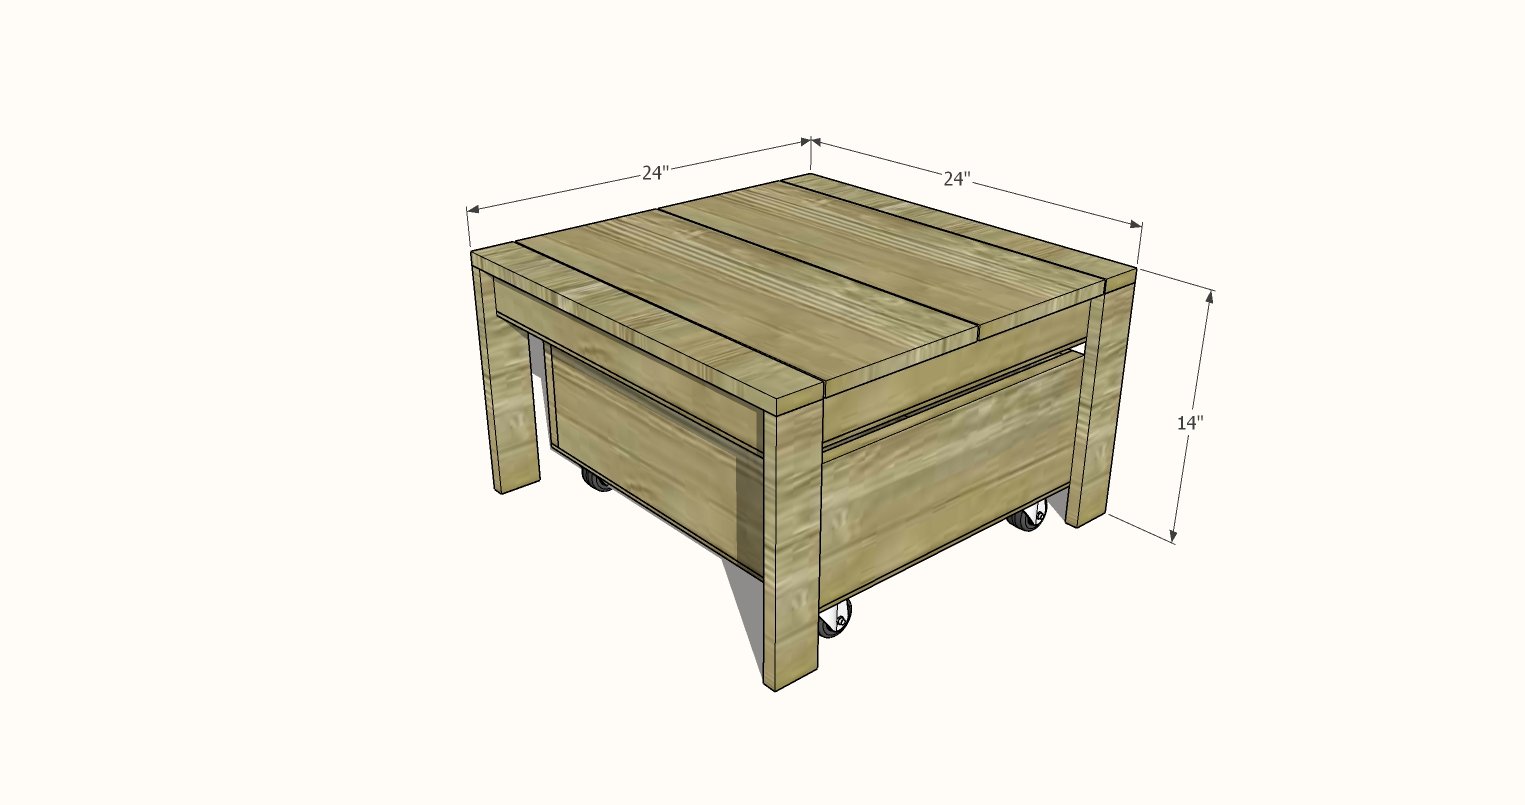
Use the size-specific shopping and cut lists below.
Shopping List
Lego Table Only
- 2 - 1x3 @ 8 feet long
- 1 - 1x10 @ 4 feet long
- 1 - 1/4" plywood panel 24" x 48"
- 5/8" and 1-1/4" brad nails
- wood glue
- one set of basic butt hinges, six screws per hinge
- 14 - 1-1/4" long self tapping wood screws (SPAX or similar)
Optional Trundle:
- 1 - 1x8 @ 8 feet long
- scrap plywood from the lego table build
- 4 caster wheels and screws
Cut List
For lego table only:
- 2 - 1x3 @ 22-1/2"*
- 2 - 1x3 @ 21"
- 1 - 1/4" plywood @ 22-1/2" x 22-1/2"*
- 2 - 1x3 @ 24"*
- 2 - 1x10 @ 24"*
- 4 - 1x3 legs @ 13-1/4" (as shown, can be taller or shorter, depending on desired table height)
For optional storage trundle - trundle can be taller with a wider width board (1x10 or 1x12) if taller legs are used.
- 2 - 1x8 @ 20-1/4"
- 2 - 1x8 @ 18-1/4"
- 1 - 1/4" plywood @ 18-1/4" x 21-3/4"
NOTE: If you are working with a 1x10 board that is exactly 4 feet long (48"), shorten the boards marked with a * by 1/4" so you can fit the two cuts on the 48" long board. The tabletop boards would then work out to 23-3/4".
Tools
- measuring tape
- square
- pencil
- safety glasses
- drill
- circular saw
- nailer
- sander
Step-by-step Instructions
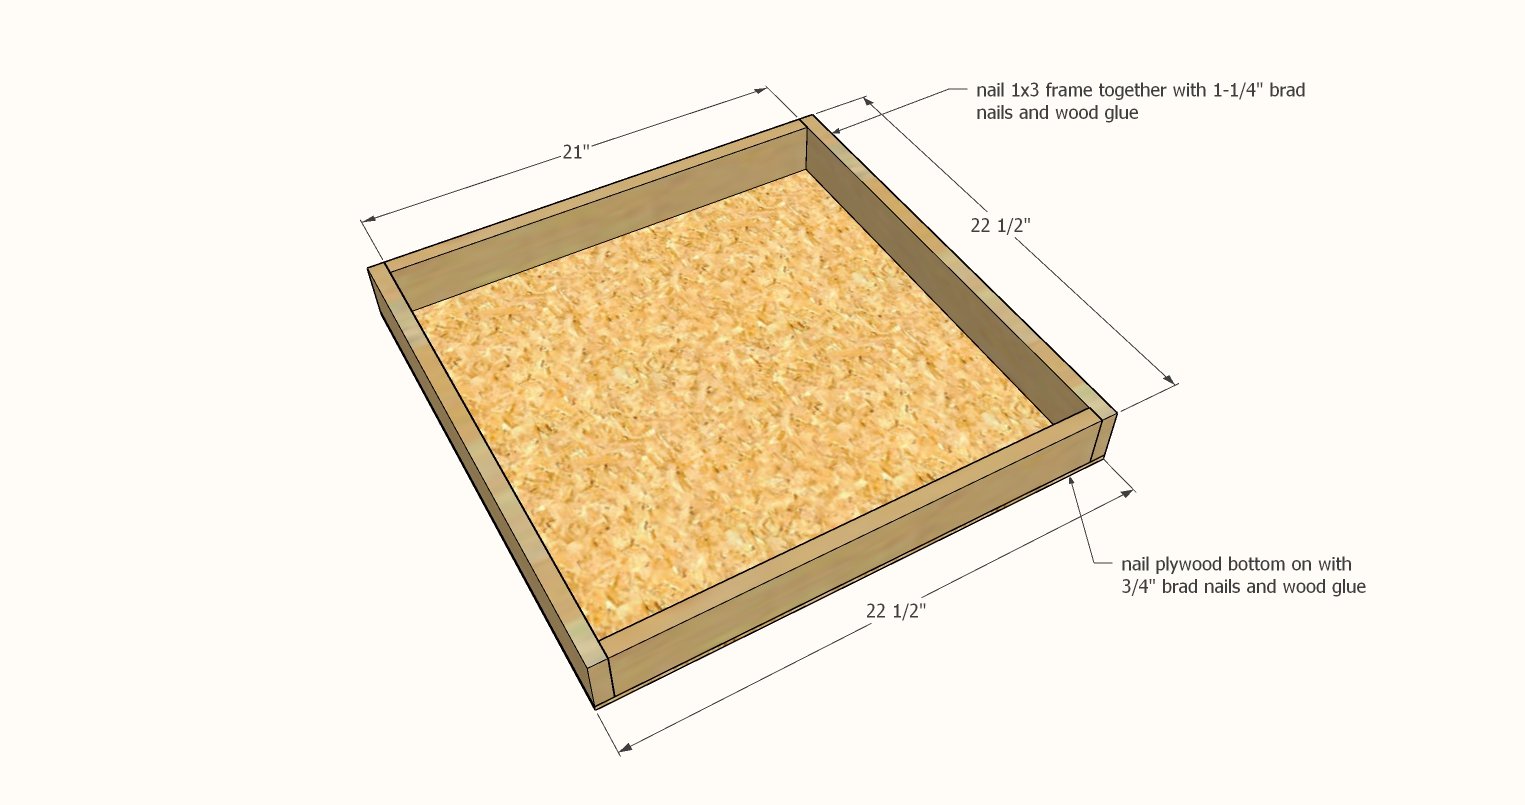
Build the basic box with 1-1/4" brad nails and glue.
Attach the 1/4" plywood panel to the bottom with the shorter brad nails. Use the plywood panel to square up the 1x3 frame.
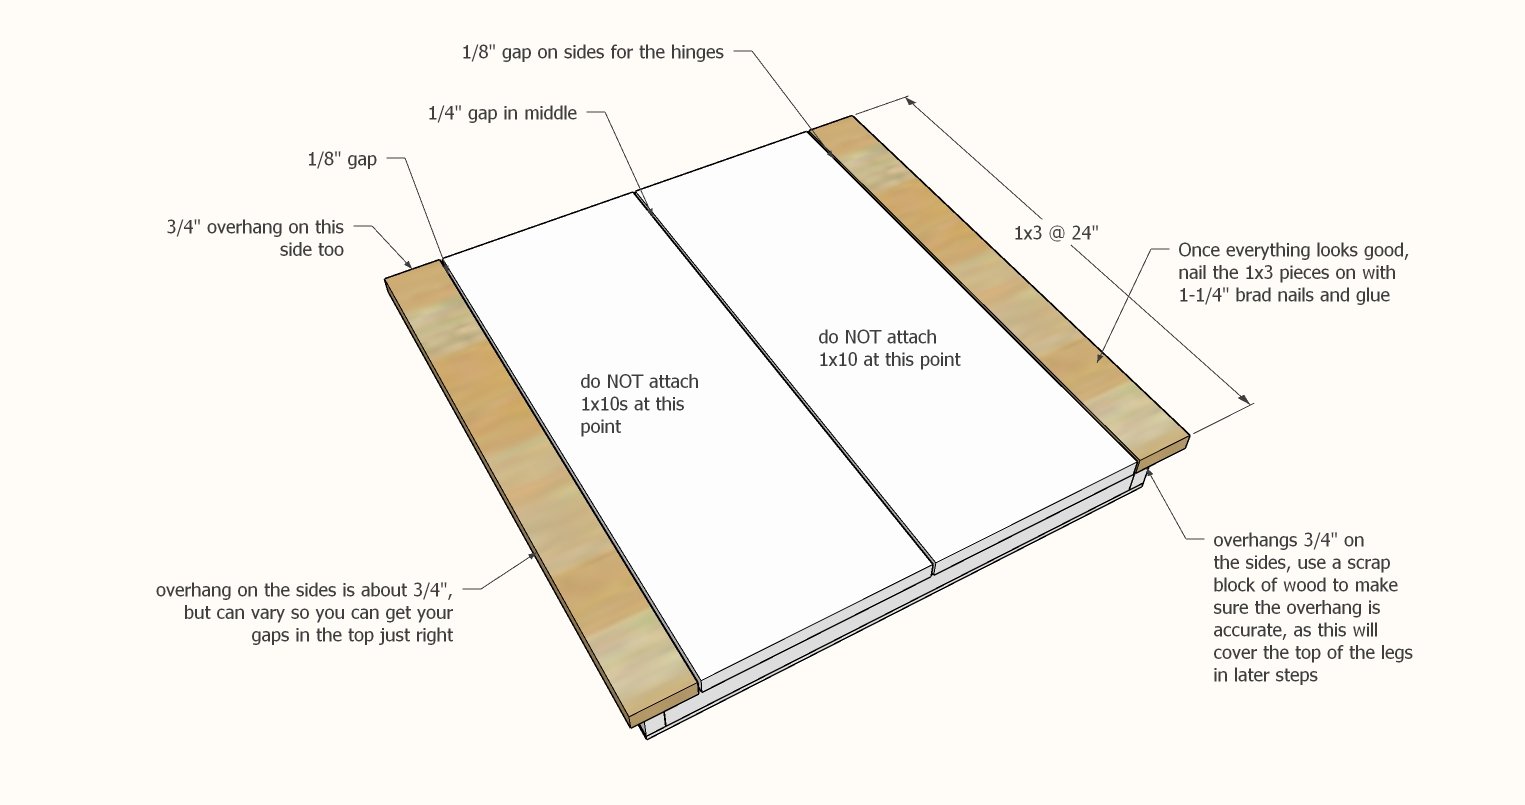
Place the tabletop boards on top.
Line up so there is gaps in between, you can use the hinges to help space out the gaps. Make sure there is a gap in between the 1x10 boards. Once satisfied with the gap placement, carefully remove the 1x10 boards. Use a pencil to trace the placement of the 1x3 boards, as you will need to remove and attach with glue. Remove the 1x3 boards, apply glue and replace. IMPORTANT: Make sure there is a 3/4" overhang on the ends of the 1x3s (where legs will go in next step) on both sides. Use a scrap piece of wood to help you. Nail down with 1-1/4" brad nails. IMPORTANT: Also attach the 1x3 boards to the top with three 1-1/4" screws per 1x3 - as this is the main attachment point for the entire tabletop.
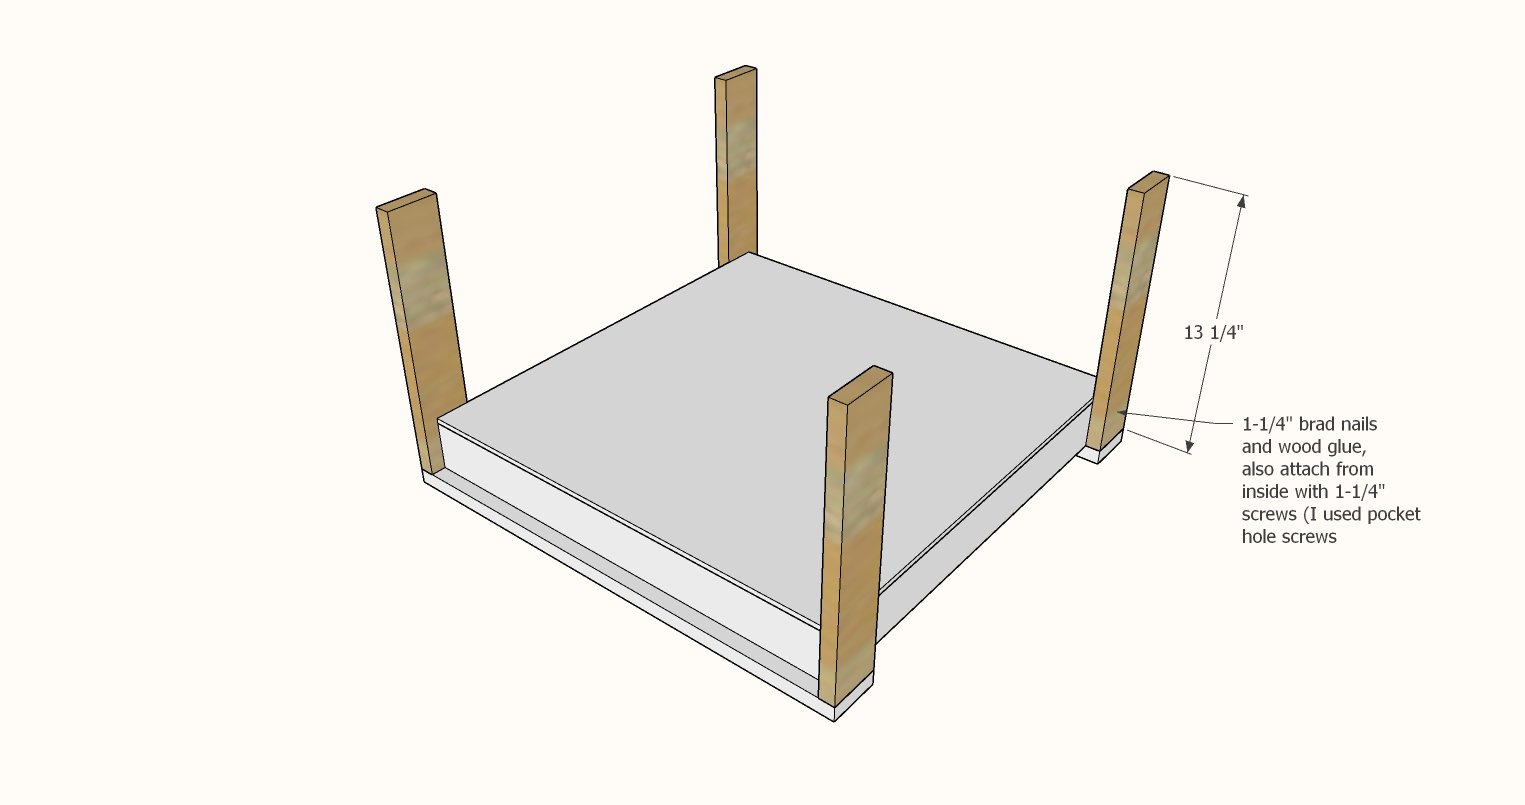
Attach legs to tabletop.
Two screws from inside per leg are needed to secure the legs.
Step 4
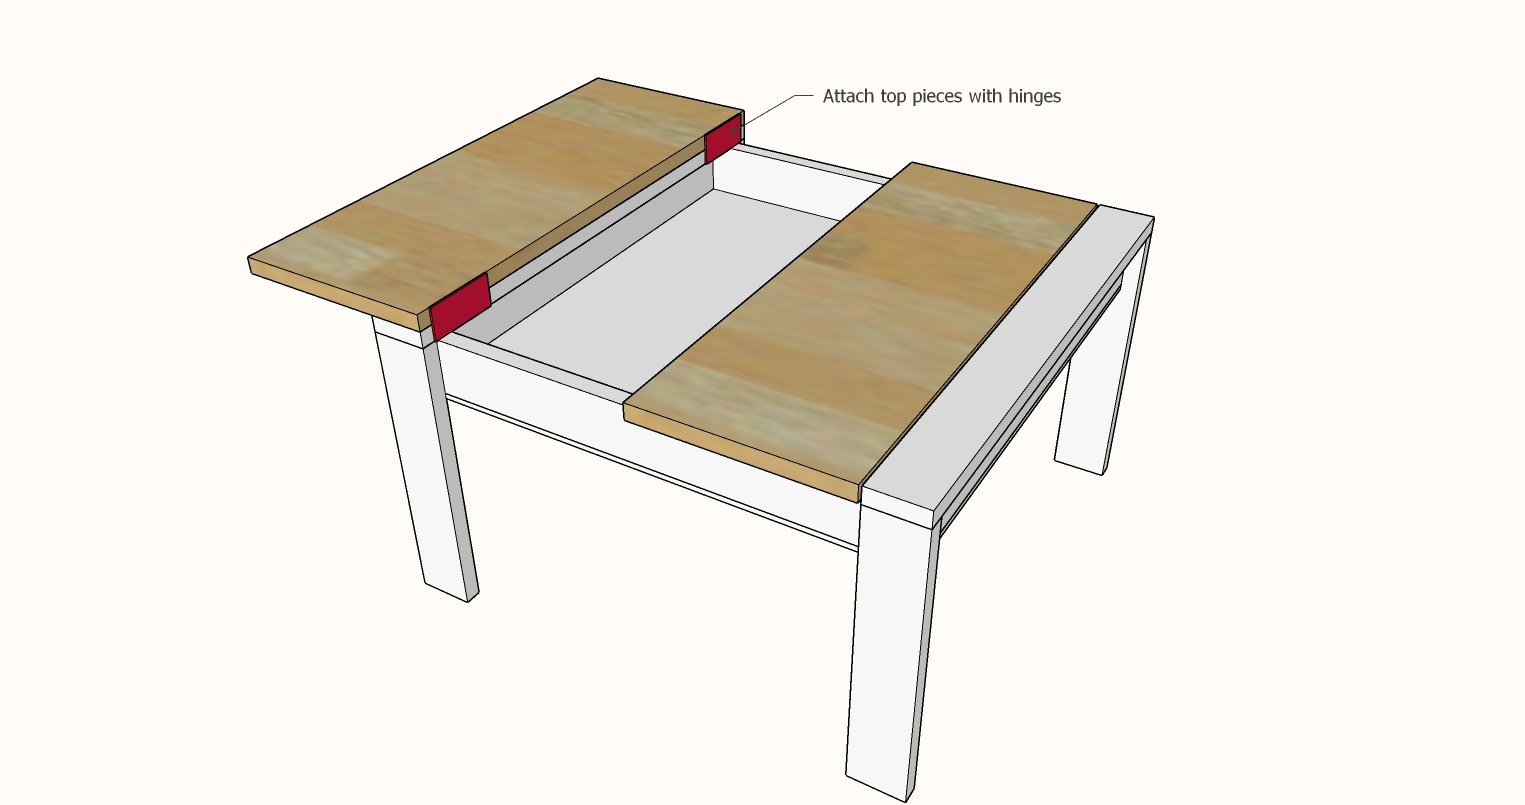
Attach 1x10s to the 1x3s with hinges as shown.
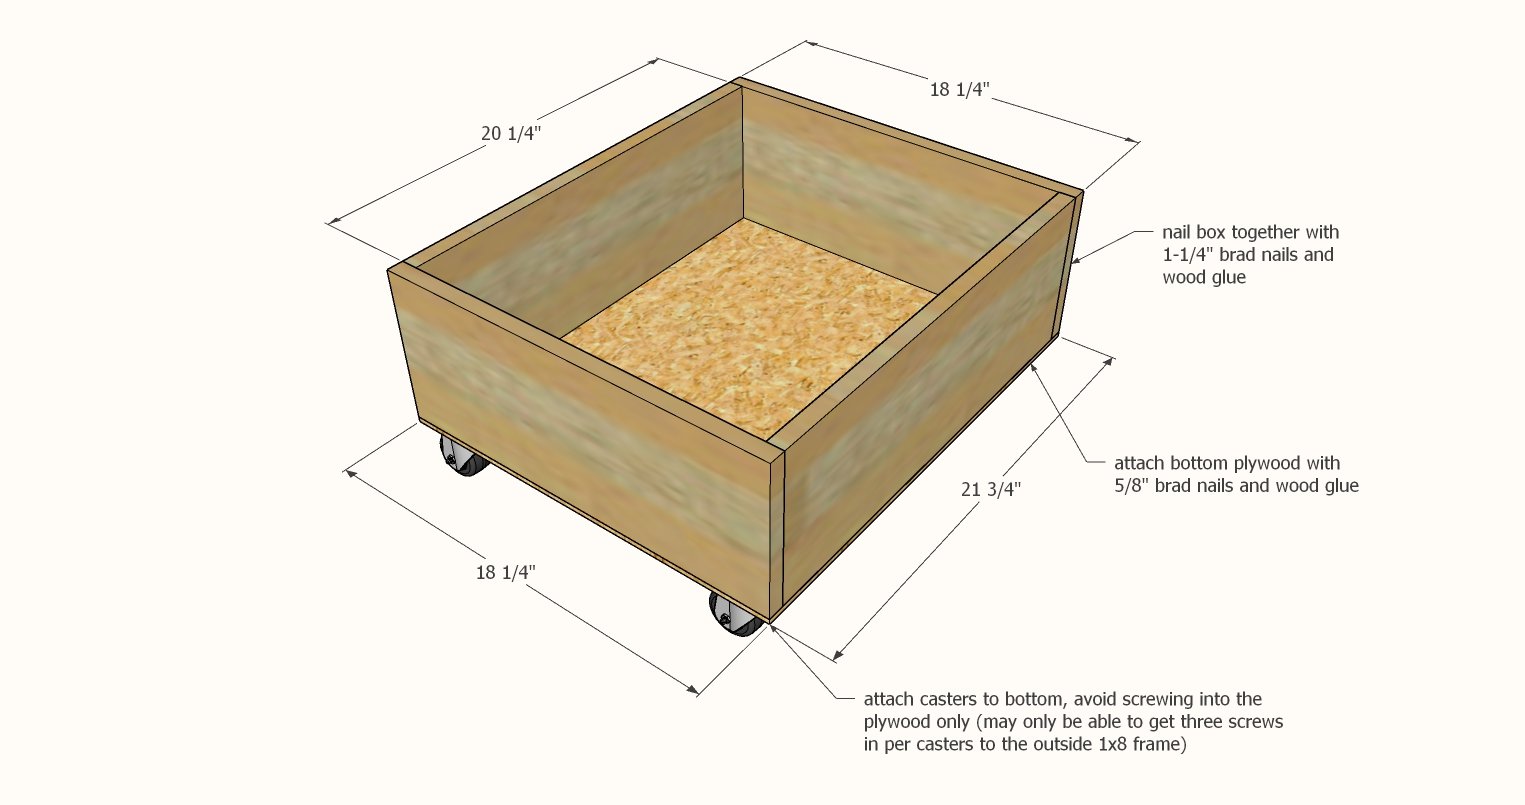
The trundle is built the same as the tray from step 1.
Add casters with screws.
Finishing
Sand all surfaces, starting with a medium grit and finishing with fine. Wipe off the dust, fill any holes or gaps with wood filler, and sand smooth once dry. Apply primer if you're painting, then finish with your choice of paint or stain and seal with a durable clear topcoat. For outdoor projects, use exterior-rated primer, paint or stain, and sealer so the piece stands up to the weather.
Source (temporary): https://www.ana-white.com/woodworking-projects/pine-wood-lego-table