Pine Wood Library Book Cart
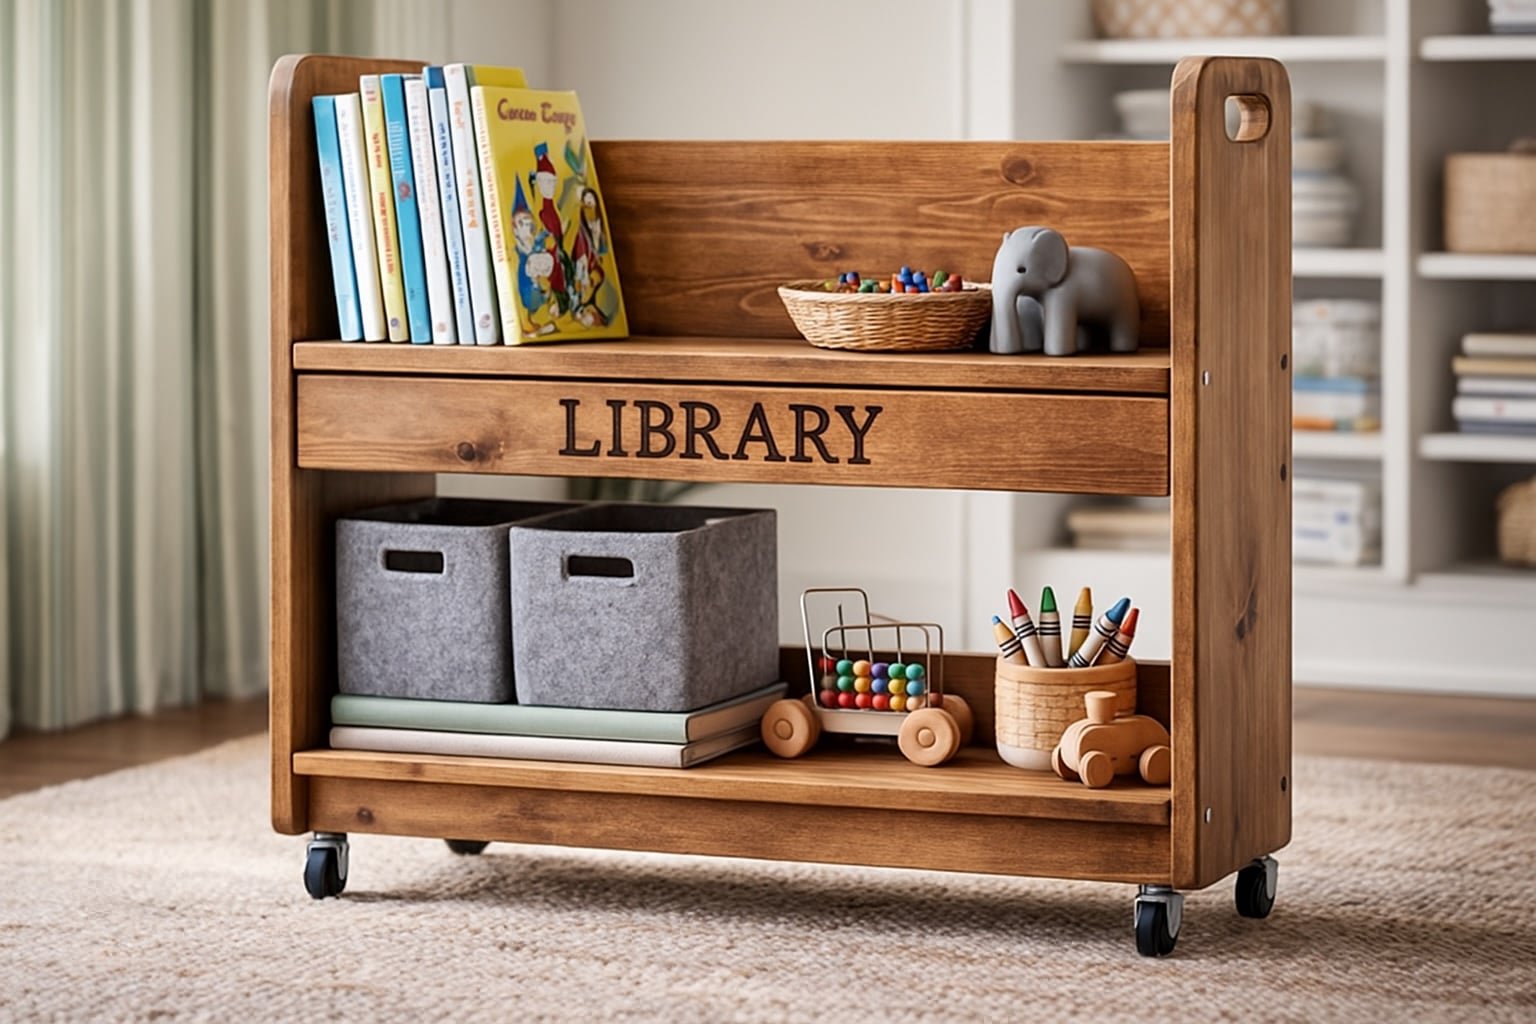
A rolling cart featuring a angled top book shelf perfect for keeping books in place, and a large bottom shelf perfect for baskets or bins, sized for children. This is a to build your own from
Specifications
| Project type | Toys |
|---|---|
| Room | Kids and Toys |
| Style | Children's and Kid's Room Furniture and Toy Plans |
| Difficulty | Beginner Projects |
| Estimated cost | $20 - $50 |
Dimensions
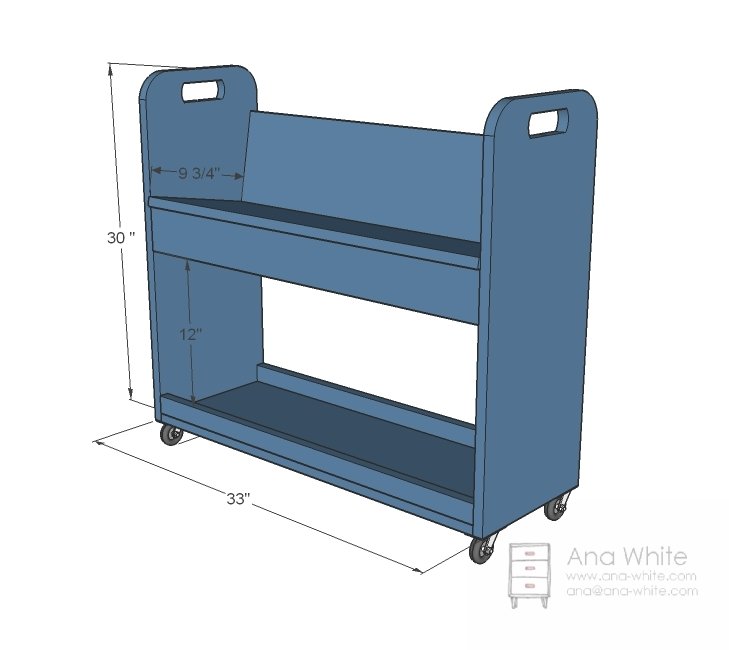
Use the size-specific shopping and cut lists below.
Shopping List
- 1 – 1×12, 10 feet long
- 1 – 1×2, 6 feet long
- 1 – 1×4, 3 feet long
- 1 – 1×8, 3 feet long
- 2″ self tapping star bit Screws OR 1 1/4″ Pocket Hole Screws (for Kreg Jig)
- 1-1/4" brad nails
- Wood filler, glue and finishing supplies
Cut List
- 2 – 1×12 @ 28″ (Sides)
- 2 – 1×12 @ 31 1/2″ (Shelves)
- 1 – 1×4 @ 31 1/2″ (Top Shelf Support)
- 2 – 1×2 @ 31 1/2″ (Bottom Shelf Trim)
- 1 – 1×8 @ 31 1/2″ Top Back)
Tools
- measuring tape
- pencil
- safety glasses
- drill
- circular saw
- jigsaw
- nailer
- sander
- level
- countersink drill bit
Step-by-step Instructions
Step 1
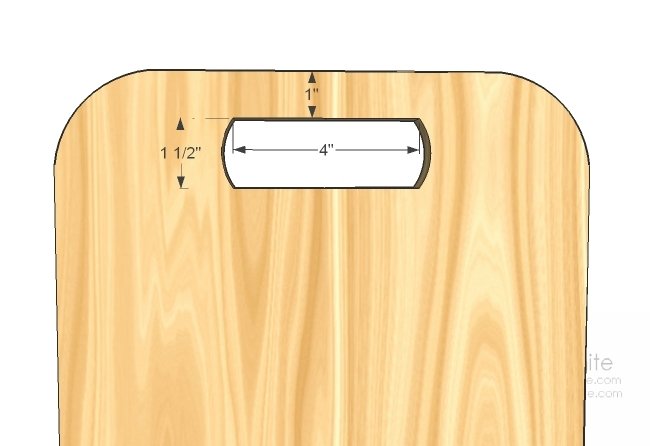
On the two side pieces, cut out the handle and round the corners if desired.
Step 2
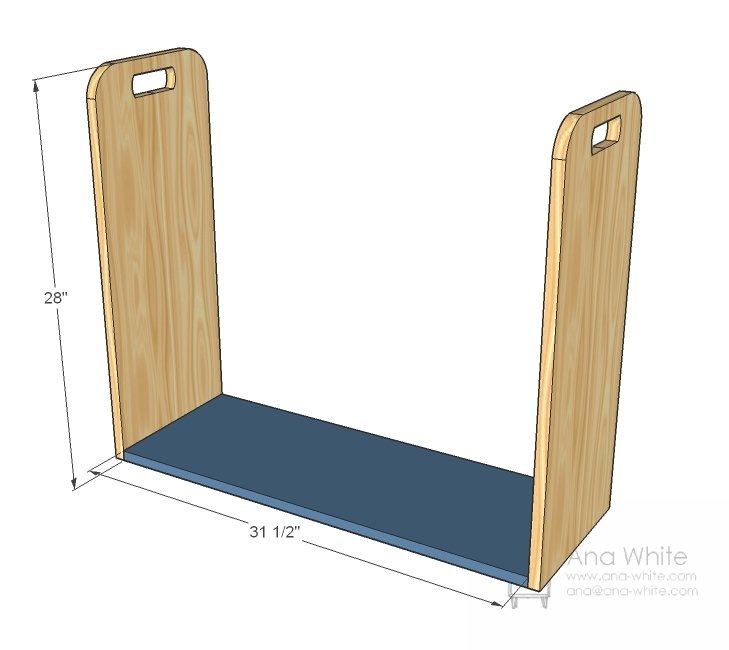
Attach the bottom shelf to the sides with either 3/4" pocket holes and 1-1/4" pocket hole screws, or 2" self tapping star bit screws. NOTE: The base can be attached at the bottom as shown in the diagram here, or with the 1x2 supports under it as shown in the main beauty image
Step 3
Attach the bottom shelf sides as shown using 1-1/4" brad nails and glue.
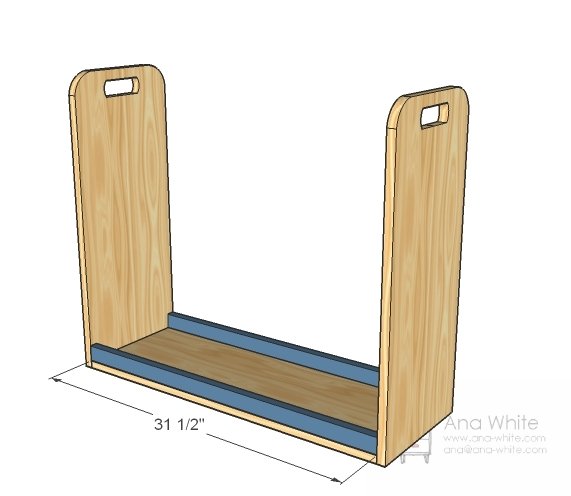
Step 4
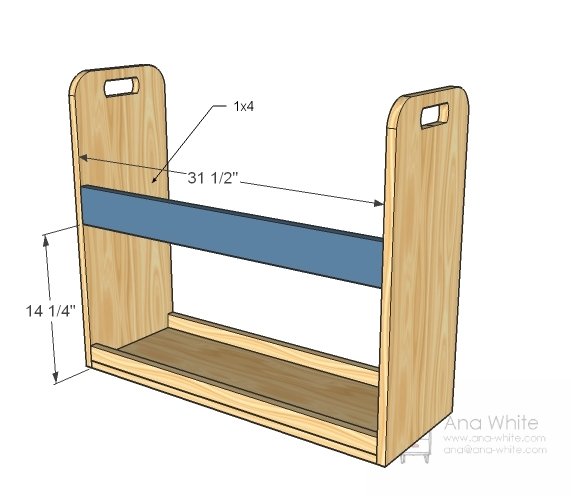
Top Shelf Support Measure and mark out the location for the top shelf support as shown in the diagram above. Use either the 3/4" pocket holes and 1-1/4" pocket hole screws, or 2" self tapping screws.
Step 5
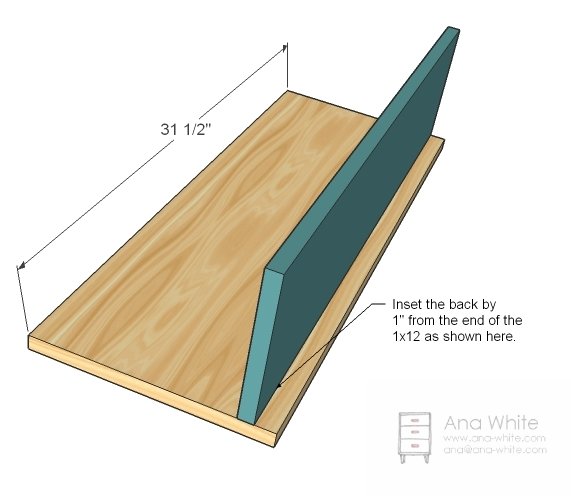
Attach the back piece to the top shelf with screws or 1-1/4" brad nails and glue.
Top Shelf
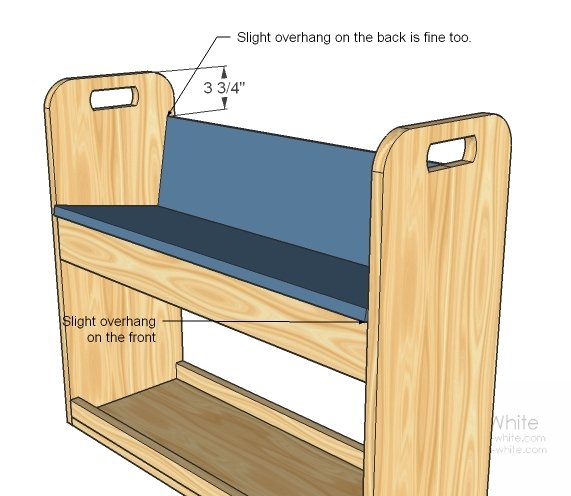
Place top shelf on top of top shelf support. Mark and screw in place with 2″ screws and glue.
Wheels
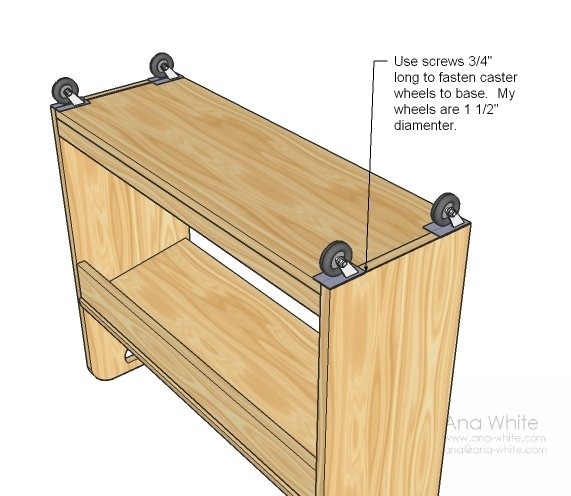
Attach caster wheels to base of the cart with screws included with the caster wheels.
Finishing
Sand all surfaces, starting with a medium grit and finishing with fine. Wipe off the dust, fill any holes or gaps with wood filler, and sand smooth once dry. Apply primer if you're painting, then finish with your choice of paint or stain and seal with a durable clear topcoat. For outdoor projects, use exterior-rated primer, paint or stain, and sealer so the piece stands up to the weather.
Source (temporary): https://www.ana-white.com/woodworking-projects/pine-wood-library-book-cart-free-plans