Pipe and Wood Slat Bed
tutorial for industrial pipe bed from
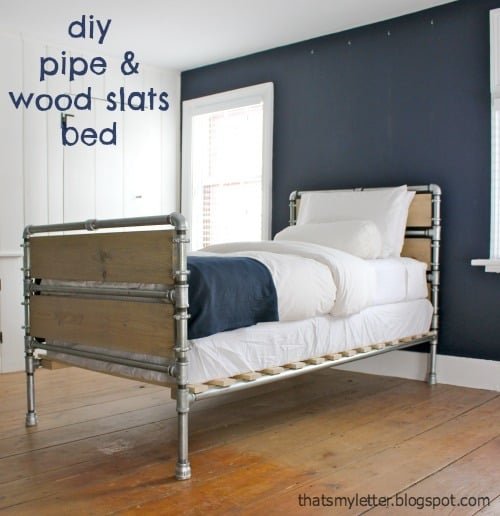
Specifications
| Project type | Twin Beds and Twin Bed Frames |
|---|---|
| Room | Bedroom |
| Style | Modern Style Furniture Plans |
| Difficulty | Intermediate |
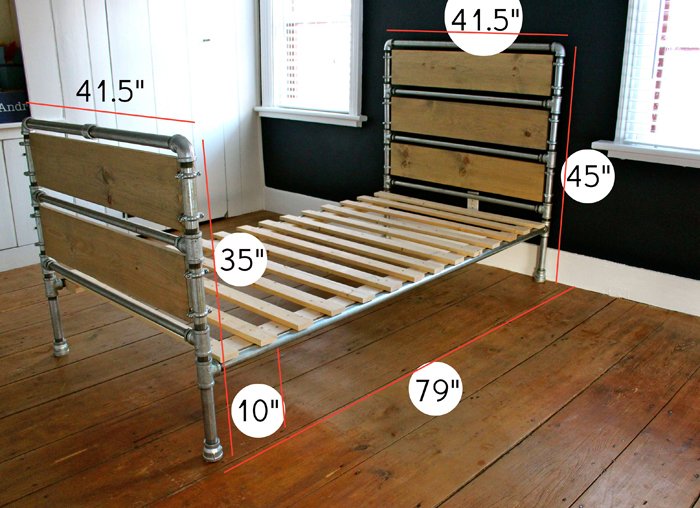
Dimensions
Use the size-specific shopping and cut lists below.
Shopping List
Shopping List
2 – 1x8x8 pine boards
1 – 1x8x6 pine board
2 – 2x4x8 studs
8 – 1x3x8 furring strips
2” wood screws
1 ½” wood screws
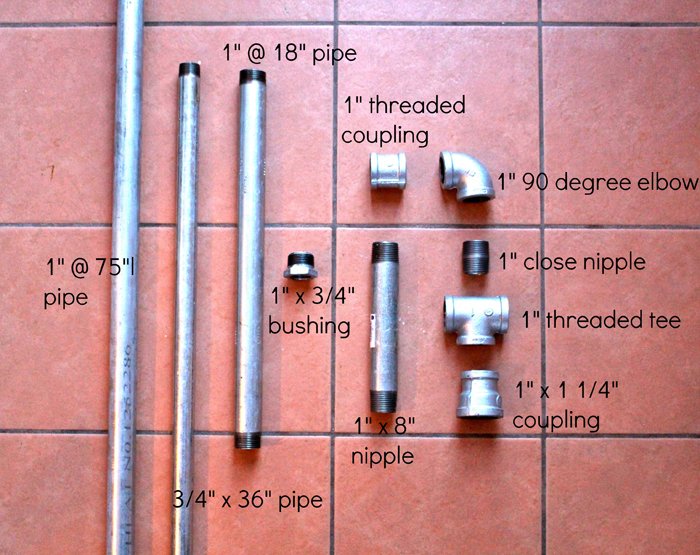
ALL GALVANIZED STEEL:
*2 – 1” pipe @ 75”l
*4 – 1” pipe @ 18”l
5 – ¾” pipe @ 36”l
14 – 1” nipple @ 8”l
4 – 1” close nipple
14 – 1” threaded tee
4 – 1” 90 degree elbow
4 – 1” x 1 ¼” coupling (feet)
2 – 1” threaded coupling
10 – 1” x ¾” bushing
20 – 1” split ring pipe hanger
*cut to length and threaded at hardware store
Cut List
WOOD CUT LIST
5 – 1x8 @ 37 ¾”l (wood slats)
2 – 2x4 @ 74”l (platform supports)
16 – 1x3 furring @ 41 ¼”l (mattress supports)
Tools
- measuring tape
- square
- pencil
Step-by-step Instructions
Step 1
Notes: No glue was used on any pipes or pipe-to-wood connections. Only hand tighten until your are confident of pipe placement, it took me multiple tries to get it all connected just right – lots of screwing and unscrewing to figure out the proper connections - but that’s the beauty of working with pipe. The most difficult portion will be connecting the siderails to the footboard and headboard since the pipe screws together in the same direction on both ends (if you’re screwing in one end essentially you are unscrewing the other end simultaneously). Follow the step by step instructions carefully.
Step 2
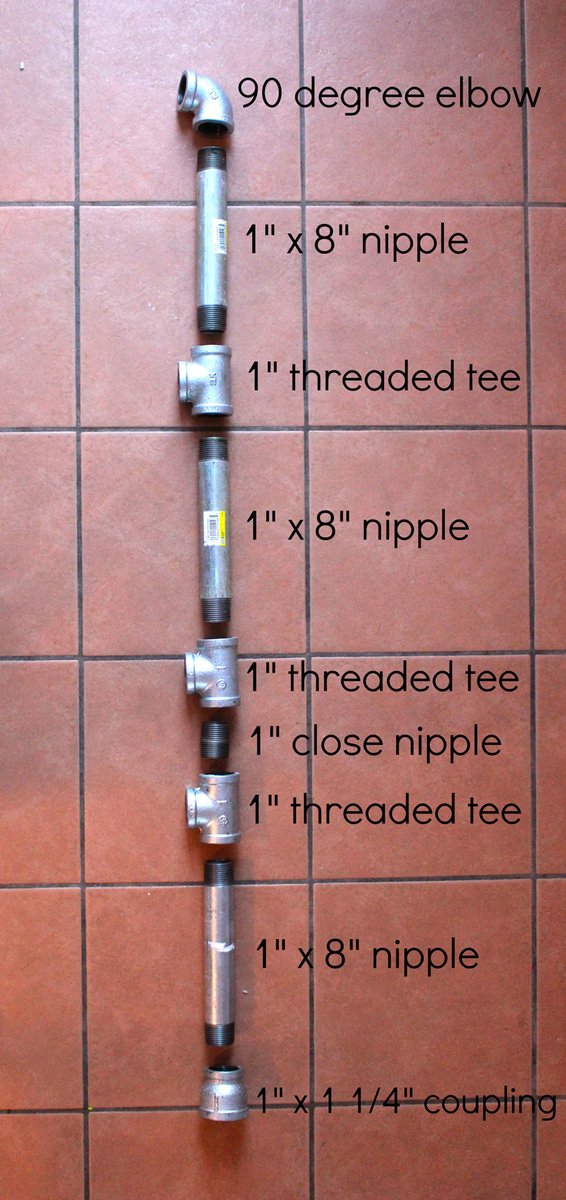
Build only one leg of the footboard as shown by screwing the pieces together until snug.
Step 3
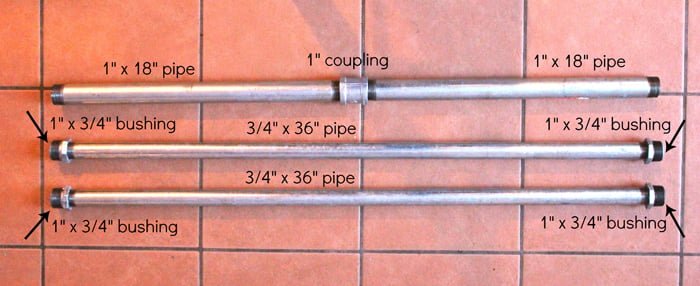
Prepare horizontal pipe support pieces as shown.
Step 4
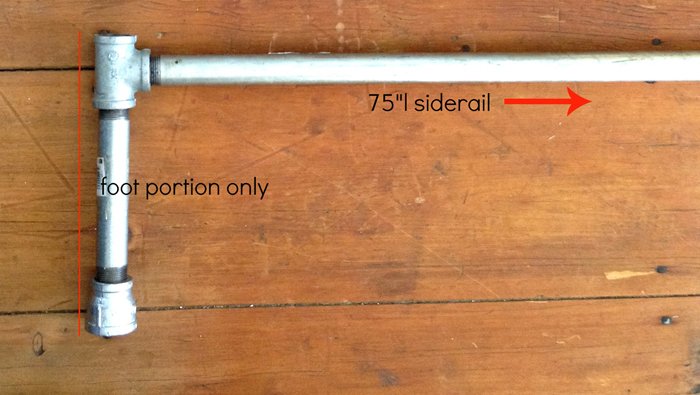
Prepare ONLY the foot portion of the other leg (1 x ¼ coupling, 1” x 8” nipple and 1” threaded tee) and connect 1” x 75”l pipe to this foot portion only.
Step 5
Step 6
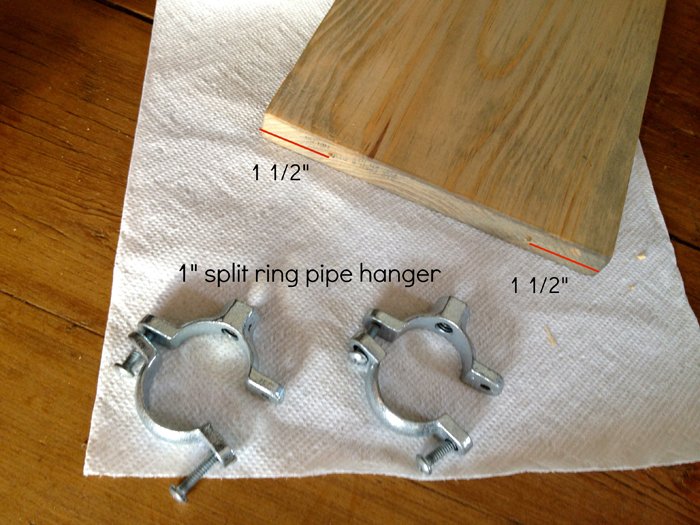
Prepare wood slats. Predrill 1 ½” from outer edge for 2 split ring pipe hangers.
Step 7
Attach pipe hangers using 2” wood screws, be sure hanger is perpendicular to wood board
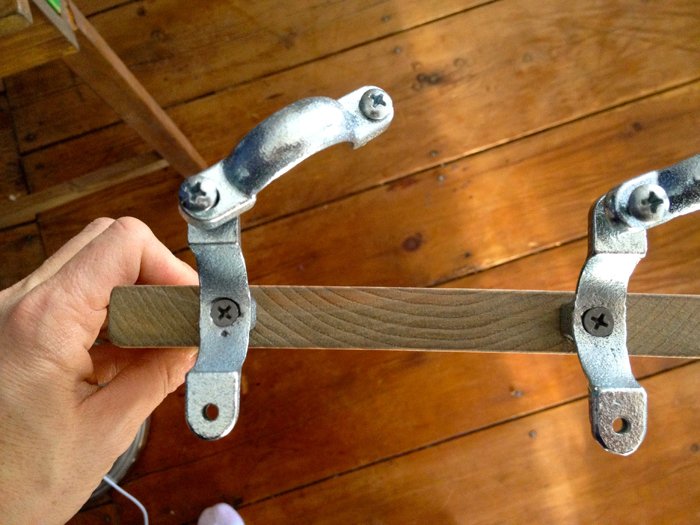
Step 8
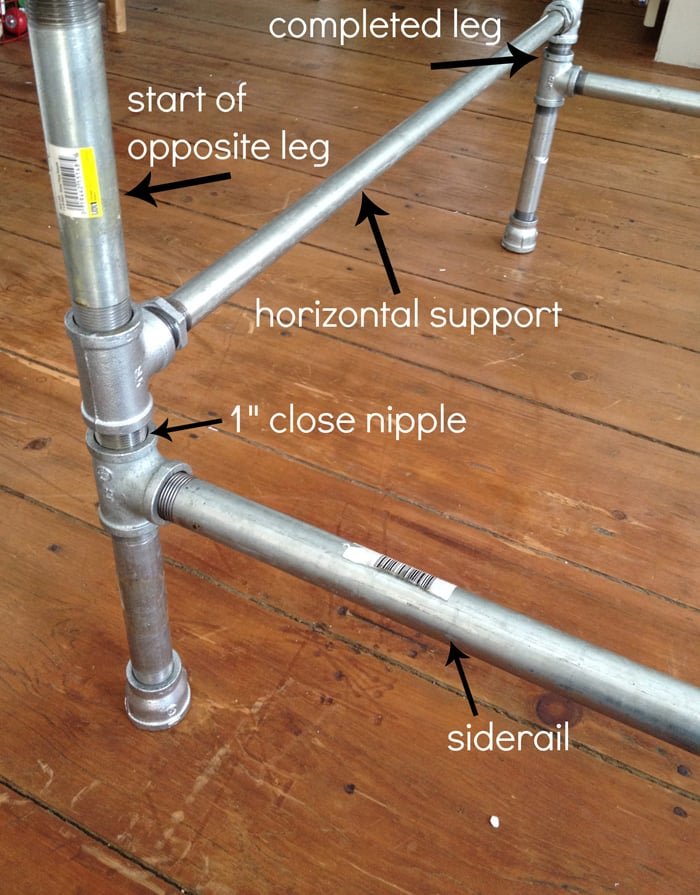
On the footboard slip one end of wood slat into completed leg side of footboard then with other end of wood slat in place screw in the next 1” x 8” nipple pipe piece. DO NOT TIGHTEN PIPE HANGERS YET.
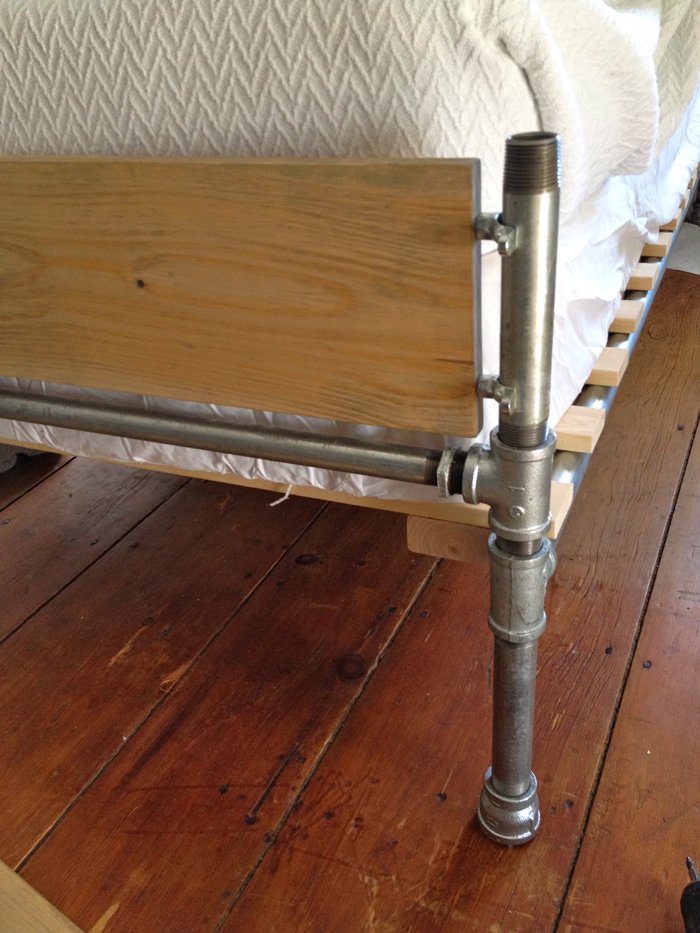
Screw on next tee piece then screw next ¾” horizontal support pipe piece:
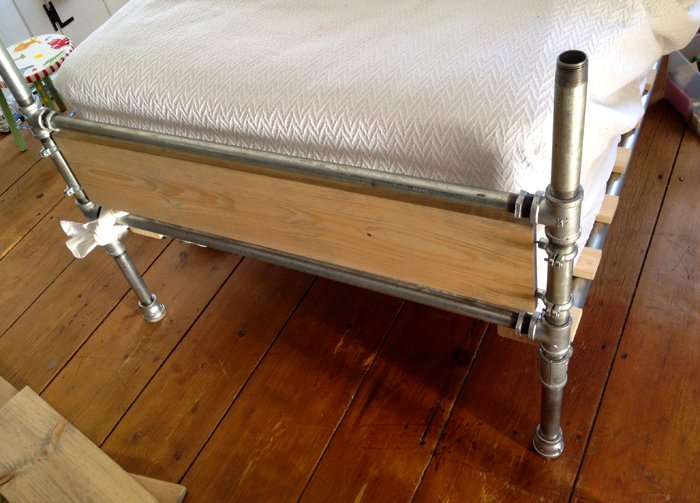
• Tip: screw horizontal pipe all the way into the completed leg side first then connect to other leg. It’s a give and take with the horizontal pipes and bushing pieces because they all screw in the same direction, eventually they will get tight just keep working back and forth from one side to the other. • The paper towel wrapped around the joint is preventing oil from dripping onto the floor. (The ¾” x 36” pipe is a stock item but my Home Depot was out at the time therefore I had to have those pieces cut, when they cut the pipe they use a thick dark oil which seeps a bit once settled.)
Step 10
Center wood slat between horizontal pipes with even spacing on both top and bottom then secure pipe hangers to pipes with equal pressure on both screws.
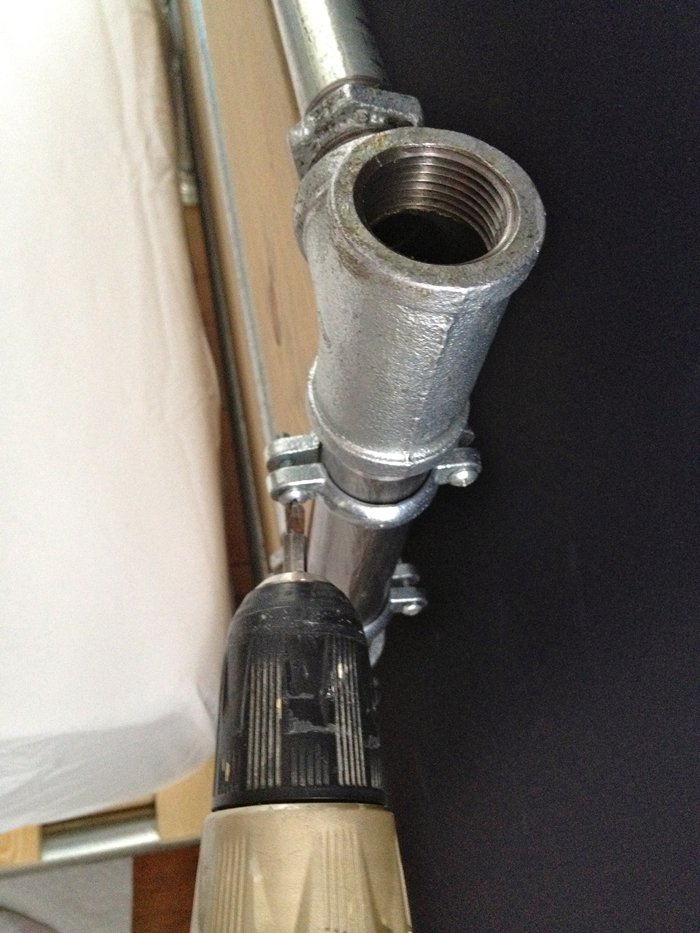
Step 11
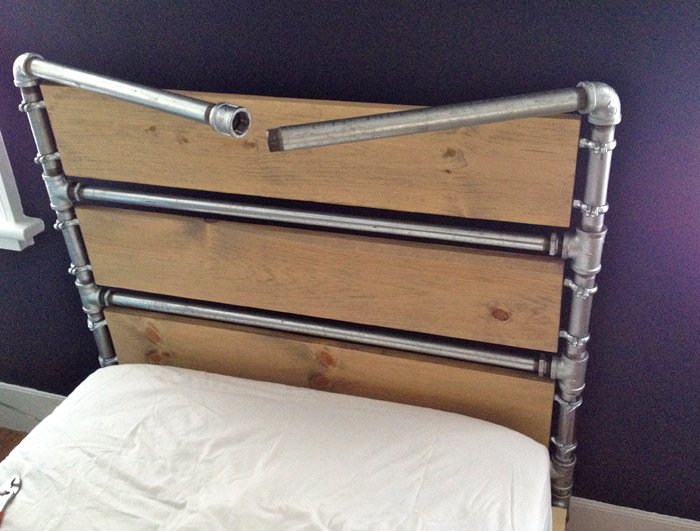
Prepare the next wood slat and repeat the process adding another 1” x 8” nipple. On top of the nipple screw in one 90 degree elbow. On the open end of the elbow screw in one 18” piece of 1” pipe and on the completed leg side screw in the other 18” pipe with a coupling. Tighten the pipe hangers and screw together the middle portion of the coupling and pipe. (headboard pictured above but we’re finishing the footboard) REPEAT steps 8 – 11 for the headboard.
Step 12
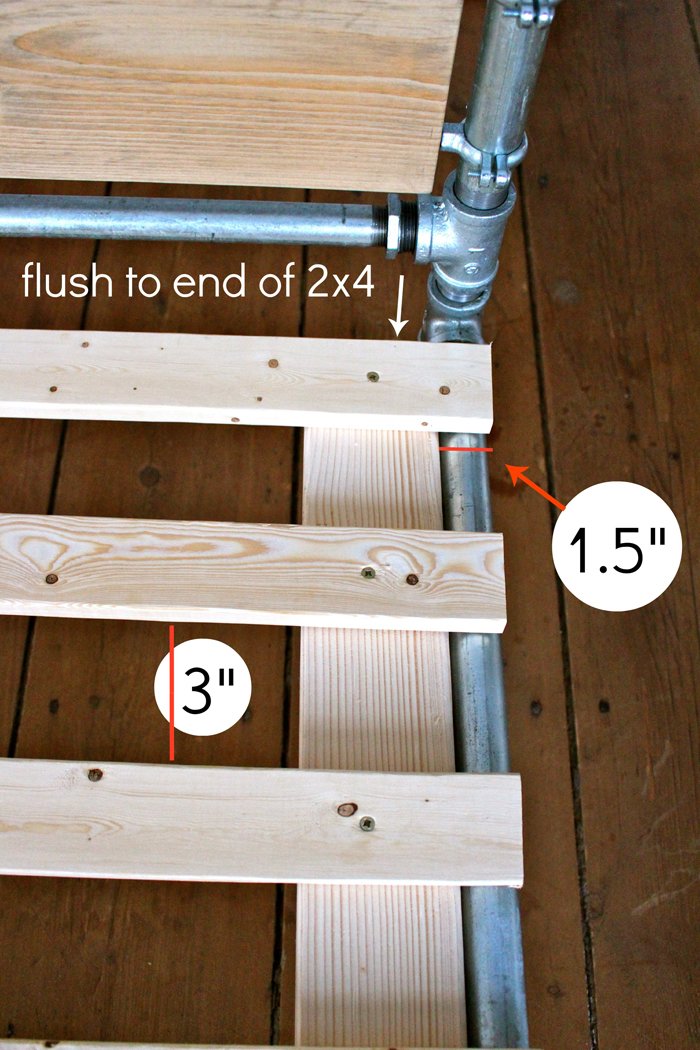
Build the mattress platform. Attach cross supports to studs using countersink and 1 ½” wood screws.
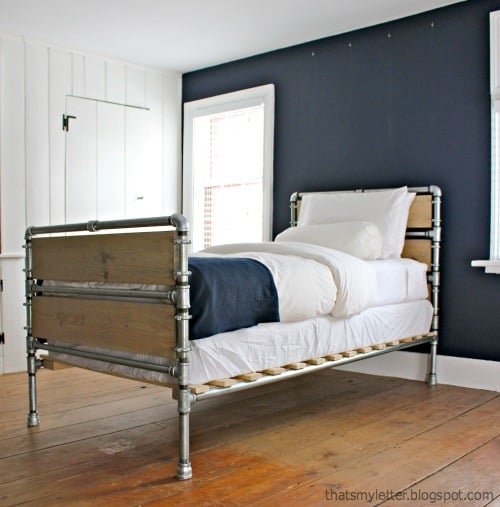
Add mattress and bedding!
For more pics, info and details, please take a second to visit Jaime at That's My Letter.
Finishing
Sand all surfaces, starting with a medium grit and finishing with fine. Wipe off the dust, fill any holes or gaps with wood filler, and sand smooth once dry. Apply primer if you're painting, then finish with your choice of paint or stain and seal with a durable clear topcoat. For outdoor projects, use exterior-rated primer, paint or stain, and sealer so the piece stands up to the weather.
Source (temporary): https://www.ana-white.com/woodworking-projects/pipe-and-wood-slat-bed