Pirate Picnic Table
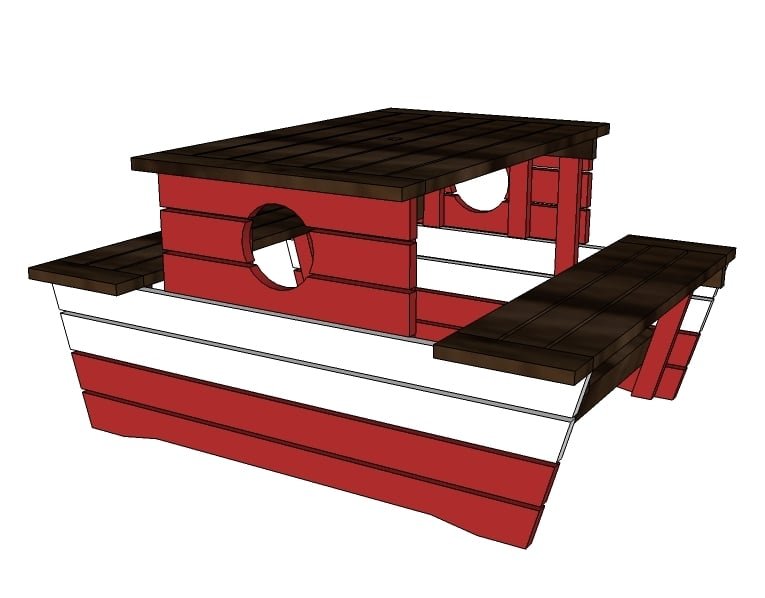
A picnic table that looks like a pirate ship! Add an umbrella and every day dining is literally a breeze.
Specifications
| Project type | Kids Tables and Chairs |
|---|---|
| Room | Outdoor |
| Style | Children's and Kid's Room Furniture and Toy Plans |
| Difficulty | Intermediate |
| Estimated cost | $20 - $50 |
Dimensions
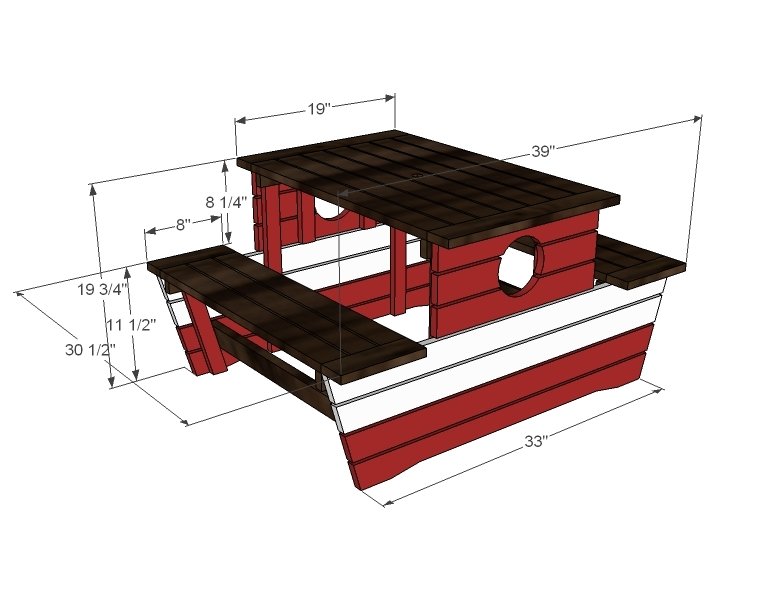
Use the size-specific shopping and cut lists below.
Shopping List
10 - 1x3 Boards, 8 feet long 2 - 1x2 @ 8 feet long
Cut List
6 - 1x3 @ 18" (Porthole sides) 2 - 1x3 @ 39" (Longest Point, both ends cut at 15 degrees off square, not parallel)
2 - 1x3 @ 37 7/16" (Longest Point, both ends cut at 15 degrees off square, not parallel)
2 - 1x3 @ 35 15/16" (Longest Point, both ends cut at 15 degrees off square, not parallel)
2 - 1x3 @ 34 3/8" (Longest Point, both ends cut at 15 degrees off square, not parallel)
2 - 1x2 @ 18" (Top Cleat)
4 - 1x2 @ 17" (Side Cleats)
4 - 1x2 @ 7 9/16" (Seat Cleats)
4 - 1x2 @ 9 9/16" (Seat Angled Cleats - both ends at 15 degrees off square)
4 - 1x2 @ 6 1/2" (Porthole Cleats)
2 - 1x3 @ 19" (Top Breadboard Ends)
4 - 1x3 @ 8" (Seat Breadboard Ends)
2- 1x3 @ 25 1/2" (Base Supports)
13 - 1x3 @ 25 1/2" (Seat/Tabletop Boards)
Tools
- measuring tape
- square
- pencil
- safety glasses
- hearing protection
- drill
- jigsaw
- compound miter saw
- sander
- level
- countersink drill bit
Step-by-step Instructions
Step 1
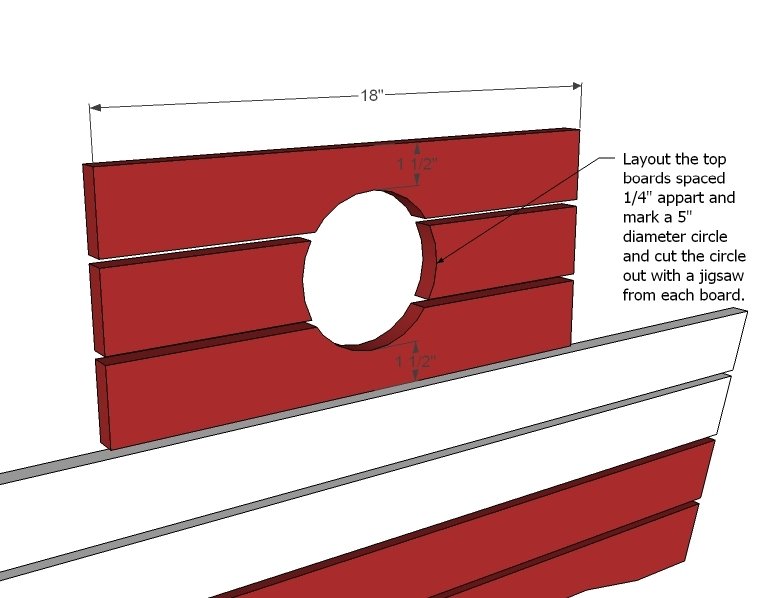
The most difficult part of this project is going to be getting those boards cut just right - namely this circle. Cut your six boards straight, as shown above, 18" long. Lay out with 1/4" spacing between the boards and draw a 5" circle on the boards. Then cut the circle parts out of each board with a jigsaw. You will need to do this on both sides.
Step 2
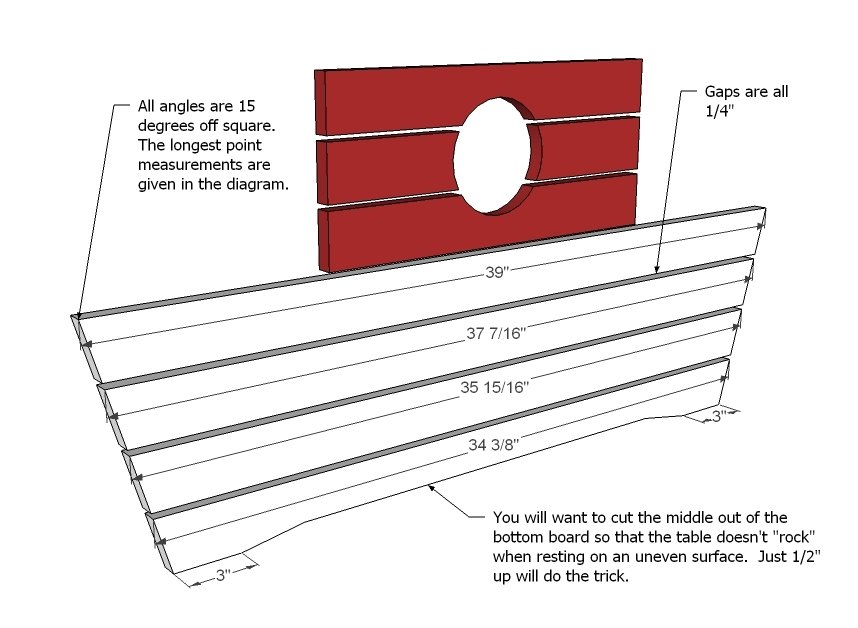
Now space the remaining side boards out, 1/4" appart as shown above. Notch the bottom out 1/2" up as shown above with a jigsaw so that the table will sit flat, despite uneven surfaces. You will need to do this on both sides.
Step 3
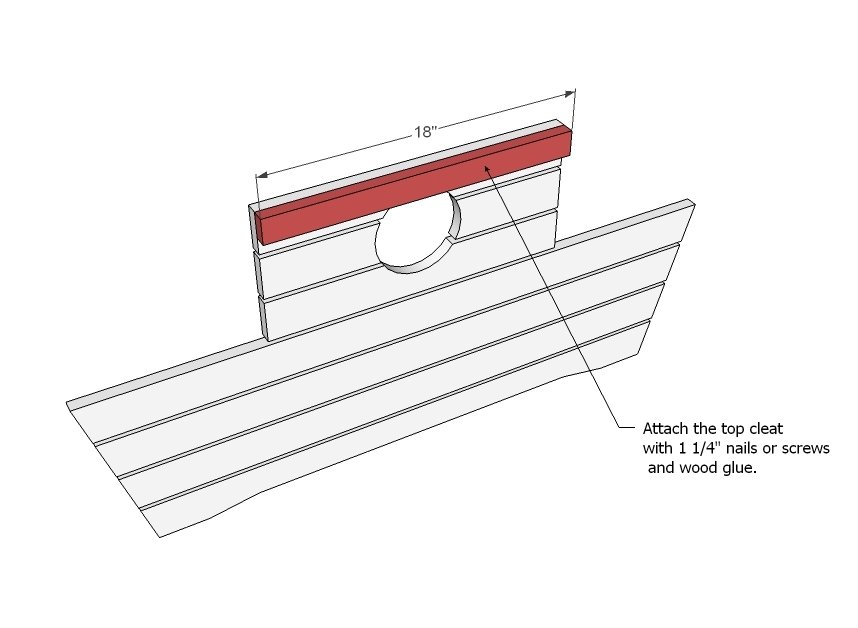
To the top board, add the top cleat as shown above.
Step 4
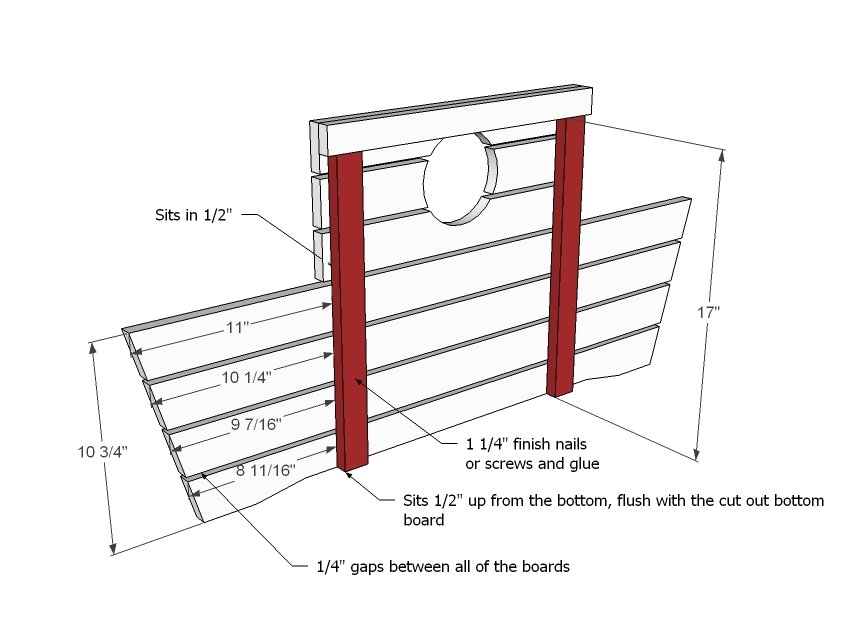
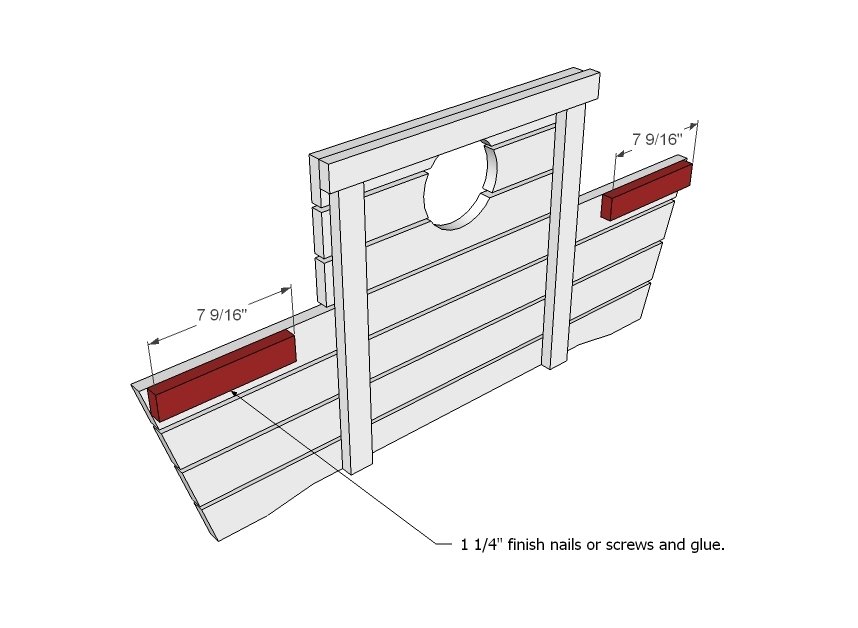
Now it's time to assemble the sides. Start at the top and work your way down, keeping a 1/4" gap between all of the boards as shown above.
Step 5
Step 6
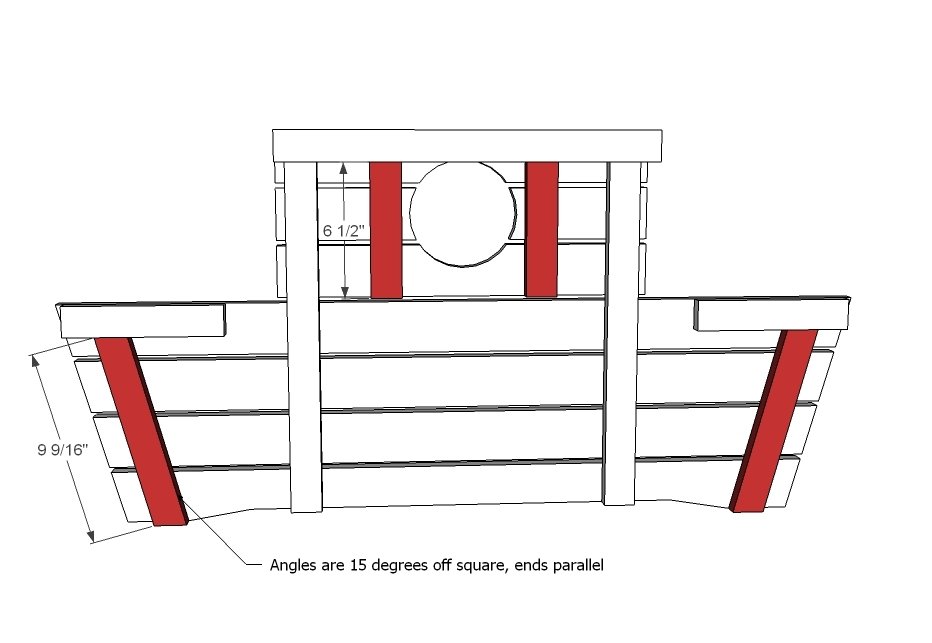
Now we need something to keep the ends in place. Add the angled cleats as shown above, and the cleats around the portholes. Again, 1 1/4" fasteners and glue.
Step 7
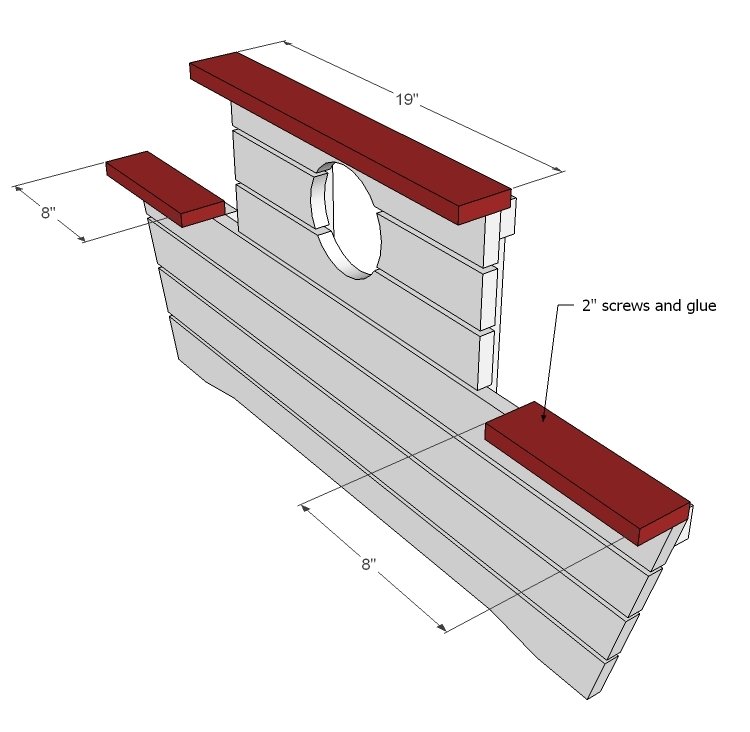
If you have a Kreg Jig™, consider building the top and seats first, and the adding to the top. But if you don't, here's how you can still get those breadboard ends. Screw (predrilled holes) and glue the breadboard ends to the top as shown above. The top will overhang 1/2" on both ends. Seats will sit flush.
Step 8
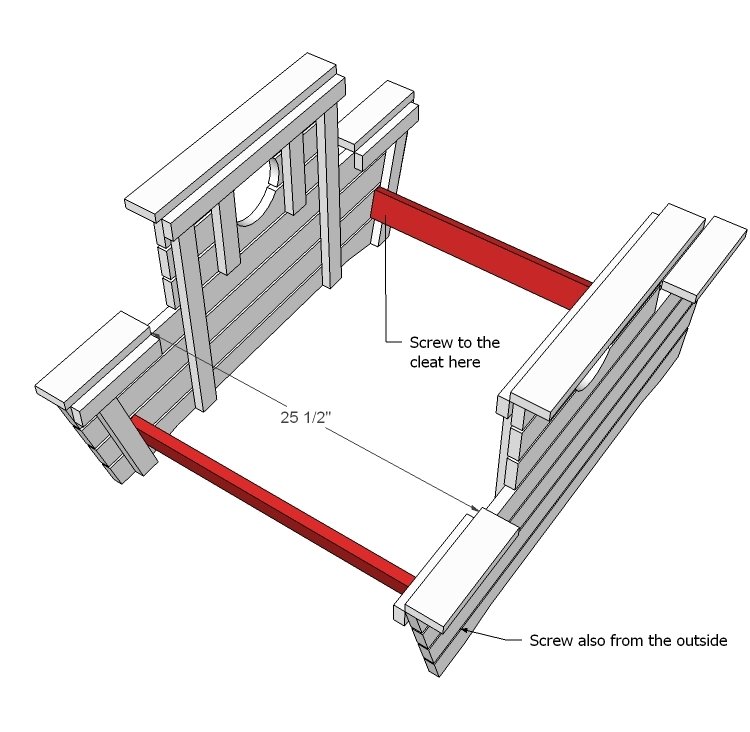
Now join the two sides together using the base support boards as shown above. Screw to the cleats and also to the sides.
Step 9
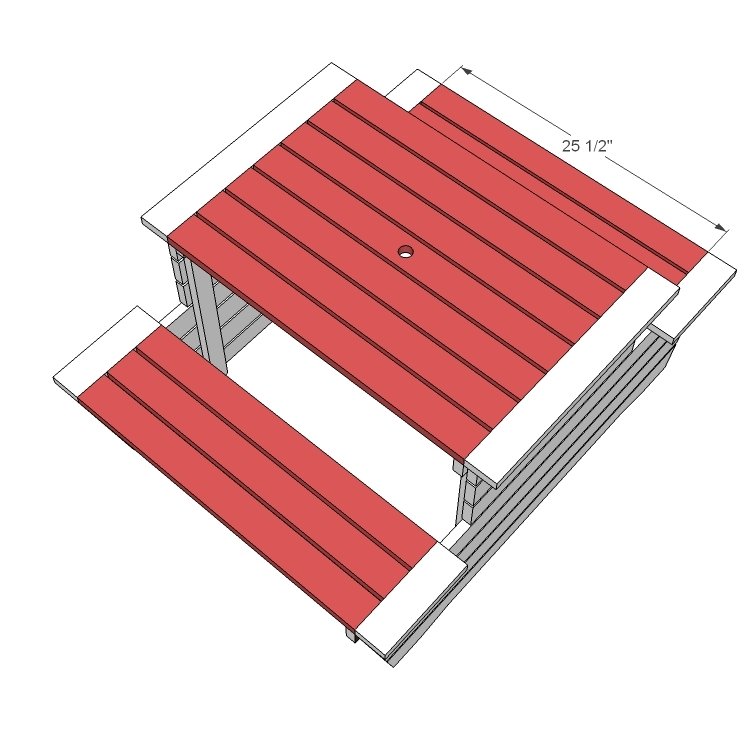
And finally, attach all of the top boards as shown above. Carefully predrill holes and use 2" screws and glue. Adjust for square.
Finishing
Sand all surfaces, starting with a medium grit and finishing with fine. Wipe off the dust, fill any holes or gaps with wood filler, and sand smooth once dry. Apply primer if you're painting, then finish with your choice of paint or stain and seal with a durable clear topcoat. For outdoor projects, use exterior-rated primer, paint or stain, and sealer so the piece stands up to the weather.
Source (temporary): https://www.ana-white.com/woodworking-projects/pirate-picnic-table