Pirate Toy Chest
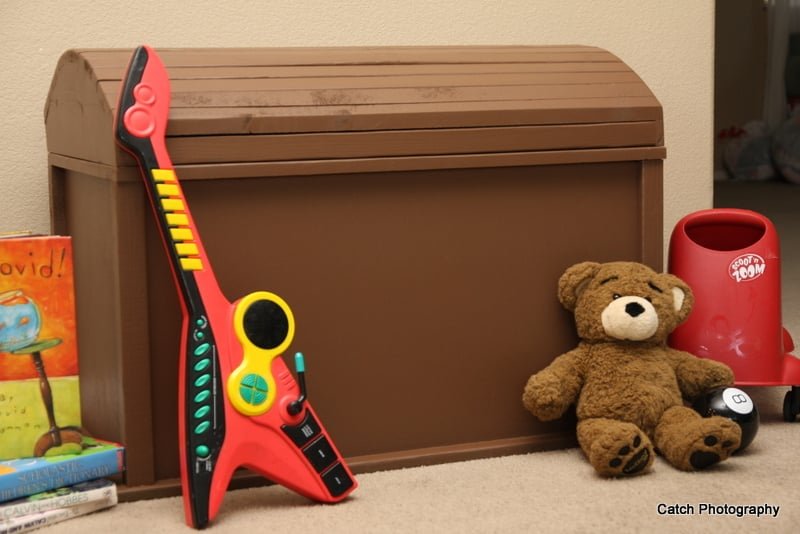
Toy chest with awesome curved top to make it look authentically "pirate-like." Or just something a little different than a plain old box.
Specifications
| Project type | Toys |
|---|---|
| Room | Storage Solutions |
| Style | Children's and Kid's Room Furniture and Toy Plans |
| Difficulty | Intermediate |
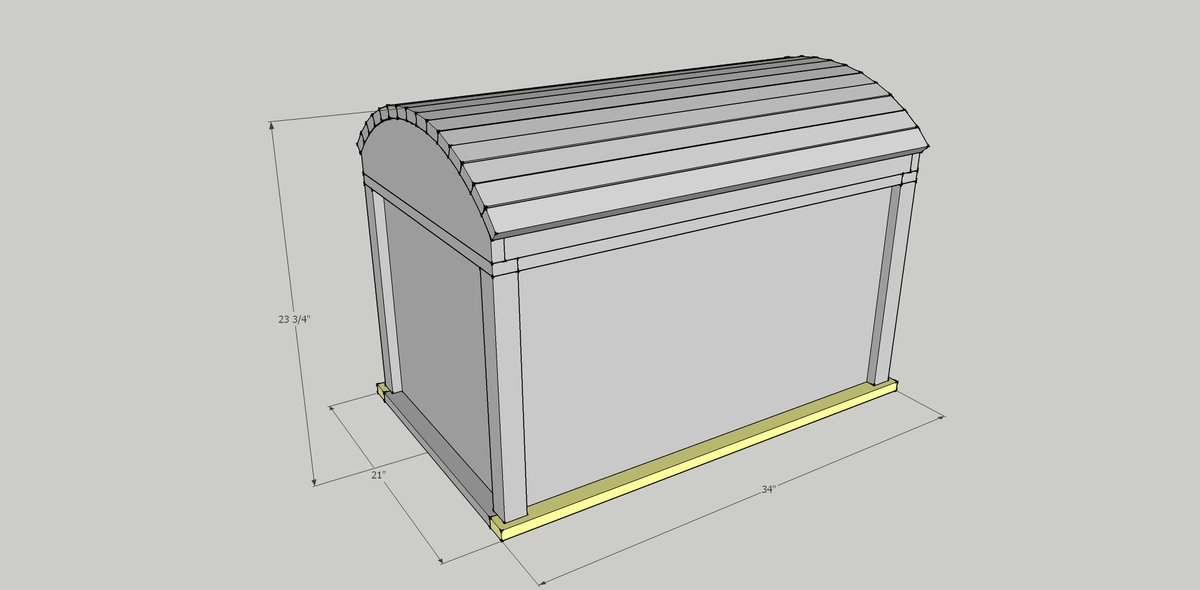
Dimensions
Use the size-specific shopping and cut lists below.
Shopping List
1/2 sheet 3/4" Plywood (4'x4')
10- 1x2's
1 - 2x2
1- 1x6 (need 2- 20" pieces if you have scraps)
Cut List
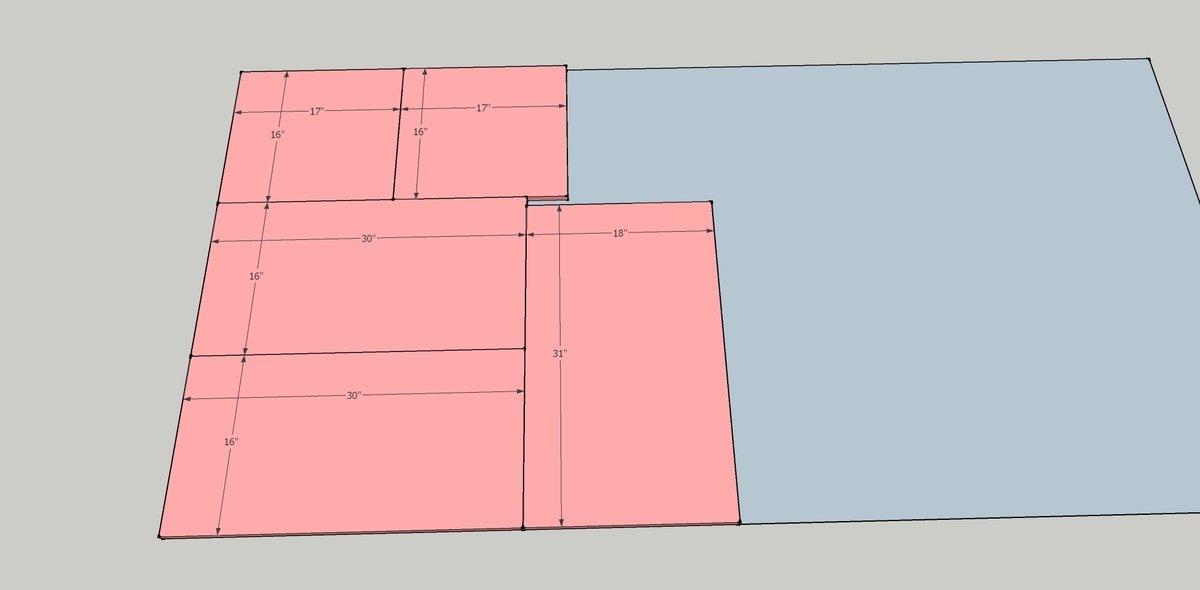
3/4" Plywood
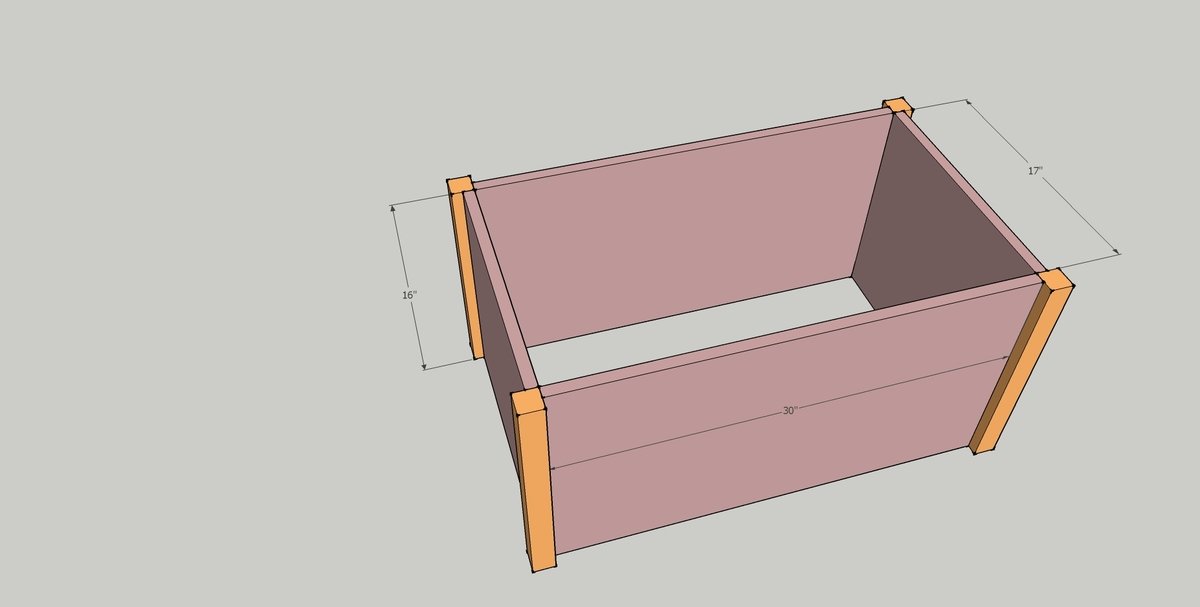
2 @ 16" x 30 "
2 @ 16" x 17"
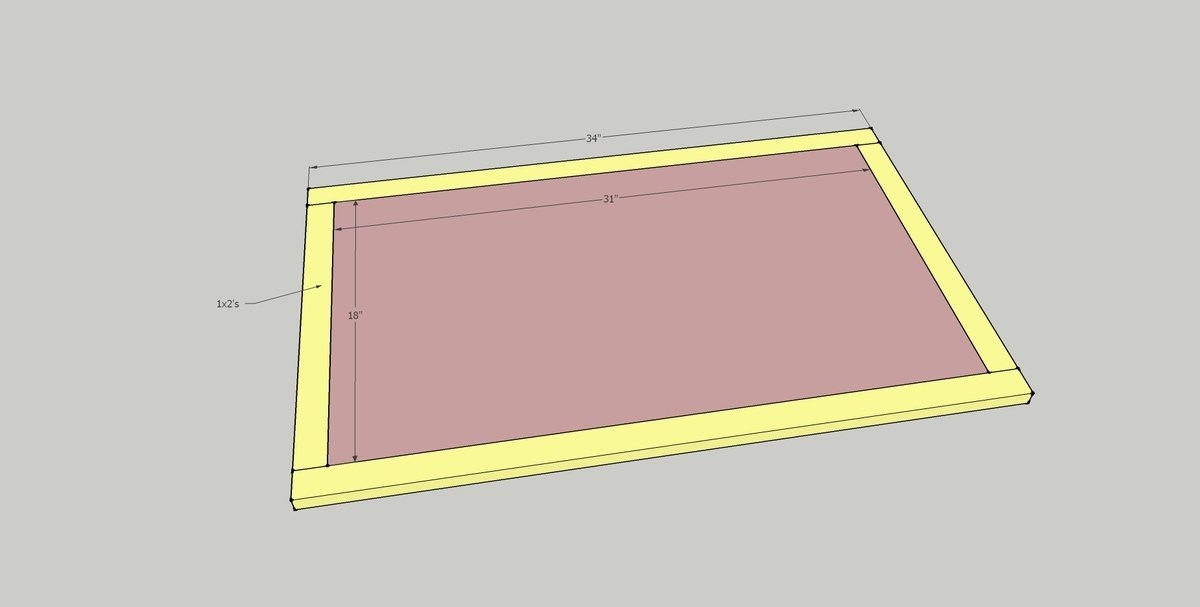
1 @ 18" x 31"
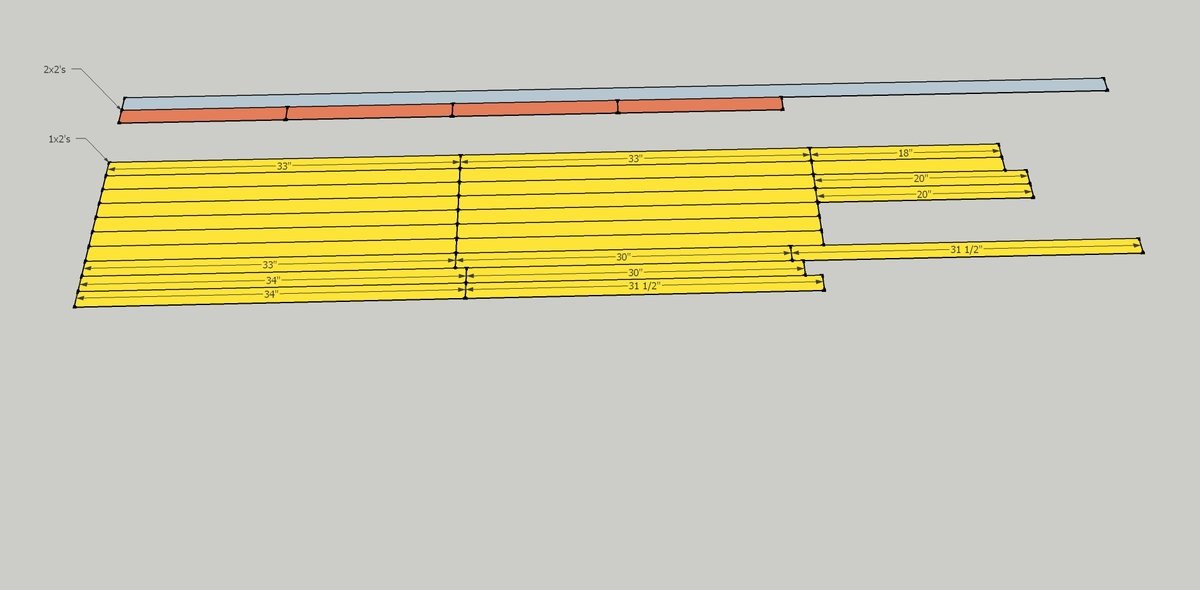
1x2's
15 @ 33"
2 @ 18"
2 @ 20"
2 @ 30"
2 @ 34"
2 @ 31 1/2"
2x2's
4 @ 16"
1x6's
2 @ 20" (refer to step 3 for cutting instructions
Tools
- measuring tape
- square
- pencil
- safety glasses
- hearing protection
- kreg-jig
- drill
- jigsaw
- compound miter saw
- table saw
- sander
Step-by-step Instructions
Step 1
Step 2
Step 3
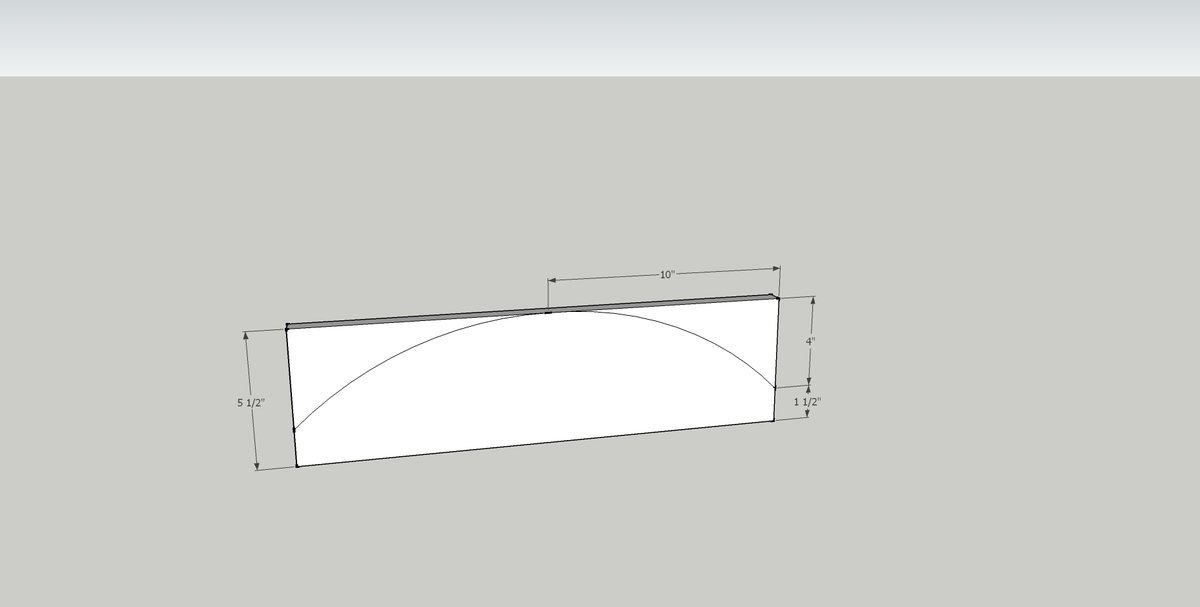
Step 4
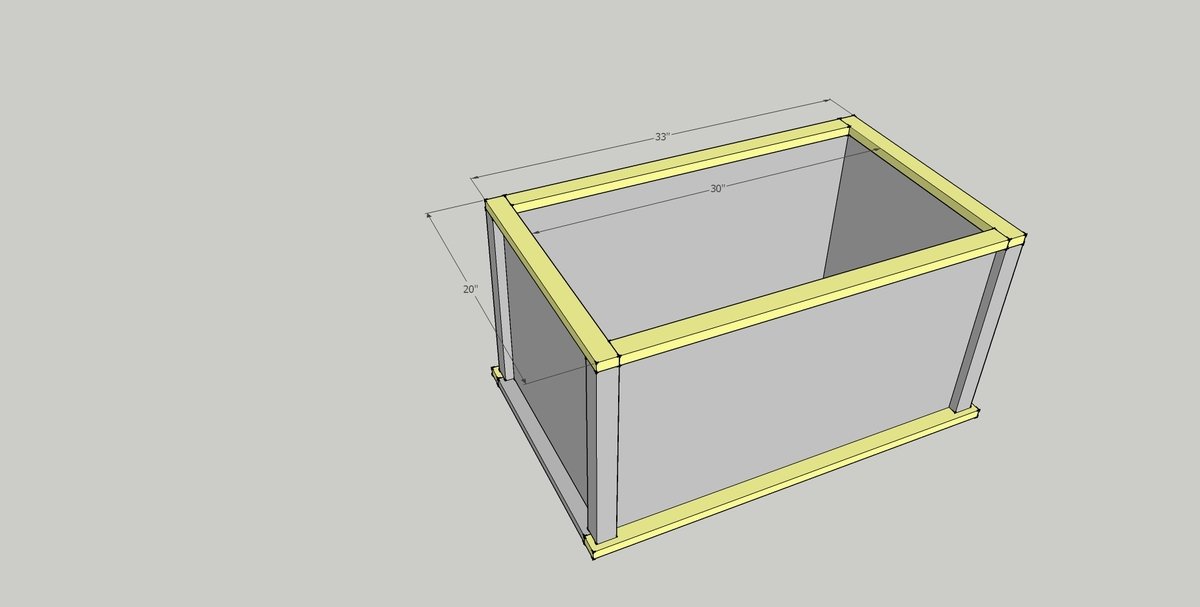
Step 5
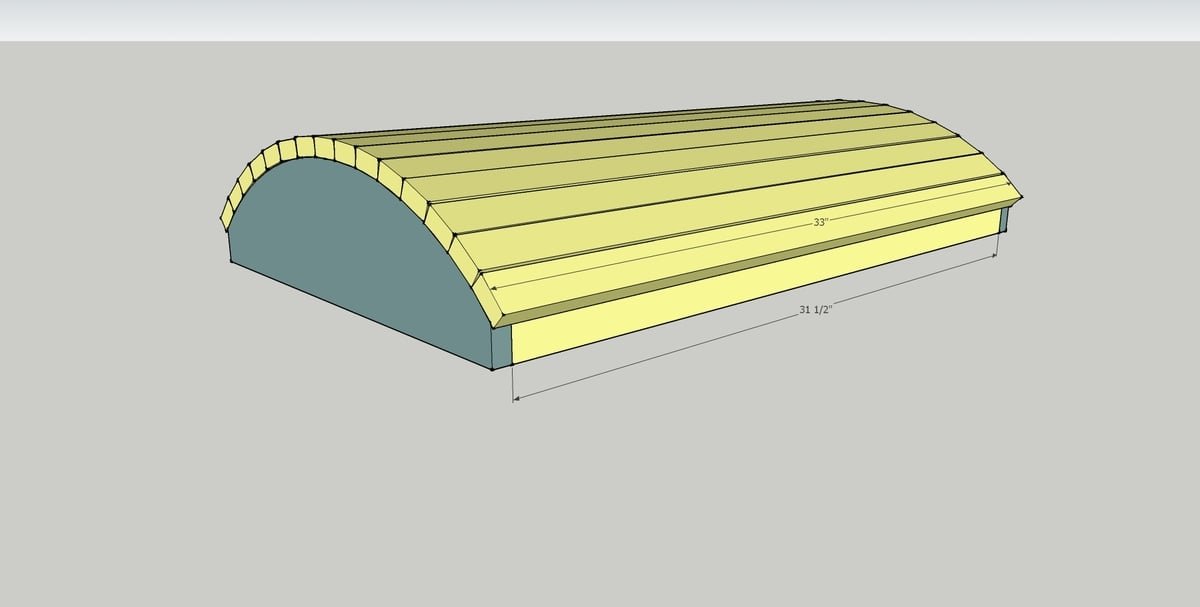
Step 6
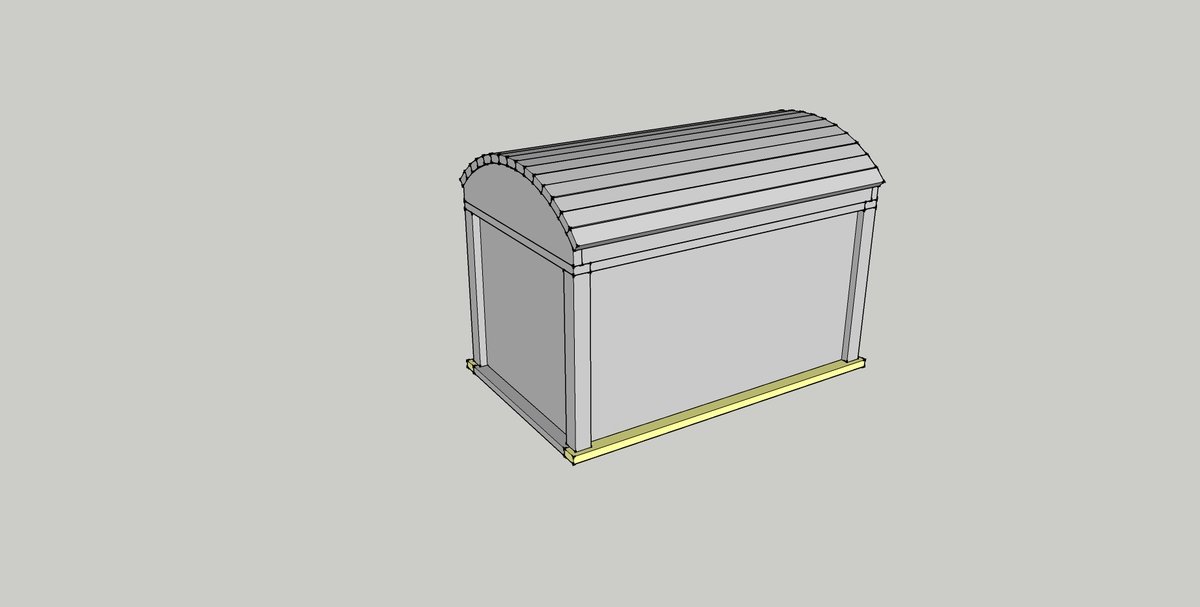
Step 7
Step 8
Finishing
Sand all surfaces, starting with a medium grit and finishing with fine. Wipe off the dust, fill any holes or gaps with wood filler, and sand smooth once dry. Apply primer if you're painting, then finish with your choice of paint or stain and seal with a durable clear topcoat. For outdoor projects, use exterior-rated primer, paint or stain, and sealer so the piece stands up to the weather.
Source (temporary): https://www.ana-white.com/woodworking-projects/pirate-toy-chest