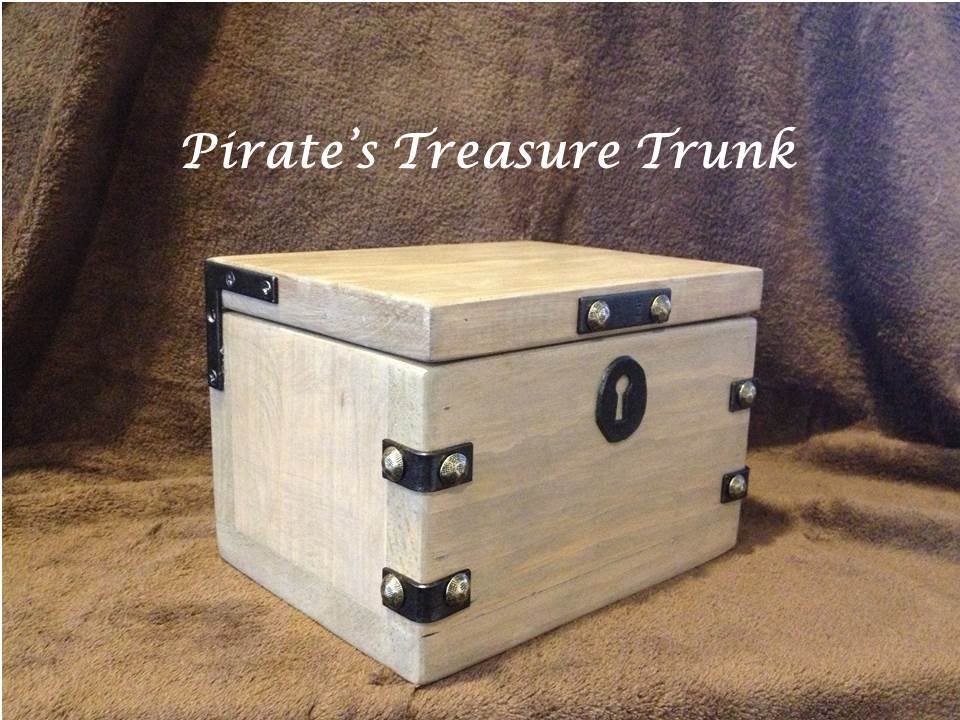
Pirate's Treasure Trunk
Build a Pirate’s Treasure Trunk, using scrap lumber and some decorations
Specifications
| Project type | Other Projects |
|---|---|
| Room | Storage Solutions |
| Style | Primitive or Early American Style Furniture Plans |
| Difficulty | Beginner Projects |
| Estimated cost | scraps |
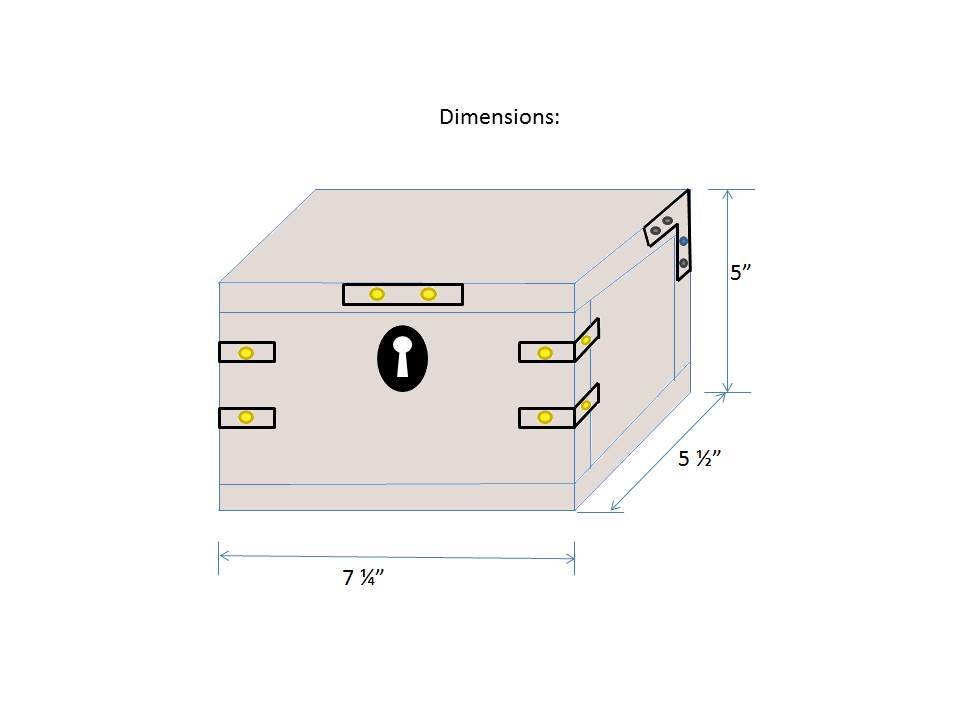
Dimensions
Use the size-specific shopping and cut lists below.
Shopping List
Shopping list: (Check your scrap wood – you’d need 23” of 1x4 and 15” of 1x6, or cut larger pieces of scrap down to the “will be” sizes in the cut list)
1 pc 1x4 at 2 feet long
1 pc 1x6 at 2 feet long
1 ¼” finish nails
Glue (wood glue, plus super glue if using optional decorative hardware)
Finishing materials for desired finish
Hardware:
3/8” x 2” zinc flat braces (2)- ($2.38/ pkg of 4)
OR you could use the larger one:
1/2” x 2 ½” zinc flat corner braces (2) $2.60/ pkg of 4
Optional decorative hardware:
½” x 1” corner bracket (4) -- $2.06/ pkg of 4
2” mending brace (1) – $1.92/ pkg of 4
½” furniture nails – $1.30/ pkg of 25
Cut List
1x4 – 2 pc @ 7 ¼” (front/back – will be 7 ¼” x 3 ½”)
1x4 – 2 pc @ 4” (sides – will be 3 ½” x 4”)
1x6 – 2 pc @ 7 ¼” (top & bottom – will be 5 ½” x 7 ¼”)
Tools
- measuring tape
- square
- pencil
- hammer
- safety glasses
- hearing protection
- drill
- compound miter saw
- nailer
- sander
Step-by-step Instructions
Step 1
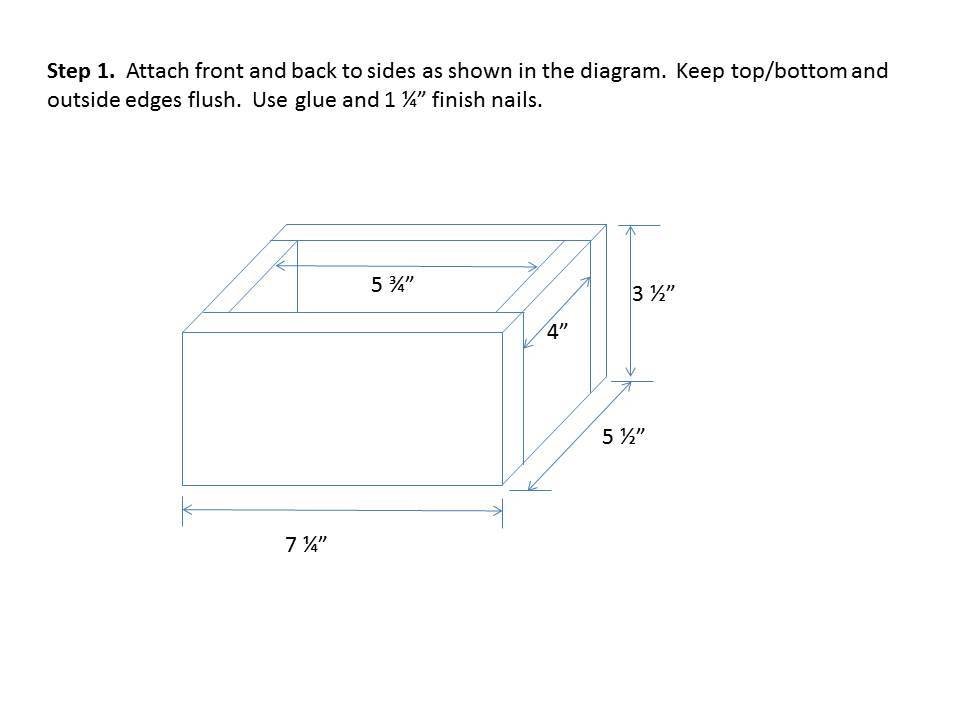
Step 1. Attach front and back to sides as shown in the diagram. Keep top/bottom and outside edges flush. Use glue and 1 ¼” finish nails.
Step 2
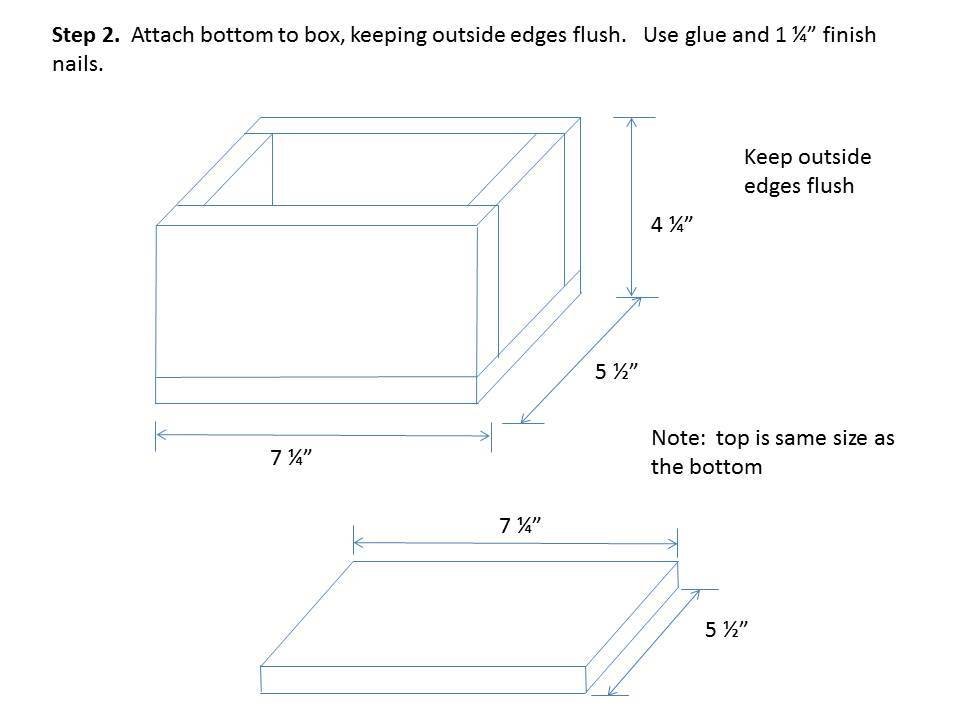
Step 2. Attach bottom to box, keeping outside edges flush. Use glue and 1 ¼” finish nails.
Step 3: Finishing: At this point finish the box and top.
Fill nail holes if desired. Use matching or stainable filler if staining. After filler dries, sand until smooth, remove all sanding residue, and apply desired finish. On this build I used a gray paint wash, then walnut glaze.
Step 4
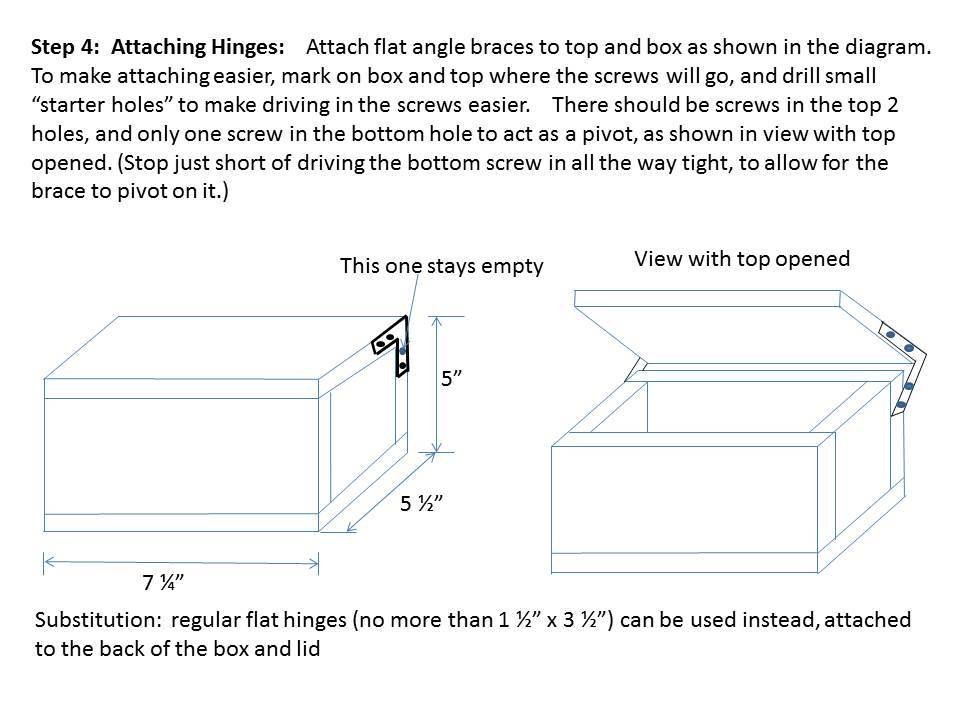
Step 4: Attaching Hinges: Attach flat angle braces to top and box as shown in the diagram. To make attaching easier, mark on box and top where the screws will go, and drill small “starter holes” to make driving in the screws easier. There should be screws in the top 2 holes, and only one screw in the bottom hole to act as a pivot, as shown in view with top opened. (Stop just short of driving the bottom screw in all the way tight, to allow for the brace to pivot on it.) Substitution: regular flat hinges (no more than 1 ½” x 3 ½”) can be used instead, attached to the back of the box and lid
Step 5

Step 6
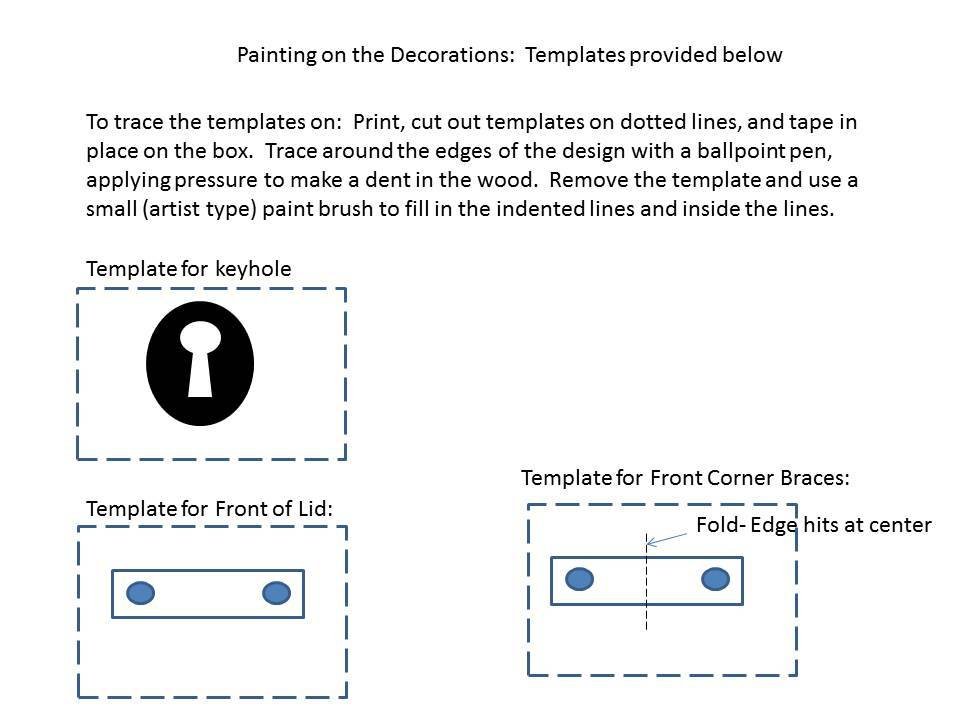
Painting on the Decorations: To trace the templates on: Print, cut out templates on dotted lines, and tape in place on the box. Trace around the edges of the design with a ballpoint pen, applying pressure to make a dent in the wood. Remove the template and use a small (artist type) paint brush to fill in the indented lines and inside the lines.
Step 7
Decorations for Decoupage, you can cut these out and apply with mod podge.

Finishing
Sand all surfaces, starting with a medium grit and finishing with fine. Wipe off the dust, fill any holes or gaps with wood filler, and sand smooth once dry. Apply primer if you're painting, then finish with your choice of paint or stain and seal with a durable clear topcoat. For outdoor projects, use exterior-rated primer, paint or stain, and sealer so the piece stands up to the weather.
Source (temporary): https://www.ana-white.com/woodworking-projects/pirates-treasure-trunk