Planked Wood Sideboard
to build a huge wood sideboard using common lumber and minimal tools. Step by step plans include diagrams, shopping and cut list and lots of reader submitted photos.
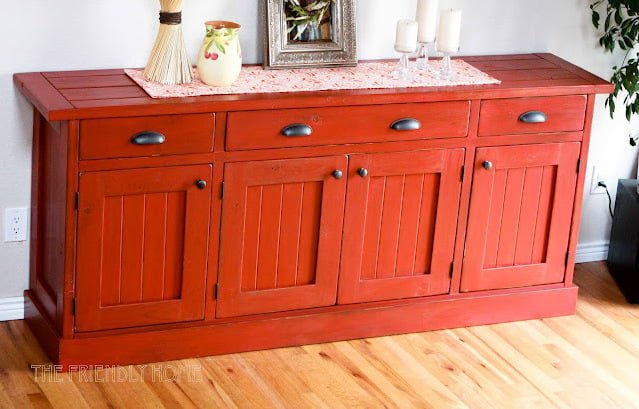
Specifications
| Project type | Buffet, Sideboard and Credenza Plans |
|---|---|
| Room | dining room |
| Style | Farmhouse Furniture |
| Difficulty | Advanced |
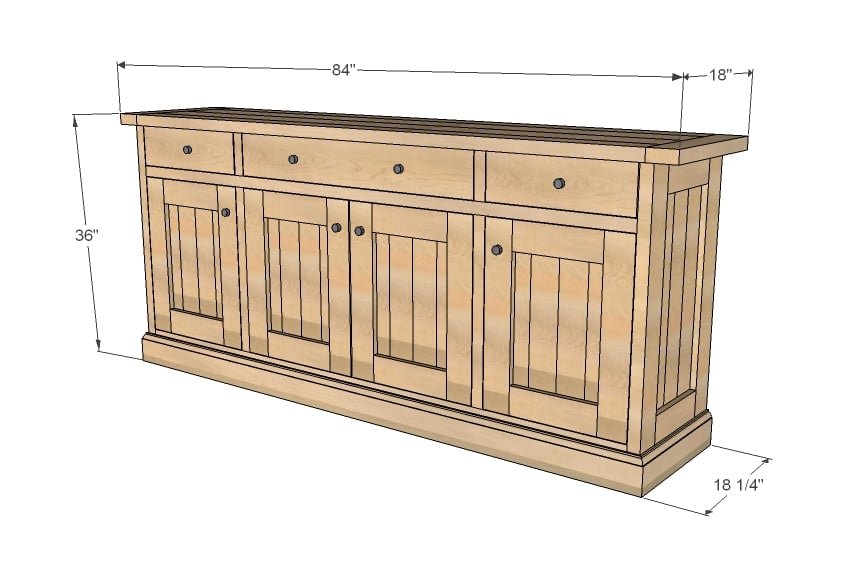
Dimensions
Use the size-specific shopping and cut lists below.
Shopping List
- 6 – 2x4 @ 8 feet long
- 2 – 2x6 @ 8 feet long
- 7 – 1x4 @ 8 feet long
- 2 – 1x2 @ 8 feet long
- 1 – 1x6 @ 6 feet long
- ¼” thick x 3 ½” wide boards for door panels or ¼” plywood or paneling
- 1 – sheet ¾” hardwood plywood
- 10 feet of 4 ¼” base moulding
- 3 – 15” drawer slides
- 2 ½” pocket hole screws
- 1 ¼” pocket hole screws
- 1 ¼” brad nails
- 2” brad nails
- 1 – sheet ¼” plywood
Cut List
- 4 - 2x4 @ 34 ½” (Legs)
- 4 – 2x4 @ 10 ½” (Panel ends)
- 6 – 1x4 @ 23 ½” (Side Panels)
- 2 – 2x4 @ 75 ½” (Bottom Supports)
- 1 – ¾” plywood @ 16 ¾” x 75 ½”
- 2 – ¾” plywood @ 16 ¾” x 30 ¼”
- 2 – 1x4 @ 18 1/8”
- 2 – 1x2 @ 75 ½”
- 2 – 1x2 @ 5 5/8”
- 2 – 1x2 @ 22 3/8”
- 2 – 2x4 @ 18”
- 2 – 2x4 @ 77”
- 2 – 2x6 @ 77”
- 8 – 1x4 @ 22 ¼”
- 8 – 1x4 @ 11” ¼” x 3 ½” hobby stock for backs of doors or ¼” plywood or paneling
- 2 – 1x4 @ 16 ¾”
- 6 – 1x4 @ 15 ½”
- 2 – 1x4 @ 33 3/4” (Measure and fit)
- 4 – 1x4 @ 15 5/8” (Measure and fit)
- 1x6 for drawer faces – cut to fit
- 1 – ¼” plywood @ 77” x 32” (Back)
Tools
- measuring tape
- square
- pencil
- safety glasses
- hearing protection
- kreg-jig
- drill
- circular saw
- compound miter saw
- nailer
- sander
- level
- countersink drill bit
Step-by-step Instructions
Step 1
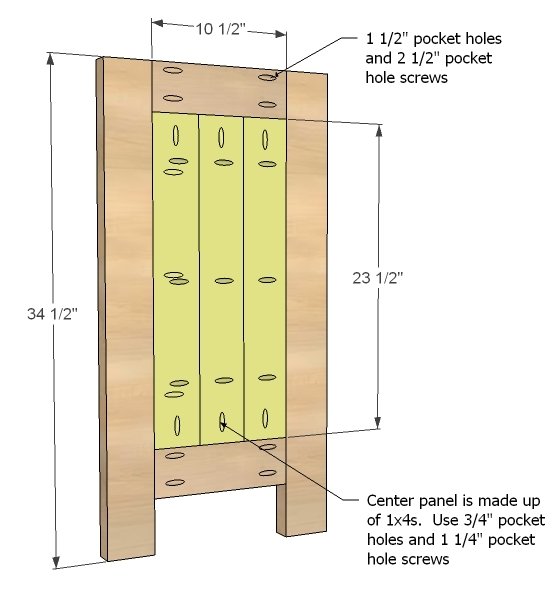
Starting on the inside 1x4 panel and working your way out to adding legs, build your ends with 1 1/2" pocket holes and 2 1/2" pocket hole screws, hiding your screws on the insides. Keep all edges flush. Remember that the backs are flush, but the outer side is not, with the 1x4 panel inset.
Step 2
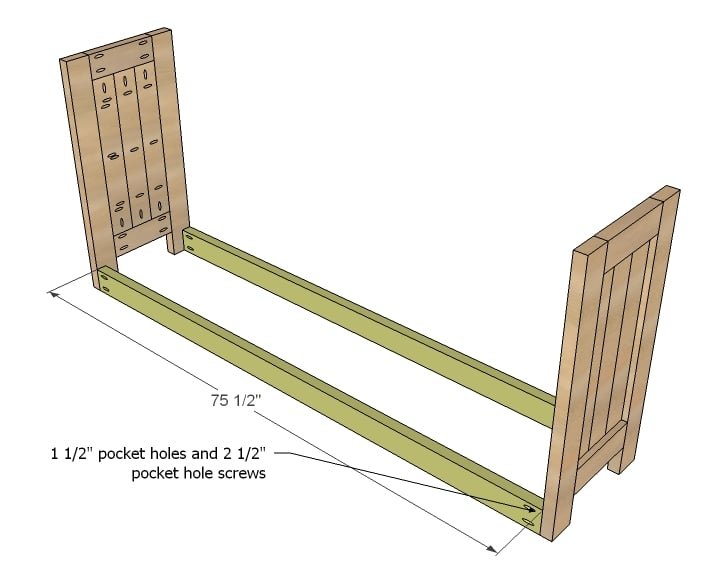
I really wanted this sideboard to NEVER sag in the middle, so these boards are more for support than anything. I recommend attaching with 1 1/2" pocket holes and 2 1/2" pocket hole screws from the back side to hide. Set aside, we'll work on the storage part now.
Step 3
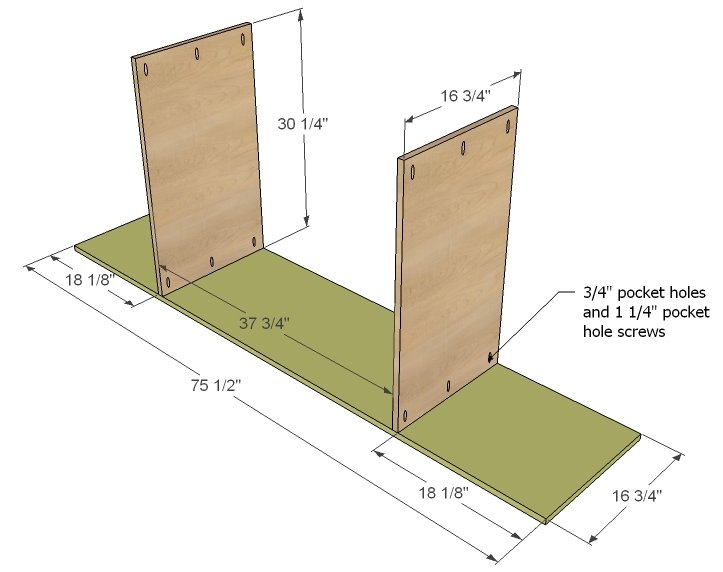
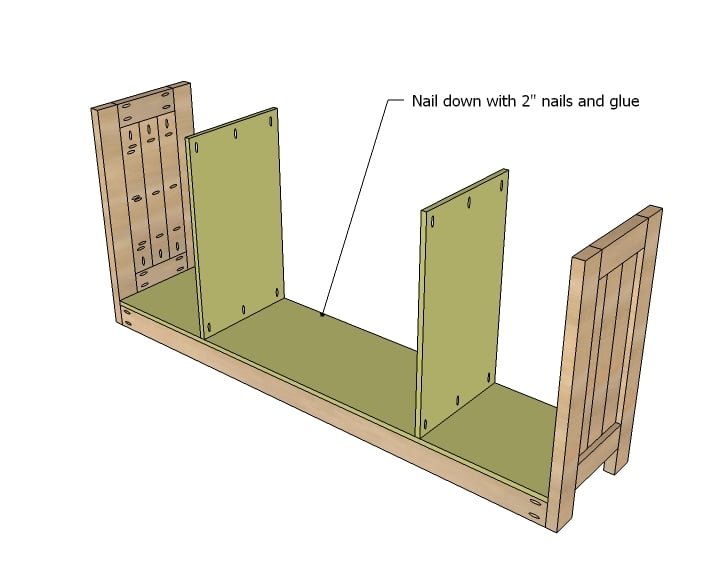
For the storage part, attach plywood dividers to bottom very carefully, making sure joints are square.
Step 4
Then fit the center divider into the base as shown above. Fit flush to back.
Step 5
Step 6
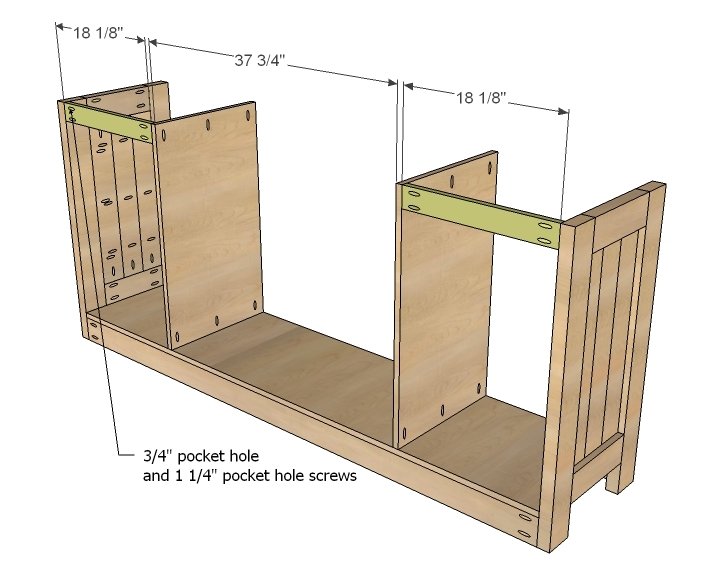
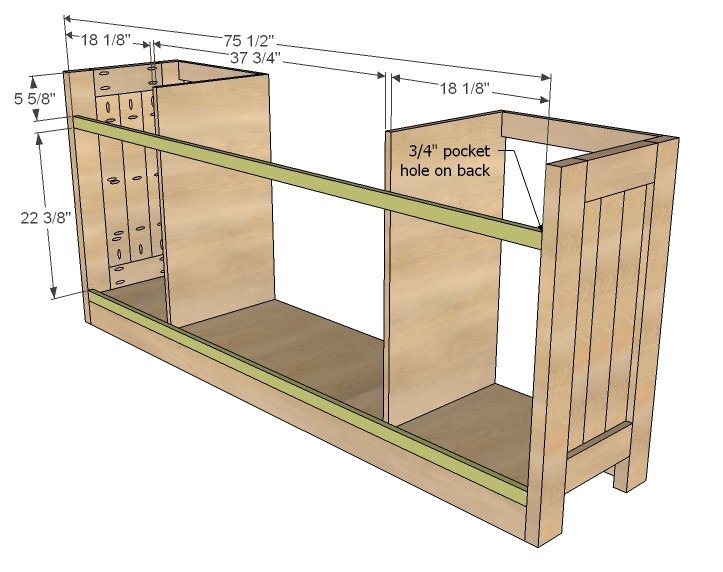
On the front, add trim, being very careful to make sure your trim is square and straight. Remember, we've got drawers to fit.
Step 7
The remaining front trim is flush to the inside of side cabinets, overhanging the center cabinet.
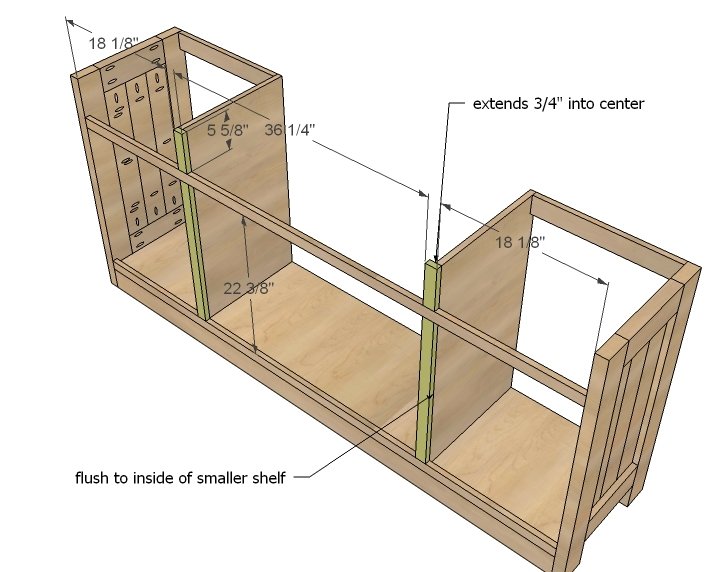
Step 8
Build top as shown in diagram.
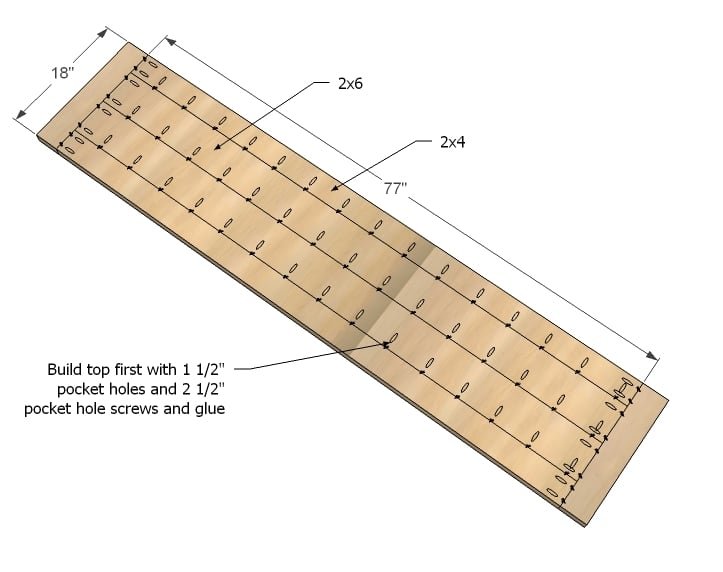
Step 9
You can attach top now, or as Hillary recommends, attach top after installing drawers.
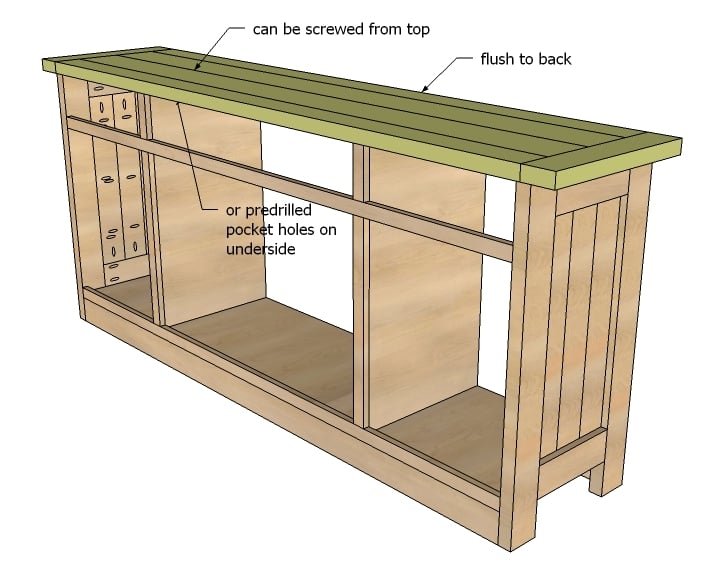
Step 10
Cut baseboard, mitering corners to fit bottom. Nail on with glue.
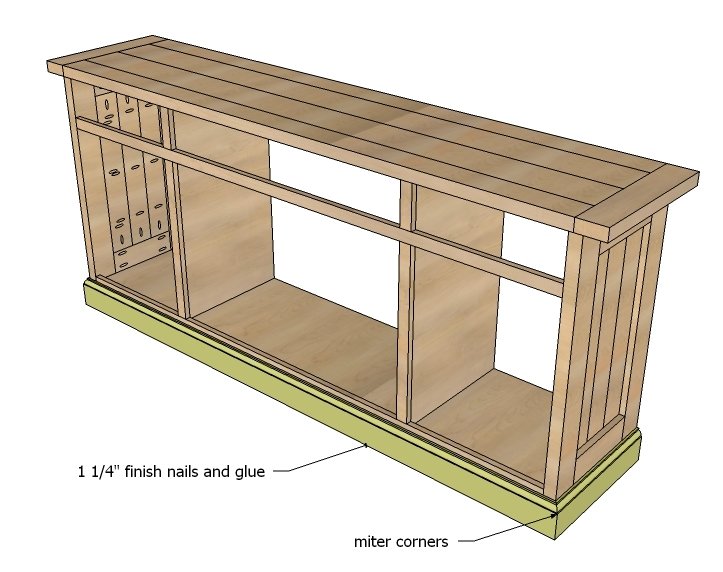
Step 11
Build your door frames as shown above.
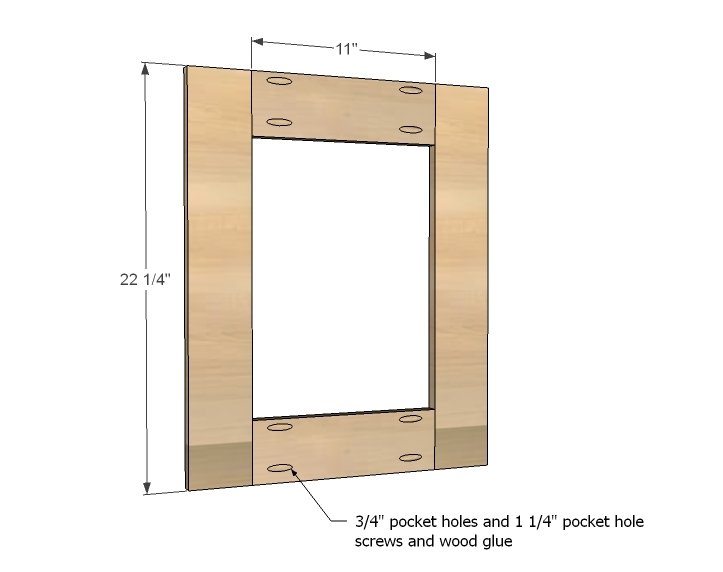
Step 12
Then attach hobby stock to centers to complete doors.
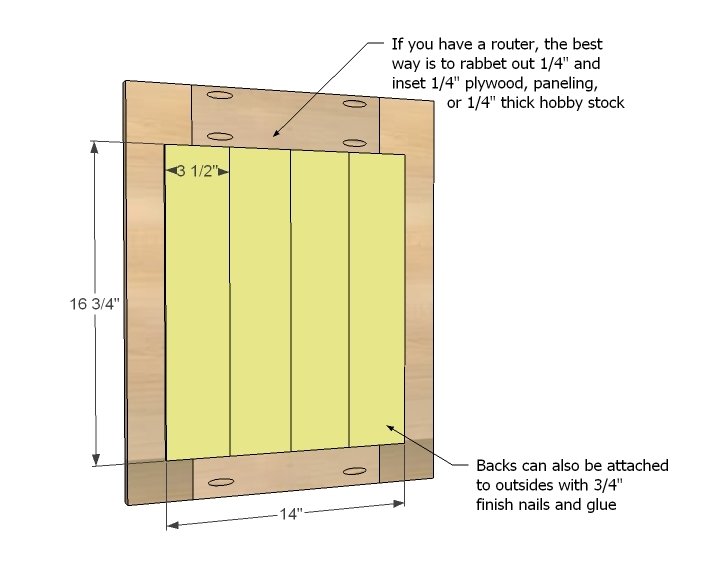
Step 13
These are for the drawers.
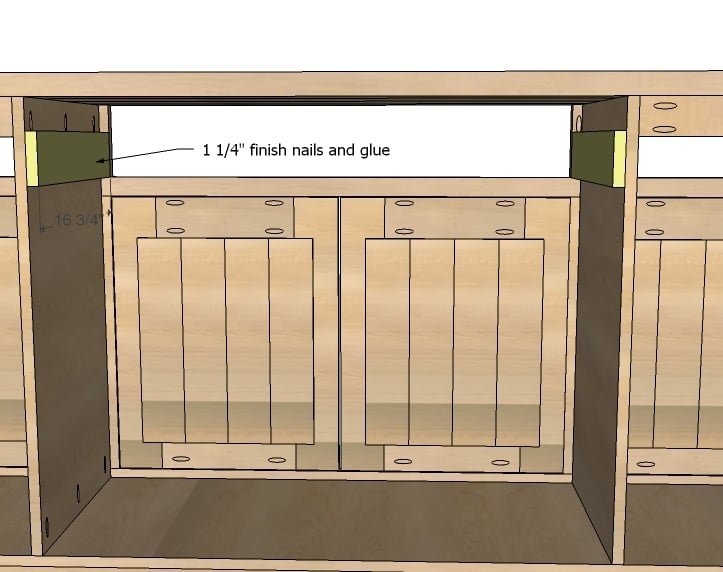
Step 14
Build drawers to fit openings. Remember, most drawer slides require 1/2" clearance on each side, or 1" overall. It's always a good idea to double check measurements with diagrams before building drawers. Here is a video on installing drawer slides
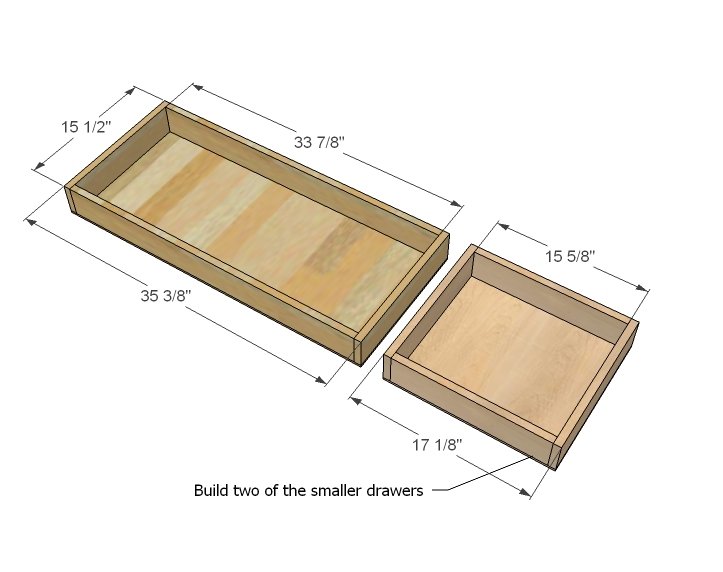
Step 15
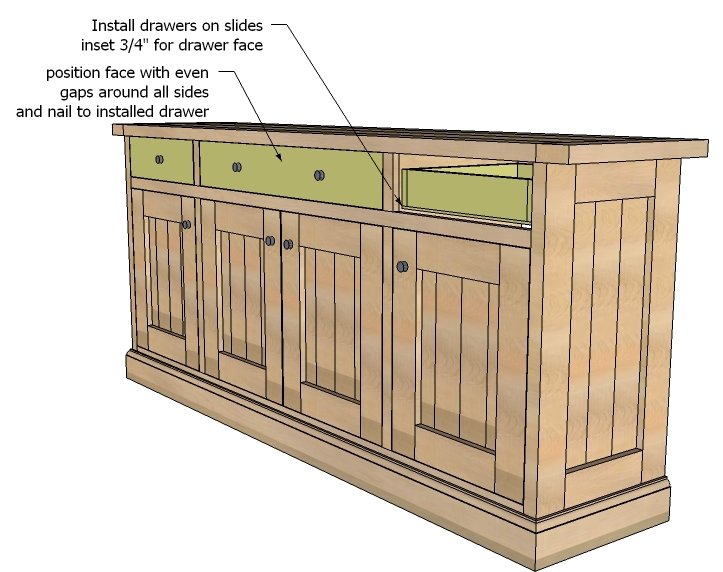
Install drawers with slides, set in 3/4" for the drawer faces. Then cut drawer faces and attach to drawers with 1 1/4" finish nails and glue.
Step 16
Add back. I really loved how Hillary inset her back.
Step 17
And finally, add shelves.
Finishing
Sand all surfaces, starting with a medium grit and finishing with fine. Wipe off the dust, fill any holes or gaps with wood filler, and sand smooth once dry. Apply primer if you're painting, then finish with your choice of paint or stain and seal with a durable clear topcoat. For outdoor projects, use exterior-rated primer, paint or stain, and sealer so the piece stands up to the weather.
Source (temporary): https://www.ana-white.com/woodworking-projects/planked-wood-sideboard