PLANS: A Murphy Bed YOU Can Build, and Afford to Build
Do you need a guest sleeping spot, but don't have a guest room? Or is your guest room also a nursery or office? Add a hidden murphy bed with this easy project plan. The bed folds away into a cabinet that looks like an armoire. Easy instructions, no special hardware required.
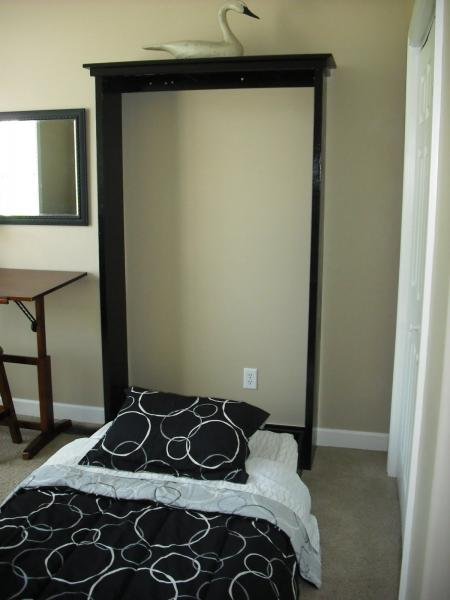
Specifications
| Project type | Beds and Bed Frames |
|---|---|
| Room | Bedroom |
| Style | Cottage Style Furniture Plans |
| Difficulty | Advanced |
| Estimated cost | $100-$150 |
Dimensions
Use the size-specific shopping and cut lists below.
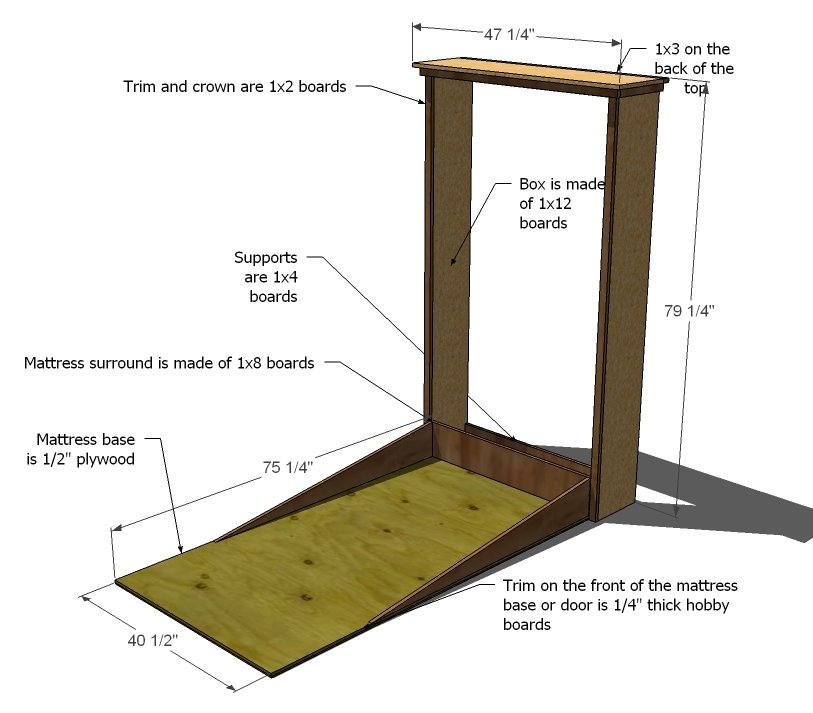
Shopping List
1 – Sheet of 1/2″ Plywood or MDF
3 – 1×12, 8′ Long
1 – 1×8, 8′ Long
1 – 1×4, 8′ Long
1 – 1×3, 8′ Long
3 – 1×2, 8′ Long
2″ Screws
2″ Nails
1 1/4″ Nails
5/8″ Brad Nails
Glue
Wood Filler
Sand Paper
1/4″ Thick Hobby Boards
Hinges (preferably heavy duty door hinges or continuous piano hinge)
Heavy duty magnetic clasp to keep the bed from falling open
Optional compression hinges to slowly lower the bed in place
Cut List
Cut List for the “Box”
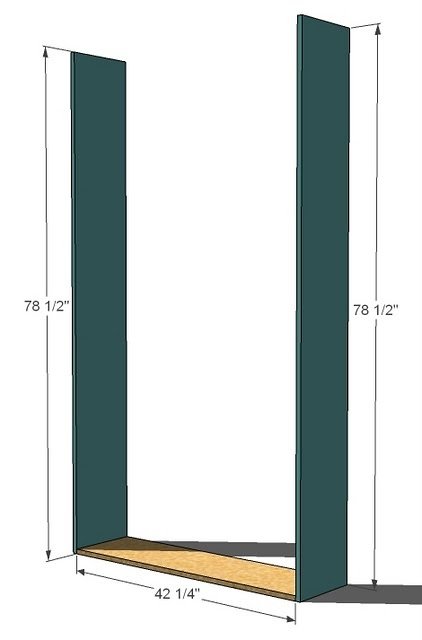
2 – 1×12 @ 78 1/2″ (Sides)
1 – 1×12 @ 42 1/4″ (Bottom)
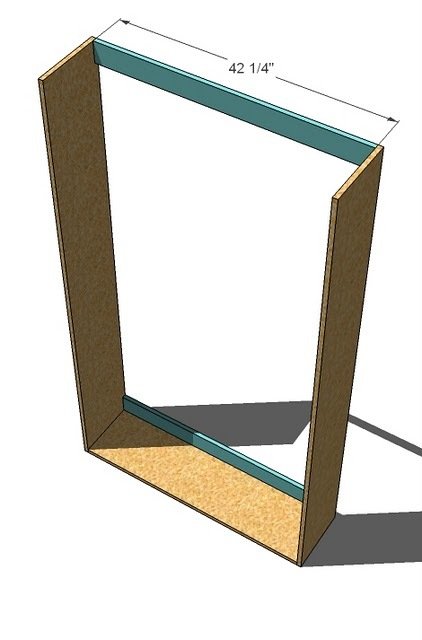
2 – 1×4 @ 42 1/4″ (Back Supports)
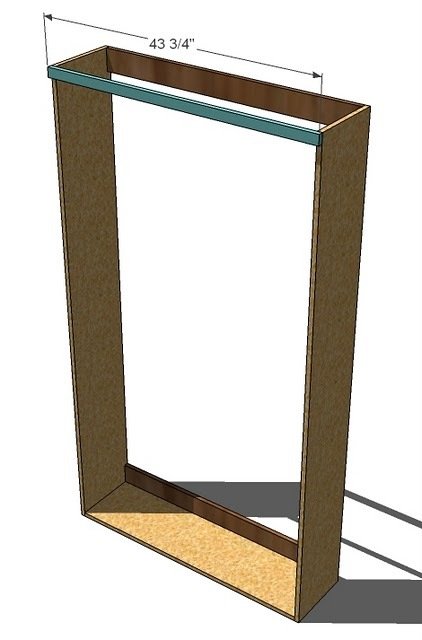
1 – 1×2 @ 43 3/4″ (Front Support Trim, Top)
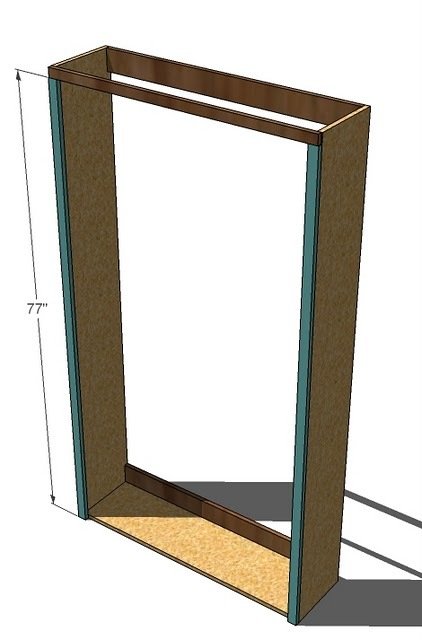
2 – 1×2 @ 77″ (Side Trim)
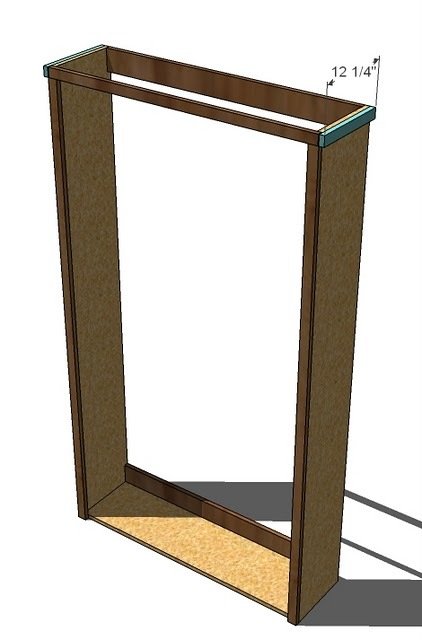
2 – 1×2 @ 12 1/4″ (Top Side Trim)
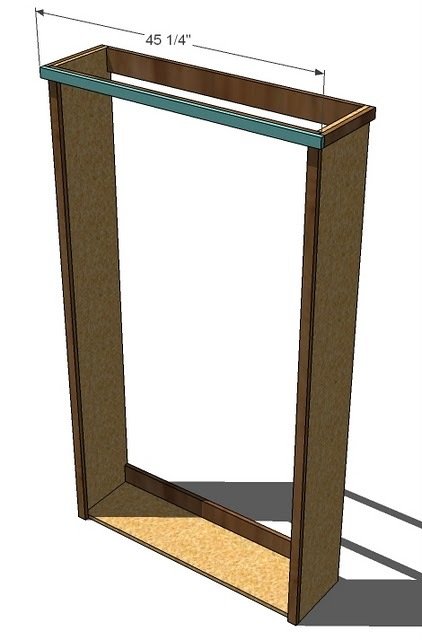
1 – 1×2 @ 45 1/4″ (Front Top Trim)
1 – 1×3 @ 47 1/4″ (Top, Back)
1 – 1×12 @ 47 1/4″ (Top, Front)
Cut List for the “Bed”
1 – 1/2″ Plywood @ 40 1/2″ x 76 1/2″ (Back)
1 – 1×8 @ 40 1/2″ (Bottom)
1 – 1×8 @ 55″ (Cut Length wise at a diagonal as shown in the plan to get 2)
Trim as desired with 1/4″ thick hobby stock
Tools
- measuring tape
- square
- pencil
- hammer
- safety glasses
- hearing protection
- kreg-jig
- drill
- circular saw
- nailer
- sander
Step-by-step Instructions
Step 1
Build the Box. Using the 2″ screws and glue, fasten the sides to the bottom
Step 2
Back Supports. Fasten the back supports to the box, flush with the top and back. Also fasten through the bottom of the box into the bottom support. Use 2″ screws and glue.
Step 3
Front Support. Fasten the front support to the box as shown above. Top edges are flush. Use 2″ screws and glue.
Step 4
Side Trim. Using 2″ nails and glue, fasten the side trim to the box. Outside edges are flush. You will need to also fasten to the bottom of the box and fasten through the top of the top trim into the top end edge of the side trim.
Step 5
Step 6
Front Top Trim. Fasten the front top trim in place using 1 1/4″ nails and glue. Keep top and outside edges flush. Use 2″ nails on the ends to fasten to the side trim and the sides.
Step 7
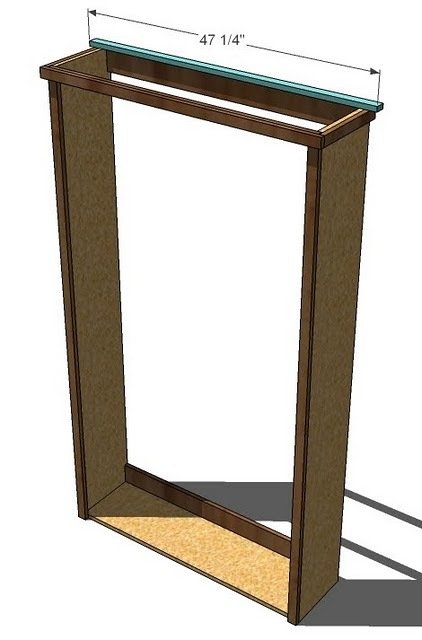
Top, Back. Using 2″ nails and glue, fasten the top back piece to the top, leaving 1″ overhang both ends. Back will be flush.
Step 8
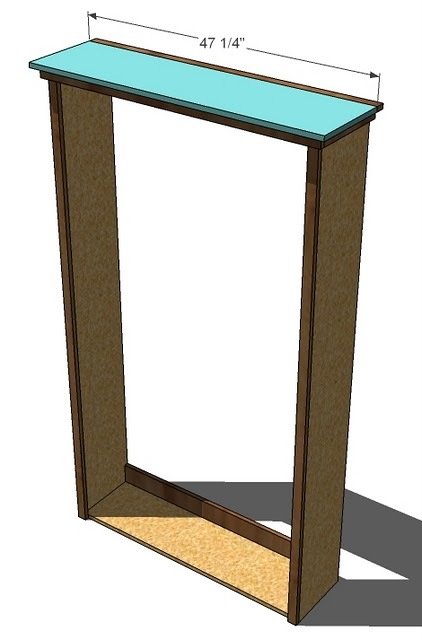
Top, Front. Leaving a 1″ overhang on front and sides, attach the top as you did the top in step 7.
Step 9
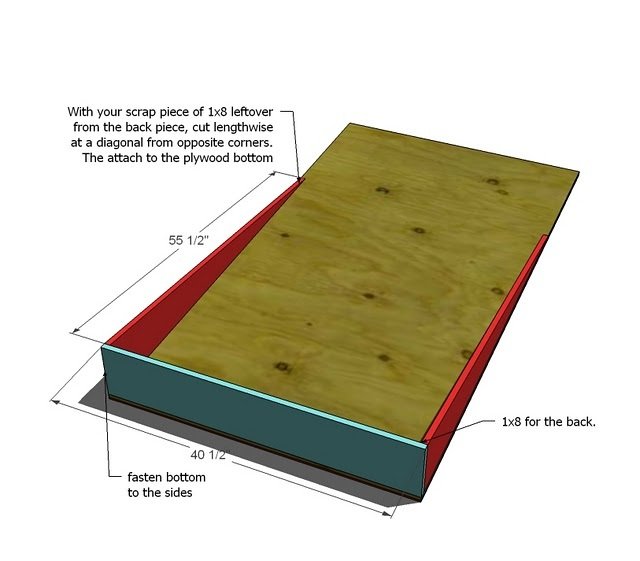
Mattress Box. Build the mattress box by using 2″ screws to screw the bottom 1×8 board to the plywood bottom. Use glue. Then fasten the sides to the bottom and the back using 2″ screws and glue. The sides are simply the scrap 1/8, cut at a diagonal to create two boards. You can cut with a jigsaw or a circular saw.
Step 10
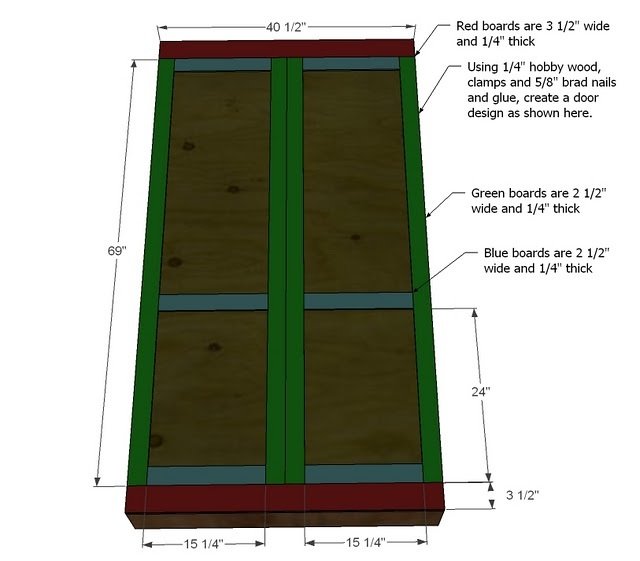
Door Decorations. Using 1/4″ thick hobby stock, fasten your desired door pattern to the face of the door (mattress bottom). Secure with glue, 5/8″ nails and clamps and let dry. Dimensions shown are for the sample pattern above.
Step 11
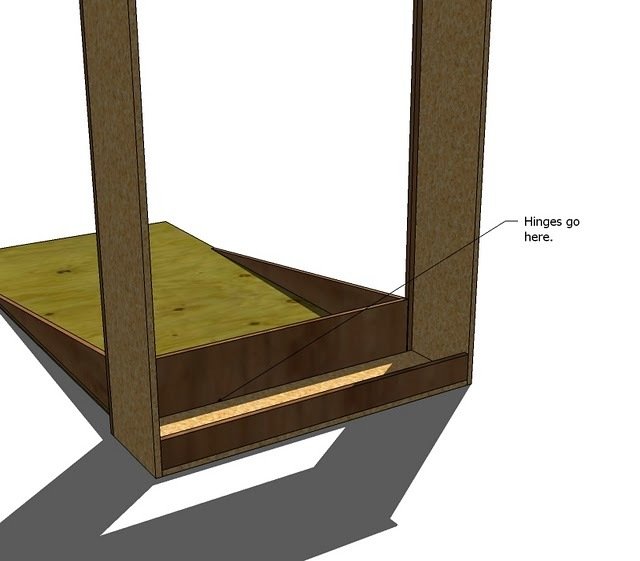
Hardware. Use the hinges to attach the mattress box to the wall box as shown above. You should also use a clasp to keep the door from falling open when shut. You can also use support hinges to keep the door from free falling open when unlatched.
Step 12
Finishing. Fill any nail or screw holes with wood filler and sand and finish as desired.
Step 13
Installation. You will need to use screws to fasten through the 1×4 support boards into a stud in the back wall. This recommended on the top and bottom. Also recommended is a wide elastic strap secured to the plywood door to keep the top of the mattress in place when the door is closed. Fits a standard twin mattress 39″ x 75″
Finishing
Sand all surfaces, starting with a medium grit and finishing with fine. Wipe off the dust, fill any holes or gaps with wood filler, and sand smooth once dry. Apply primer if you're painting, then finish with your choice of paint or stain and seal with a durable clear topcoat. For outdoor projects, use exterior-rated primer, paint or stain, and sealer so the piece stands up to the weather.
Source (temporary): https://www.ana-white.com/woodworking-projects/plans-murphy-bed-you-can-build-and-afford-build