Plant Caddy
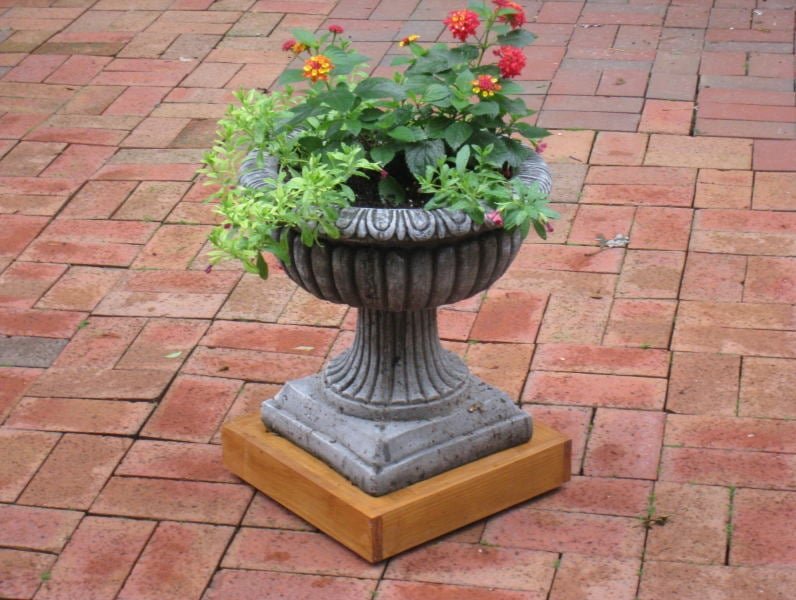
My wife likes to move her large flowers pots around for variety and so they get equal amounts of sun. But the largest pots with dirt and plants are pretty heavy, likely around 60-70 lbs. Commercial plant caddies are usually kind of junky and virtually all have inadequate plastic furniture casters that don't roll right and quickly break. Here is a design that virtually hides the stronger wheels, creates a platform look, and rolls much more easily than the commercial ones. The most expensive part of this project will be the wheels. We picked up 4 screw-attached wheels at Harbor Freight for $10. They carry various sizes and types; we went with these 1 5/8 inch wheels: If you choose larger wheels, they will no doubt roll a little easier over bumps but you will need to live with them being more visible or you will need to buy or cut wider boards than this design calls for to hide them. A decision is also required as to what type of wood to use. This project will include two approaches, one simpler, sturdier, and does not require a table saw. The other approach is cheaper and sturdy enough. For the simpler approach: You will need 10 feet of 1 X 3 of the wood species of your choice. All boards are 2 1/2 inches wide with either approach. My local Home Depot has 6 foot long X 6 inch wide X 5/8 dog-ear cedar fence slats for and incredible $1.39. One of these is enough for 1 plant caddy, with a little left over. There are 2 downsides to using this wood. First, it is rough wood; not finished on the sides. The other is its 6 inches wide and needs to be ripped to 2 1/2inch widths. But it's $1.39. I am lucky and have both a table saw and power planer so neither of these issues caused me problems.
Specifications
| Project type | Outdoor Projects |
|---|---|
| Room | Outdoor |
| Style | Modern Style Furniture Plans |
| Difficulty | Intermediate |
| Estimated cost | Under $20 |
Dimensions
Use the size-specific shopping and cut lists below.
Shopping List
You will need 1" coarse Kreg Screws for the cedar plank.
1 1/4 inch coarse screws may be better for the 3/4 lumber version.
Cut List
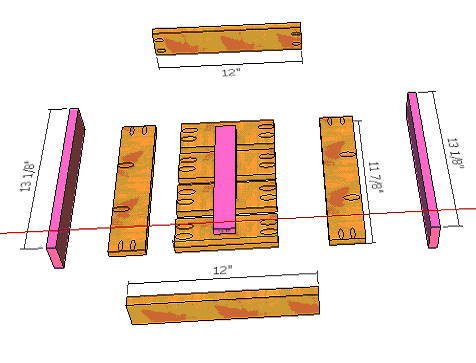
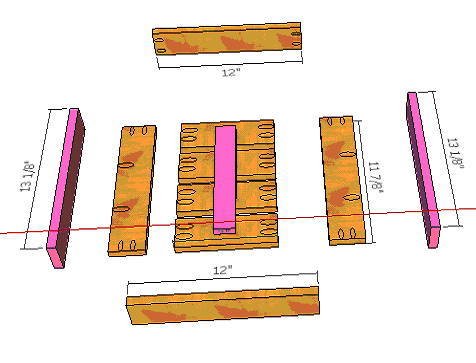
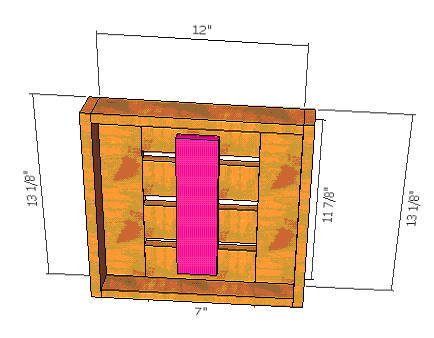
4) @ 7 inch Inner boards
2) @ 11/7/8 side boards
2) @ 12 short outer boards
2) @ 13 1/8 long outer boards
1) @ 10 inch cross board
Tools
- measuring tape
- square
- pencil
- safety glasses
- kreg-jig
- drill
- jigsaw
Step-by-step Instructions
Step 1
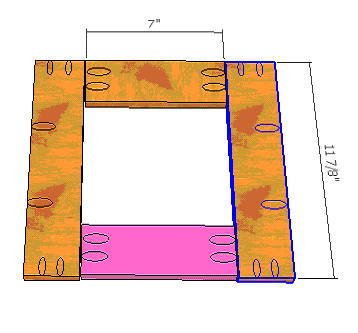
This image shows where the pocket screws go: All boards except the 3 pink boards (outer 13 1/8 boards and cross brace) have pocket holes.
The assembly order seems to work best as follows:
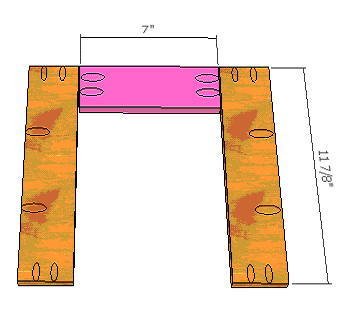
Attach the topmost 7 inch inner board to the 11 7/8 side boards with pocket screws
Step 3
Next pocket screw the bottom-most i7 inch inner board to the side boards.
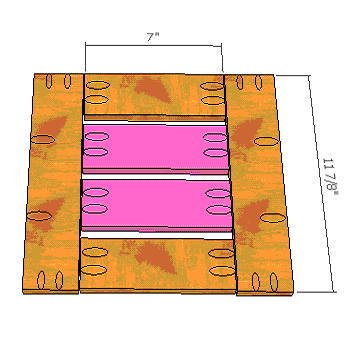
Step 4
Then pocket screw each of the center 7 inch inner boards
Step 5
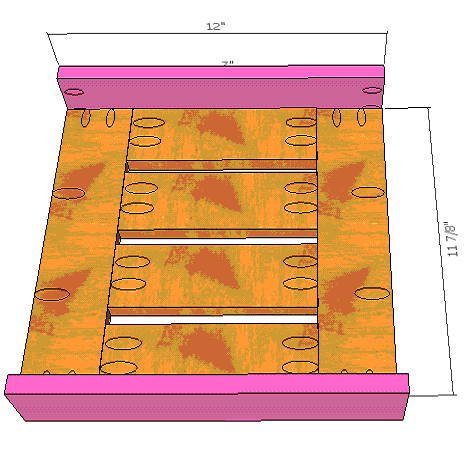
Step 6
Using both the pocket screws in the 12 inch short outer boards and the pocket screws in the sides of the 11 1/7/8 side boards, attach the 13 1/8 long outer boards.
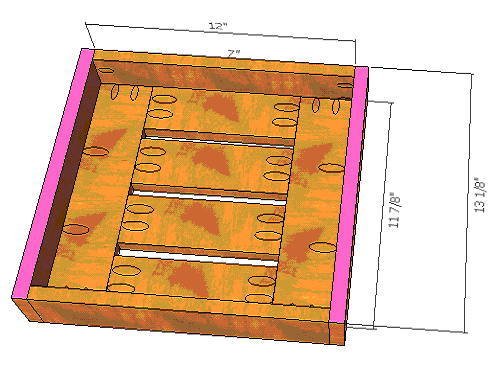
Step 7
Now attach the cross brace, this time with regular wood screws.
Step 8
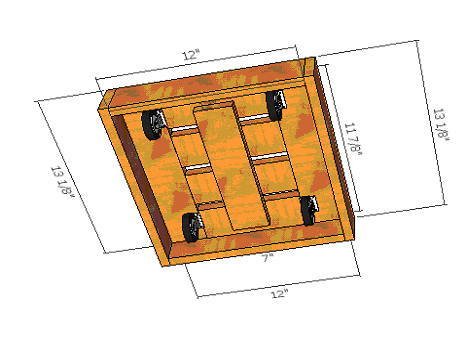
Finally screw in the wheels. (Make sure to leave enough room for the wheel to turn a complete 360 degrees. Image below does not account for this) This part can be a little tricky as the screw holes for the wheels need to placed far enough into the boards to prevent breakout. It will be close, but it will fit with the suggested wheels
Finishing
Sand all surfaces, starting with a medium grit and finishing with fine. Wipe off the dust, fill any holes or gaps with wood filler, and sand smooth once dry. Apply primer if you're painting, then finish with your choice of paint or stain and seal with a durable clear topcoat. For outdoor projects, use exterior-rated primer, paint or stain, and sealer so the piece stands up to the weather.
Source (temporary): https://www.ana-white.com/woodworking-projects/plant-caddy