Planter Box with Trellis
Build your own planter box with trellis. with diagrams, shopping list and cut list.
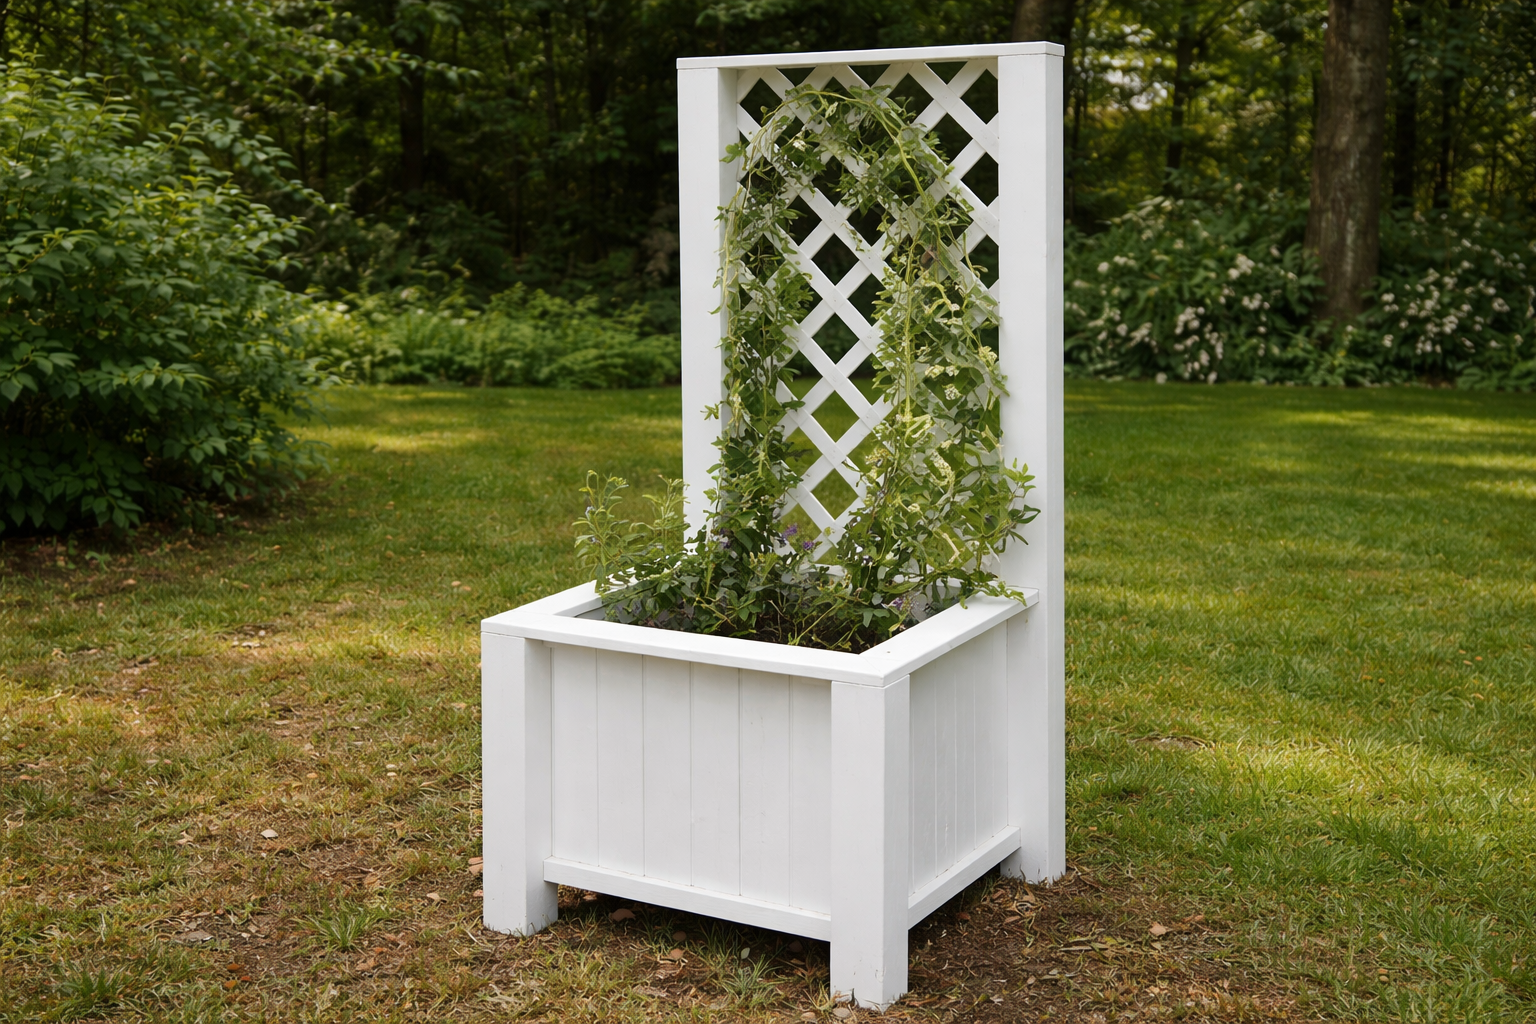
Specifications
| Project type | Planters, Garden Beds, and Greenhouses |
|---|---|
| Room | Outdoor |
| Style | Modern Style Furniture Plans |
| Difficulty | Beginner Projects |
| Estimated cost | $50 - $100 |
Dimensions
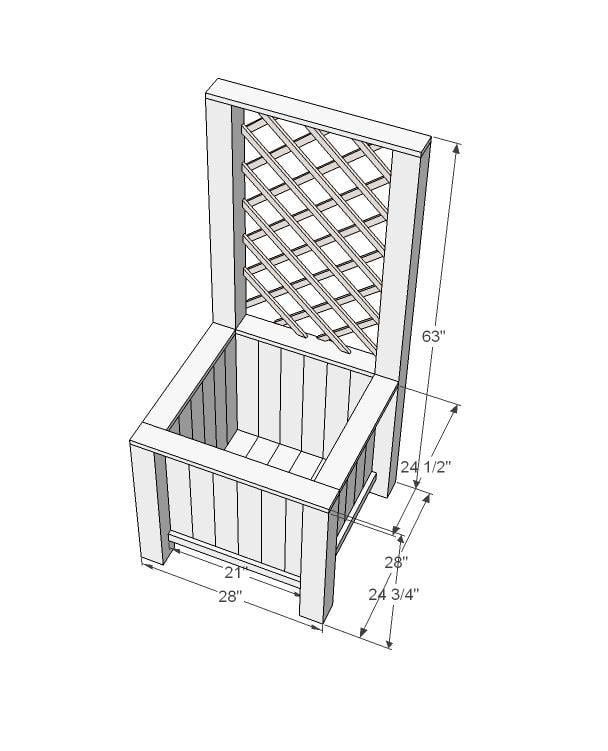
Use the size-specific shopping and cut lists below.
Shopping List
- 168" of 1x2 (2@8' total OR 1@8'/1@6' OR 1@14')
- 706" of 1x4 (59' total)
- 172 1/2" of 4x4 (14' 6" total OR 2@8')
- 21" x 37 1/2" trellis (or furring strips or yardsticks)
- 14-20 L-brackets
- 1 1/4" Nails (optional)
- 8-12 4" production screws (optional)
Cut List
- 8 - 1x2 @ 21" (Box Wall Trim)
- 1 - 1x4 @ 28" (Box Trim, Front)
- 3 - 1x4 @ 21" (Box Trim, Sides & Back)
- 6 - 1x4 @ 22 1/2" (Box Bottom)
- 24 - 1x4 @ 20" (Box Walls)
- 2 - 4x4 @ 24" (Front Posts)
- 2 - 4x4 @ 62 1/4" (Back Posts)
- 21" x 37 1/2" piece trellis (or yardsticks or furring strips)
Tools
- measuring tape
- square
- safety glasses
- drill
- level
Step-by-step Instructions
Step 1
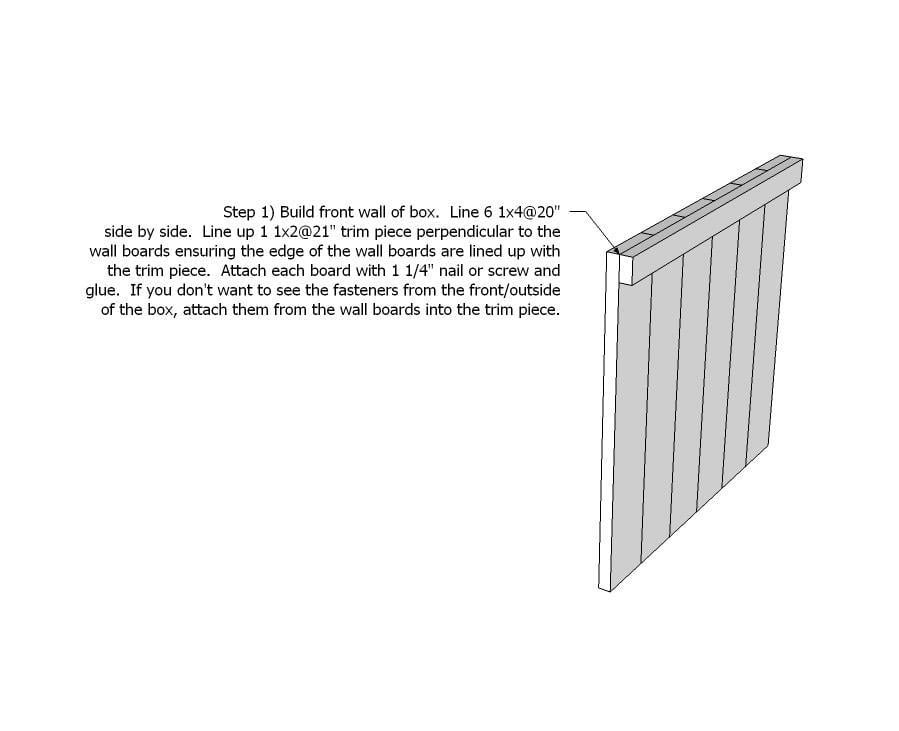
Step 1) Build front wall of box. Line 6 1x4@20" side by side. Line up 1 1x2@21" trim piece perpendicular to the wall boards ensuring the edge of the wall boards are lined up with the trim piece. Attach each board with 1 1/4" nail or screw and glue. If you don't want to see the fasteners from the front/outside of the box, attach them from the wall boards into the trim piece.
Step 2
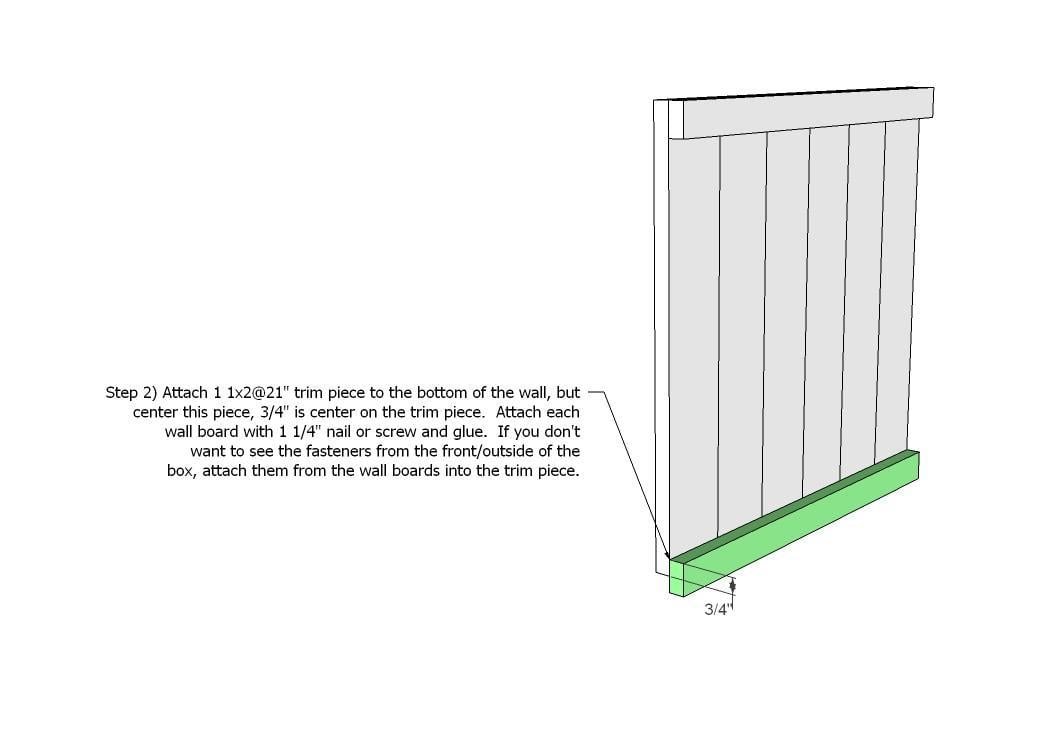
Step 2) Attach 1 1x2@21" trim piece to the bottom of the wall, but center this piece, 3/4" is center on the trim piece. Attach each wall board with 1 1/4" nail or screw and glue. If you don't want to see the fasteners from the front/outside of the box, attach them from the wall boards into the trim piece.
Step 3
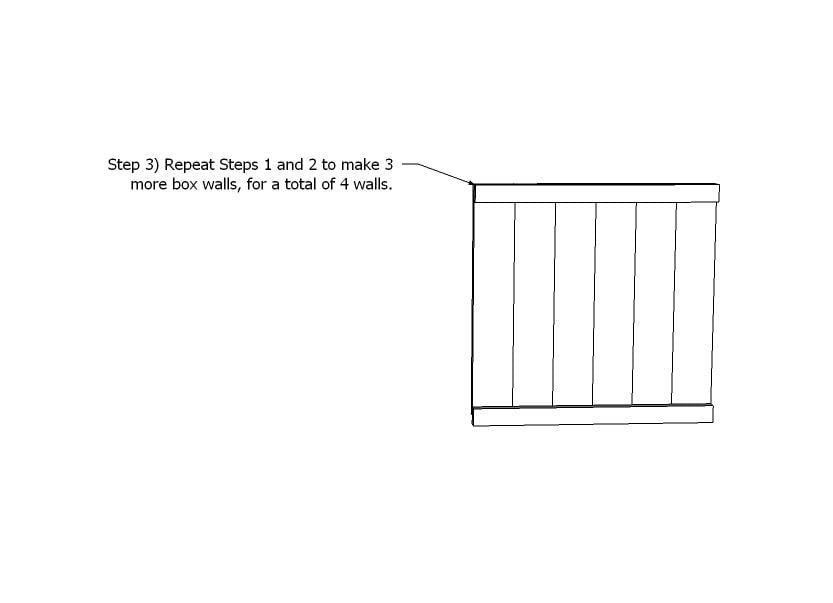
Step 3) Repeat Steps 1 and 2 to make 3 more box walls, for a total of 4 walls.
Step 4
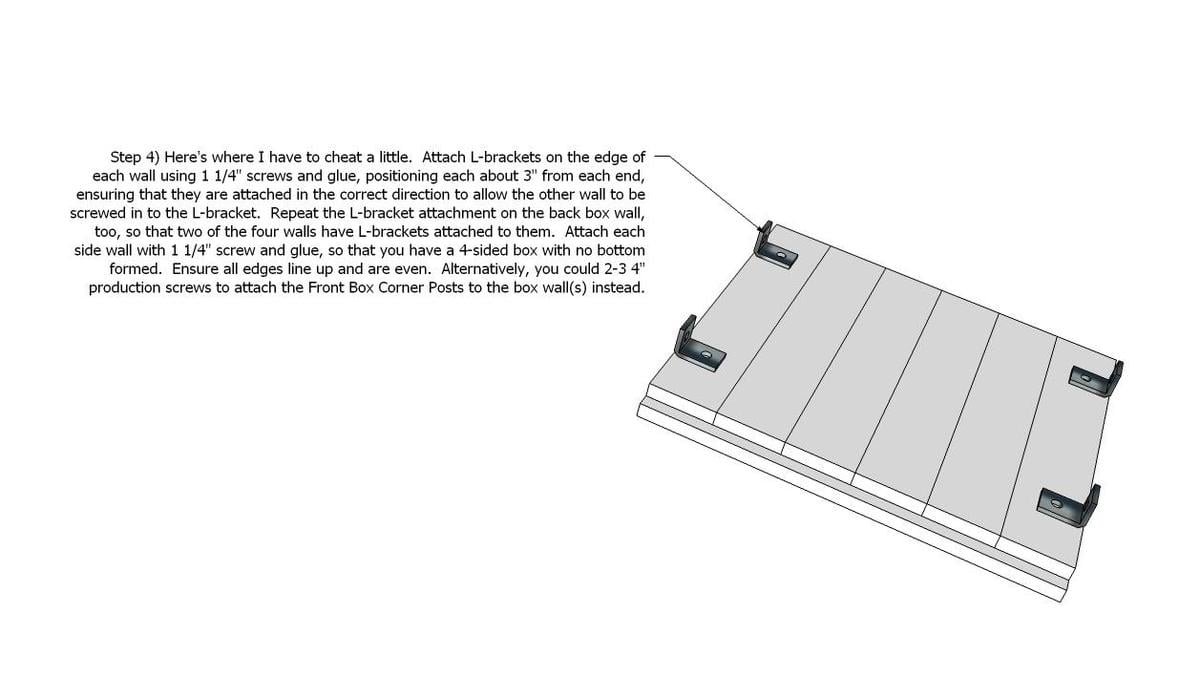
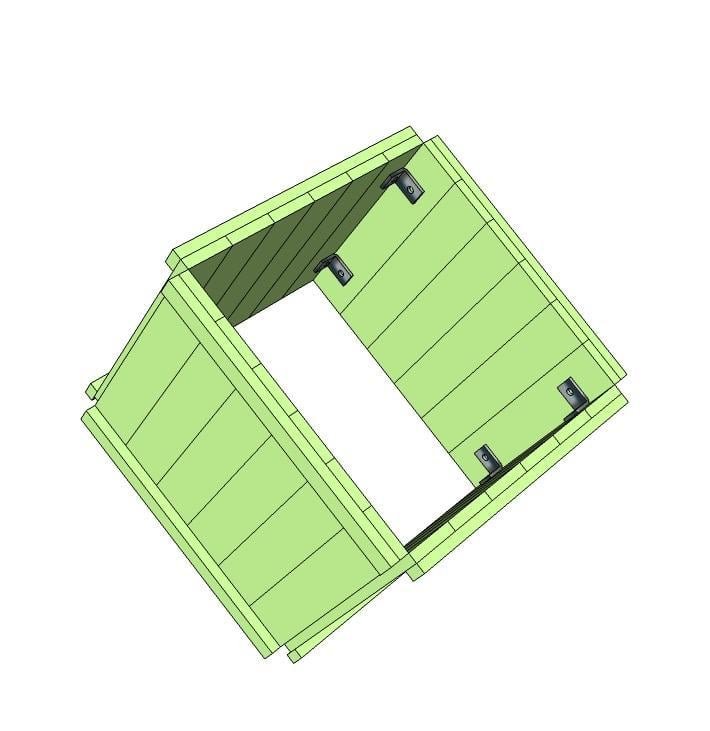
Step 4) Here's where I have to cheat a little. Attach L-brackets on the edge of each wall using 1 1/4" screws and glue, positioning each about 3" from each end, ensuring that they are attached in the correct direction to allow the other wall to be screwed in to the L-bracket. Repeat the L-bracket attachment on the back box wall, too, so that two of the four walls have L-brackets attached to them. {Continued...}
Step 5
Step 6
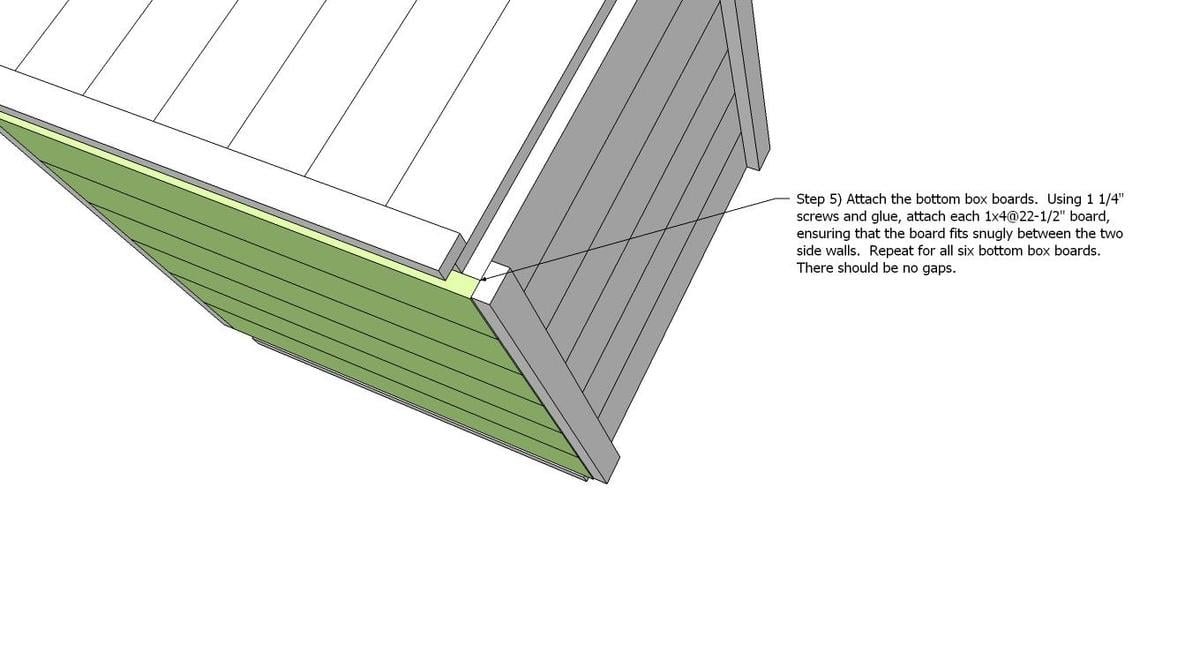
Step 5) Attach the bottom box boards. Using 1 1/4" screws and glue, attach each 1x4@22-1/2" board, ensuring that the board fits snugly between the two side walls. Repeat for all six bottom box boards. There should be no gaps.
Step 7
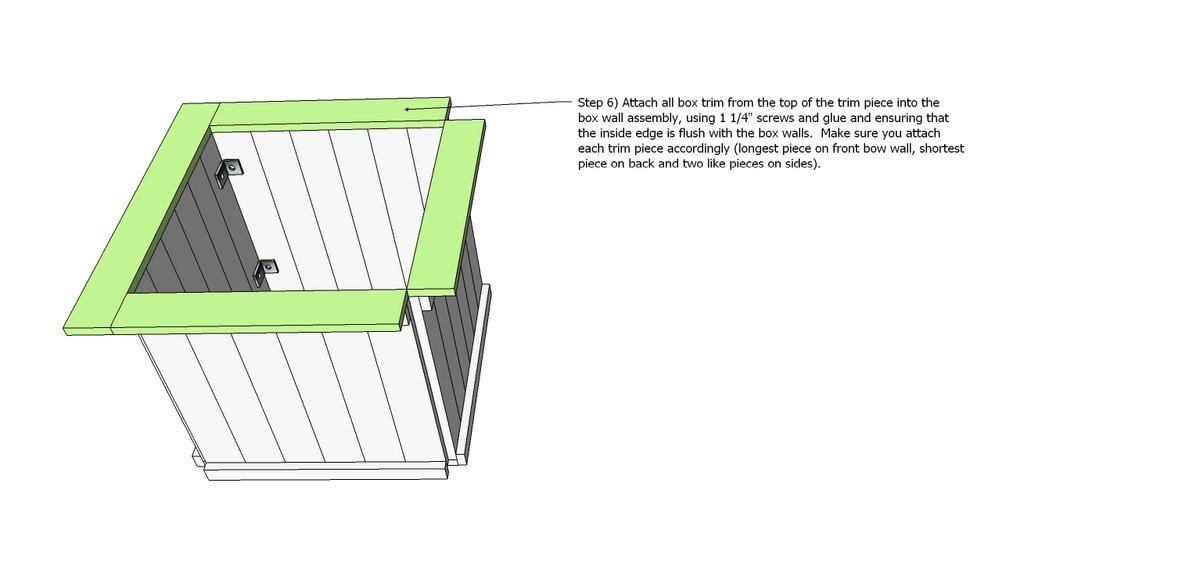
Step 6) Attach all box trim from the top of the trim piece into the box wall assembly, using 1 1/4" screws and glue and ensuring that the inside edge is flush with the box walls. Make sure you attach each trim piece accordingly (longest piece on front box wall, shortest piece on back and two like pieces on sides).
Step 8
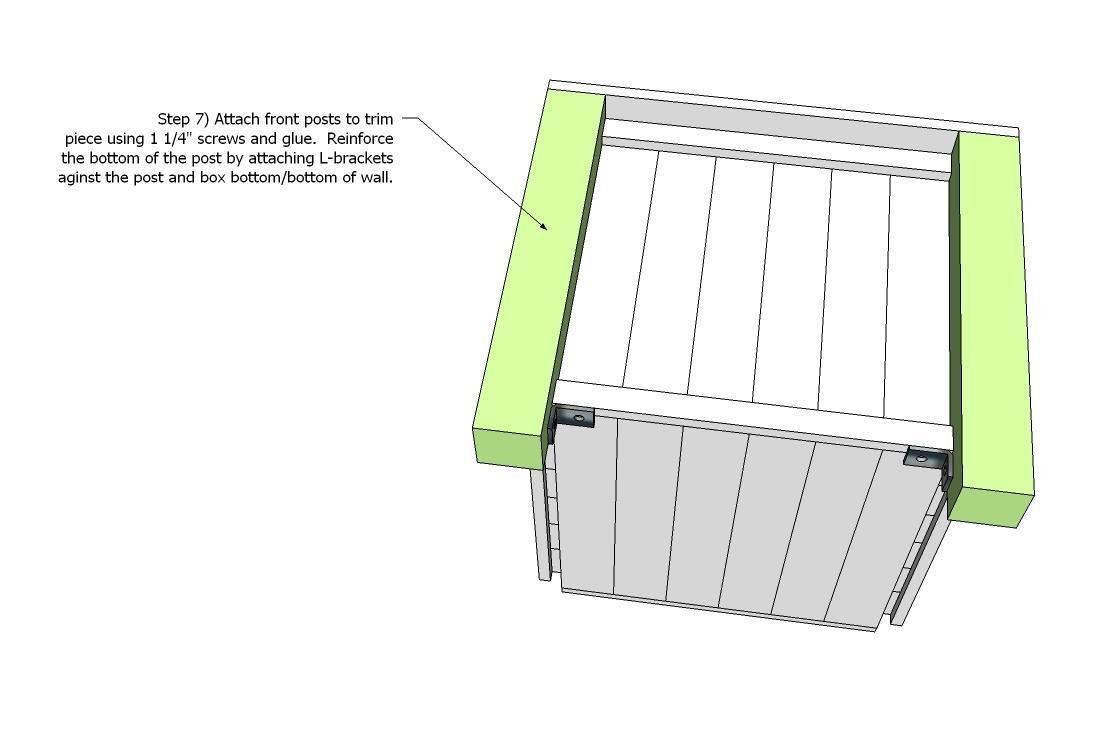
Step 7) Attach front posts to trim piece using 1 1/4" screws and glue. Reinforce the bottom of the post by attaching L-brackets against the post and box bottom/bottom of wall.
Step 9
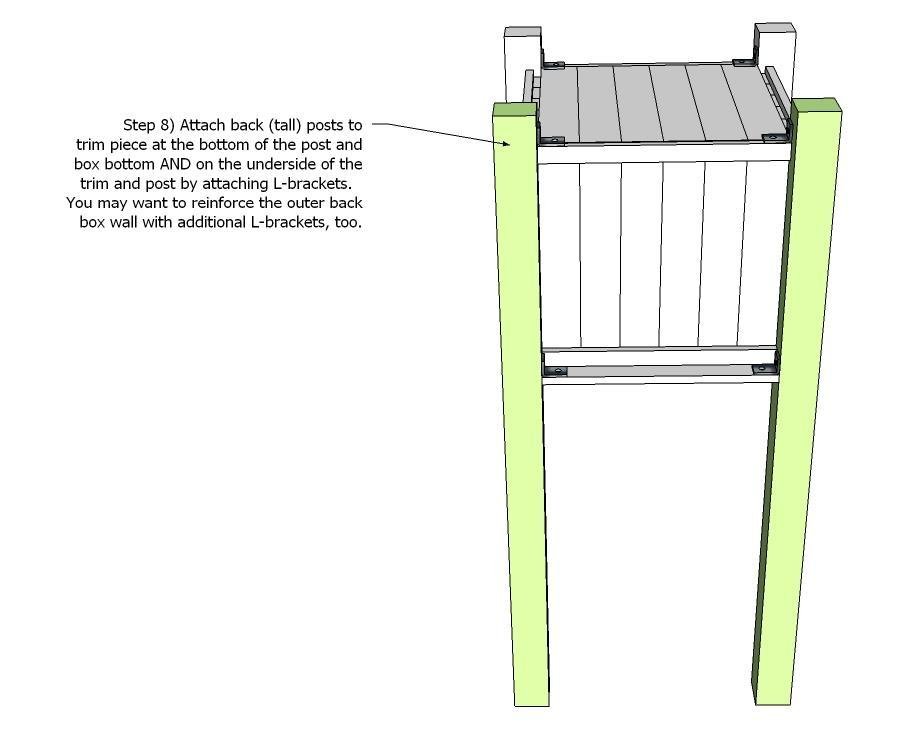
Step 8) Attach back (tall) posts to trim piece at the bottom of the post and box bottom AND on the underside of the trim and post by attaching L-brackets. You may want to reinforce the outer back box wall with additional L-brackets, too.
Step 10
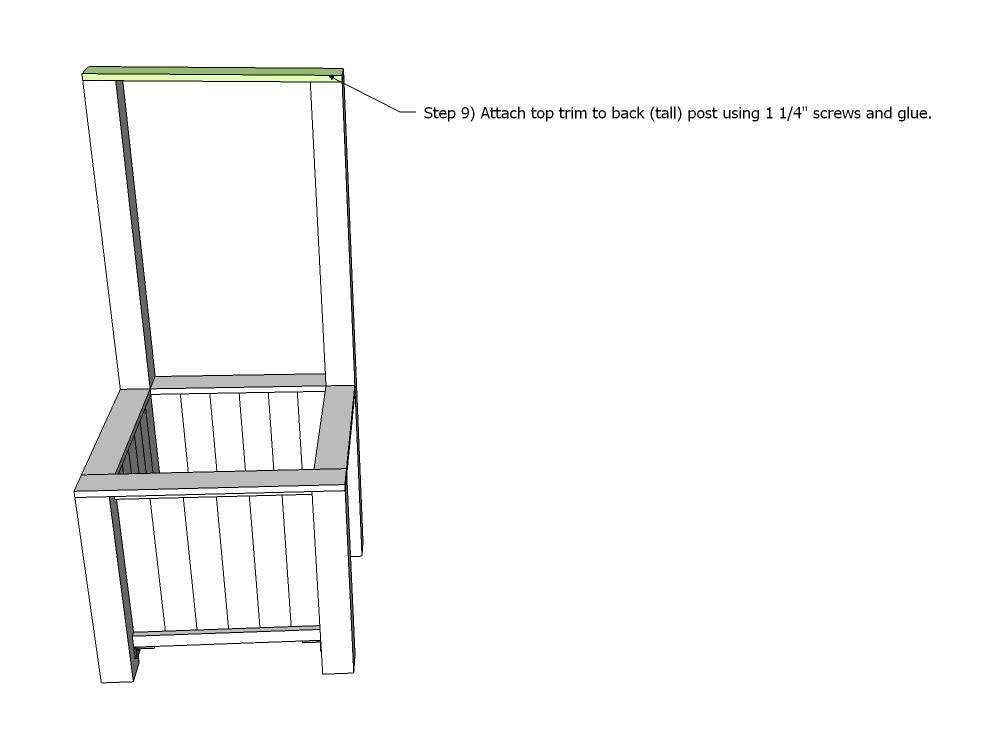
Step 9) Attach top trim to back (tall) post using 1 1/4" screws and glue.
Step 11
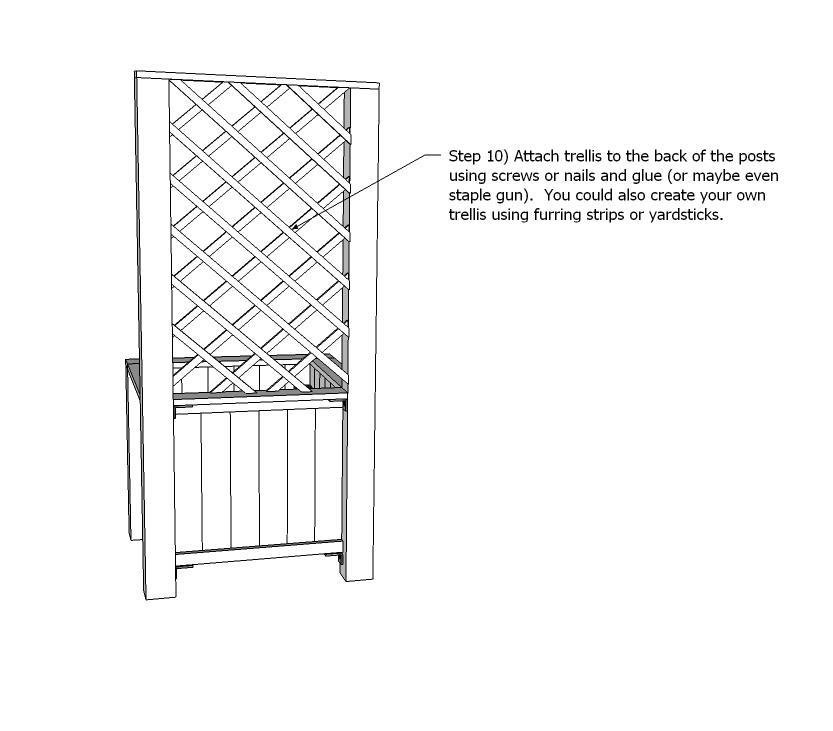
Step 10) Attach trellis to the back of the posts using screws or nails and glue (or maybe even staple gun). You could also create your own trellis using furring strips or yardsticks.
Step 12
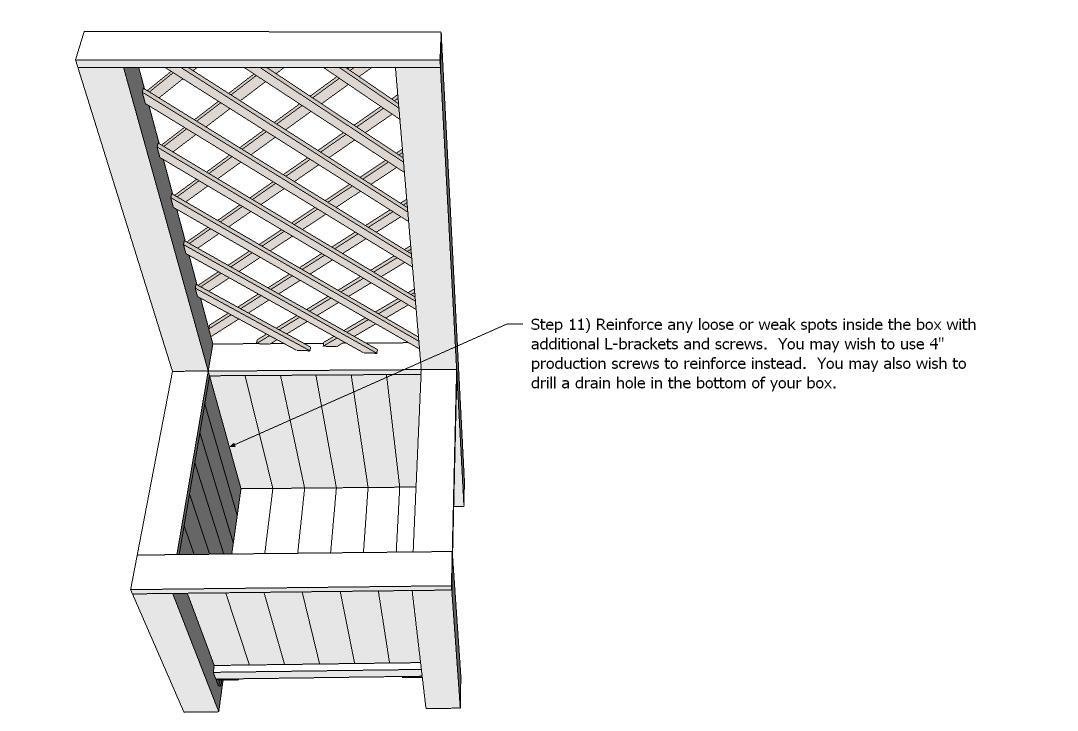
Step 11) Reinforce any loose or weak spots inside the box with additional L-brackets and screws. You may wish to use 4" production screws to reinforce instead. You may also wish to drill a drain hole in the bottom of your box. Finish as desired; use caution with finish if planting edible vegetation!
Finishing
Sand all surfaces, starting with a medium grit and finishing with fine. Wipe off the dust, fill any holes or gaps with wood filler, and sand smooth once dry. Apply primer if you're painting, then finish with your choice of paint or stain and seal with a durable clear topcoat. For outdoor projects, use exterior-rated primer, paint or stain, and sealer so the piece stands up to the weather.
Source (temporary): https://www.ana-white.com/woodworking-projects/planter-box-trellis