Play Kitchen Stove and Sink with Running Water
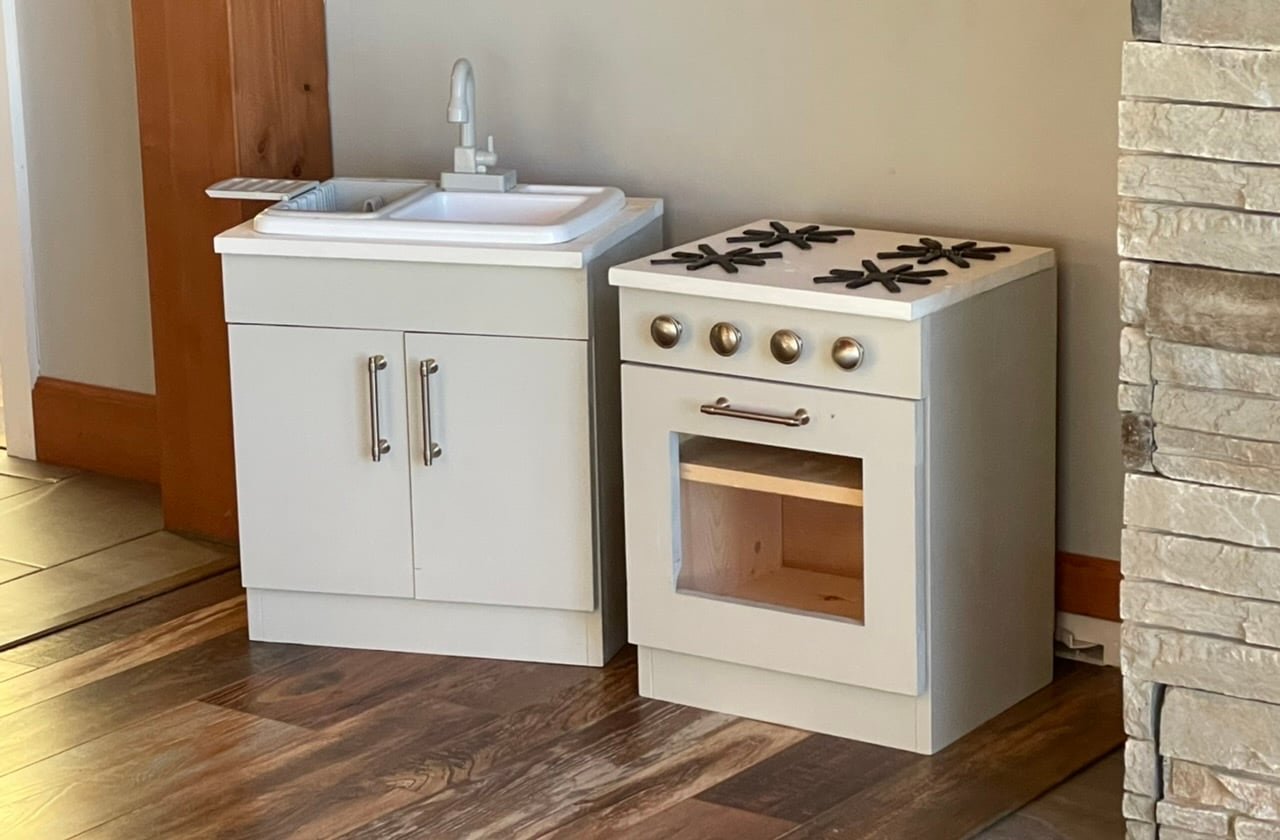
to build a play kitchen sink and stove with a real working sink! This is an easy build project and makes the cutest little play set. with diagrams from
Specifications
| Project type | Play Kitchen Collection |
|---|---|
| Room | Kids and Toys |
| Difficulty | Beginner Projects |
Dimensions
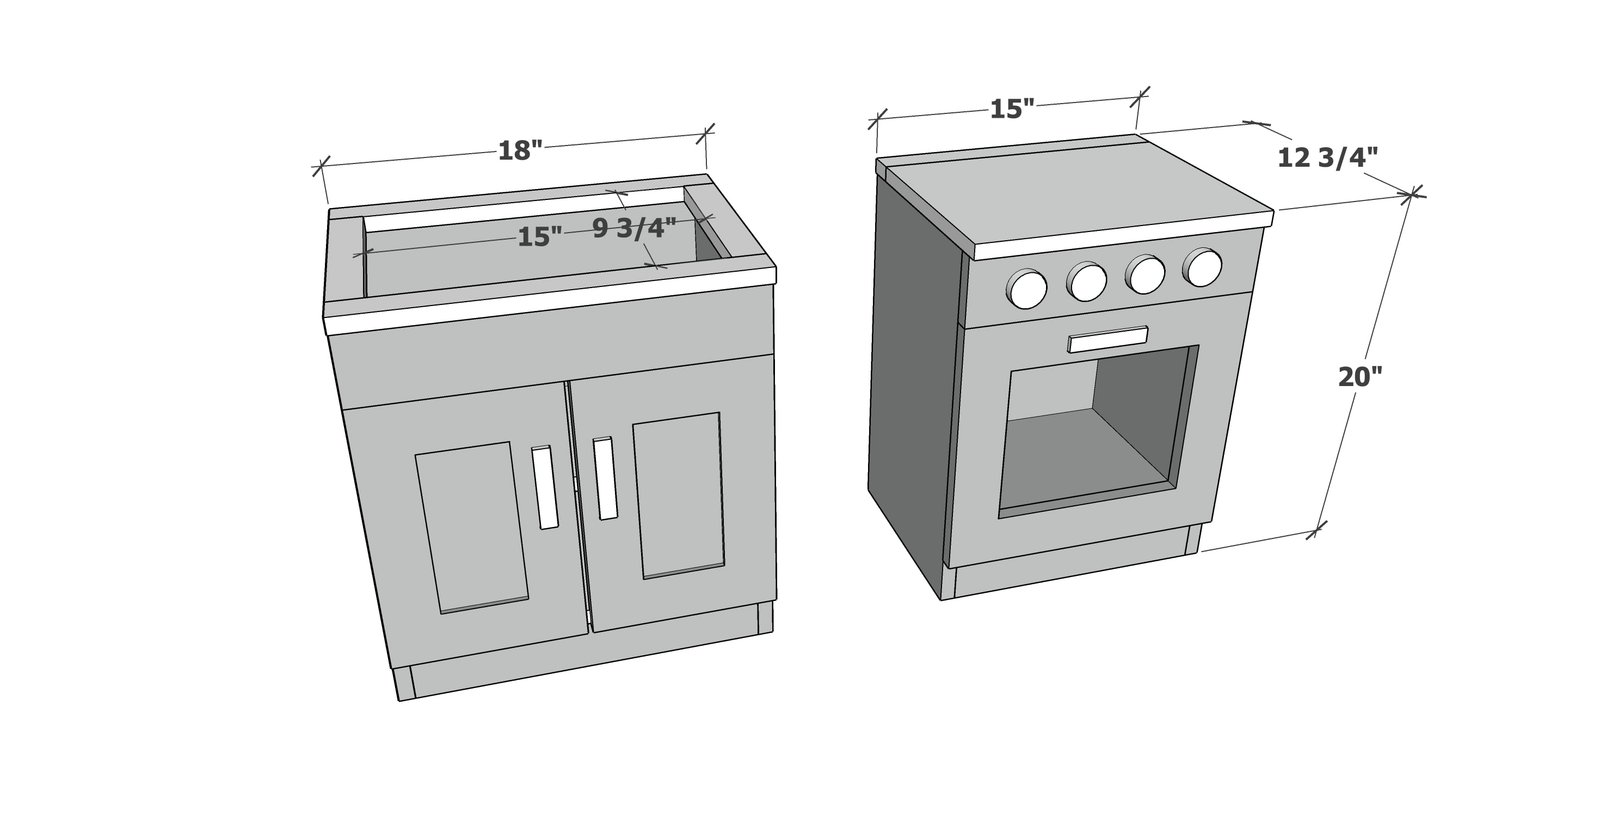
Use the size-specific shopping and cut lists below.
Shopping List
SINK SHOPPING LIST
- 1 - 1x12 @ 5 feet long
- 1 - 1x4 @ 18" long
- 1 - 1x3 @ 8 feet long
- 1 - 1x10 @ 16-1/2" long (shelf)
- 1 - 1x2 @ 5 feet long
- 1/4" plywood, minimum size 18" x 19-1/4" plus scrap piece for door backs
- Sink with running water, sized about 16" x 10-3/4", I used this one
- 1-1/4" and 5/8" brad nails
- wood glue
- 1-1/4" pocket hole screws for building the doors and top
- 4 surface mount hinges and 2 magnetic clasps
STOVE SHOPPING LIST
- 1 - 1x12 @ 6 feet long
- 1 - 1x4 @ 15"
- 1- 1x3 @ 8 feet long
- 1 - 1x10 @ 13-1/2" long (shelf)
- 1 - 1x2 @ 15" long
- 1/4" plywood, minimum size 15" x 19-1/4"
- acrylic glass piece 9" x 11"
- 1-1/4" and 5/8" brad nails
- wood glue
- 1-1/4" pocket hole screws for building doors
- 2 surface mount hinges and 1 magnetic clasp
Cut List
SINK CUT LIST - Measure the sink dimensions first and adjust plans as needed to fit
- 2 - 1x12 @ 19-1/4" - sides
- 1 - 1x12 @ 16-1/2" - bottom
- 2 - 1x3 @ 16-1/2" - toekick and back top support
- 1 - 1x4 @ 18" - front
- 1 - 1x10 @ 16-1/2" - shelf
- 1 - 1/4" plywood @ 19-1/4" x 18" - back
- 2 - 1x2 @ 18" - top front and back
- 2 - 1x2 @ 9-3/4" - top sides
STOVE CUT LIST
- 2 - 1x12 @ 19-1/4" - sides
- 1 - 1x12 @ 13-1/2" - bottom
- 2 - 1x3 @ 13-1/2" - toekick and back top support
- 1 - 1x4 @ 15" - front
- 1 - 1x10 @ 13-1/2" - shelf
- 1 - 1/4" plywood @ 19-1/4" x 15" - back
- 1 - 1x2 @ 15" - top back
- 1 - 1x12 @ 15" - top main
Tools
- measuring tape
- square
- pencil
- safety glasses
- kreg-jig
- drill
- compound miter saw
- nailer
- sander
Step-by-step Instructions
Step 1
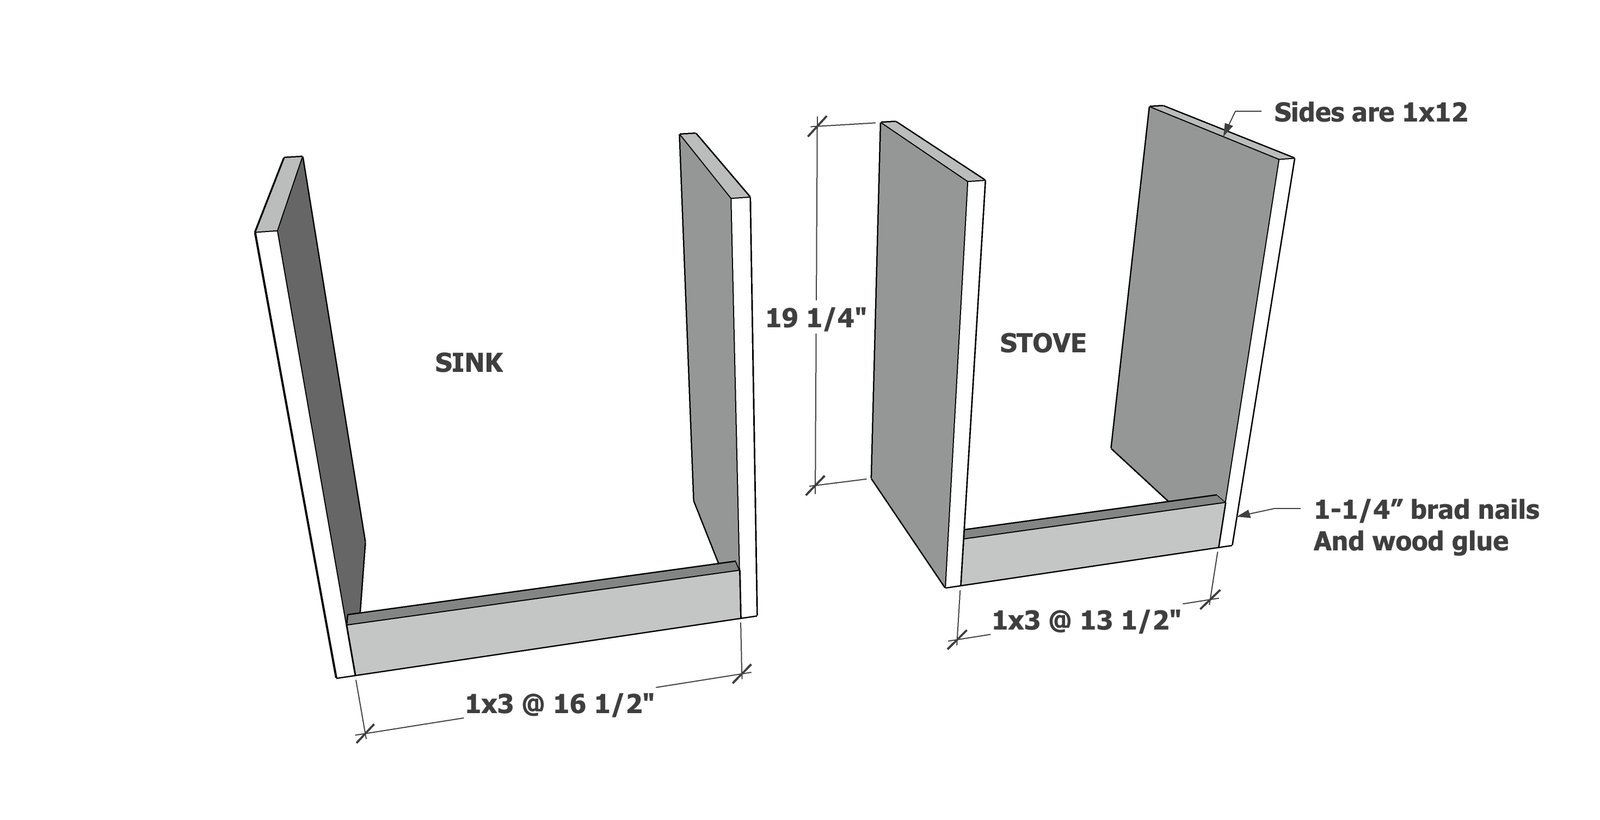
Attach the sides to the toekick with 1-1/4" brad nails and wood glue.
Step 2
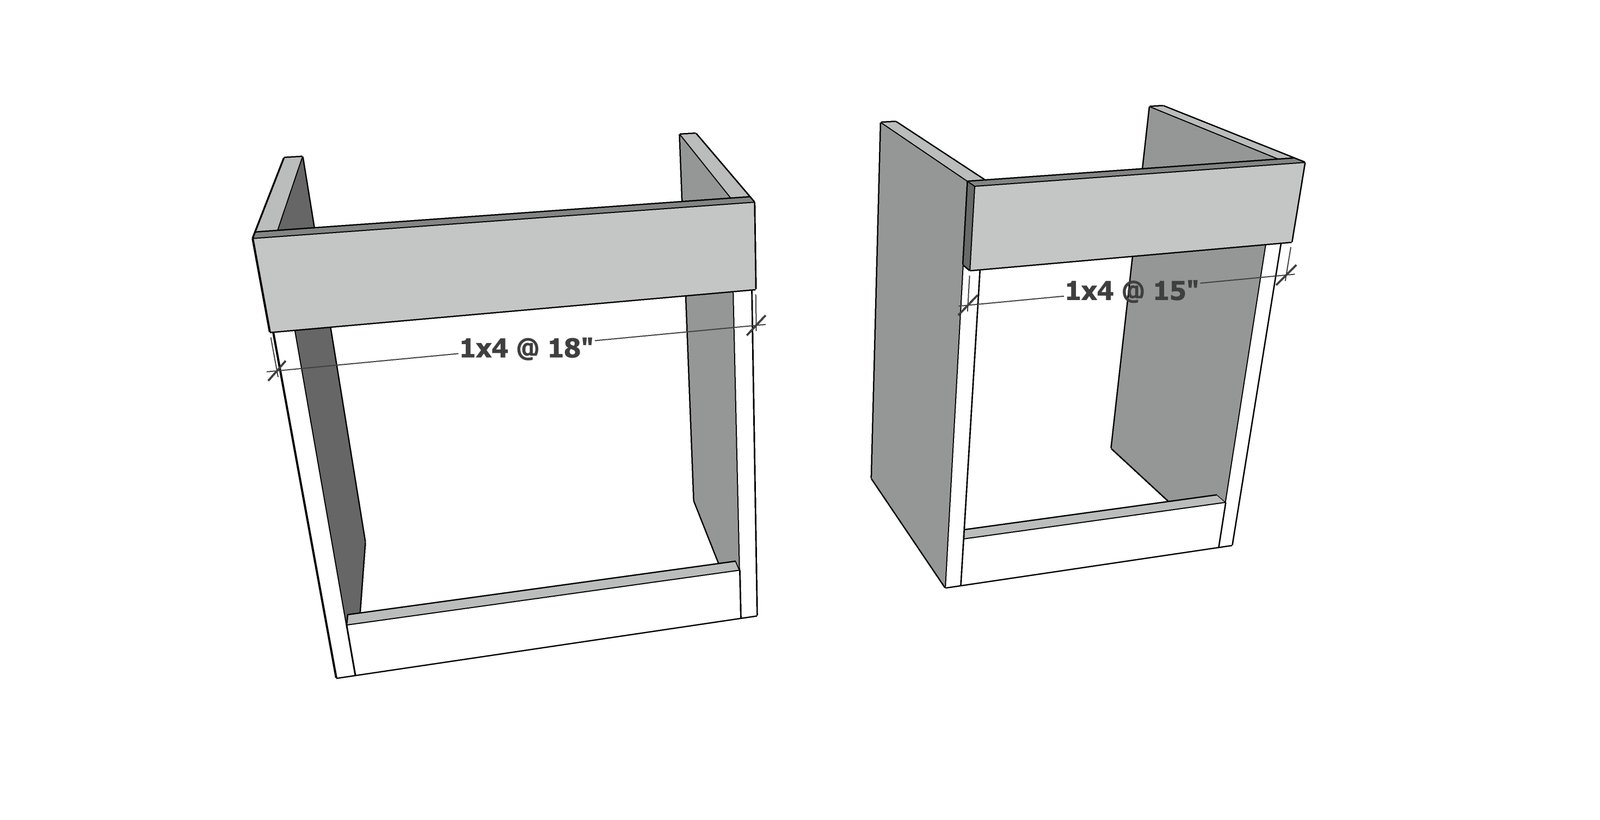
Attach the front to the sides, flush on top and sides, with 1-1/4" brad nails and wood glue.
Step 3
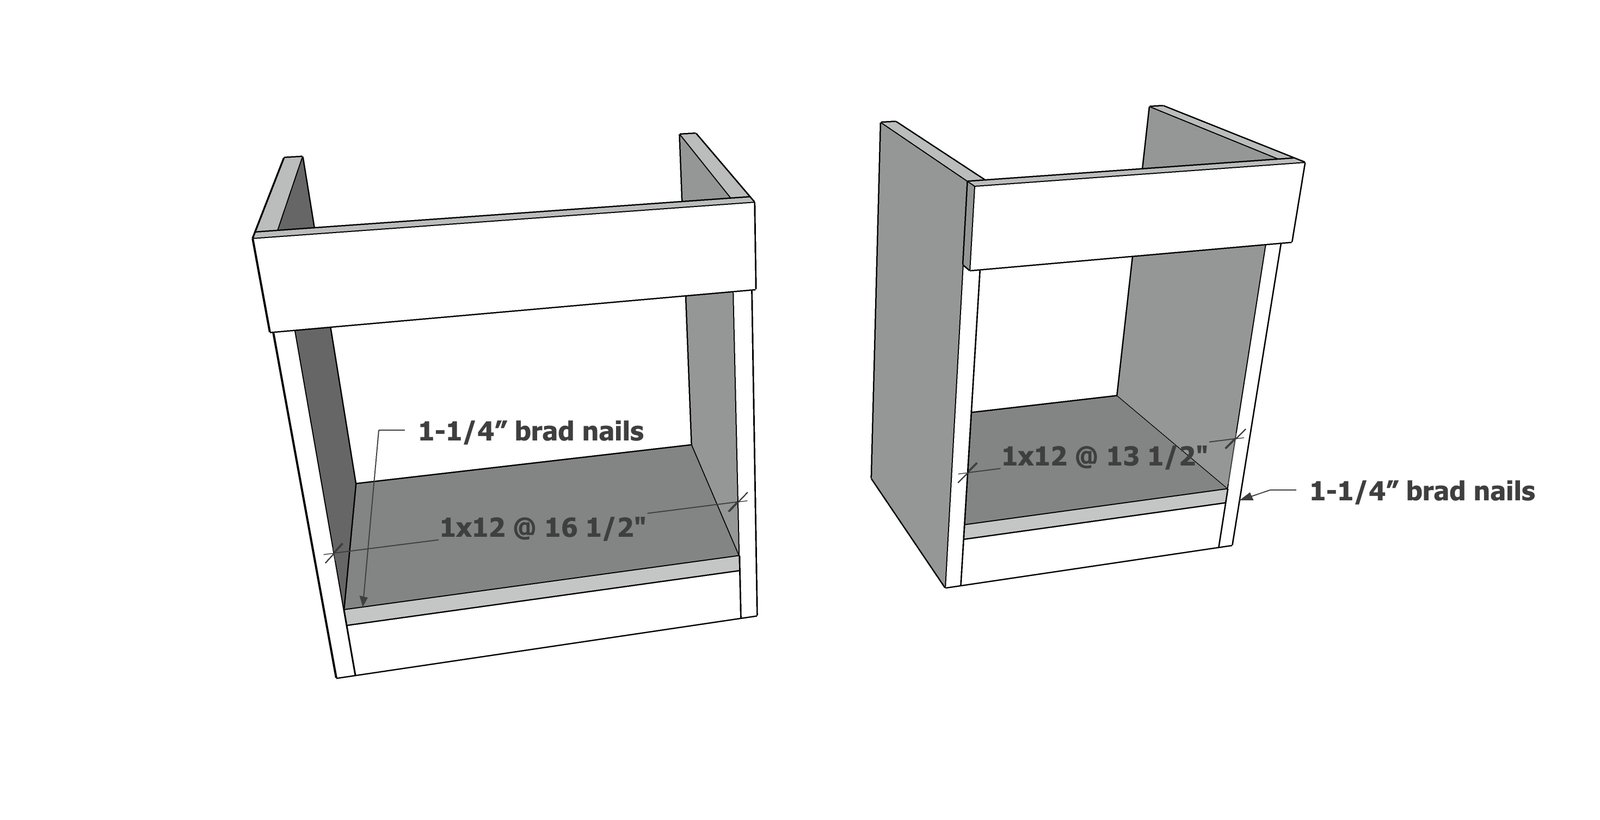
Attach the bottom shelf to the sides and the toekick with 1-1/4" brad nails and wood glue.
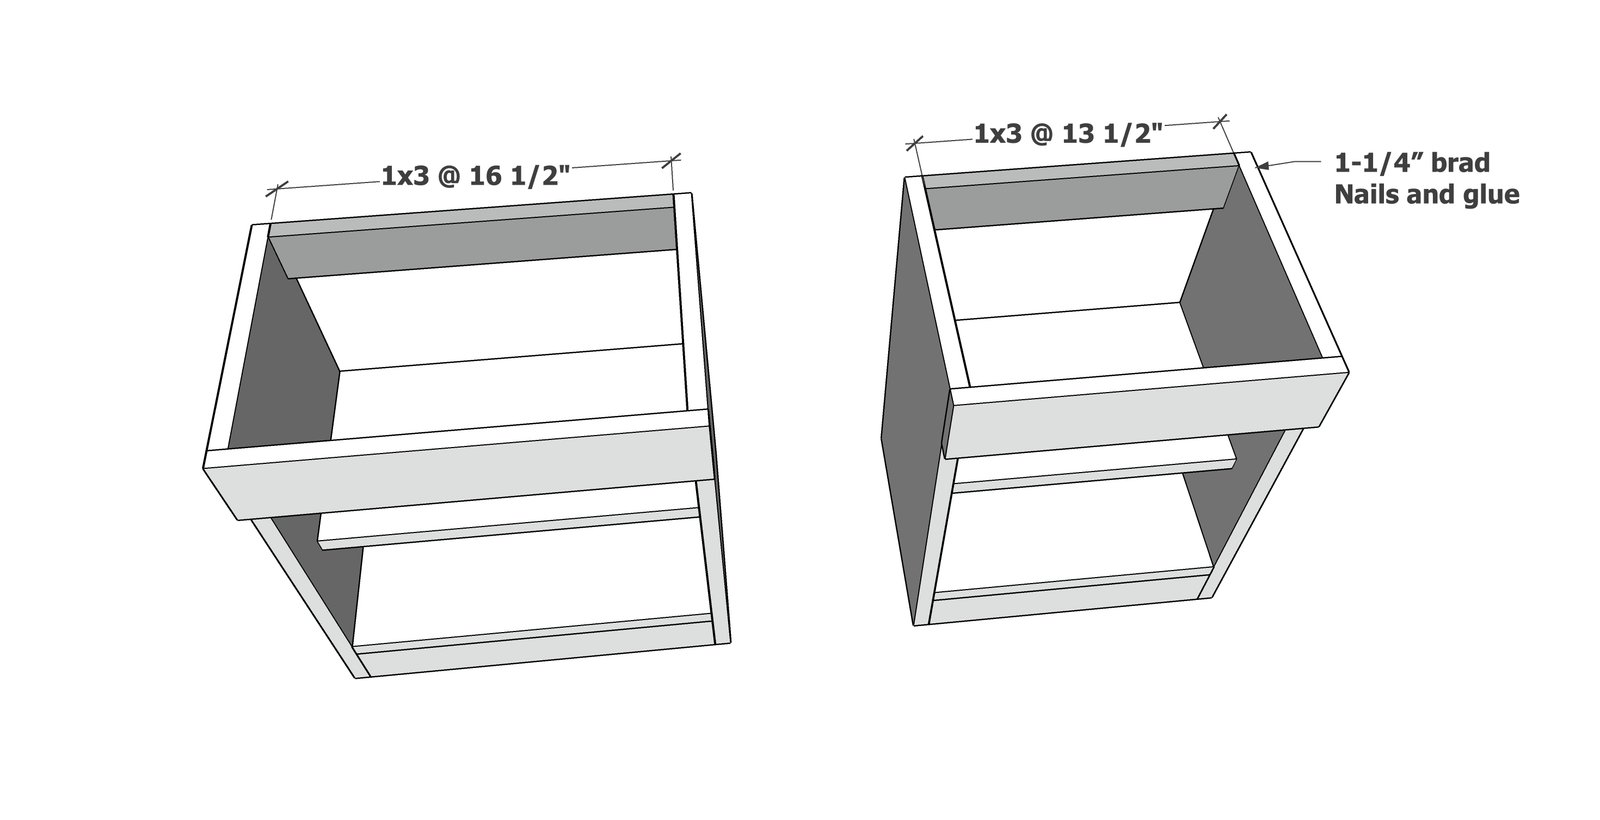
Attach the back top support to the back top corner with 1-1/4" brad nails and wood glue.
Also attach the 1x10 shelves inside, flush to the back, with 1-1/4" brad nails and wood glue. I left about 6" space under the bottom shelf.
Step 5
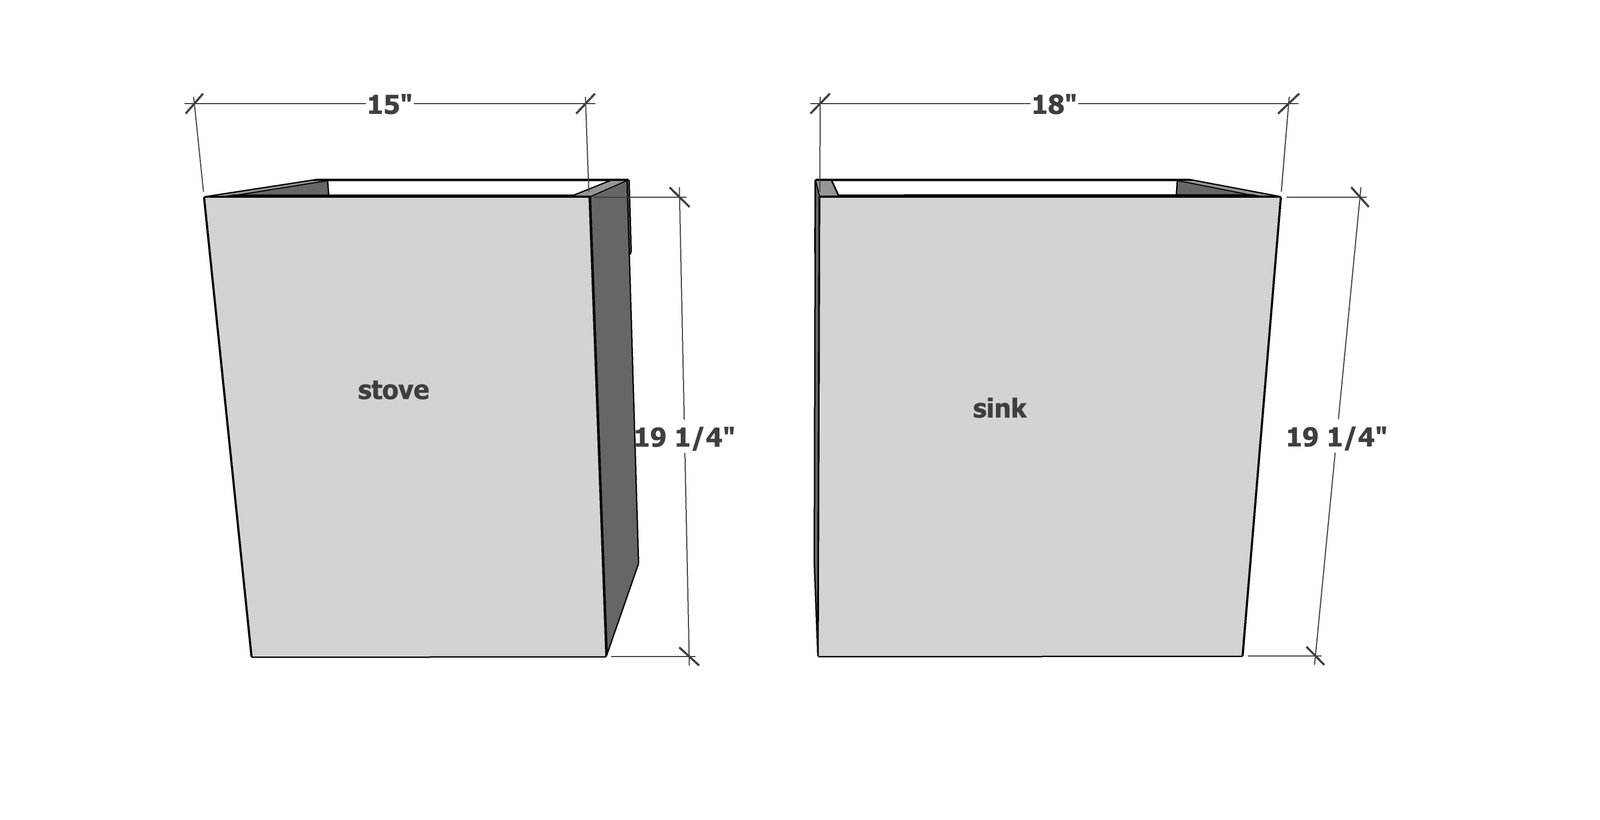
Attach the back panel pieces with 5/8" brad nails and wood glue.
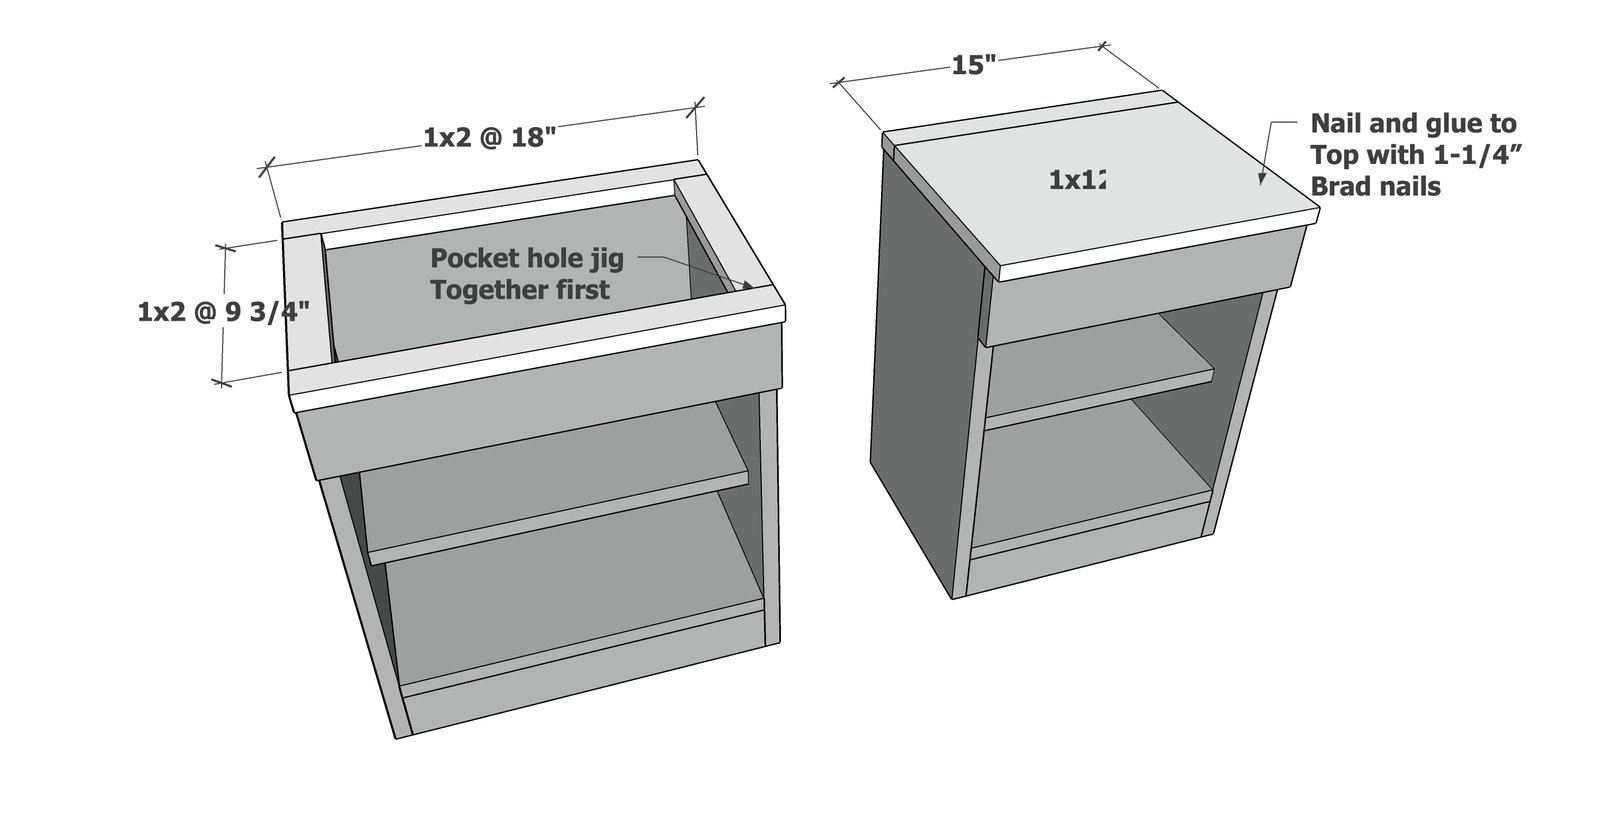
For the sink, attach the frame with 3/4" pocket holes and 1-1/4" pocket hole screws.
Then attach the top pieces to the tops of the stove and sink with 1-1/4" brad nails and glue.
Step 7
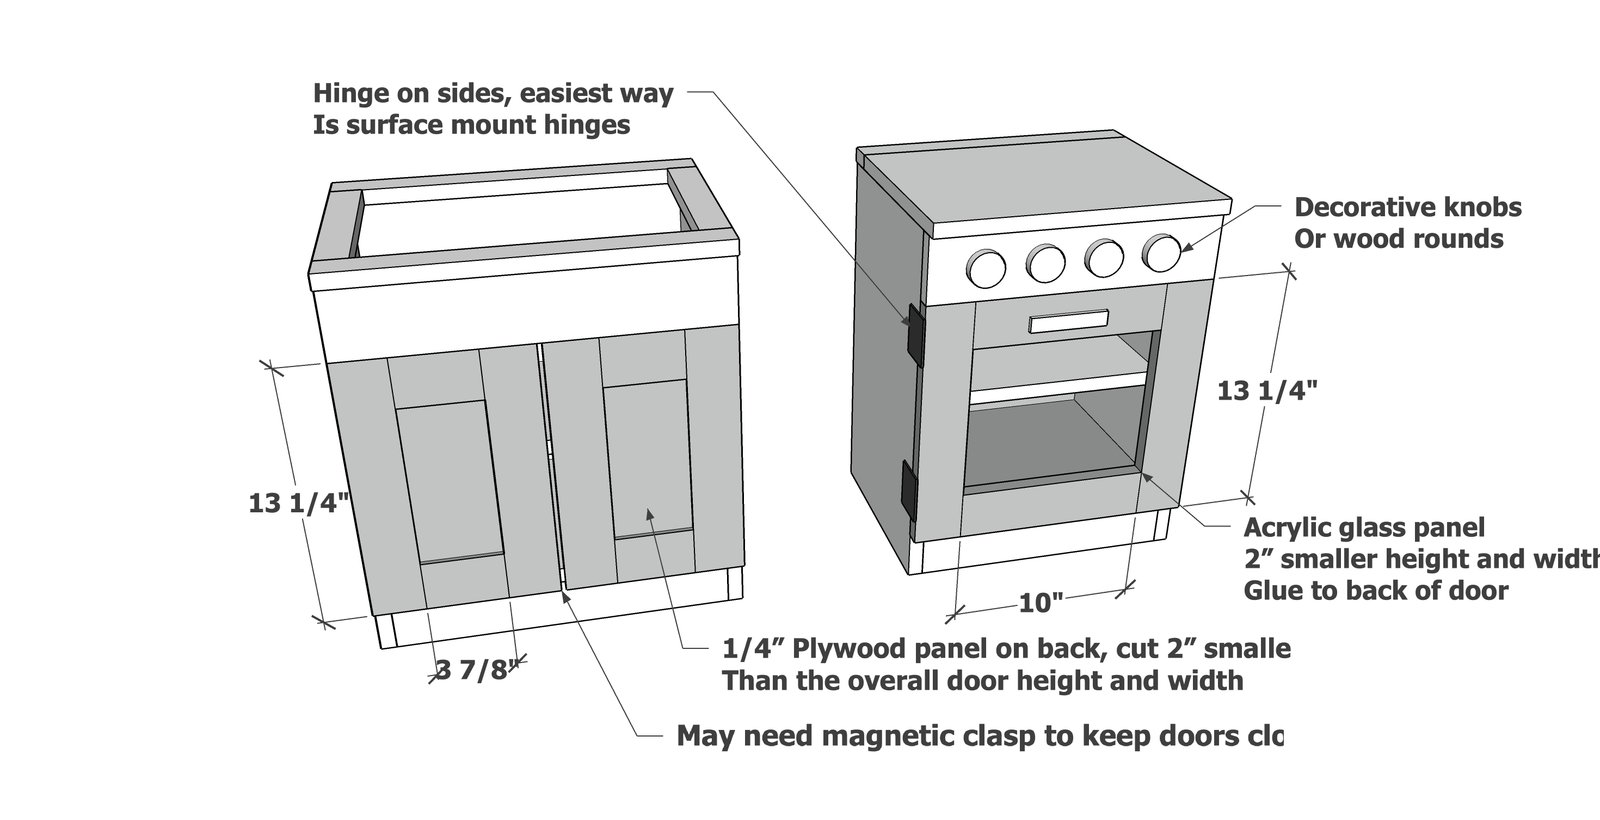
For the doors, use 1x3s to make the frames. Attach frames together with 3/4" pocket holes and 1-1/4" pocket hole screws (two per joint). Then attach 1/4" plywood to the back with 5/8" brad nails and wood glue. Plywood panels should be about 1" larger than the center opening, not the full size of the door back. Attach the acrylic glass to the stove with suitable glue or predrill and use small hardware screws. Attach with hinges on the sides and use magnetic clasps to keep closed. Advanced users can use Concealed Hinges for Frameless Cabinets. Add knobs and handles. The stove knobs are spaced 3" apart, starting from the center working outward.
Finishing
Sand all surfaces, starting with a medium grit and finishing with fine. Wipe off the dust, fill any holes or gaps with wood filler, and sand smooth once dry. Apply primer if you're painting, then finish with your choice of paint or stain and seal with a durable clear topcoat. For outdoor projects, use exterior-rated primer, paint or stain, and sealer so the piece stands up to the weather.
Source (temporary): https://www.ana-white.com/woodworking-projects/play-kitchen-stove-and-sink-running-water