Play Stand
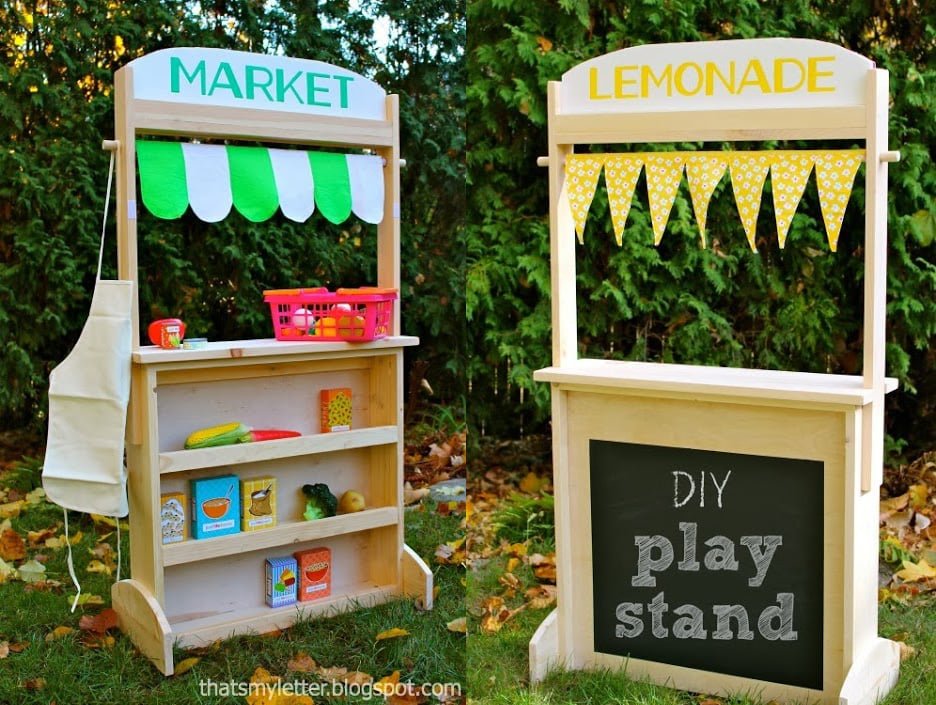
Build your own play stand with! Your child will love this pretend play stand that becomes a play market, play post office, puppet theater, lemonade stand - or much more! Built by Jaime Costiglio for Handbuilt Holiday
Specifications
| Project type | Grace's Town |
|---|---|
| Room | Kids and Toys |
| Style | Children's and Kid's Room Furniture and Toy Plans |
| Difficulty | Intermediate |
| Estimated cost | $20 - $50 |
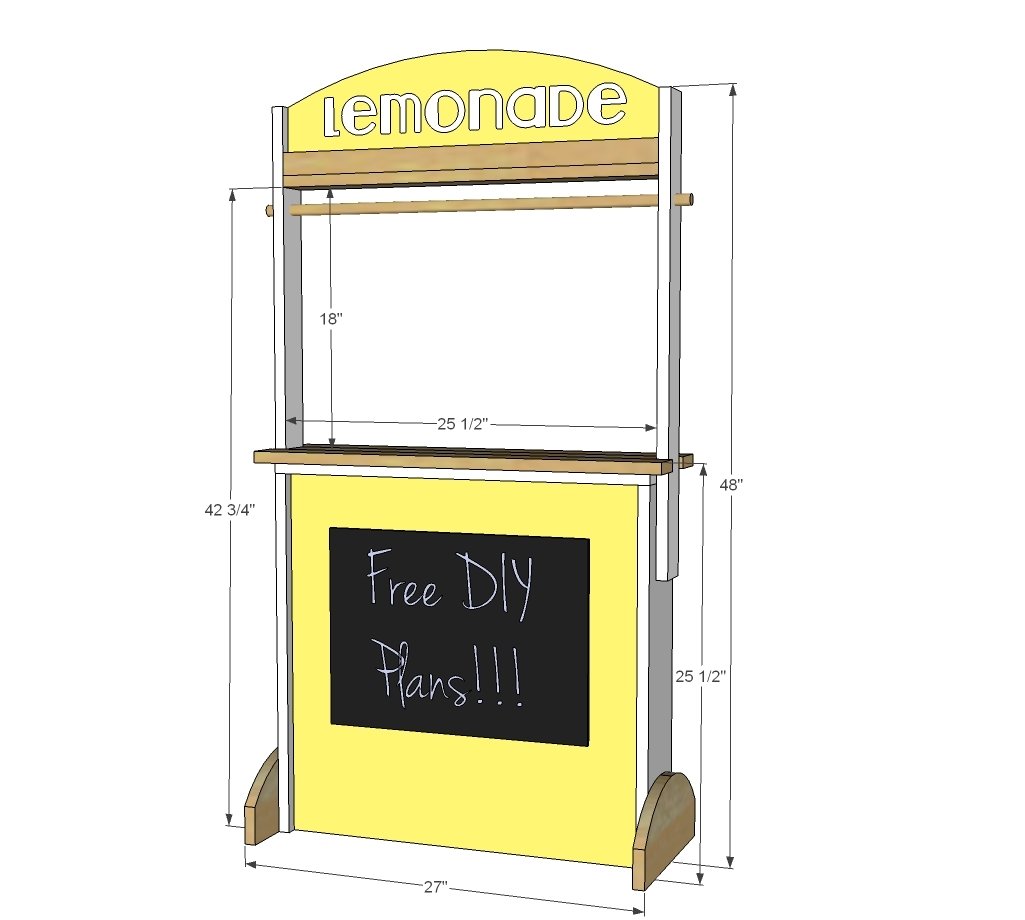
Dimensions
Use the size-specific shopping and cut lists below.
Shopping List
- 1 - 1x6 @ 10 feet long
- 2 - 1x2 @ 8 feet long
- 1 - 1x4 @ 8 feet long
- 2 - 1x3 @ 8 feet long
- 1 - 1/4” plywood 24” x 24”
- 1 - 3/4” dowel 30” long
- Cardboard or foam board for signs
- 1 1/4” finish nails
- Chalk board paint or chalk board decal
Cut List
BASE
- 2 - 1x6 @ 24”
- 1 - 1x6 @ 25 1/2”
- 4 - 1x2 @ 24”
- 3 - 1x4 @ 24”
- 1 - 1/4” plywood 24” x 24”
- 2 - 1x6 @ 12”
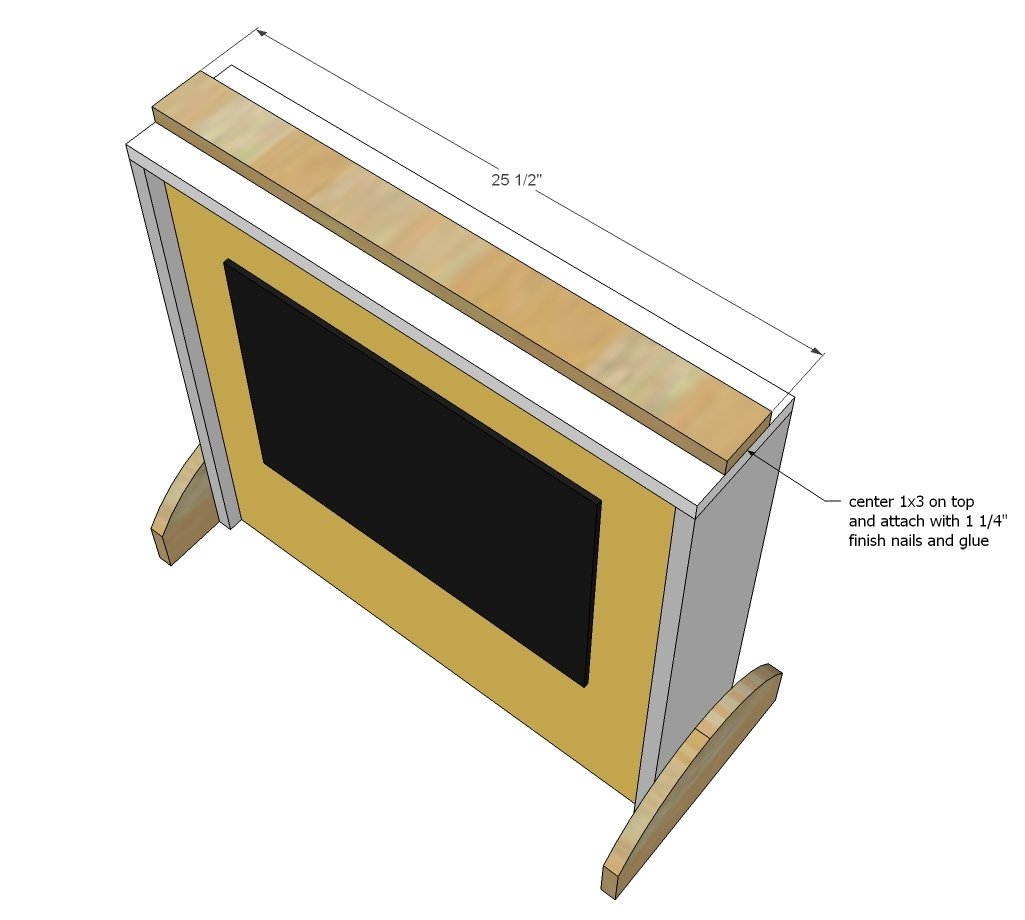
- 1 - 1x3 @ 25 1/2”
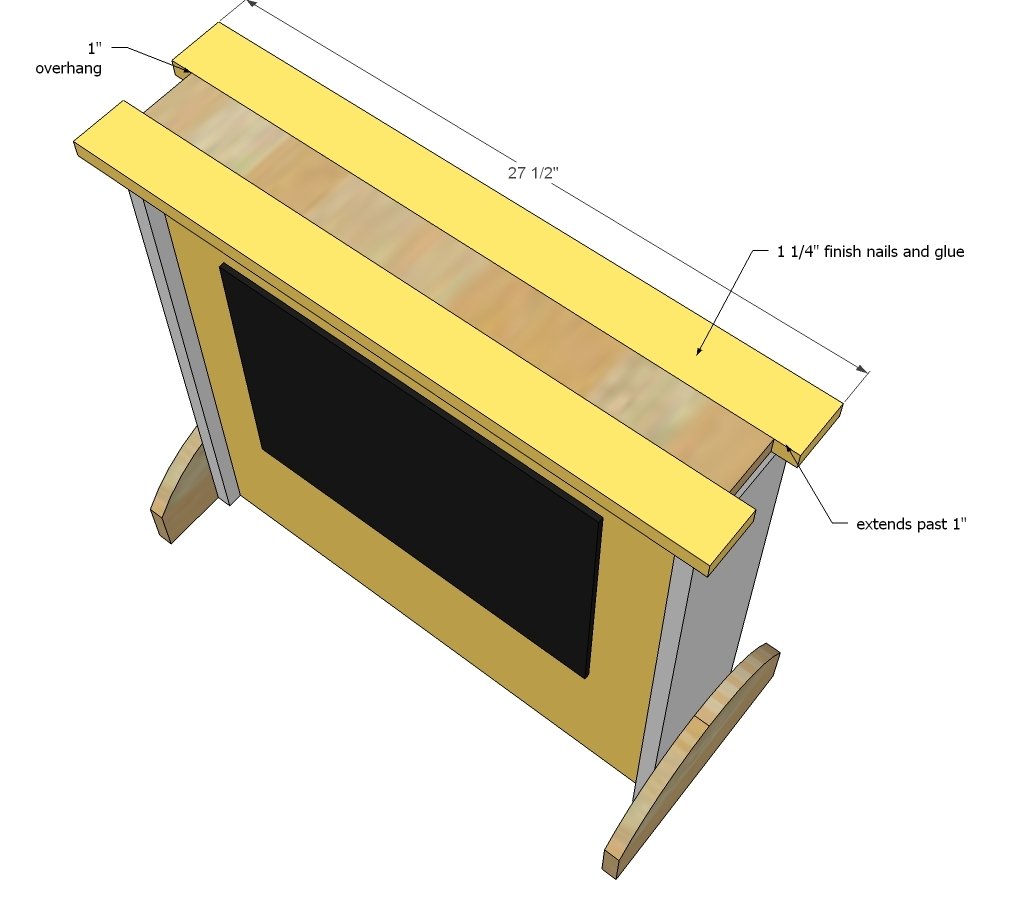
- 2 - 1x3 @ 27 1/2”
HUTCH
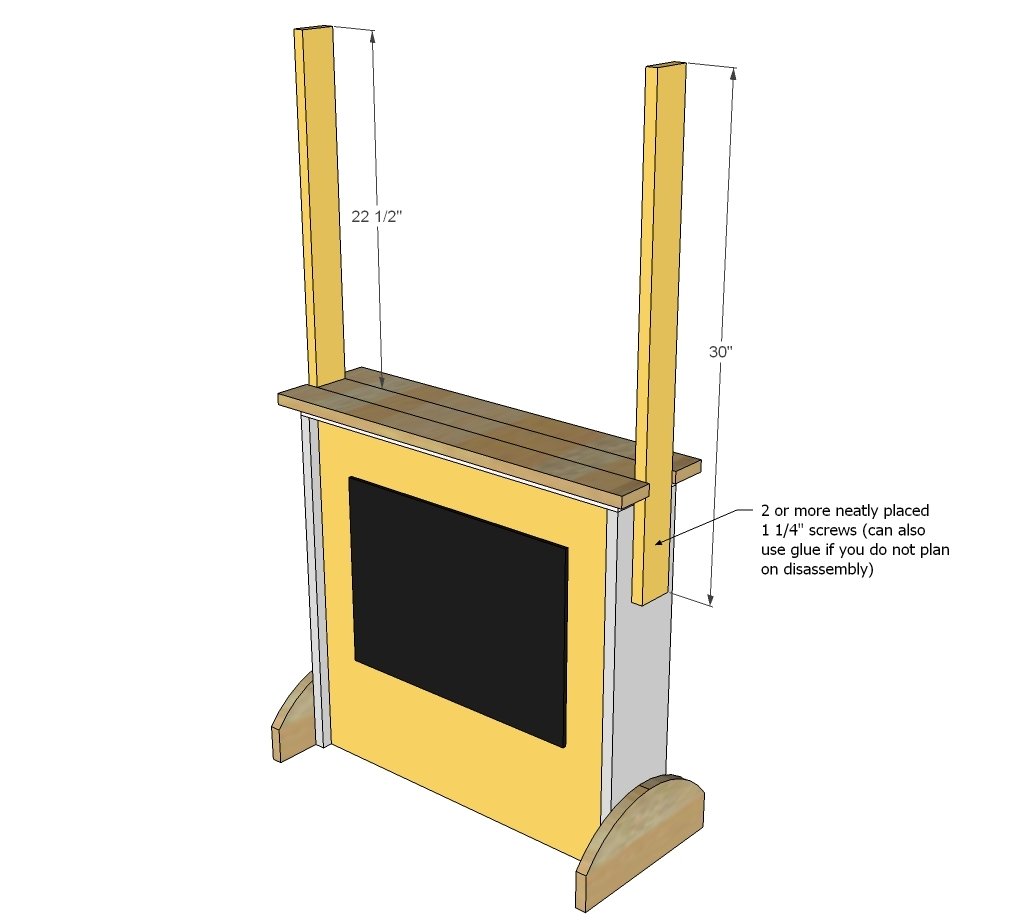
- 2 - 1x3 @ 30”
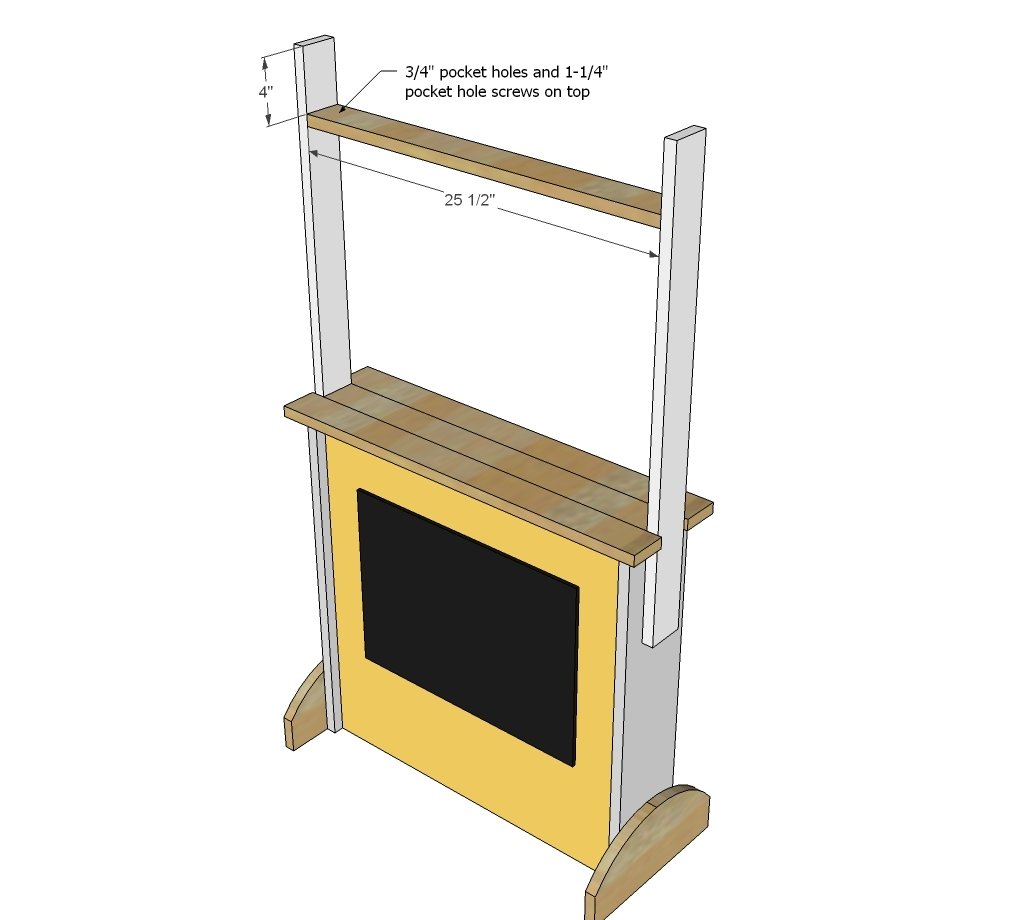
- 1 - 1x3 @ 25 1/2”
- 2 - 1x2 @ 25 1/2”
- 1 - 3/4” dowel @ 30”
- Thick cardboard or foam board for signs 7 1/2” x 25 1/2” (you want these to be lightweight to prevent falling hazard)
Tools
- measuring tape
- square
- pencil
- safety glasses
- hearing protection
- kreg-jig
- drill
- jigsaw
- compound miter saw
- nailer
Step-by-step Instructions
Step 1
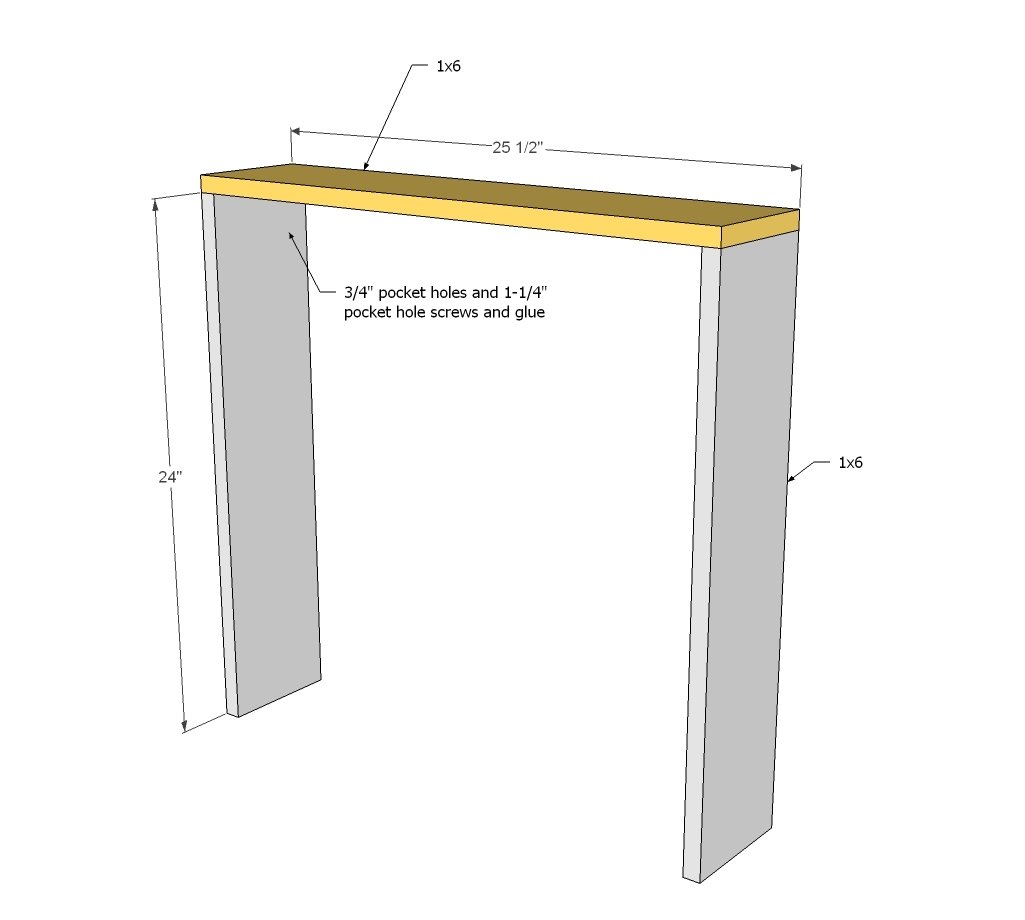
Start by making the basic box with the top and sides.
Step 2
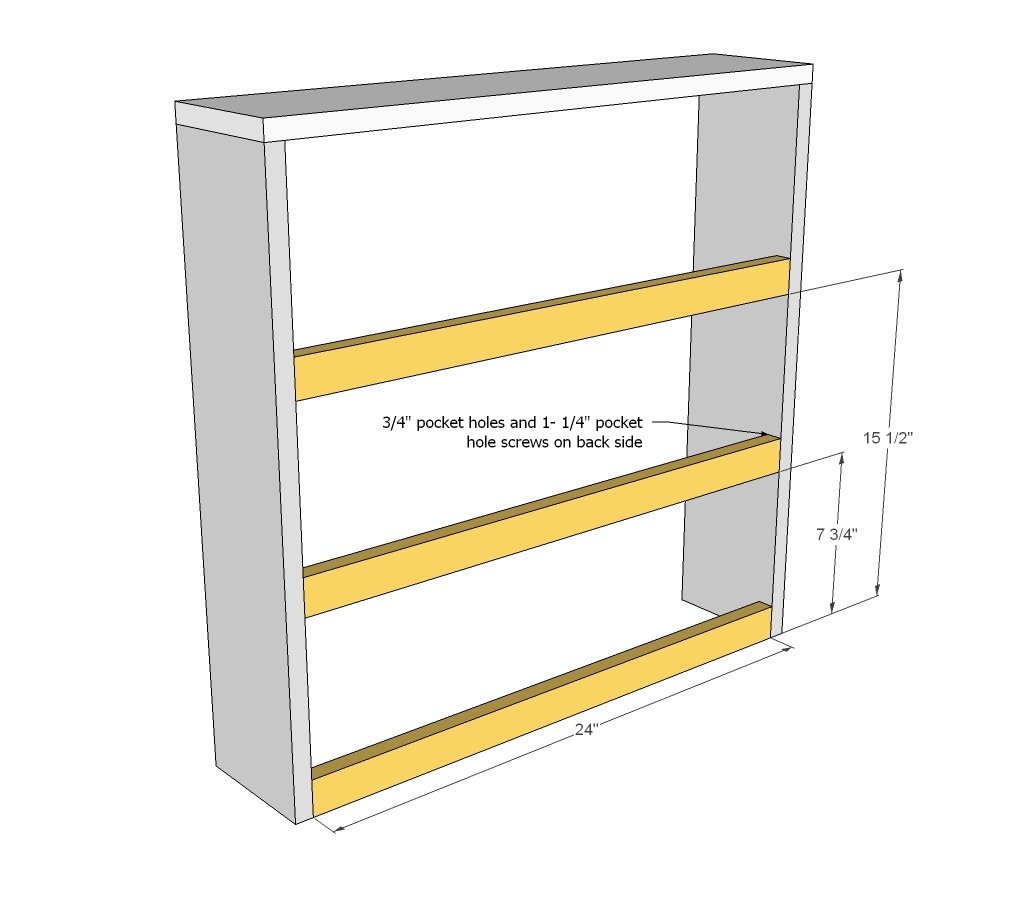
Add the rungs for the back shelves.
Step 3
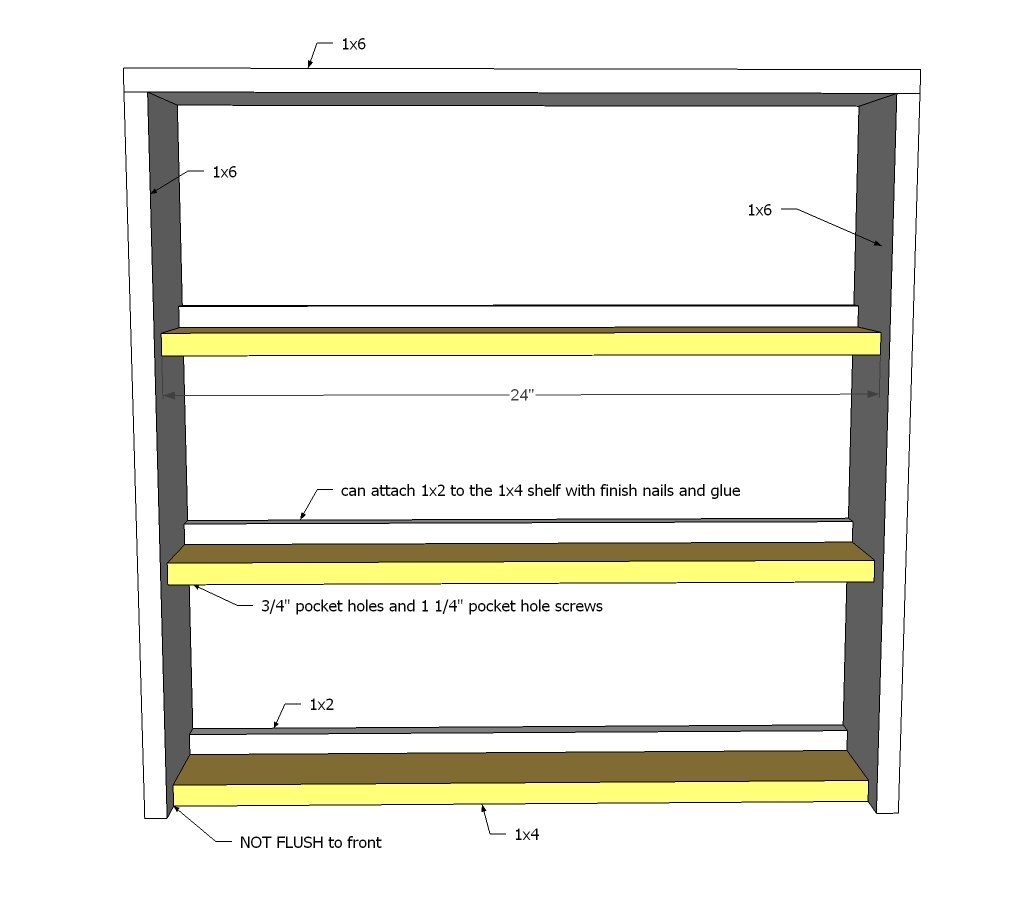
And then the back shelves themselves - notice they sit flush to the 1x2 rungs, but don't make it to the front of the 1x6 sides.
Step 4
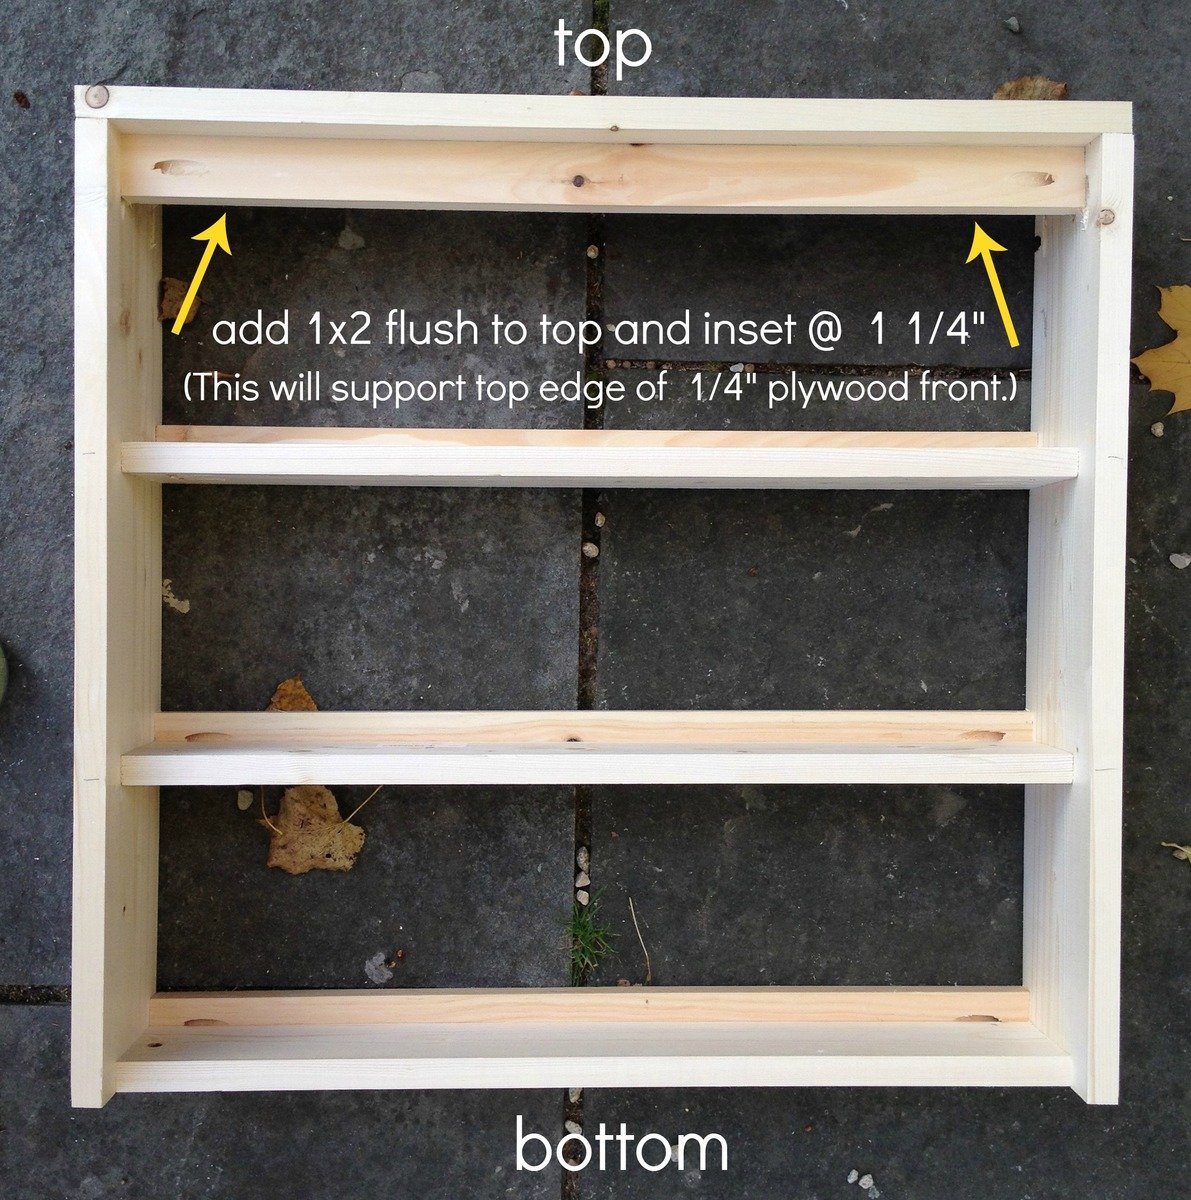
Jaime also recommends adding a fourth 1x2 at the top - flush with the 1x4 shelf backs - to give the plywood (next step) something to attach to at the top.
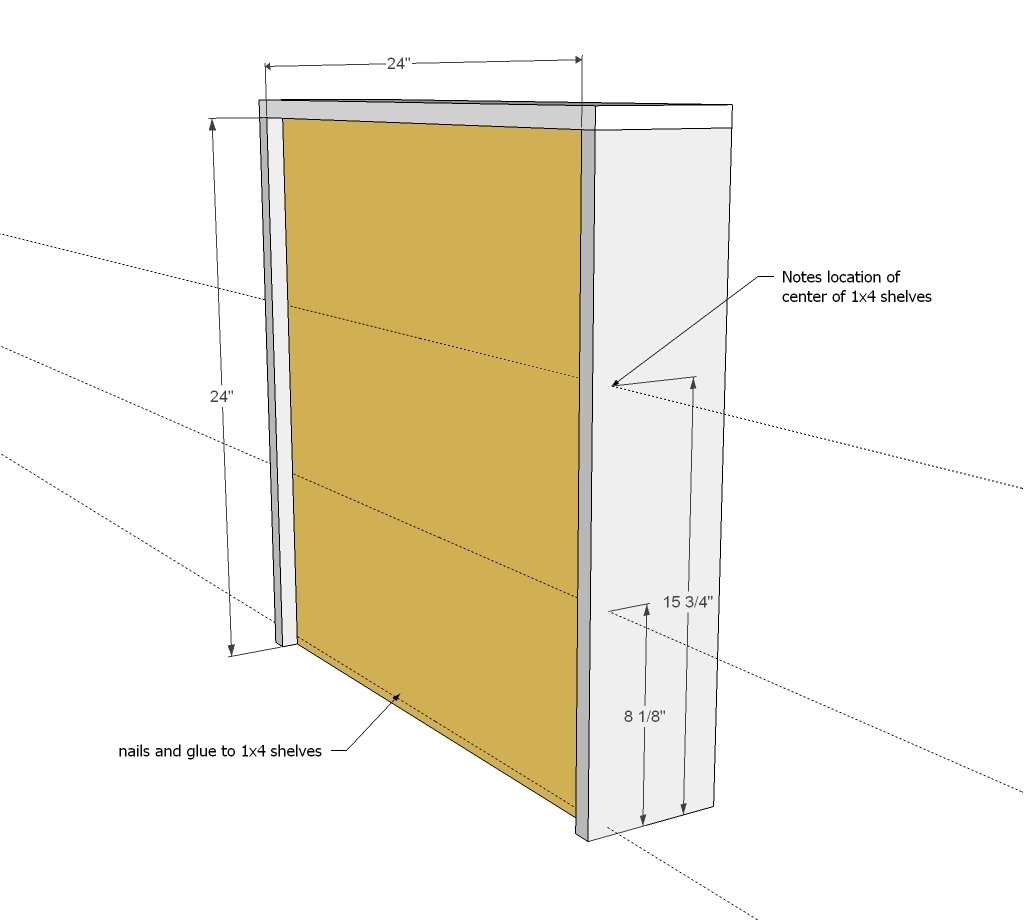
Attach with nails and glue to the 1x4s.
TIP: Mark location of 1x4s FIRST with a pencil on the sides, then place the plywood on top, and transfer the marks on top of the plywood.
Step 6
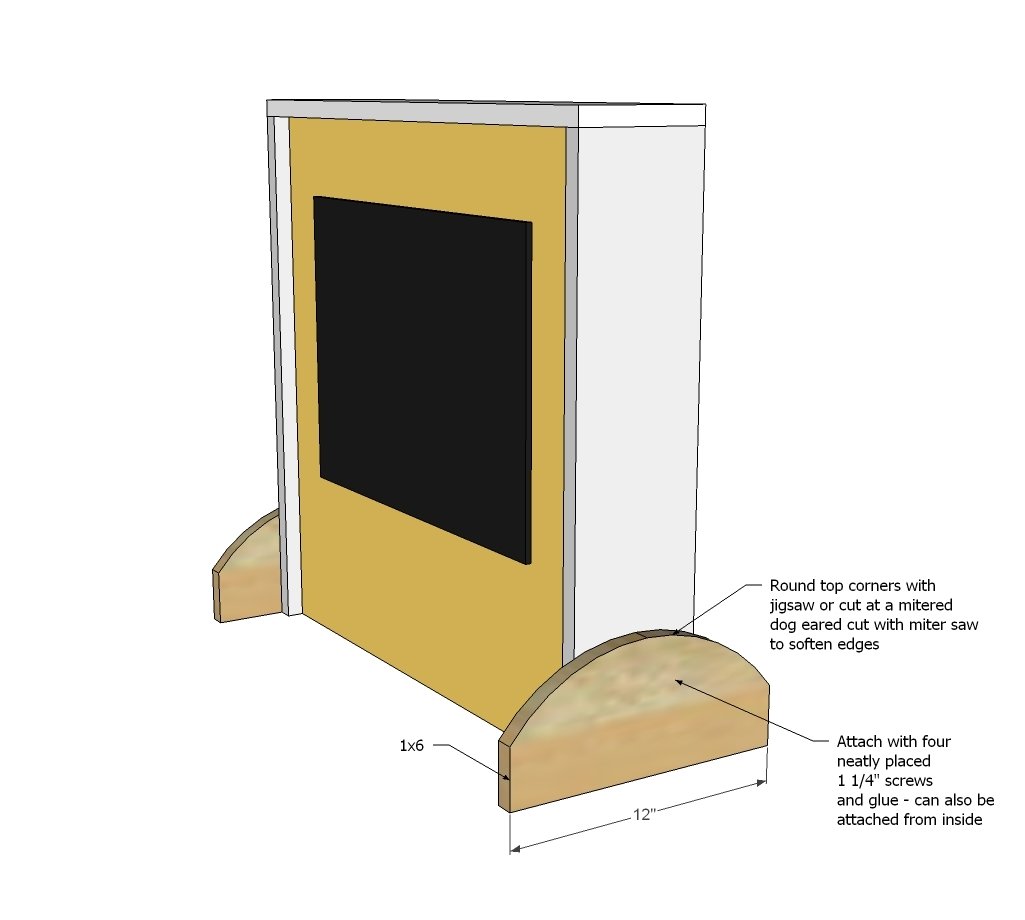
You'll need something to keep the play stand from tipping forward or backward - these guys will do the trick. NOTE: If you go higher, you may need to make these wider - use your best judgement here.
Step 7
Now for the top - find the center, and attach the short 1x3 in the center.
Step 8
Then attach the longer 1x3s on either side, overextending equally.
Step 9
Now for the sides of the hutch top - those get attached in the notched area on the ends.
Step 10
Next, attach the top shelf...
Step 11
And then the sides for holding the signs...
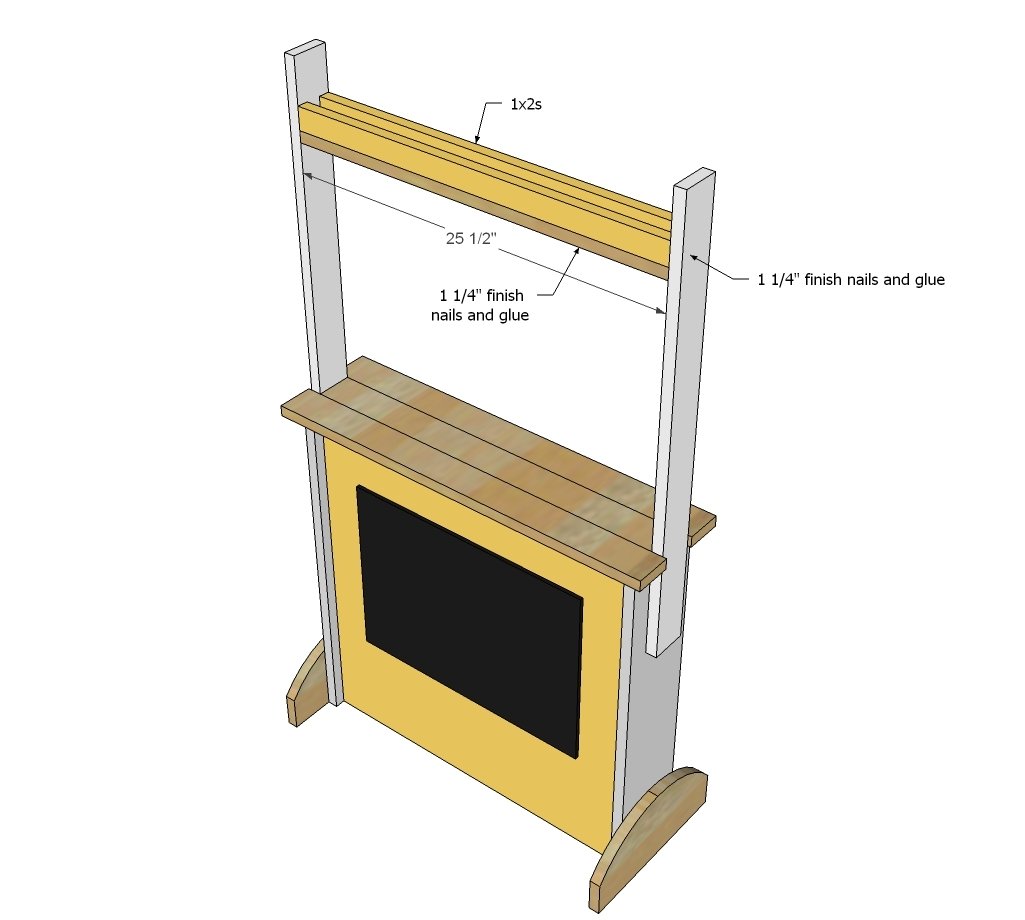
Step 12
Then add the dowel..
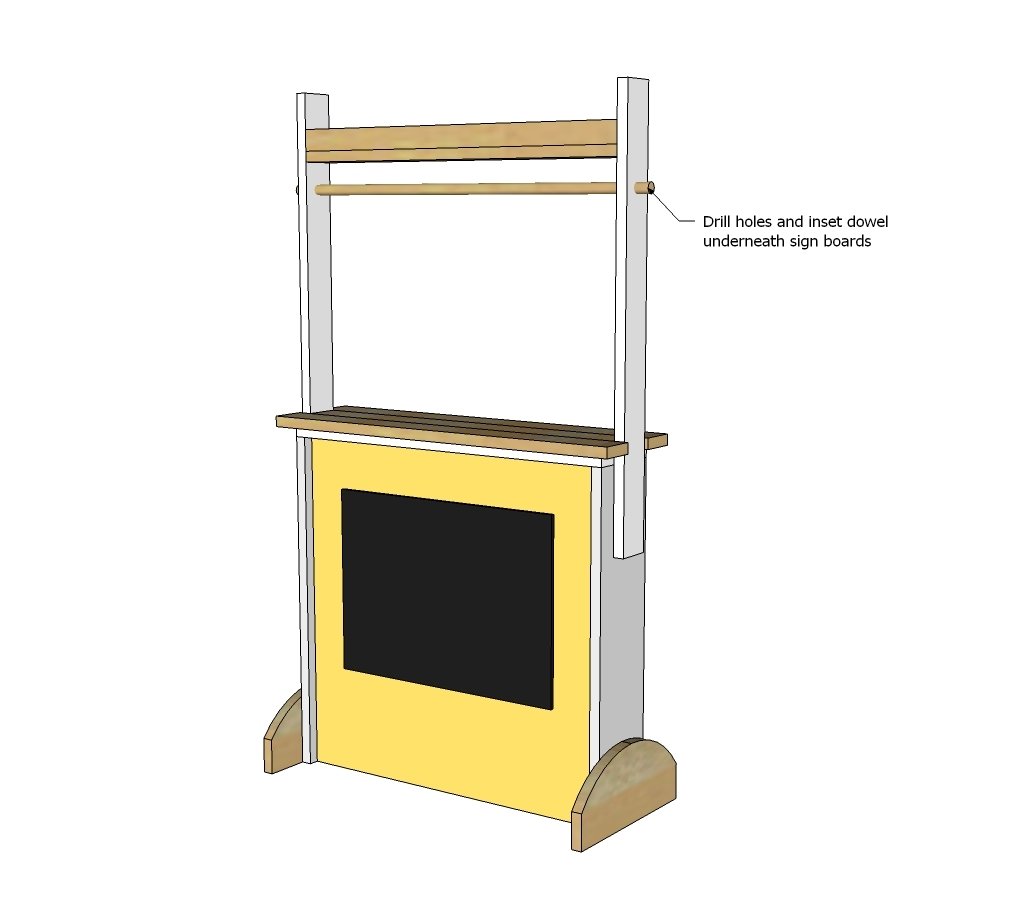
Step 13
And finally, it's time for the signs - I recommend lightweight foam board just to prevent any injury and because it's cheap and easy to work with and comes in a variety of colors.
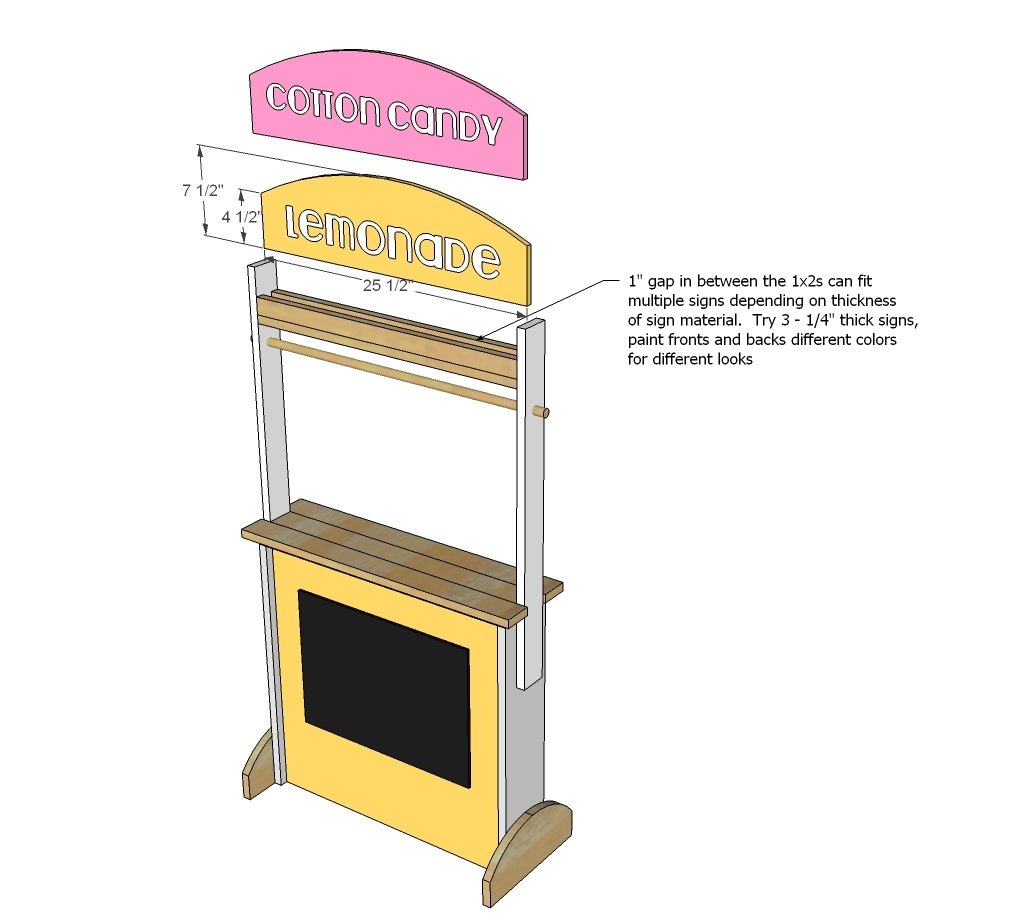
Step 14
Jaime has free patterns for the buntings here - so check them out too!
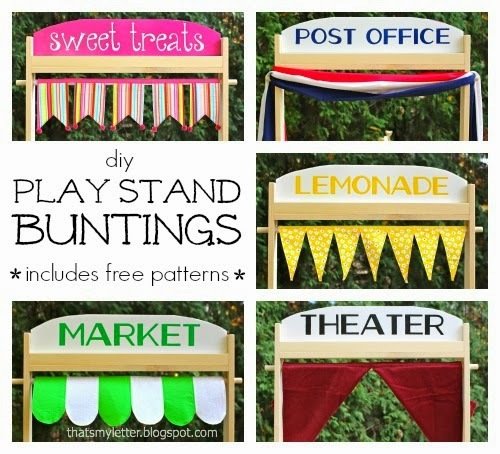
Finishing
Sand all surfaces, starting with a medium grit and finishing with fine. Wipe off the dust, fill any holes or gaps with wood filler, and sand smooth once dry. Apply primer if you're painting, then finish with your choice of paint or stain and seal with a durable clear topcoat. For outdoor projects, use exterior-rated primer, paint or stain, and sealer so the piece stands up to the weather.
Source (temporary): https://www.ana-white.com/woodworking-projects/play-stand