Play Table Stools
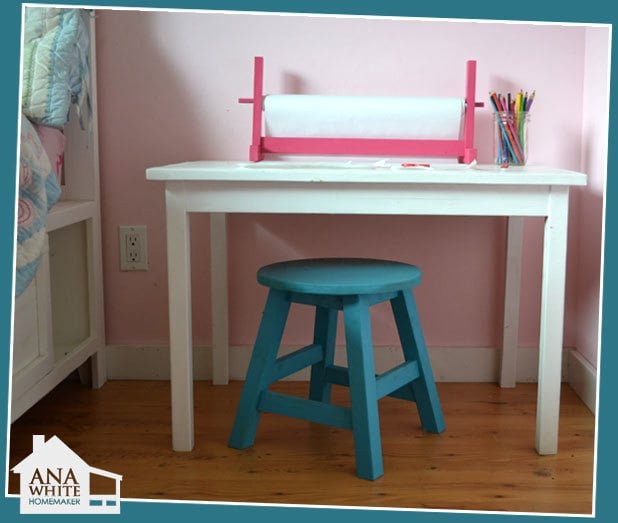
Make your kids their very own stools! This DIY project is free and contains step by step instructions so you can build stools from wood boards!
Specifications
| Project type | Side and End Table Plans |
|---|---|
| Room | Kids and Toys |
| Style | Children's and Kid's Room Furniture and Toy Plans |
| Difficulty | Advanced |
| Estimated cost | Under $20 |
Dimensions
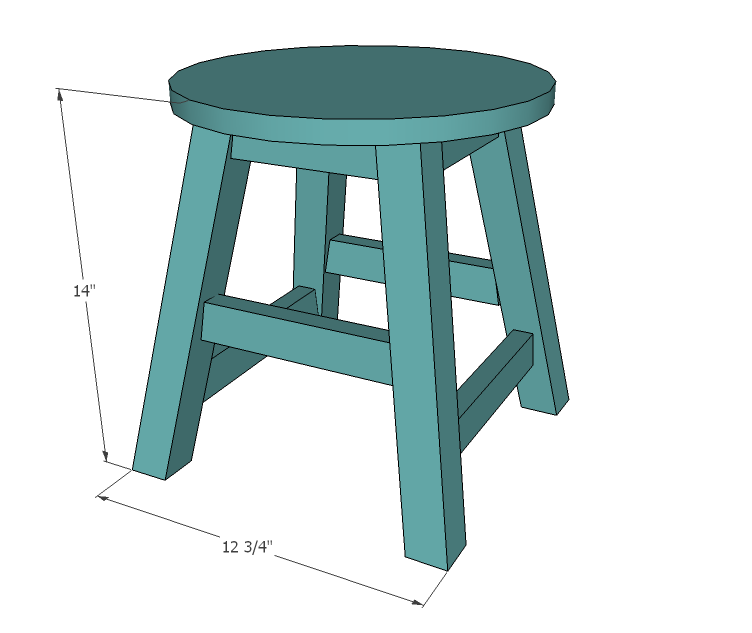
Use the size-specific shopping and cut lists below.
Shopping List
1 - 2x2 @ 6 feet long
1 - 1x2 @ 8 feet long
1 - 3/4" Plywood measuring at least 13" x 13" or a 13" diameter wood round (this is the stool top)
Cut List
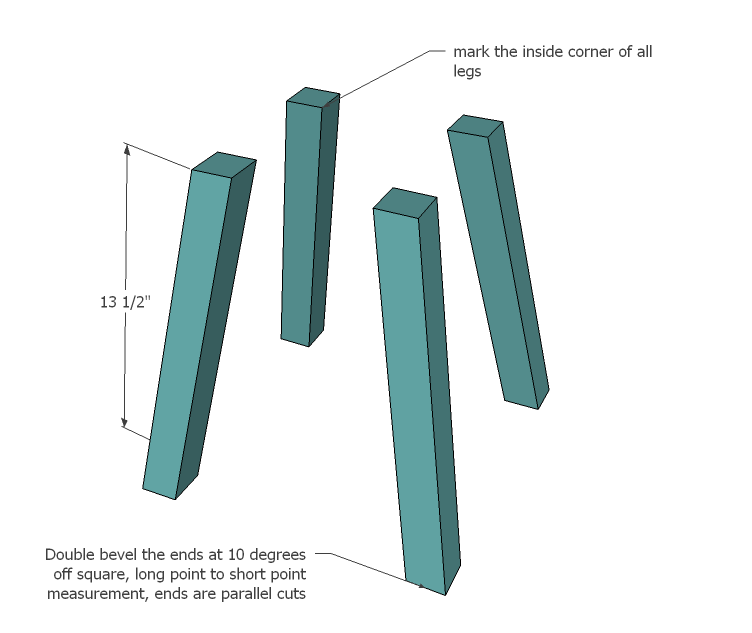
4 - 2x2 @ 13 1/2" (Ends double beveled at 10 degrees/10 degrees with ends parallel)
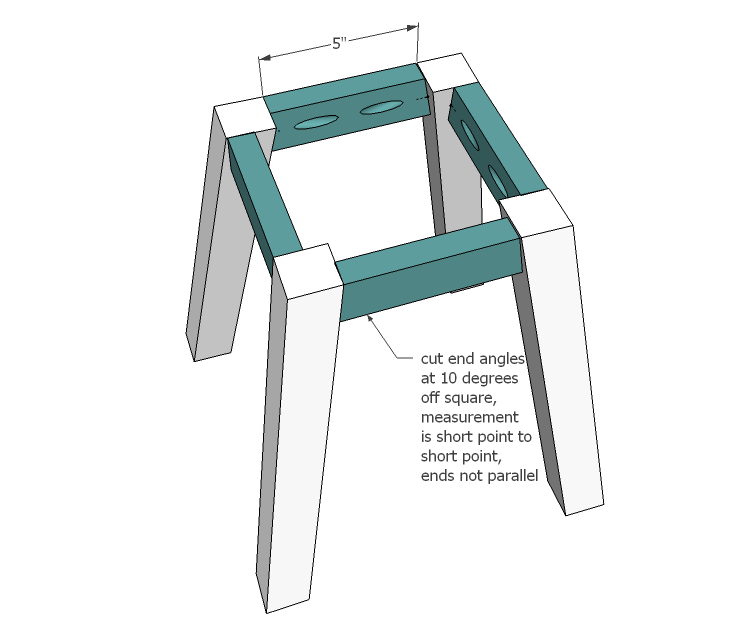
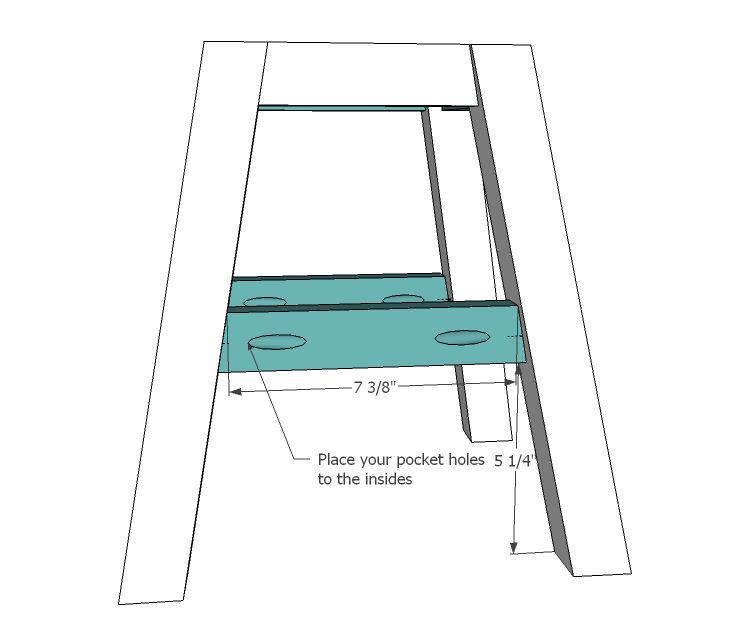
4 - 1x2 @ 5" (Short point to short point, both ends at 10 degrees off square, ends are NOT parallel)
2 - 1x2 @ 7 3/8" (Short point to short point, ends are NOT parallel, both ends cut at 10 degrees off square)
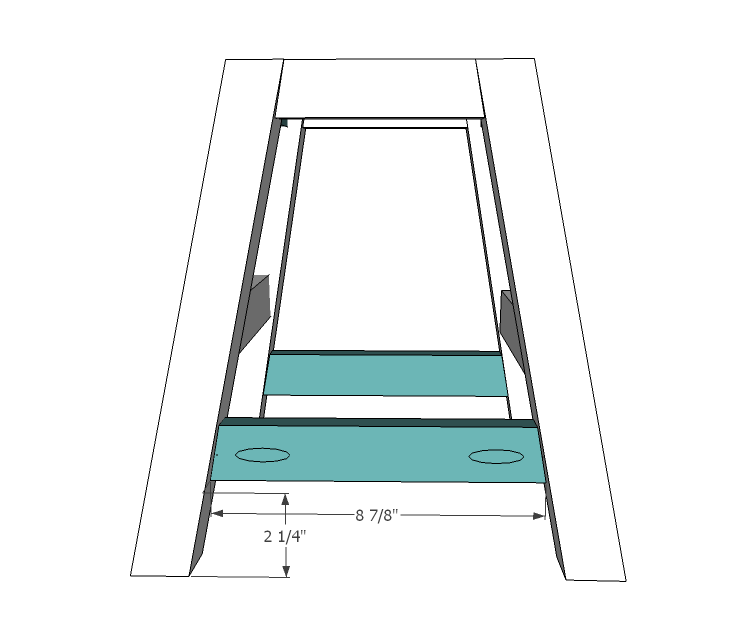
2 - 1x2 @ 8 7/8" (Long Point to long point, ends are not parallel, both ends cut at 10 degrees off square)
1 - 3/4" Plywood cut into 13" diameter round
Tools
- measuring tape
- square
- pencil
- safety glasses
- hearing protection
- kreg-jig
- drill
- jigsaw
- compound miter saw
- sander
- level
- countersink drill bit
Step-by-step Instructions
Step 1
You'll want to mark all legs so you can clearly tell what point is the inside corner.
Step 2
Pocket holes are the way to go on this stool. I used a Kreg Jig and attached the top aprons as shown above, flush to the outside top corner. NOTE: You will want to drill one pocket hole (not shown) in each apron center to attach the top. See step 5.
Step 3
Now carefully measure and add the first row or stretchers.
Step 4
And then the second and final row.
Step 5
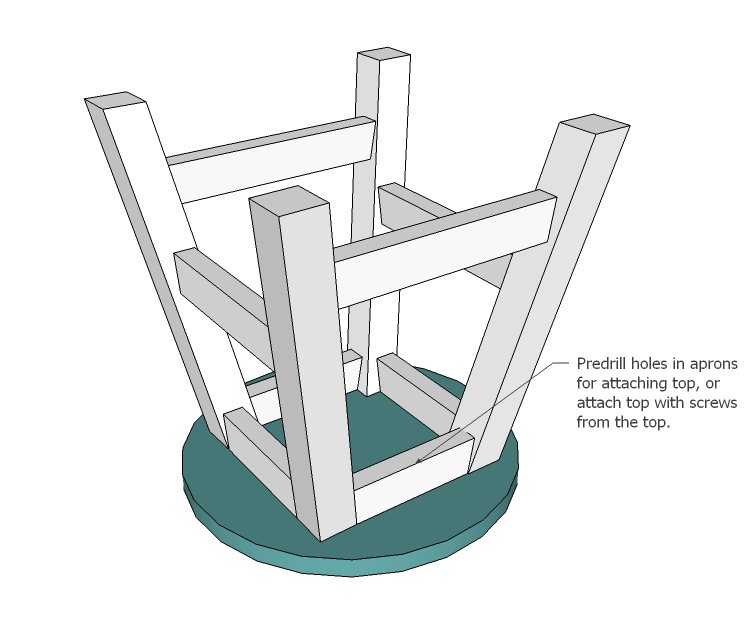
Finishing
Sand all surfaces, starting with a medium grit and finishing with fine. Wipe off the dust, fill any holes or gaps with wood filler, and sand smooth once dry. Apply primer if you're painting, then finish with your choice of paint or stain and seal with a durable clear topcoat. For outdoor projects, use exterior-rated primer, paint or stain, and sealer so the piece stands up to the weather.
Source (temporary): https://www.ana-white.com/woodworking-projects/play-table-stools