Play Vanity
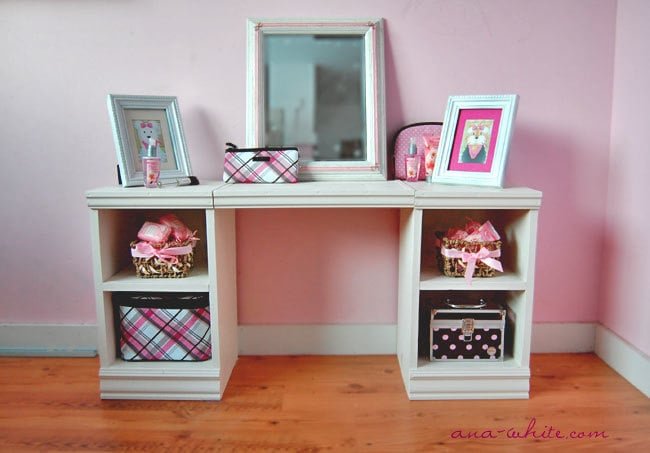
A play vanity that is both adorable and easy to build. Features four cubbies, large top surface.
Specifications
| Project type | Toys |
|---|---|
| Room | Kids and Toys |
| Style | Children's and Kid's Room Furniture and Toy Plans |
| Difficulty | Beginner Projects |
| Estimated cost | $20 - $50 |
Dimensions
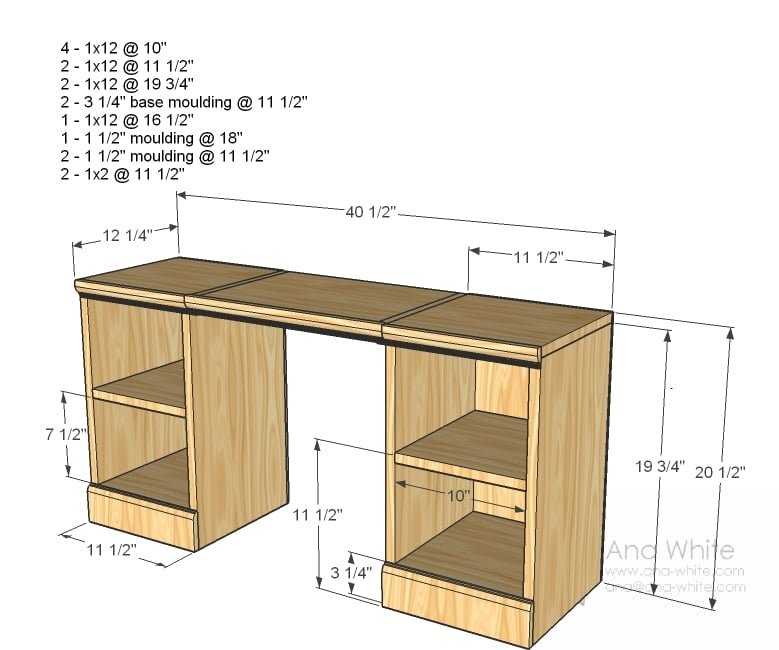
Use the size-specific shopping and cut lists below.
Shopping List
2 – 1×12, 8 feet long
24″ of 3 1/4″ base moulding (go to orange, the let you buy just two feet of moulding instead of an entire stick)
24″ of 1x2s
48″ of 1 1/2″ moulding
2″ screws
1 1/4″ screws
1 1/4″ finish nails
1/4″ plywood or beadboard scraps for the back, 2 at least 11 1/2″ wide x 20 1/2″ tall
wood glue, filler, sandpaper and finishing supplies
Cut List
4 - 1x12 @ 10"
2 - 1x12 @ 11 1/2"
4 - 1x12 @ 19 3/4"
2 - 3 1/4" base moulding @ 11 1/2"
1 - 1x12 @ 16 1/2"
1 - 1 1/2" moulding @ 18"
2 - 1 1/2" moulding @ 11 1/2"
2 - 1x2 @ 11 1/2"
Tools
- measuring tape
- square
- pencil
- hammer
- safety glasses
- hearing protection
- drill
- circular saw
- nailer
- sander
- countersink drill bit
Step-by-step Instructions
Step 1
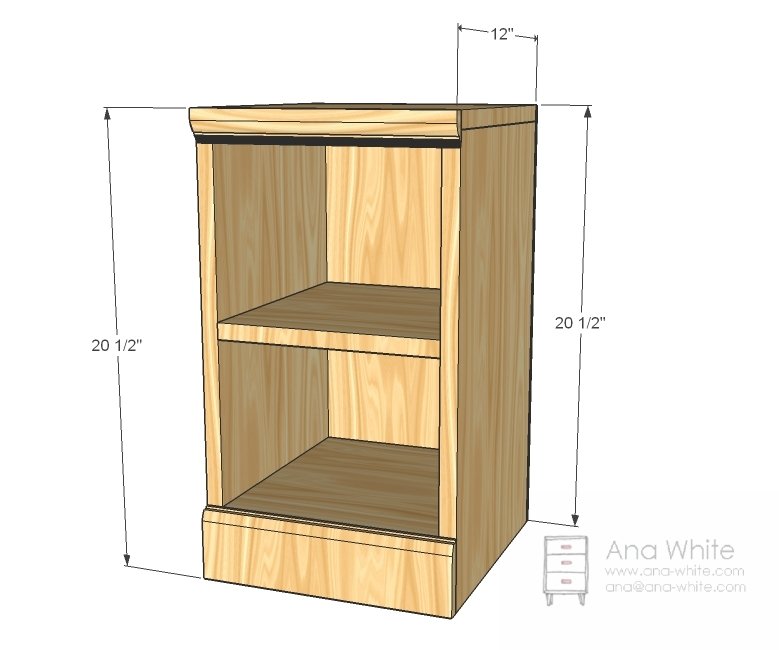
Here are the dimensions for the “nightstands” perfect for a toddler bed or small bedroom or playroom. You will need to build two of these. This morning, I woke up, made coffee, went out and got some firewood and made fires in the garage and house, answered a few emails, was on a few calls, started building these about 10 am. By the time the Nate Berkus show was over, I was back inside (we’ve got a tv in the garage so I can watch Nate ) to let the wood filler dry, and cleaned house and cooked brunch. Then I went back out and sanded and put a coat of primer on. More cleaning, some more emails, a little work on the other not so fun stuff. Then a coat of paint. A little more work, a few pages of the Alphabet book, and then I could see the sun going down at about 2:00 PM and still slightly wet, hauled the vanity in and photographed it. Grace is almost four now, so she doesn’t need the constant attention of a toddler or baby, but I do pay for not entertaining her by cleaning up later! If you are set up and build fairly often, this is an easy afternoon project that you can finish in plenty of time for wrapping paper.
Box
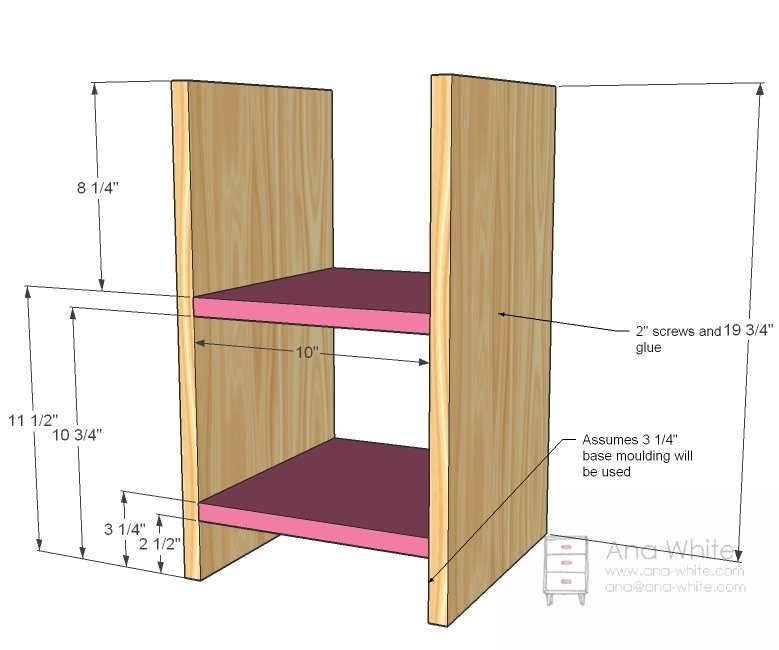
I started by marking the sides where the shelves go on the insides and outsides (so I know where the shelves go and where to screw. Then I predrilled holes and applied glue to the shelves and screwed it together with 2″ screws.
Top
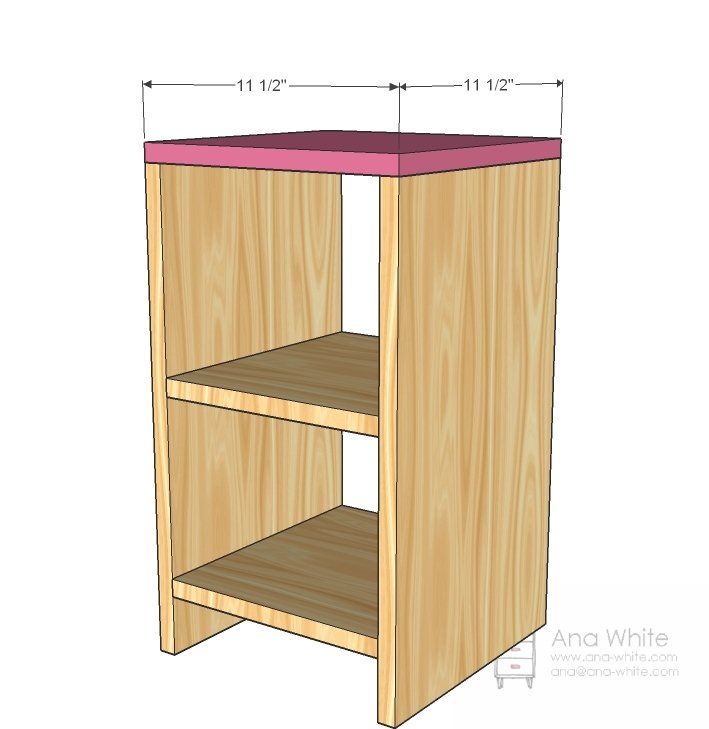
The top is so easy, just predrill holes along the sides, and apply glue to the top of the sides and screw down with 2″ screws. Keep your outside edge
Back
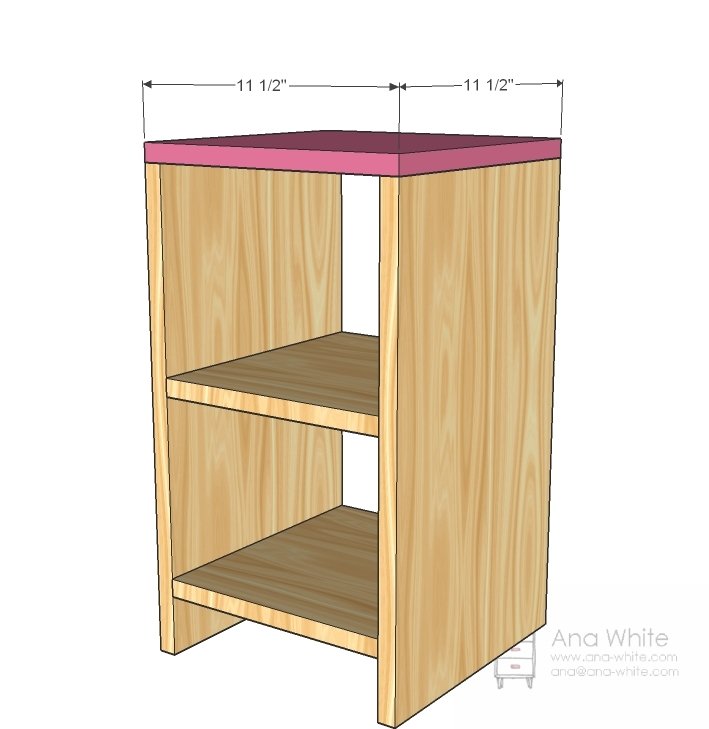
I cut my backs with a 10″ sliding compound miter saw by first cutting one side, then flipping it over and cutting the other.
Step 5
Front Base Trim
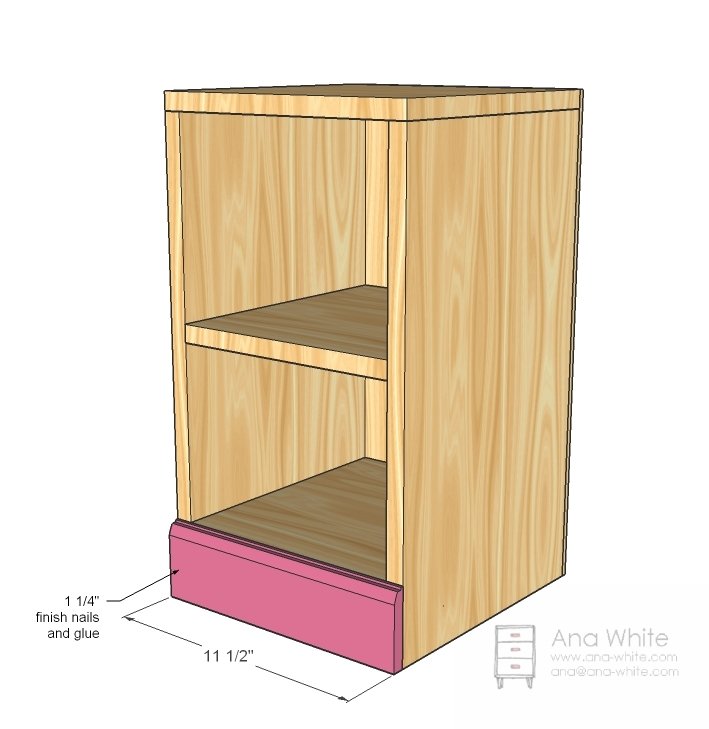
Glue and nail it down.
Tabletop
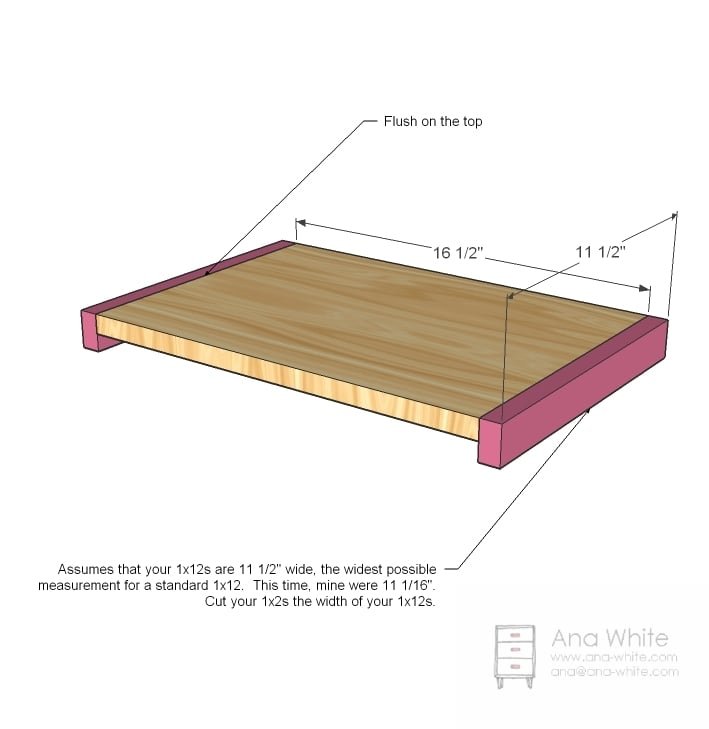
Simply predrill holes and screw the 1x2s to the sides of the 1x12s with 2″ screws and glue. Keep top flush.
Front Trim
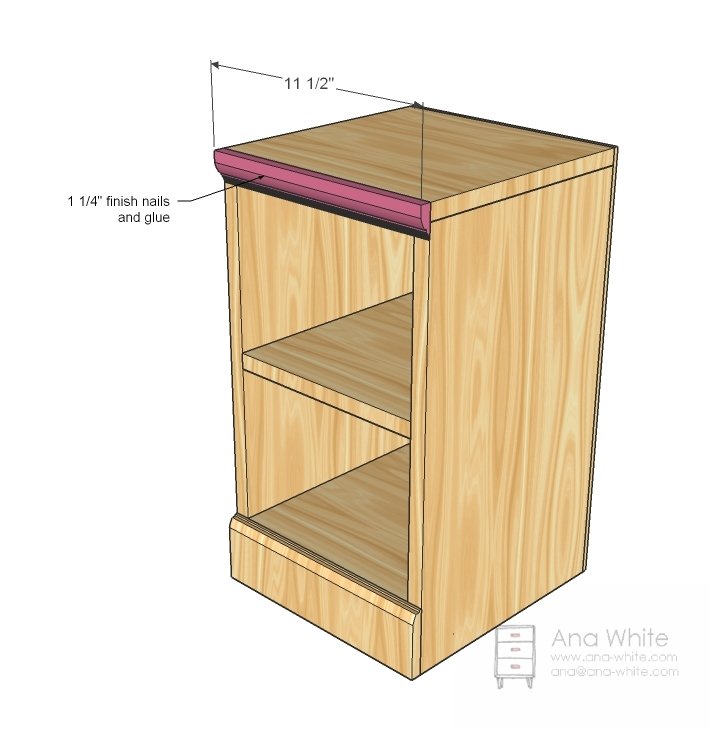
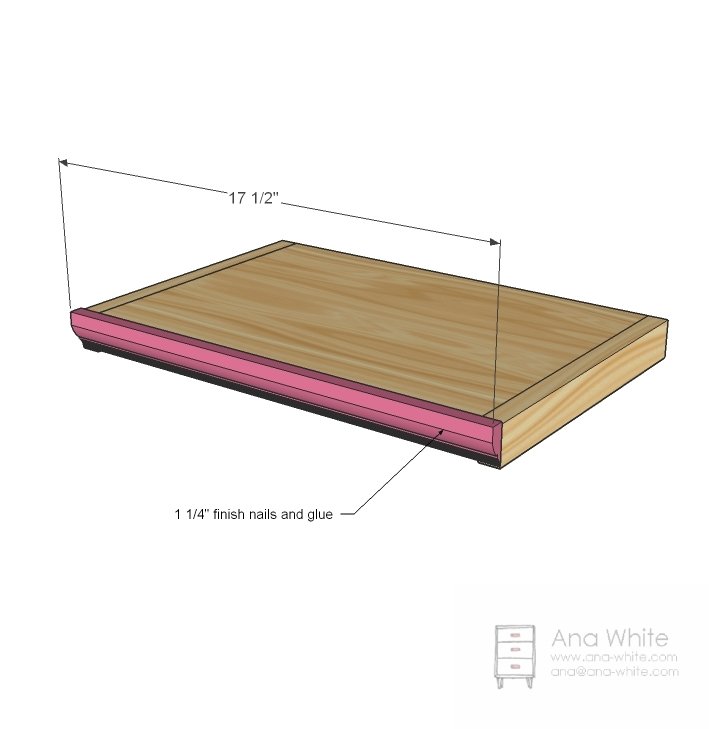
And then nail trim on with glue and 1 1/4″ finish nail
Assembly
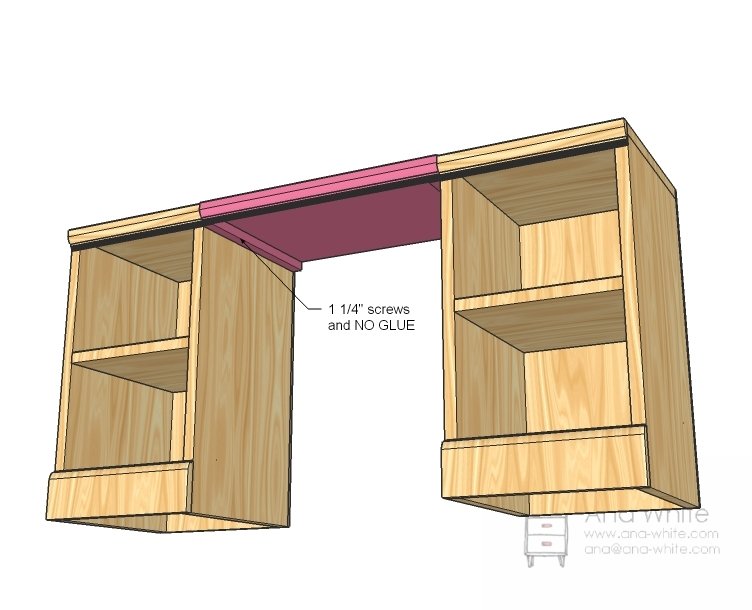
Assembly is easy, but have someone give you a hand (Grace held it up while I screwed). It’s best to predrill holes in the 1x2s first, that way it’ll be easy to start your screws. Or just put it together upside down on the floor.
Finishing
Sand all surfaces, starting with a medium grit and finishing with fine. Wipe off the dust, fill any holes or gaps with wood filler, and sand smooth once dry. Apply primer if you're painting, then finish with your choice of paint or stain and seal with a durable clear topcoat. For outdoor projects, use exterior-rated primer, paint or stain, and sealer so the piece stands up to the weather.
Source (temporary): https://www.ana-white.com/woodworking-projects/play-vanity