Plywood and Lumber Storage System
Plywood and Lumber Easy Build Storage Solution I’ve been building furniture for over 20 years, and one thing I’ve learned is that keeping lumber on hand — and stored properly — makes building faster, easier, and helps keep boards straighter and ready to use. This is the simple storage system I use in my own shop. use just 9 standard 2x4 boards to build a hardworking DIY lumber rack that stores full sheets of plywood off the ground, organizes 8' lumber lengths, and even provides space on top for shorter boards and extra stock. It’s an easy, budget-friendly project that helps keep your workshop neat and your materials ready for the next build.
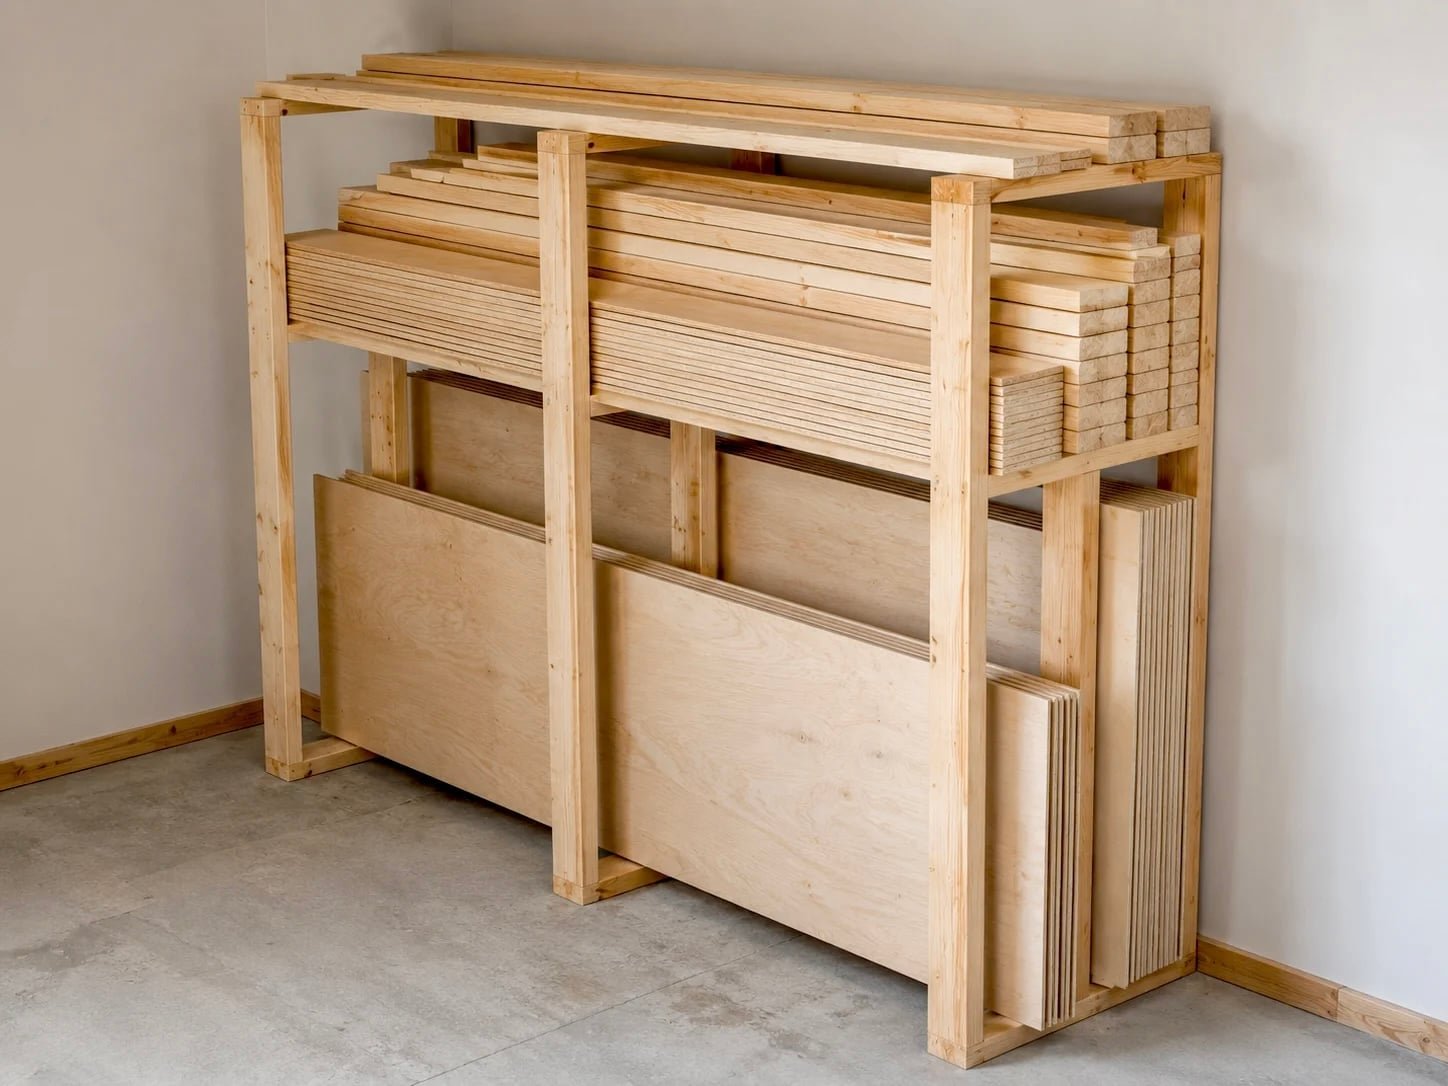
Specifications
| Project type | Garage Storage |
|---|---|
| Room | Garage and Workshop |
| Difficulty | Beginner Projects |
Dimensions
Use the size-specific shopping and cut lists below.
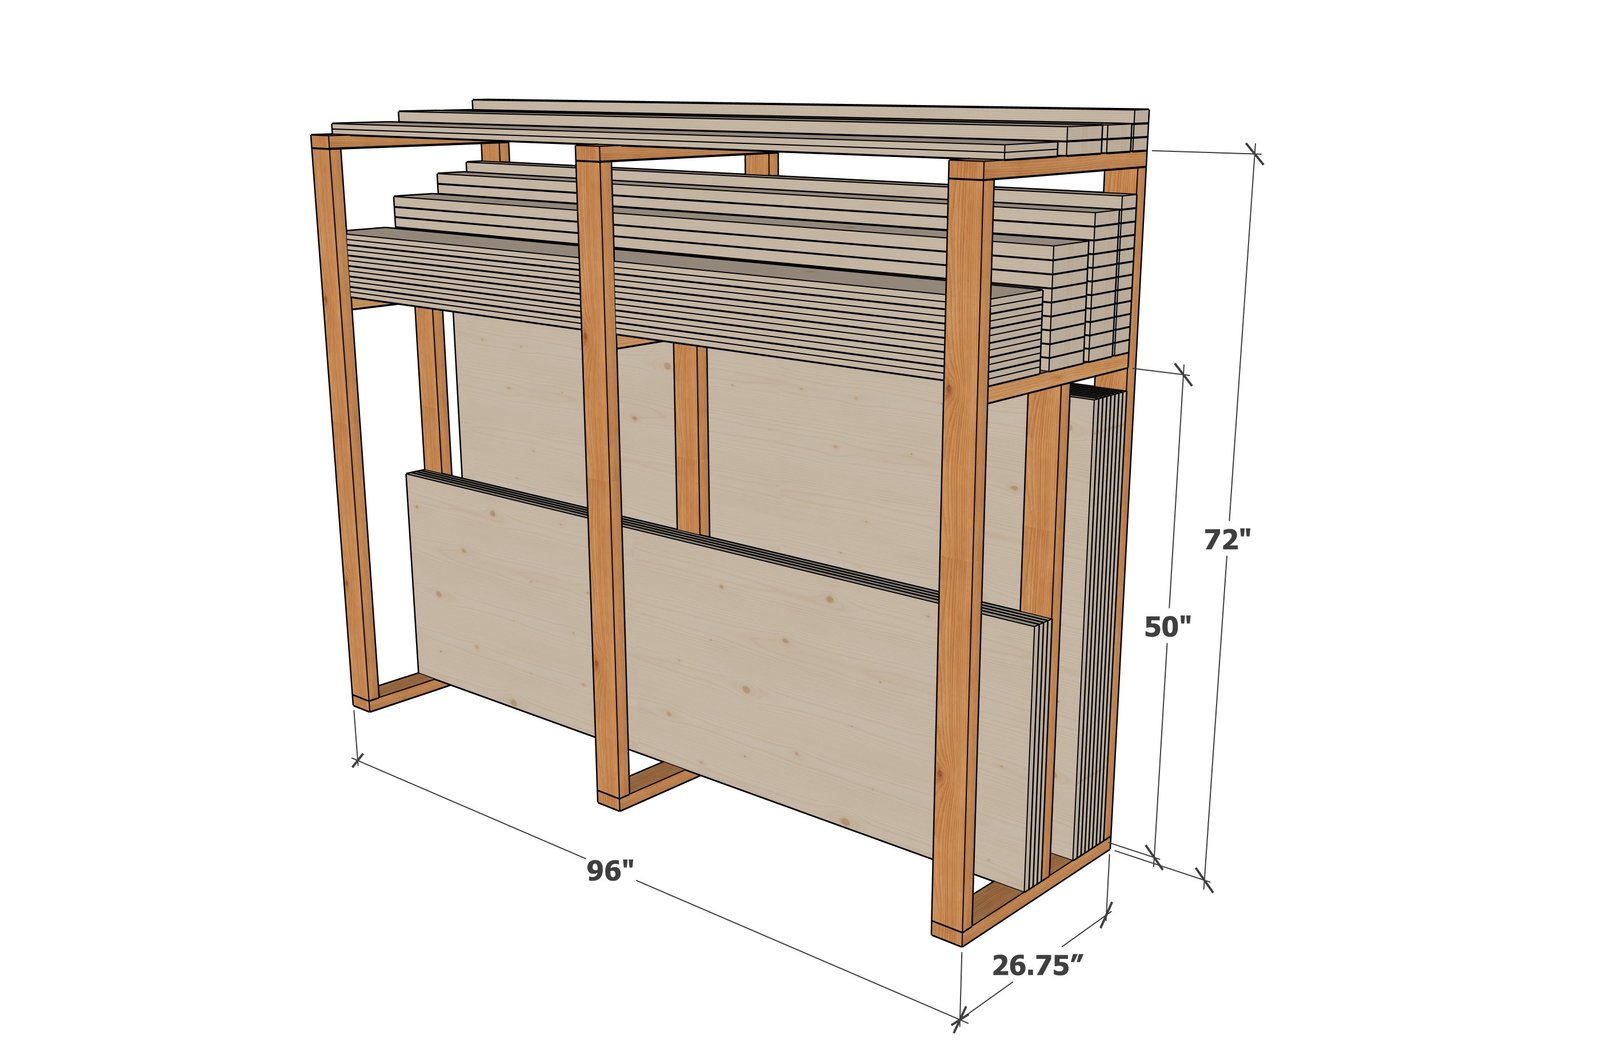
Shopping List
- 9 - 2x4 @ 8 feet long
- 150 - 2-3/4" self tapping wood screws
Cut List
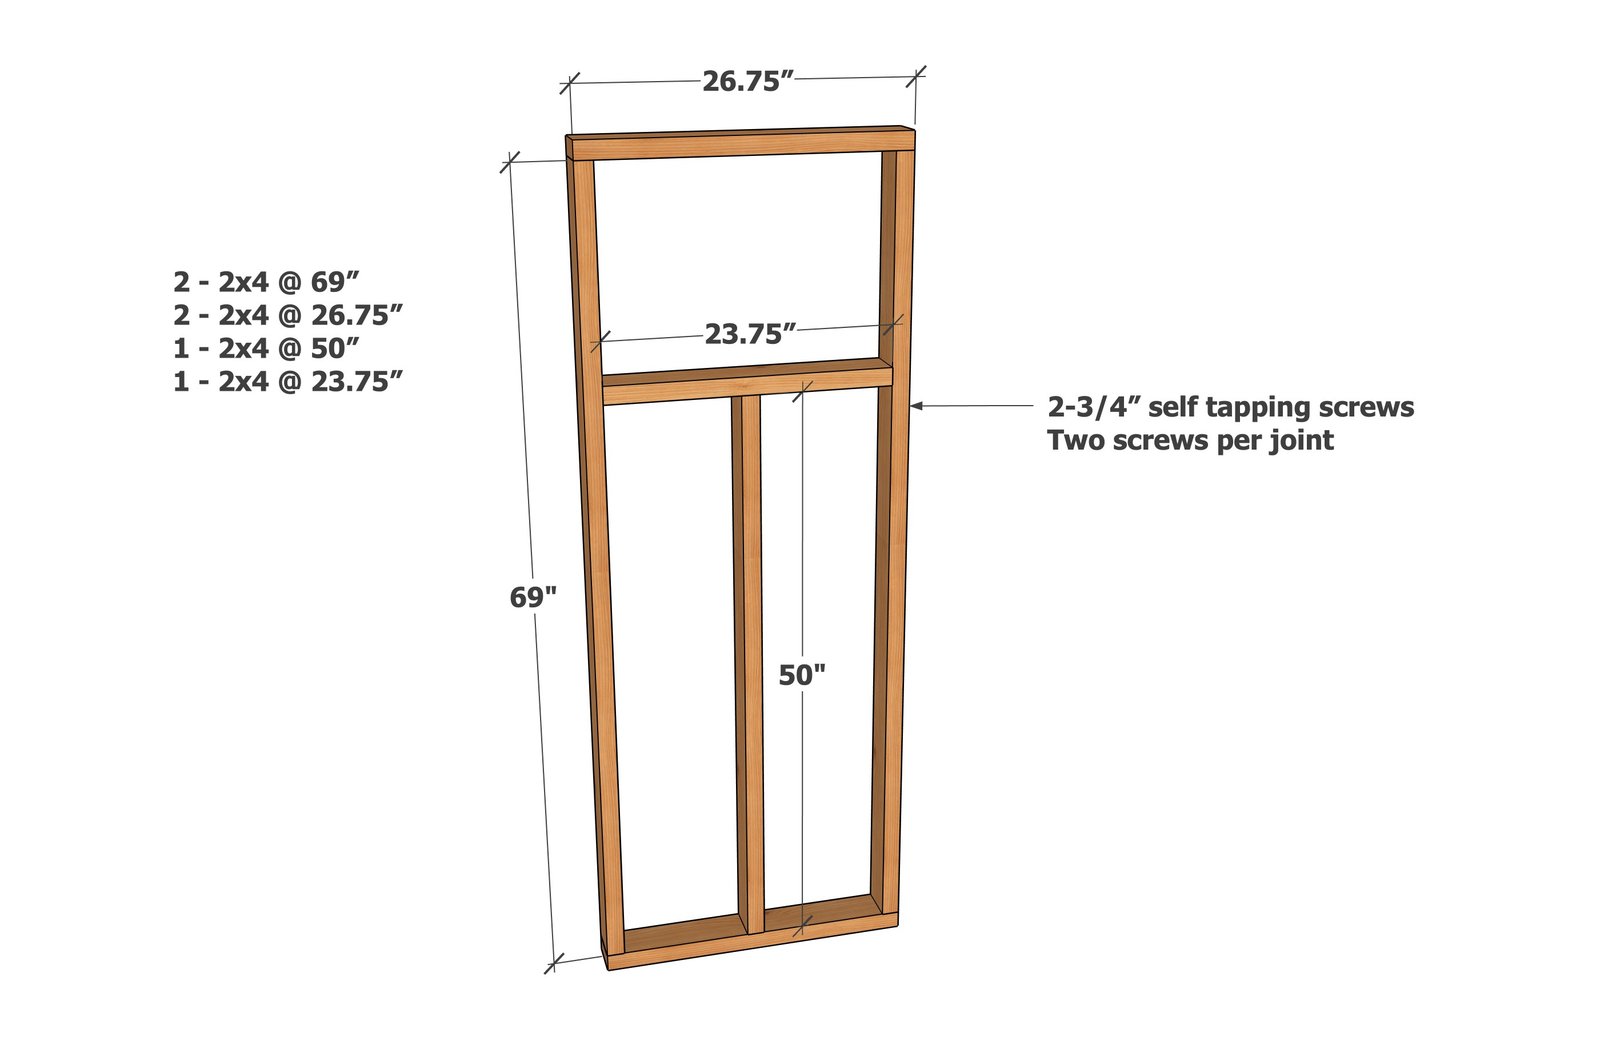
- 6 - 2x4 @ 69"
- 6 - 2x4 @ 26-3/4"
- 3 - 2x4 @ 50"
- 3 - 2x4 @ 23-3/4"
Tools
- measuring tape
- square
- pencil
- safety glasses
- drill
- circular saw
Step-by-step Instructions
Step 1
Build three of the support racks as shown, using two screws per joint and wood glue.
Step 2
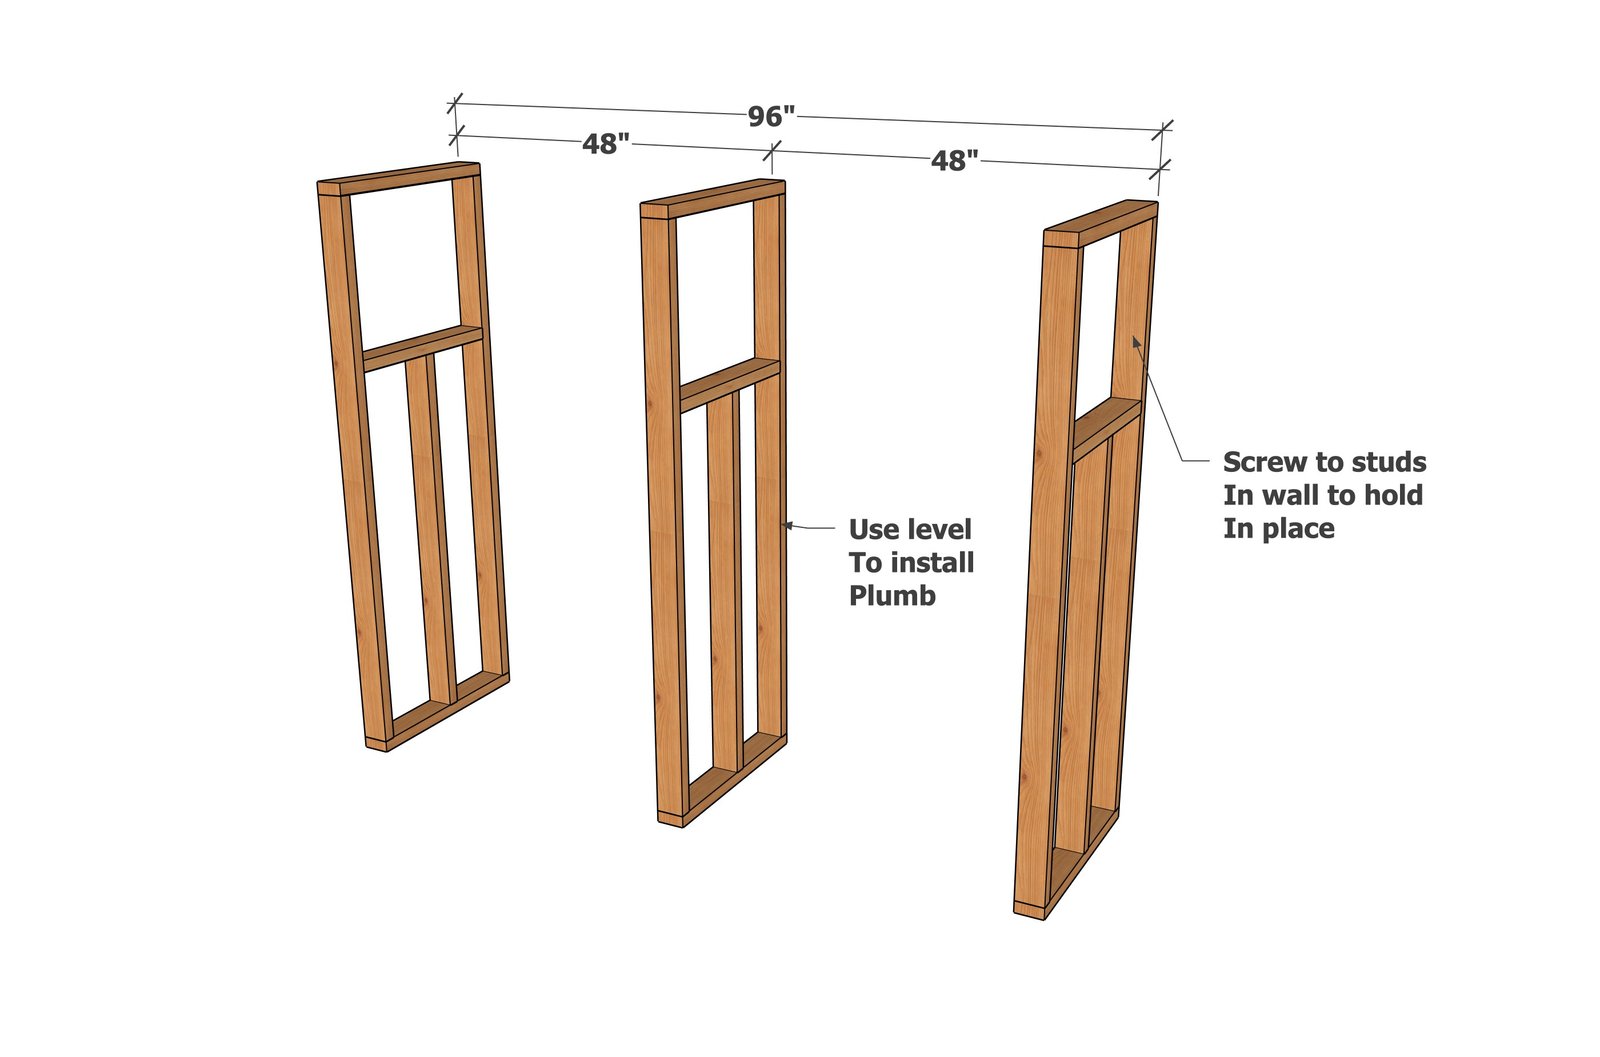
Locate studs in walls and attach the dividers to studs in walls.
BASEBOARDS/IRREGULAR STUD PATTERNS
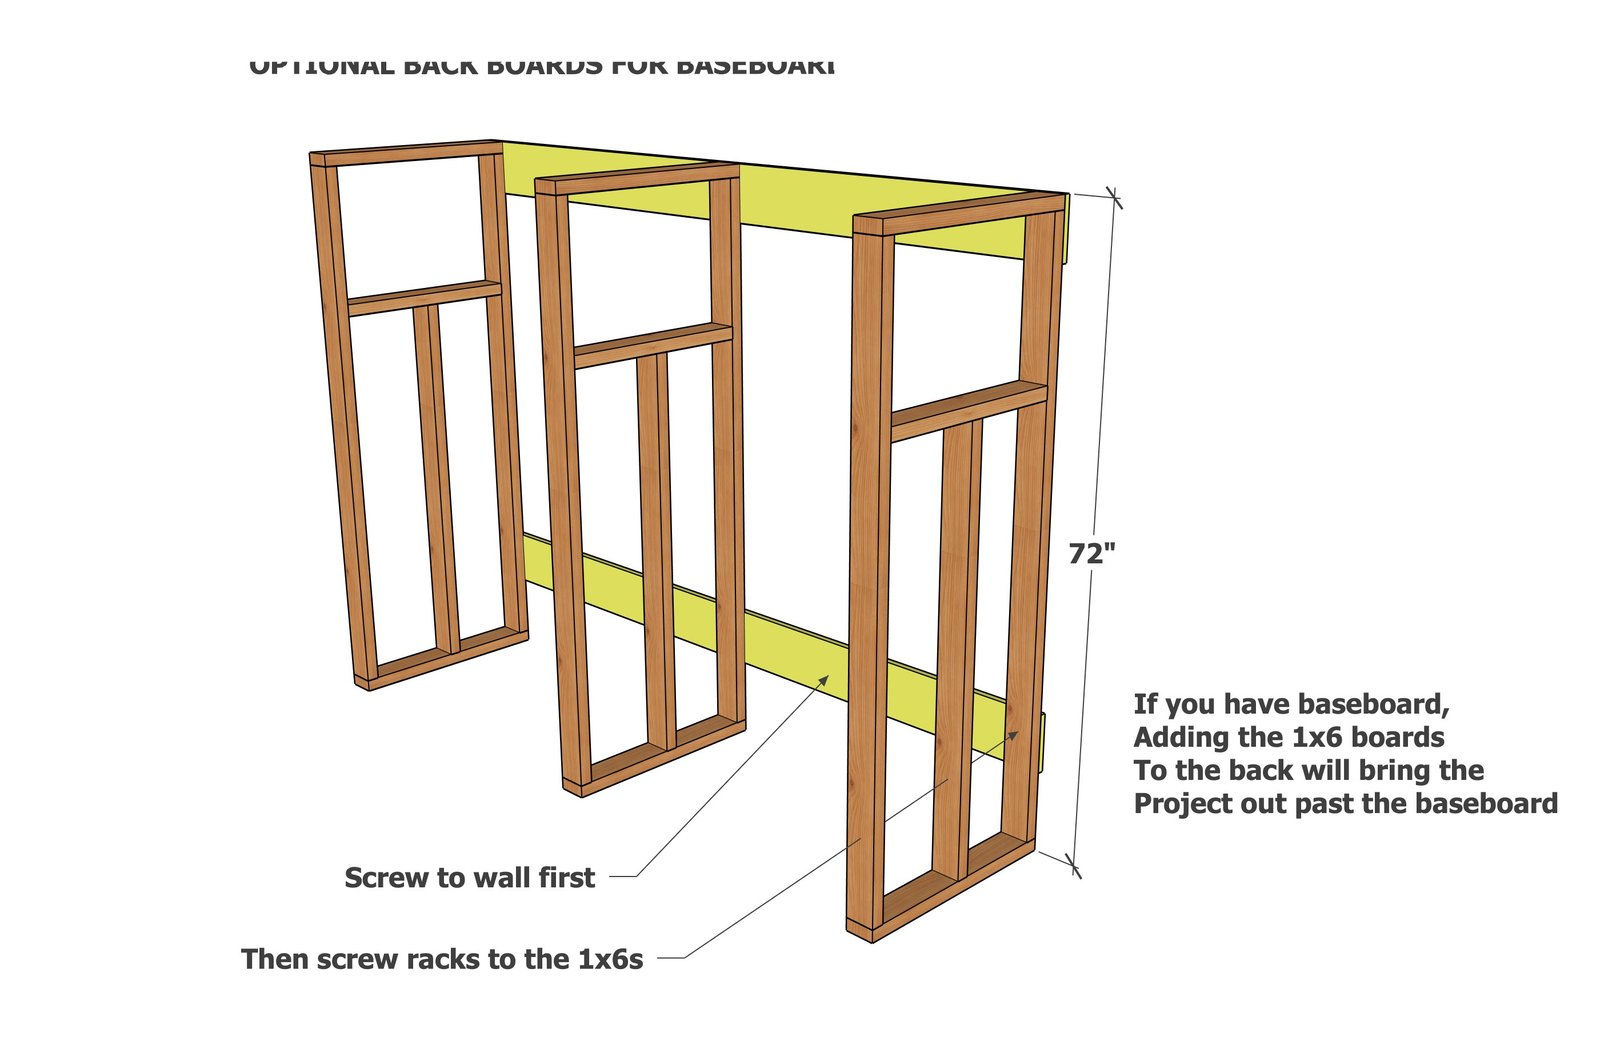
If you don't want to remove a baseboard, or can't line the racks up with studs in the wall, here's an easy way to do this - Attach 1x6 boards to the wall, then attach the rack to the 1x6s.
Step 4
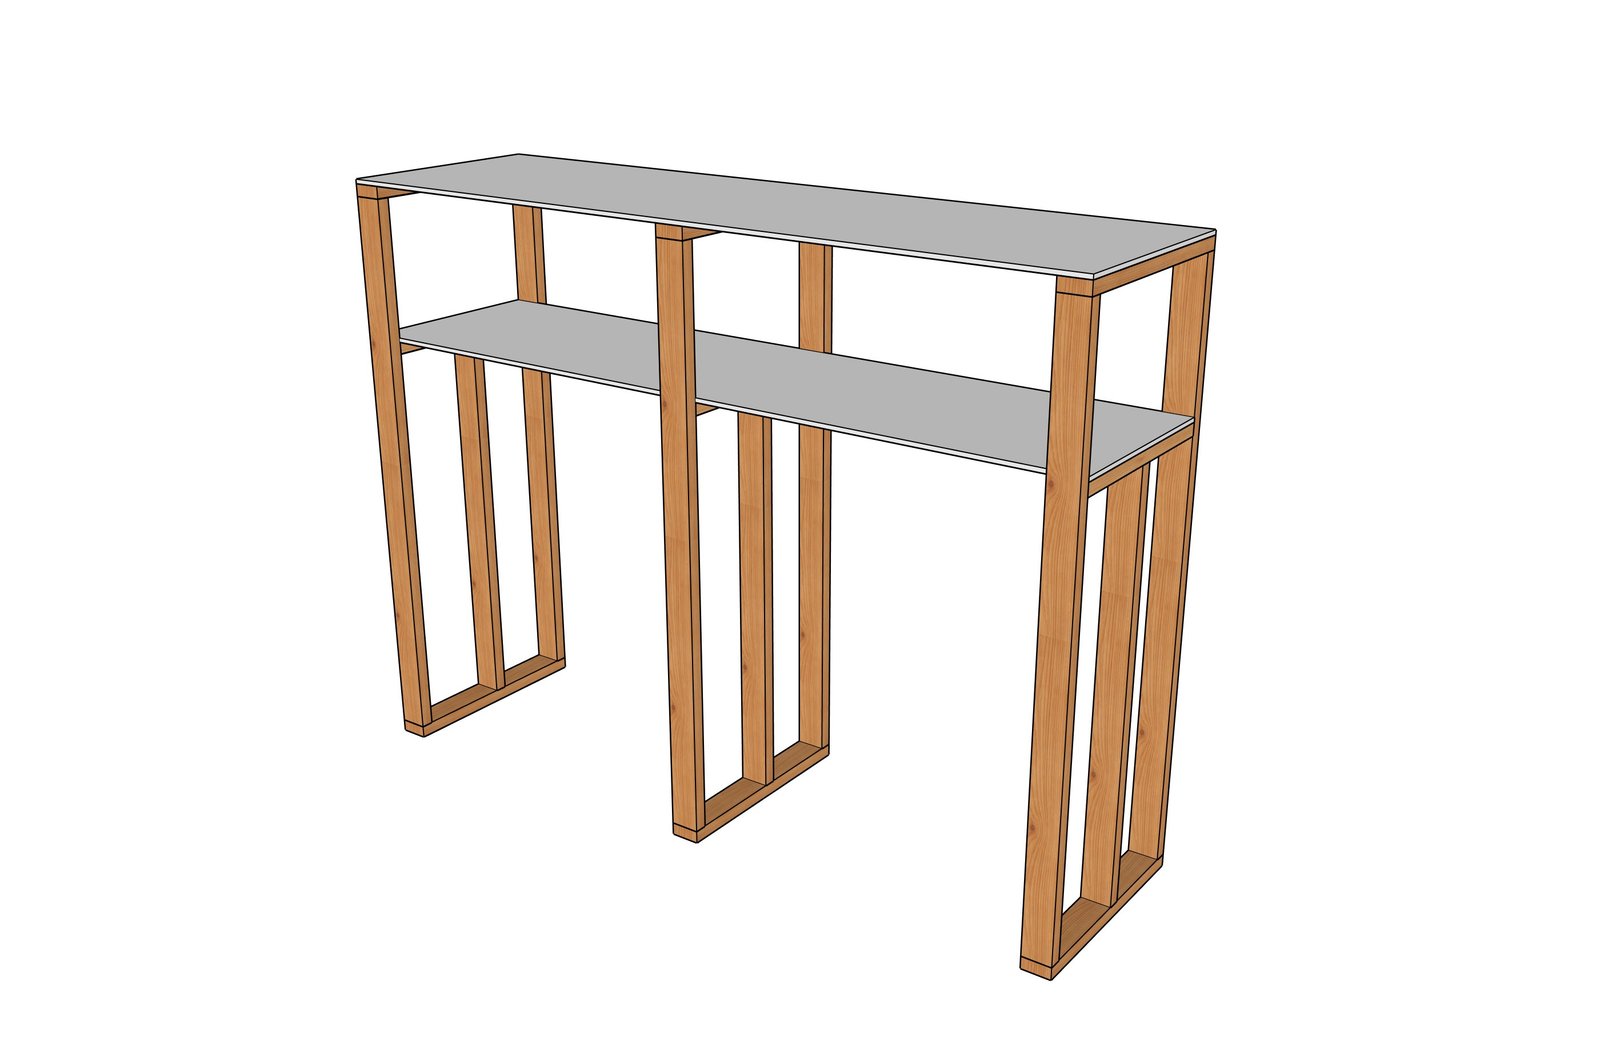
If desired, you can cover the top and middle shelves with 1/2" plywood, allowing for different sized materials. I just used 8' lengths of wood at the bottom to serve as shelving, and stack smaller pieces on top
Finishing
Sand all surfaces, starting with a medium grit and finishing with fine. Wipe off the dust, fill any holes or gaps with wood filler, and sand smooth once dry. Apply primer if you're painting, then finish with your choice of paint or stain and seal with a durable clear topcoat. For outdoor projects, use exterior-rated primer, paint or stain, and sealer so the piece stands up to the weather.
Source (temporary): https://www.ana-white.com/woodworking-projects/plywood-and-lumber-storage-system