Pocket Hole Planters
If you love hidden joints and pocket holes, try this simple planter plan! All joints are hidden on the inside, so it looks beautiful on the outside. 2x2 legs, with your choice of wood between the 2x2s. This is a free planter plan that you can use to build your own beautiful wood planters.
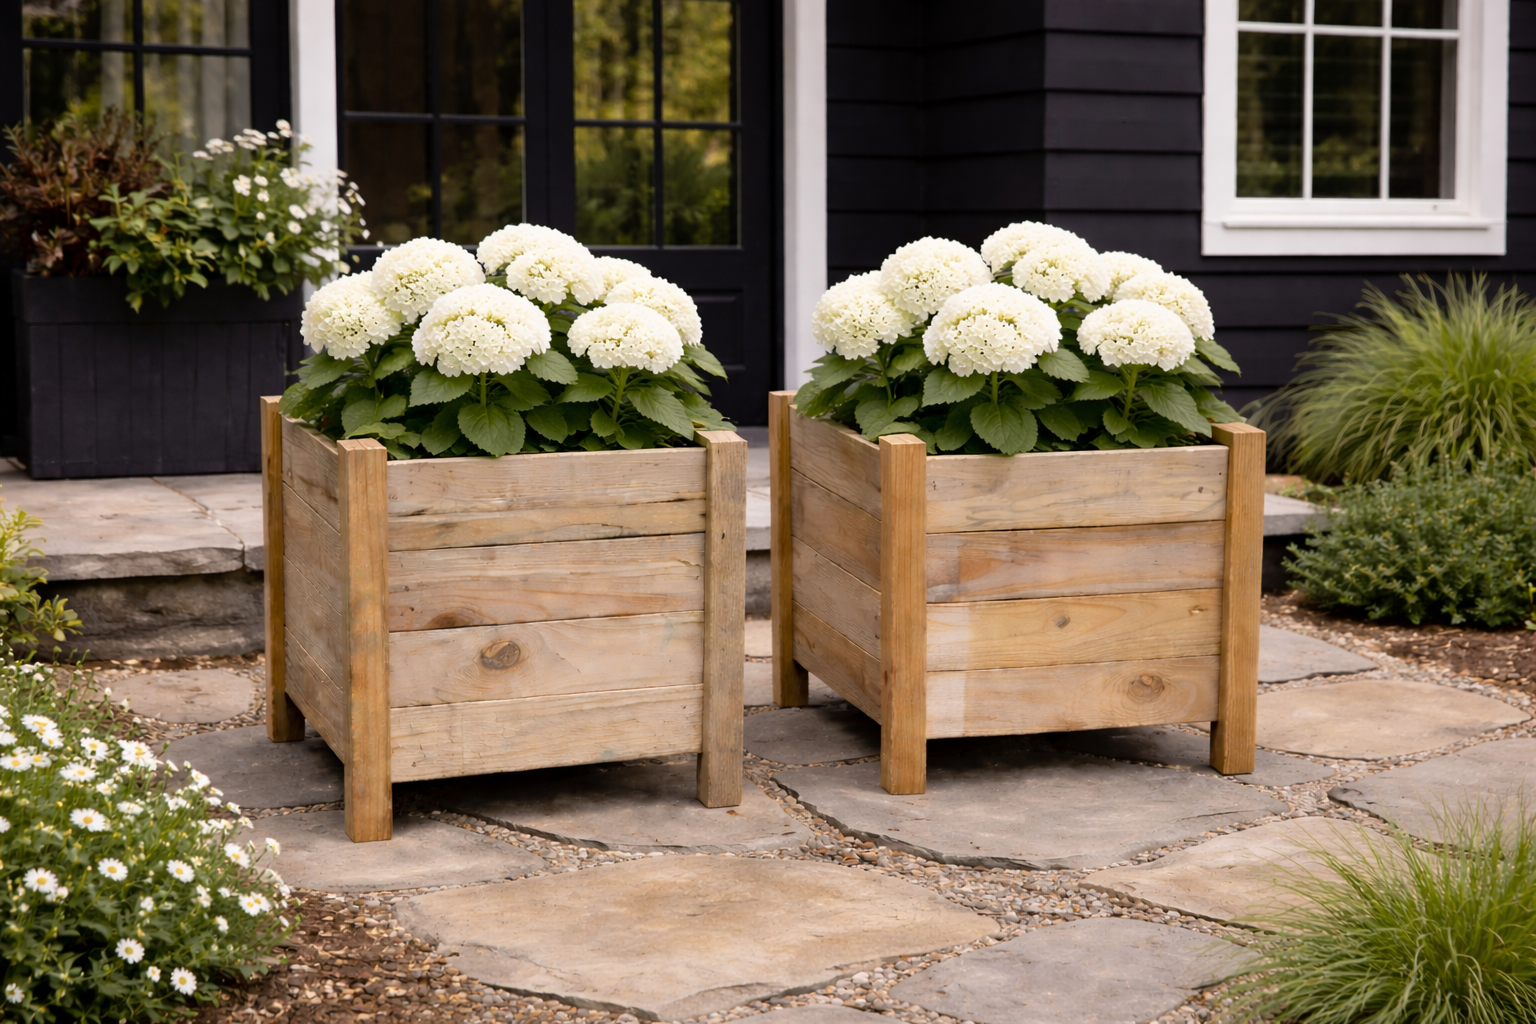
Specifications
| Project type | Planters, Garden Beds, and Greenhouses |
|---|---|
| Room | Outdoor |
| Style | Cottage Style Furniture Plans |
| Difficulty | Beginner Projects |
Dimensions
Use the size-specific shopping and cut lists below.
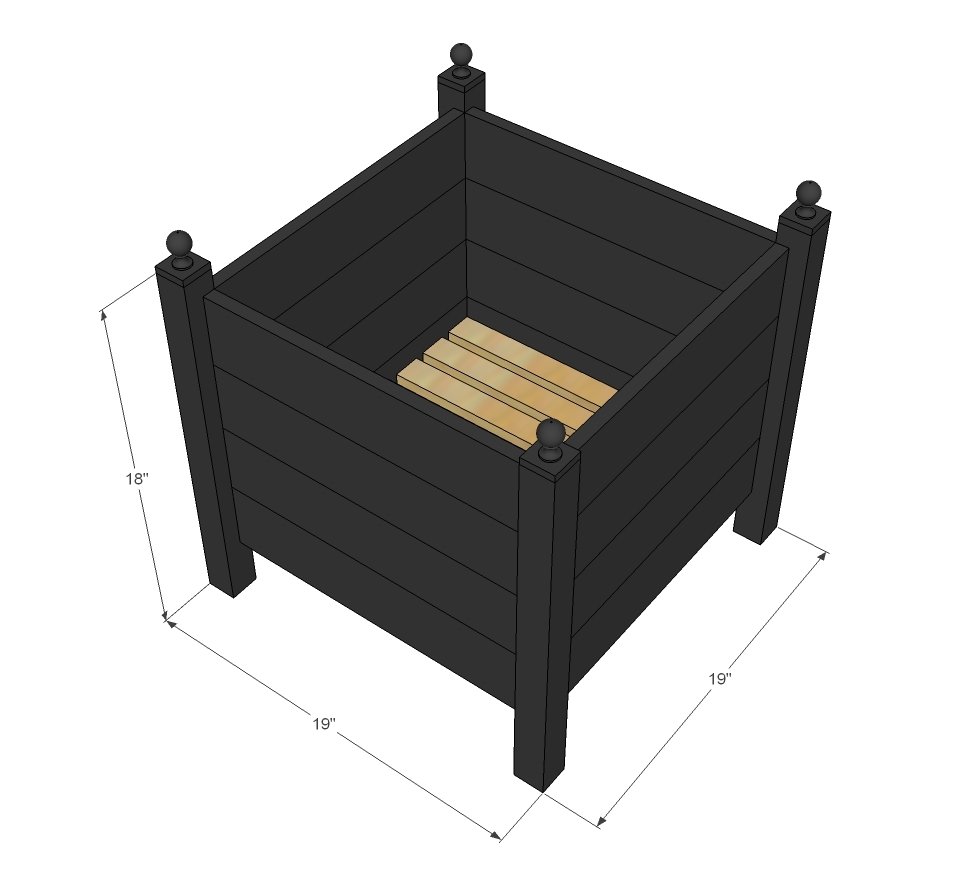
Shopping List
- Either 2 – 1x6 @ 8 feet long OR 3 – 1x4 @ 8 feet long
- 2 – 1x2 furring strips @ 8 feet long
- 1 – 2x2 @ 8 feet long
- 4 craft finials (optional)
- 1-¼” pocket hole screws
- 1 ¼” brad nails
- Wood glue
- Hardware cloth, tar paper or other material or plastic planter for containing soil on slats
Cut List
- 4 – 2x2 @ 18” long (legs)
- 16 – 1x4 @ 15 ¾” OR 12 – 1x6 @ 15 ¾” (sides)
- 10 – 1x2 @ 15 ¾” (bottom slat system)
Tools
- measuring tape
- square
- pencil
- safety glasses
- hearing protection
- kreg-jig
- drill
- circular saw
- sander
- countersink drill bit
Step-by-step Instructions
Step 1
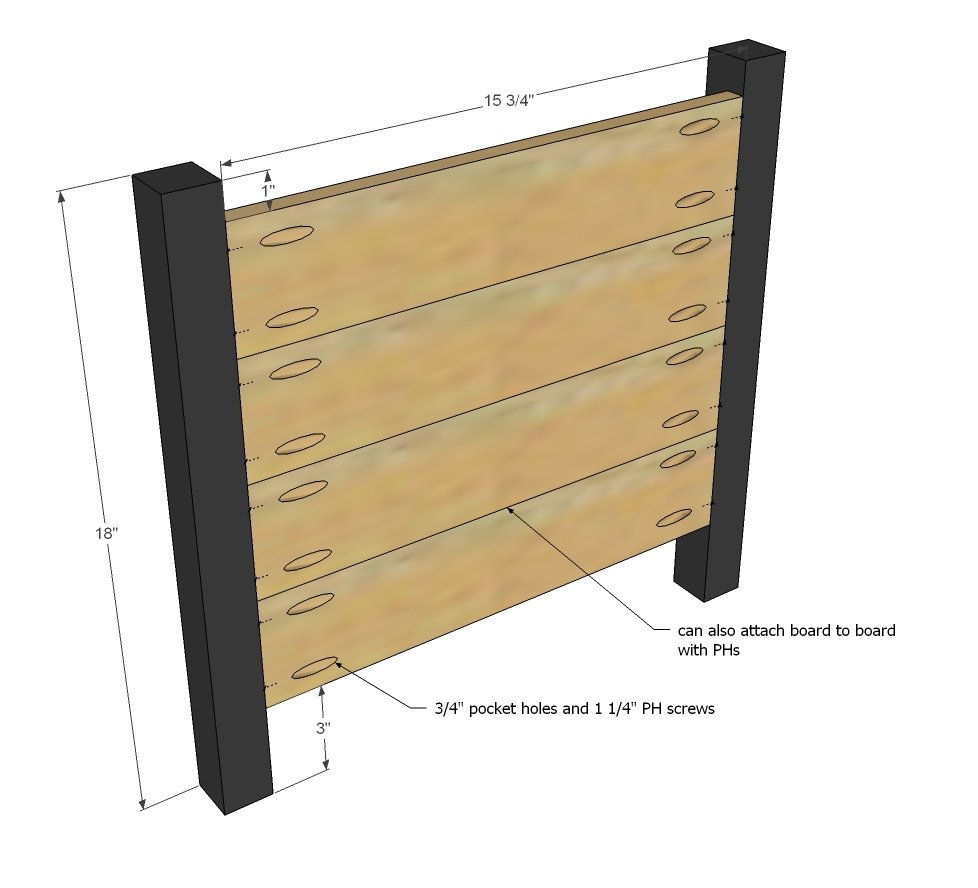
First build two ends as shown above. Note that you can build shorter or longer sides - it's all the same basic construction.
Step 2
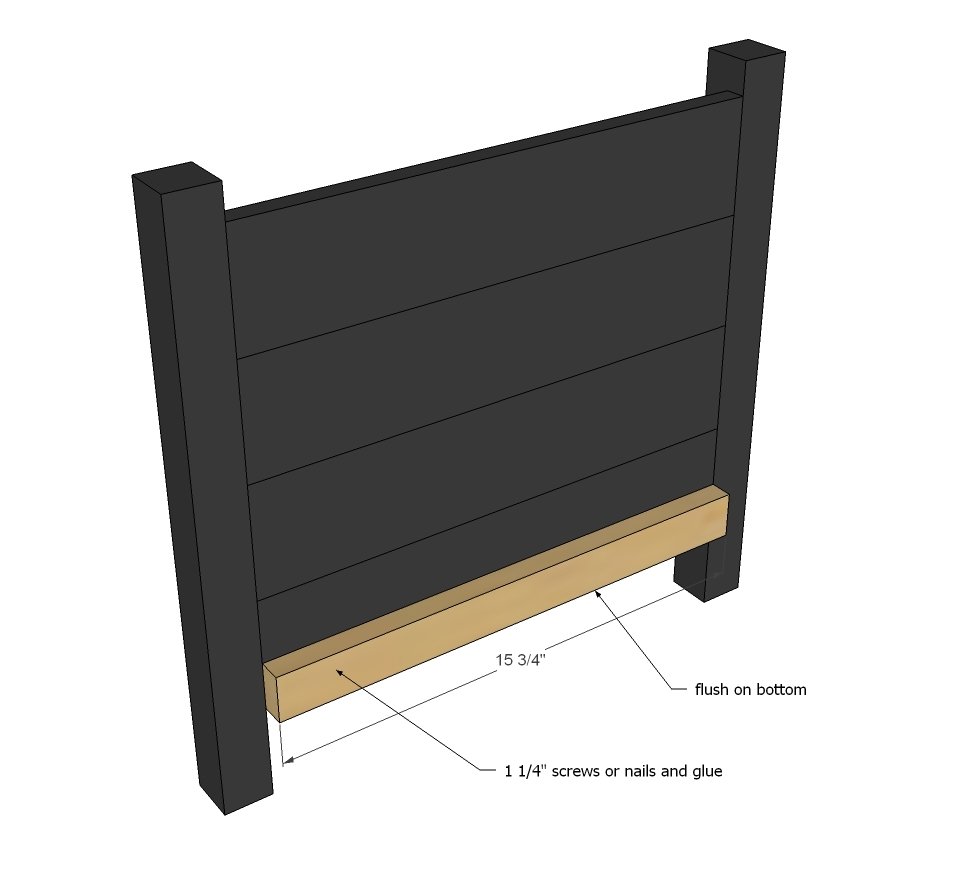
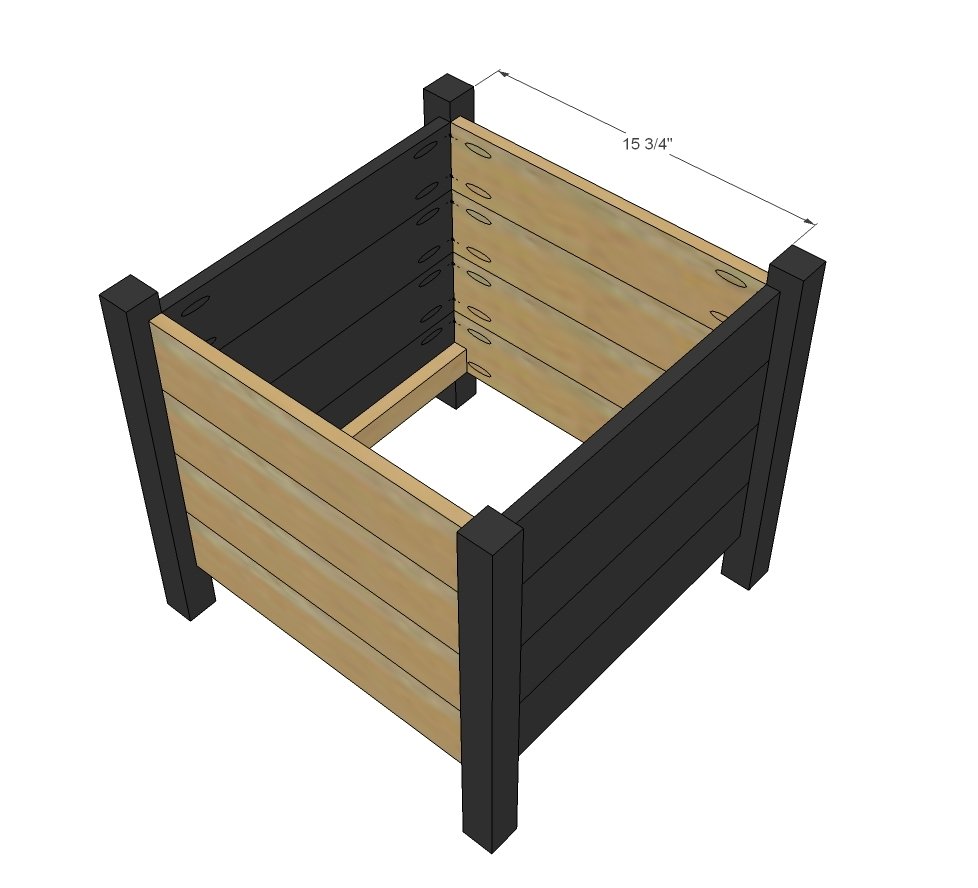
To the two ends that you built, add the cleats. It's easier to do this now then later.
Step 3
Now add the sides - easy peasy!!!
Step 4
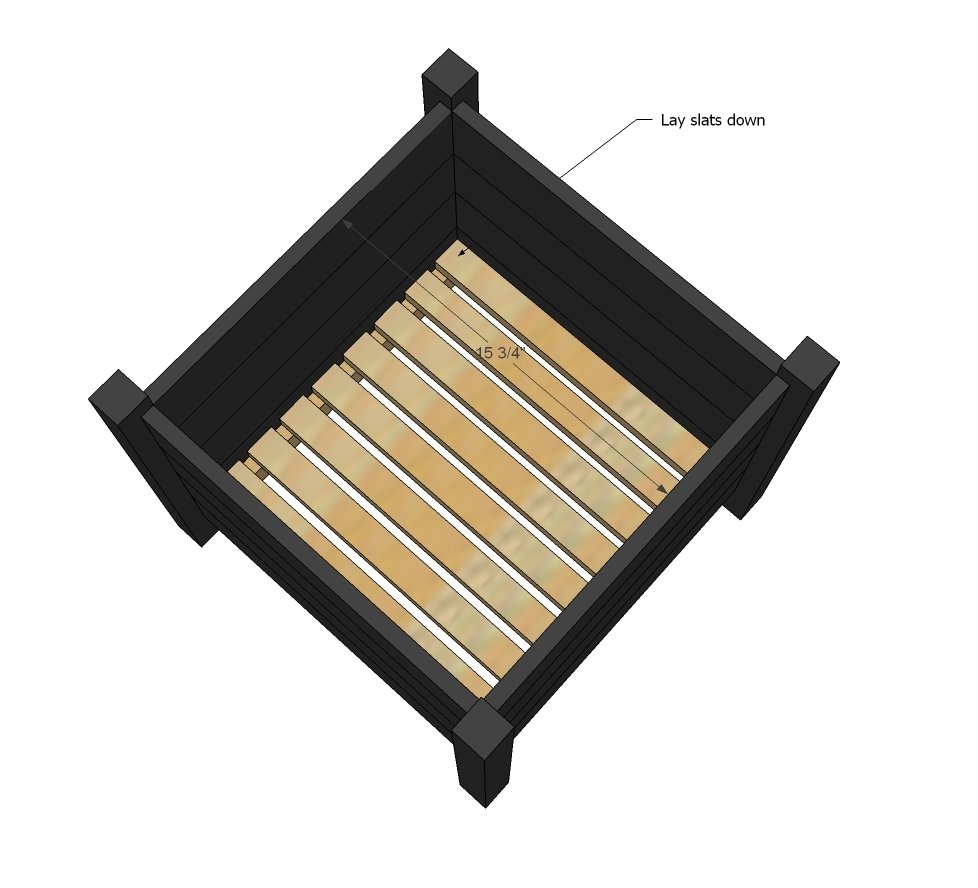
And finally, lay slats down. You may wish to add gardener's cloth to the bottom to protect the wood.
Finishing
Sand all surfaces, starting with a medium grit and finishing with fine. Wipe off the dust, fill any holes or gaps with wood filler, and sand smooth once dry. Apply primer if you're painting, then finish with your choice of paint or stain and seal with a durable clear topcoat. For outdoor projects, use exterior-rated primer, paint or stain, and sealer so the piece stands up to the weather.
Source (temporary): https://www.ana-white.com/woodworking-projects/pocket-hole-planters