Portable Two Piece Wooden Beach Chair with
For about $10 in lumber, using this, you can build your own wooden beach chairs! This chair breaks down into two pieces that nest together so it's easy to transport and store. This is a very comfortable chair, suitable for small to average sized persons. The chair is built using cedar fence pickets and furring strips, the cost to build each chair should be under $10. It is a beginner friendly plan, perfect for a first woodworking project or a youth project. Step by step plans include video, detailed diagrams, shopping and cut lists, everything you need to build your own two piece wooden beach chairs!
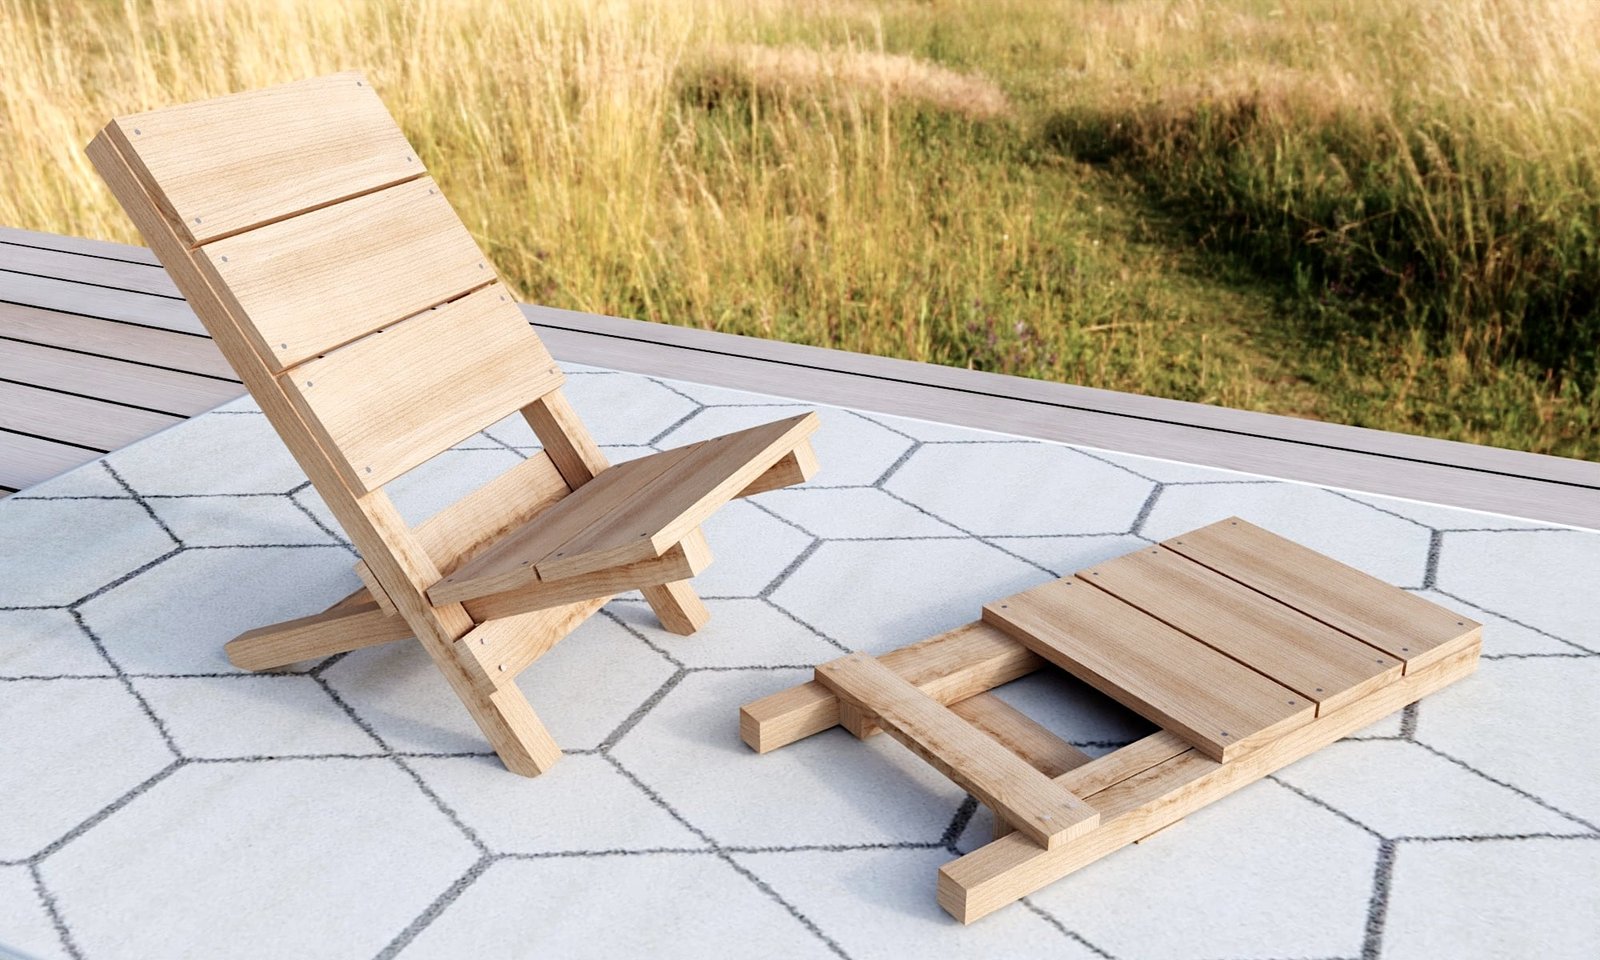
Specifications
| Project type | Outdoor Seating, Lounging and Accents |
|---|---|
| Room | Outdoor |
| Difficulty | Starter Projects |
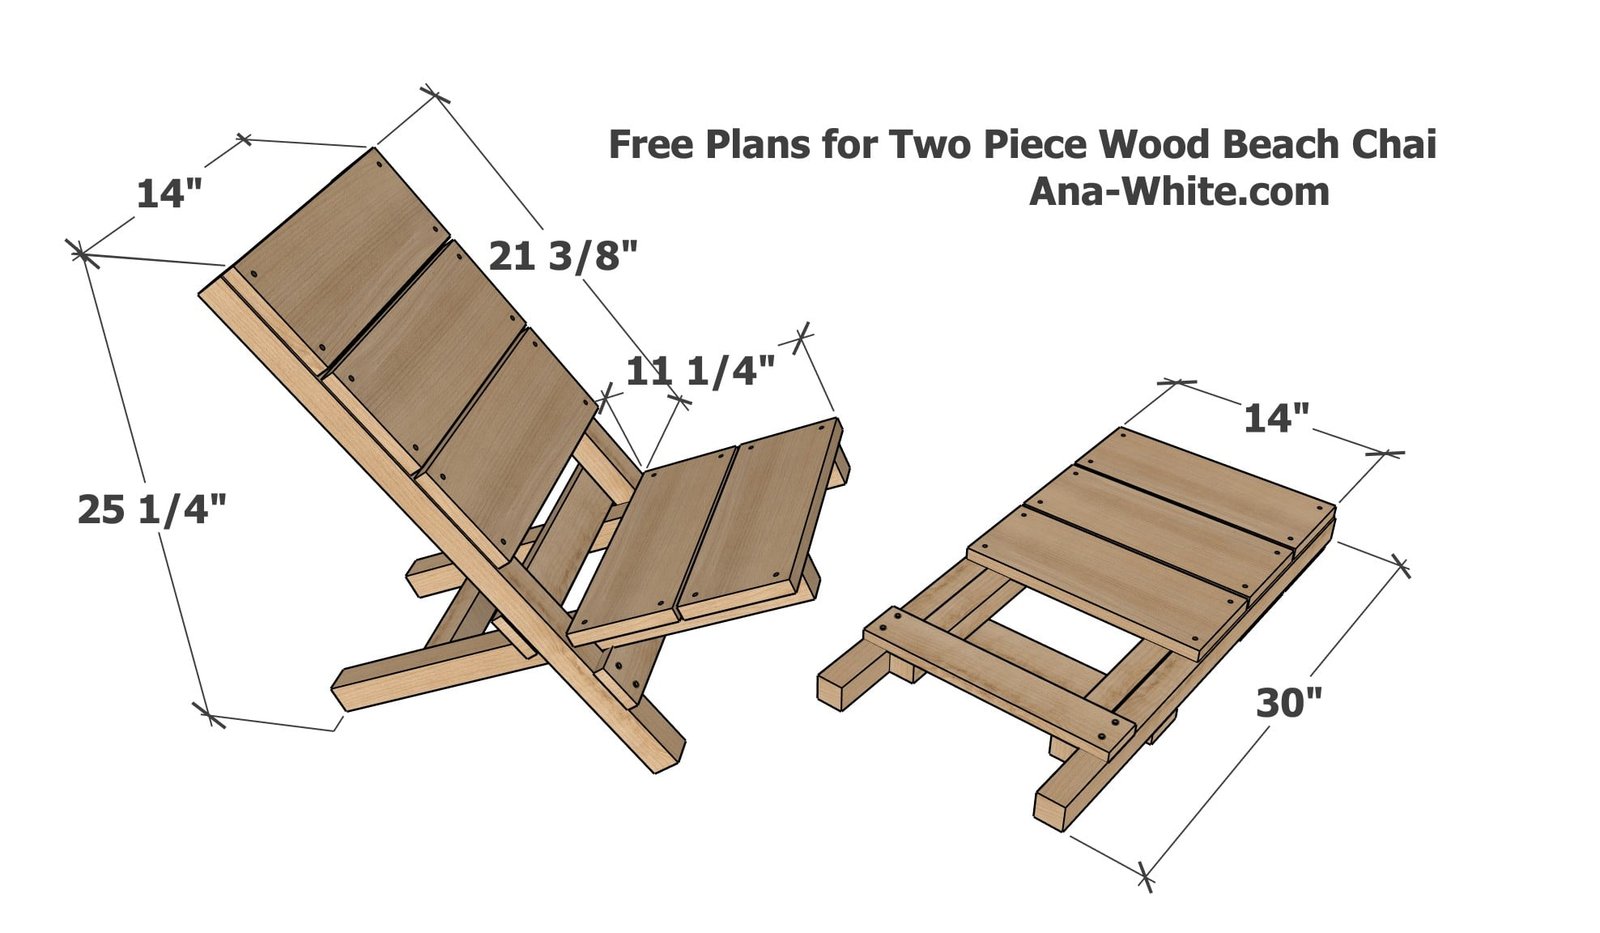
Dimensions
Use the size-specific shopping and cut lists below.
Shopping List
Stronger Version (2x2 frame) Shopping List Per Chair:
- 1 cedar fence picket, 5-1/2" wide x 72" long (sand with coarse sand paper)
- 2 - 2x2 furring strips, 8 feet long
- 30" of 1x3 furring strips
- 30 - 1-3/4" self tapping star bit screws (exterior rated)
- wood glue
Lightweight Version (1x2 frame) Shopping List Per Chair:
- 1 cedar fence picket, 5-1/2" wide x 72" long (sand with coarse sand paper)
- 12 linear board feet of 1x2 furring strips
- 30 - 1-1/4" self tapping star bit screws (exterior rated)
- wood glue
Cut List
Stronger Version (2x2 frame) Cut List Per Chair:
- 5 - cedar fence pickets @ 14-1/4" (decking)
- 2 - 2x2 @ 30" (back frame legs)
- 2 - 1x3 @ 14-1/4" (back frame supports
- 2 - 2x2 @ 26" (seat frame legs)
- 1 - 2x2 @ 8" (seat frame support)
Lightweight Version (1x2 frame) Cut List Per Chair:
- 5 - cedar fence pickets @ 14-1/4" (decking)
- 2 - 1x2 @ 30" (back frame legs)
- 2 - 1x2 @ 14-1/4" (back frame supports
- 2 - 1x2 @ 26" (seat frame legs)
- 1 - 1x2 @ 11" (seat frame support)
Tools
- measuring tape
- square
- pencil
- safety glasses
- drill
- circular saw
- sander
Step-by-step Instructions
You'll need to work quickly through this step to prevent the glue from drying on you.
Layout the back frame as shown and measure and mark location of the bottom support. Apply glue and just one screw per corner as shown. Proceed to step 2 quickly (before glue dries)
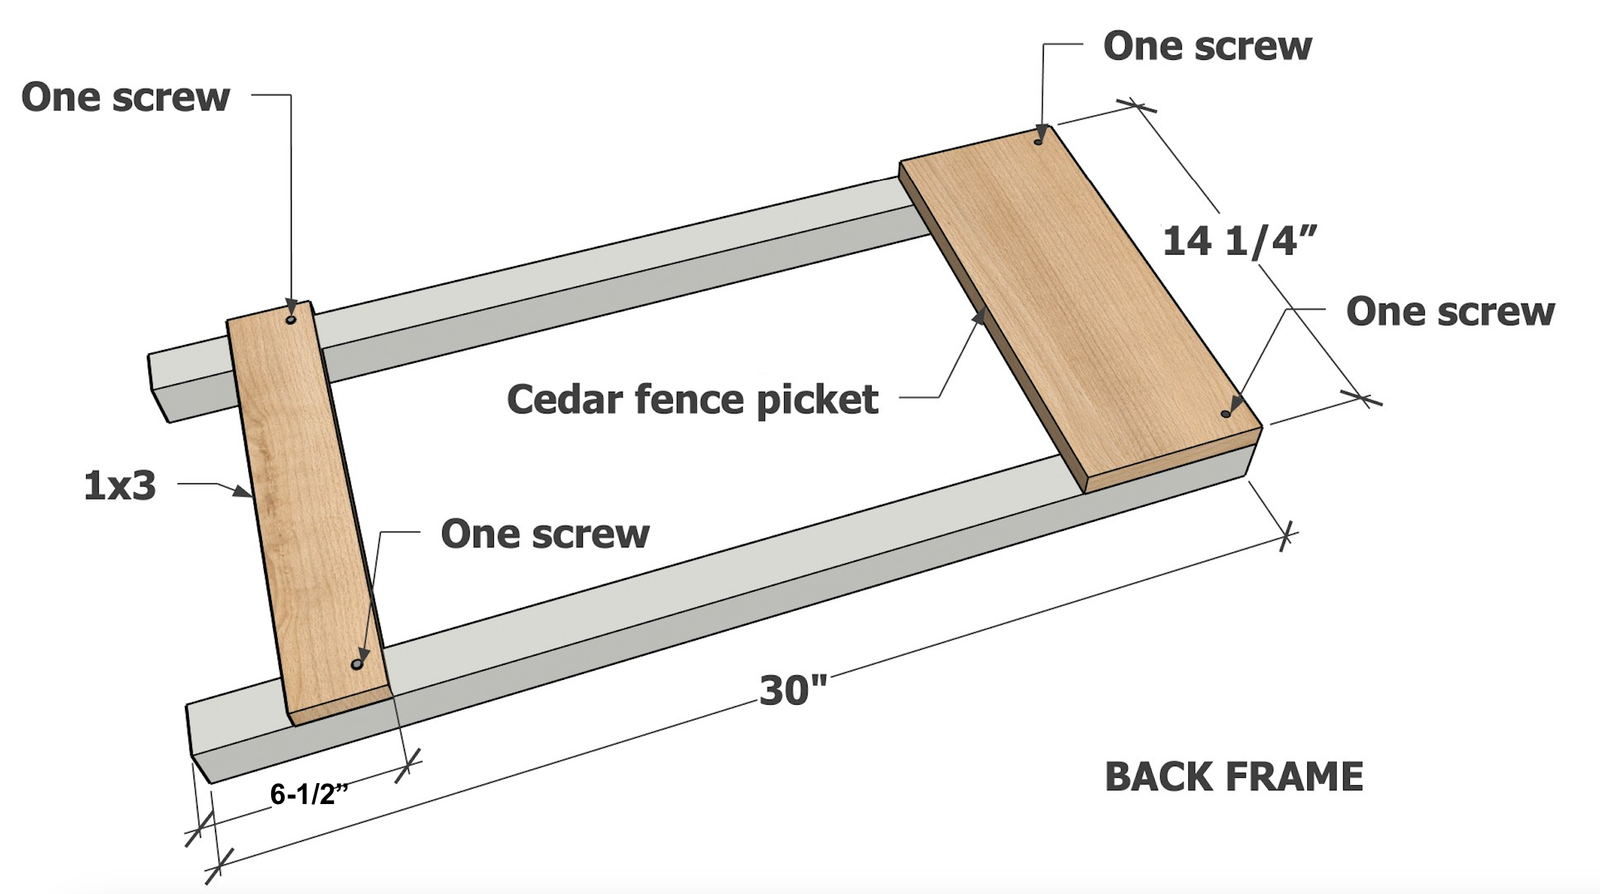
Take a square of the back frame by taking opposite diagonal measurements.
If one diagonal is longer than the other, push the longer diagonal corners together. Adjust until the two diagonal match. Your project is now "square". Add remaining screws as shown. NOTE: If using 1x2s, predrill screws to prevent from splitting wood.
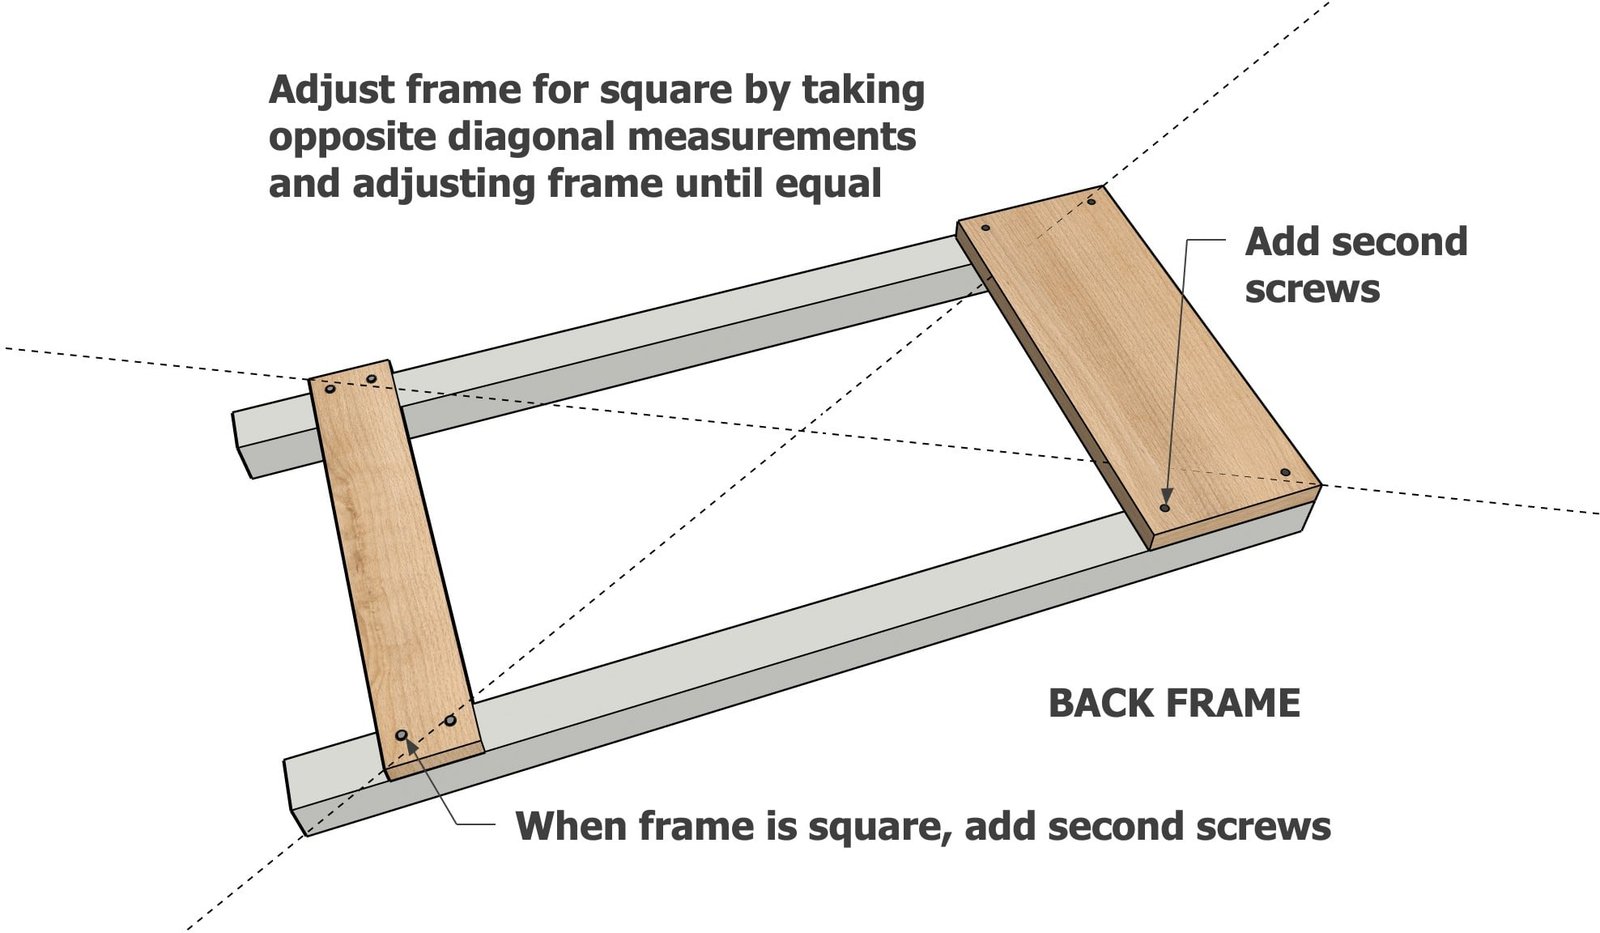
Step 3
Add the remaining fence pickets to the frame as shown.
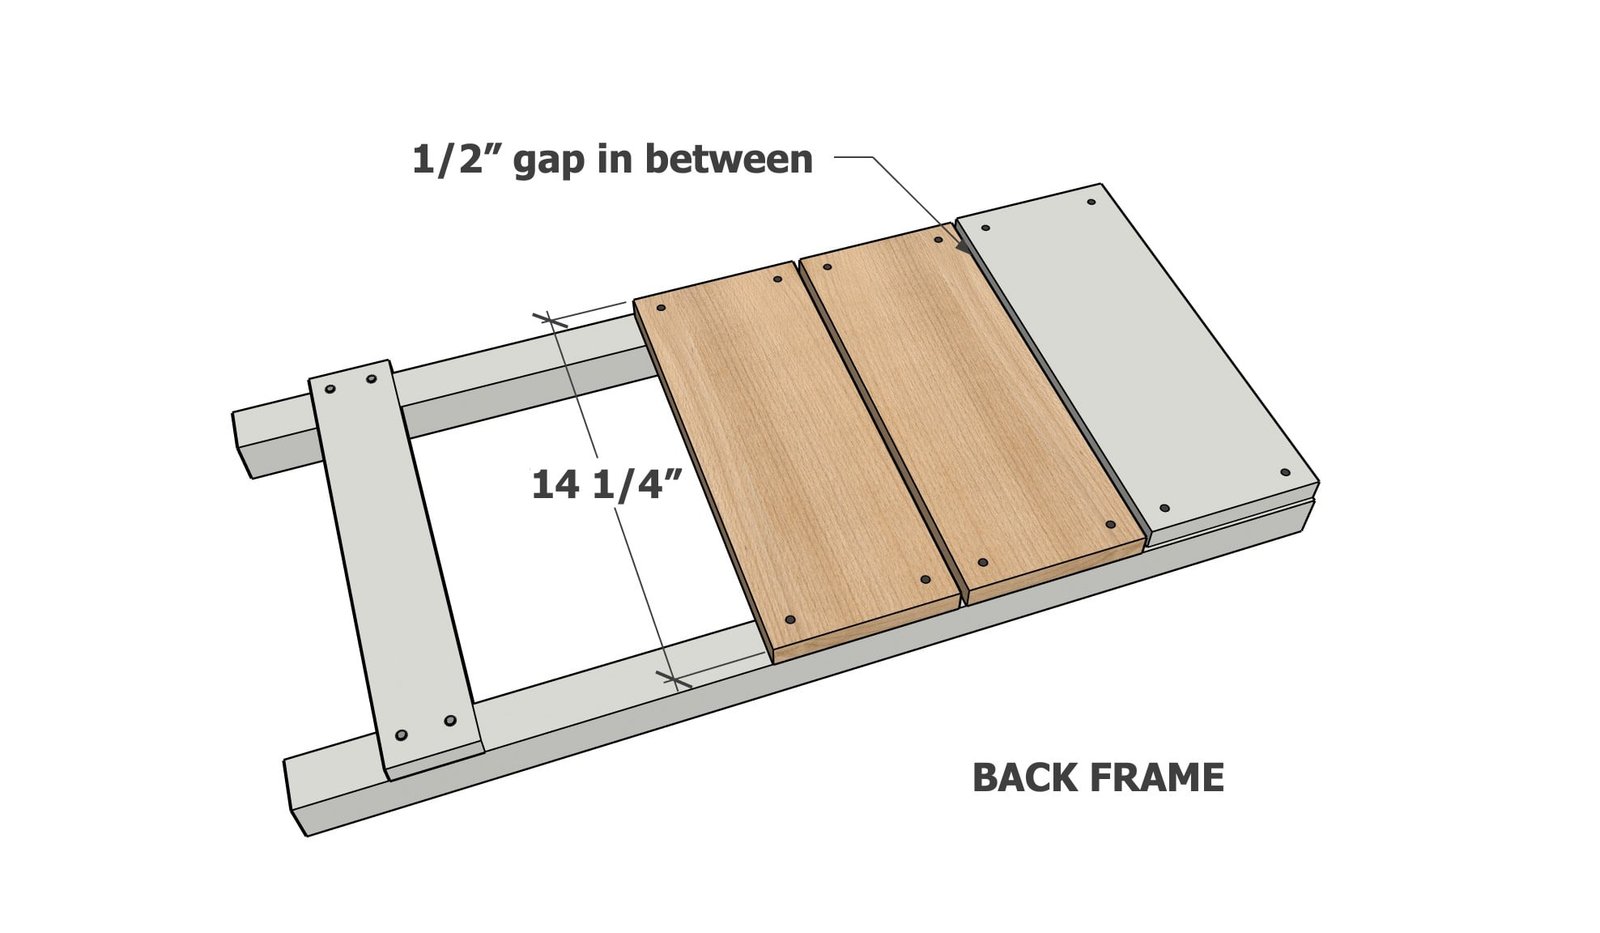
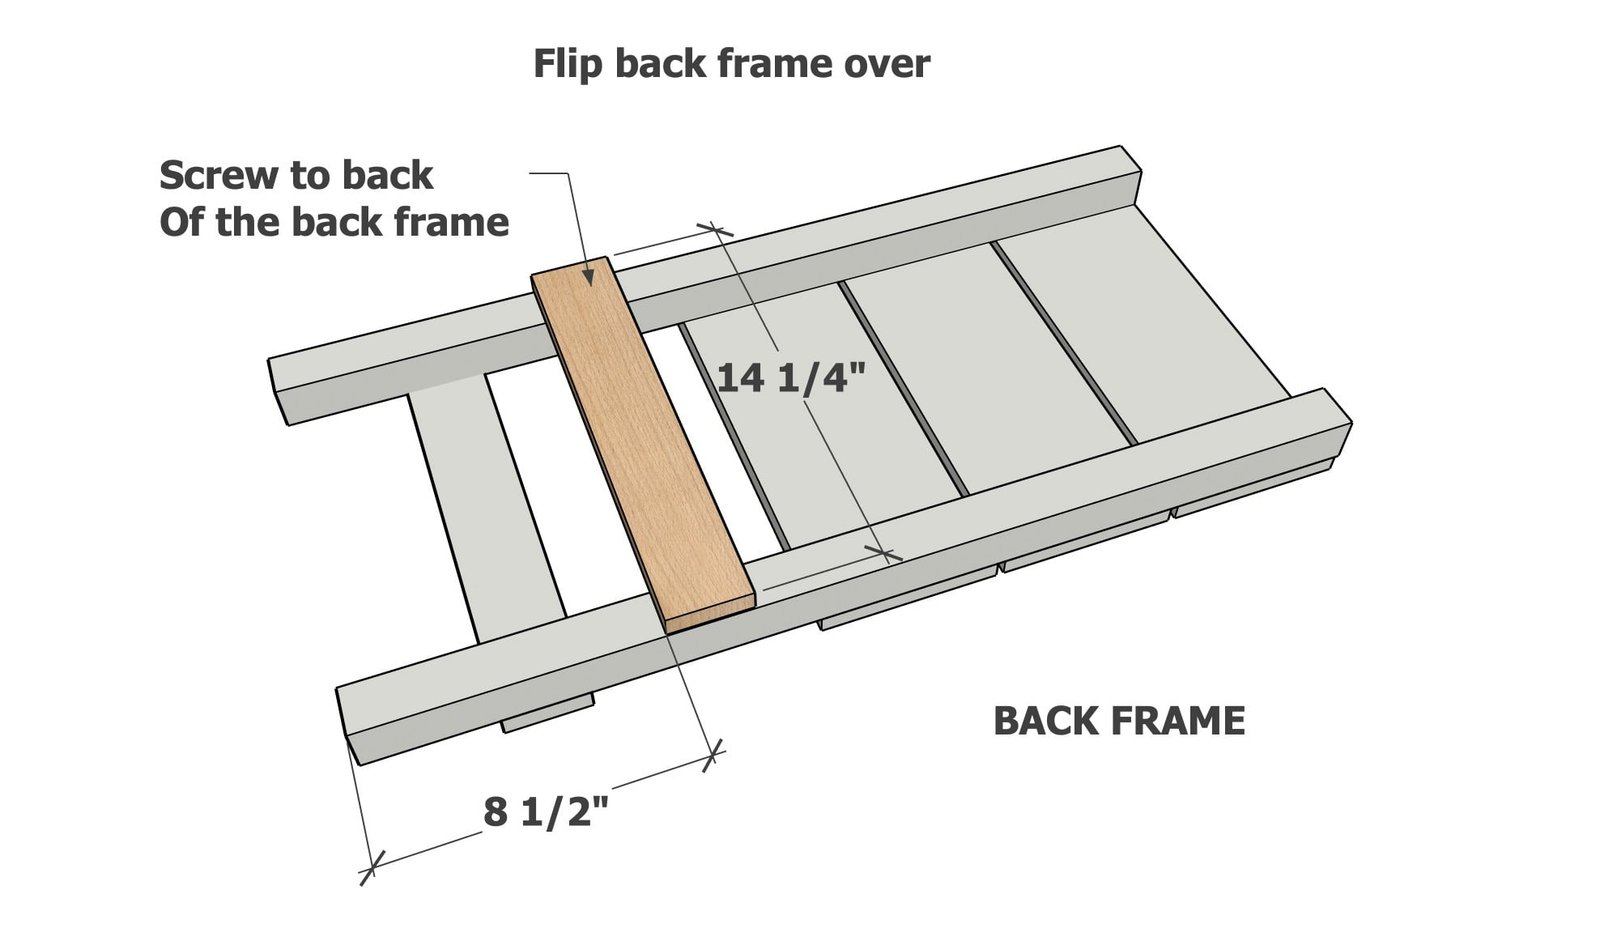
Flip the project over and add the back support as shown.
This complete construction of the back frame.
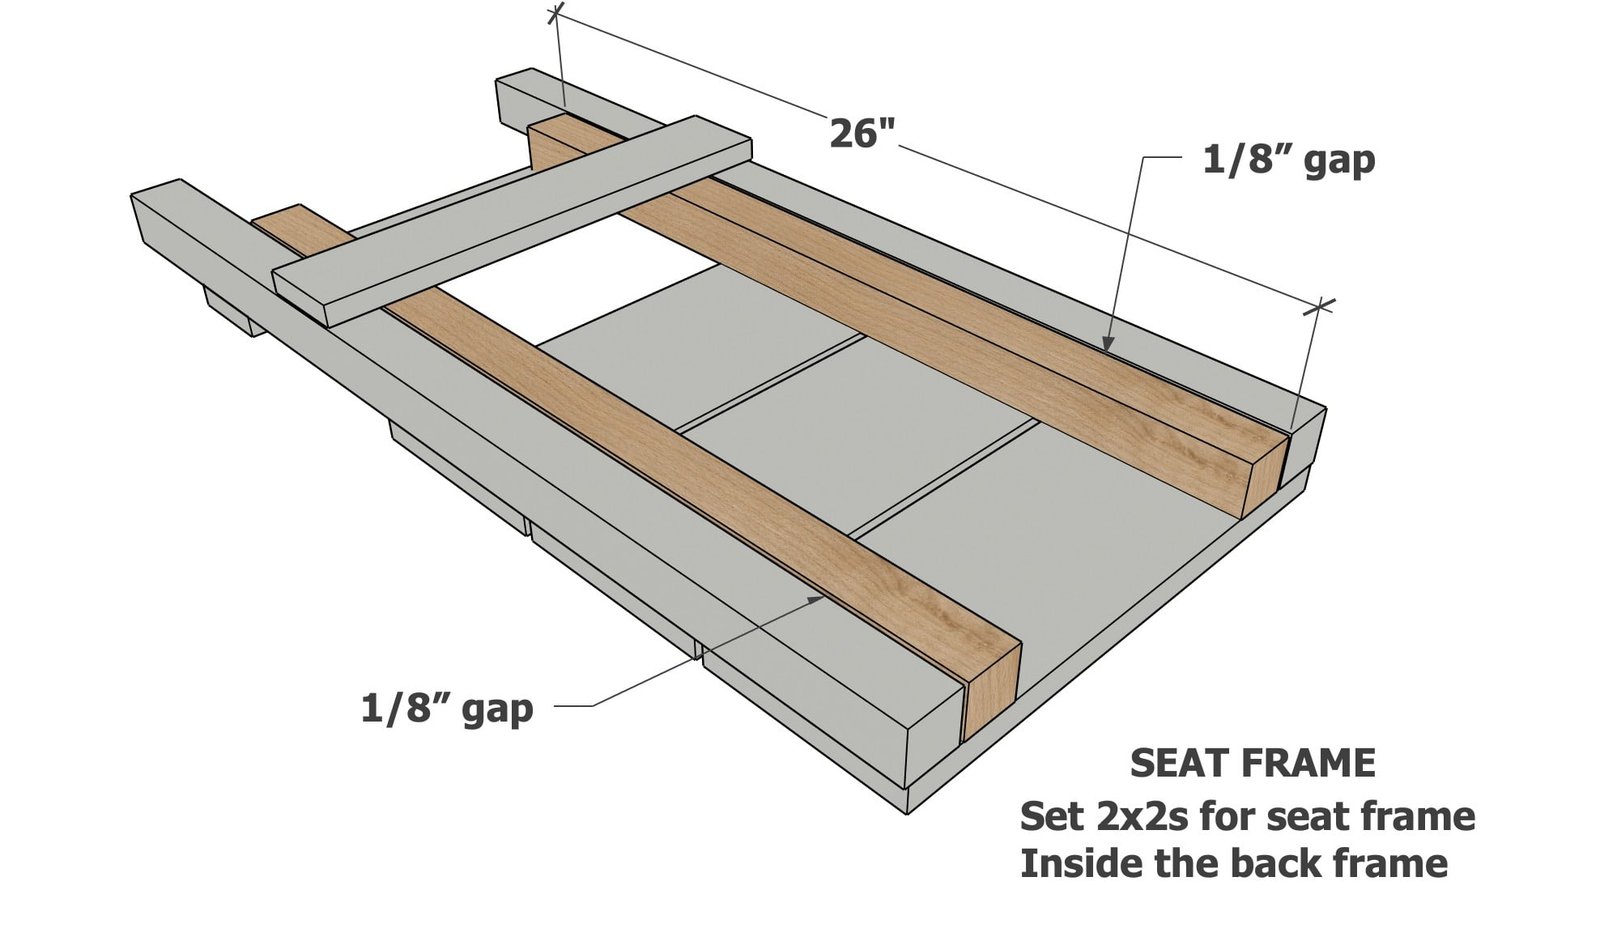
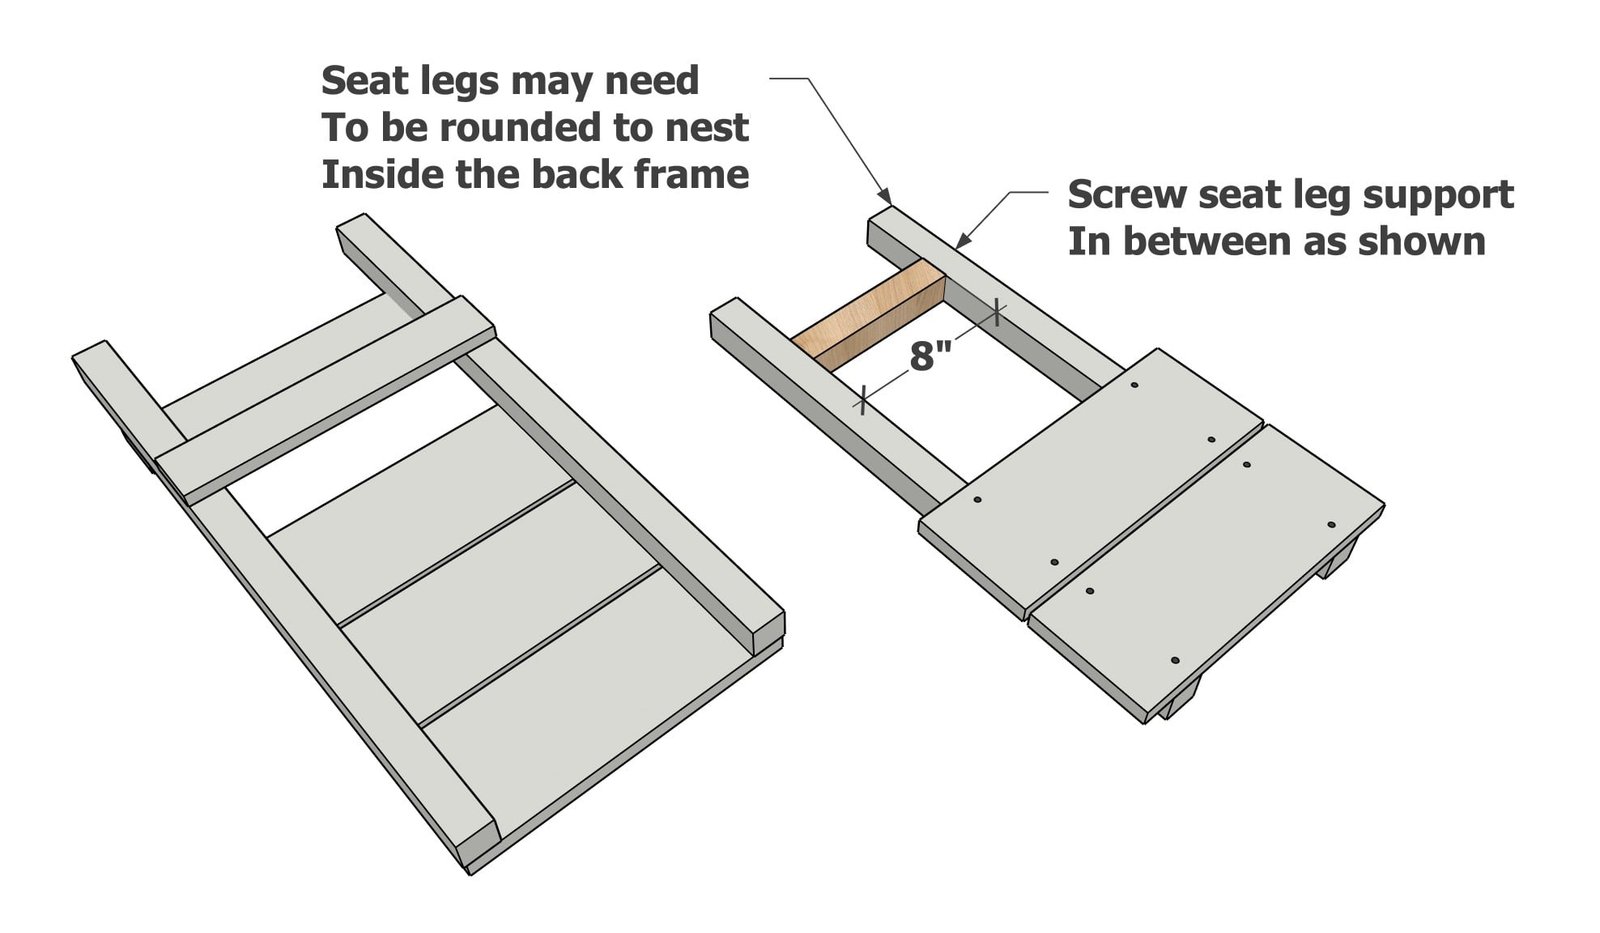
Place seat frame legs inside the back frame.
If the fit is too snug, try rotating if using 2x2s. You may need to round the corners or sand lightly to get the seat frame legs to fit inside the back frame. Set the seat legs so there is an approximate 1/8" gap between the back frame legs.
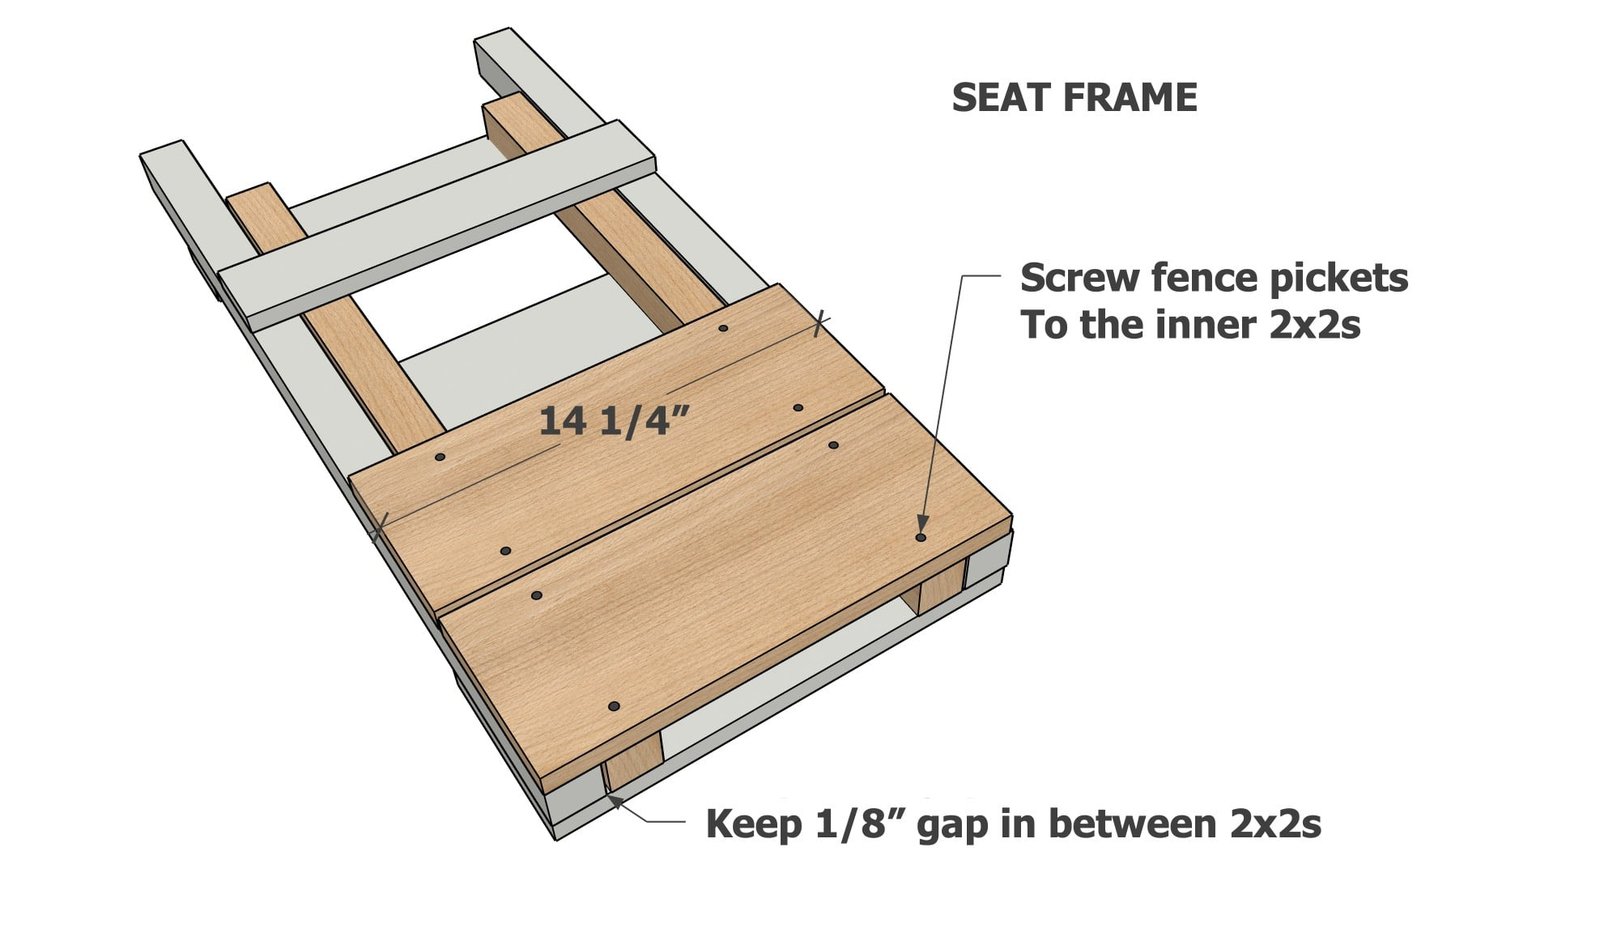
Set the remaining fence pickets on the seat frame legs and adjust as needed.
Screw the fence pickets to the seat frame legs.
Remove the seat frame from the back frame and screw the bottom support to the inside.
For the 1x2 construction, the 1x2 will be 11" long
Finishing
Sand all surfaces, starting with a medium grit and finishing with fine. Wipe off the dust, fill any holes or gaps with wood filler, and sand smooth once dry. Apply primer if you're painting, then finish with your choice of paint or stain and seal with a durable clear topcoat. For outdoor projects, use exterior-rated primer, paint or stain, and sealer so the piece stands up to the weather.
Source (temporary): https://www.ana-white.com/woodworking-projects/portable-two-piece-wooden-beach-chair-free-plans